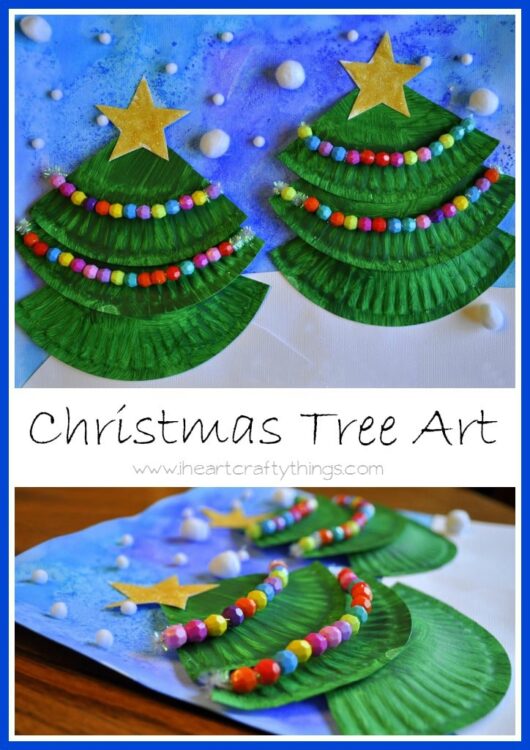
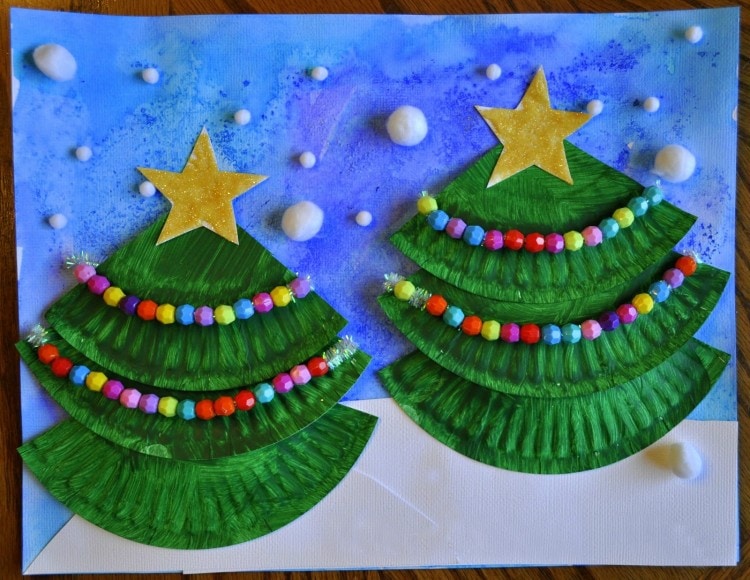
We decided to make some Christmas Tree Art today. There are some projects we do that after a short time I feel comfortable throwing them away since I have a picture to remember them by. This particular project is one that you will never want to throw away! It’s definitely a beautiful keepsake!
Supplies you will need:
- 2 white sheets of Cardstock paper
- watercolors
- table salt
- 2 small paper plates
- green acrylic paint
- scissors
- 2 pipecleaners
- beads
- small white poms
- gold glitter
- glue
Directions:
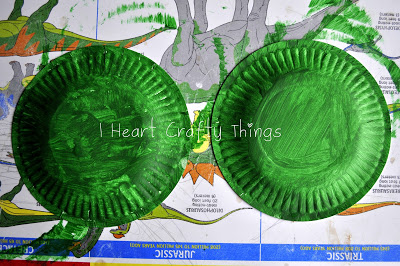
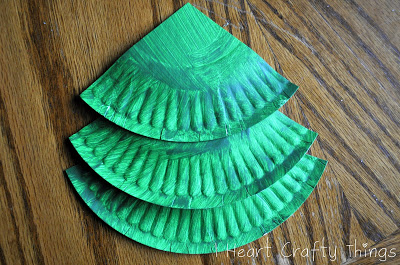
1. Paint the bottom of two paper plates
We started by painting the bottom of two small paper plates green. We used the small dessert sized plates. Let them dry completely.
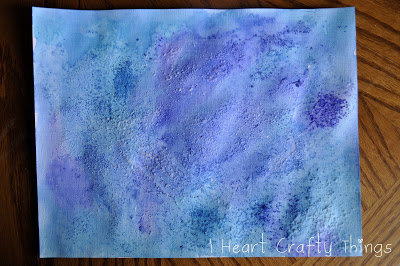
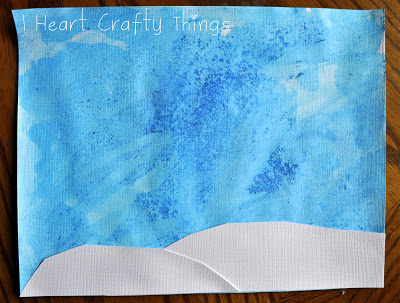
2. Paint a sheet of white cardstock and add salt sprinkles
Next, paint a sheet of white cardstock with blue and purple watercolors. Add sprinkles of salt while painting and at the end over all the wet spots. Let this dry completely.
3. Make tree garlands
While the first two steps are drying, it’s time to make the pretty garland to decorate the trees. We used our silver shimmer sticks and Faceted Beads to make these. Cut the shimmer stick in half and put beads on each half, leaving a small space empty on each side. We made two for each tree.

4. Rub off all salt, cut out hills and glue them onto cardstock
Once the watercolor scene is dry, rub off all the salt into a trash can and you are left with a neat effect on your paper. We cut some hills from another sheet of white cardstock and glued them to the bottom of our paper.
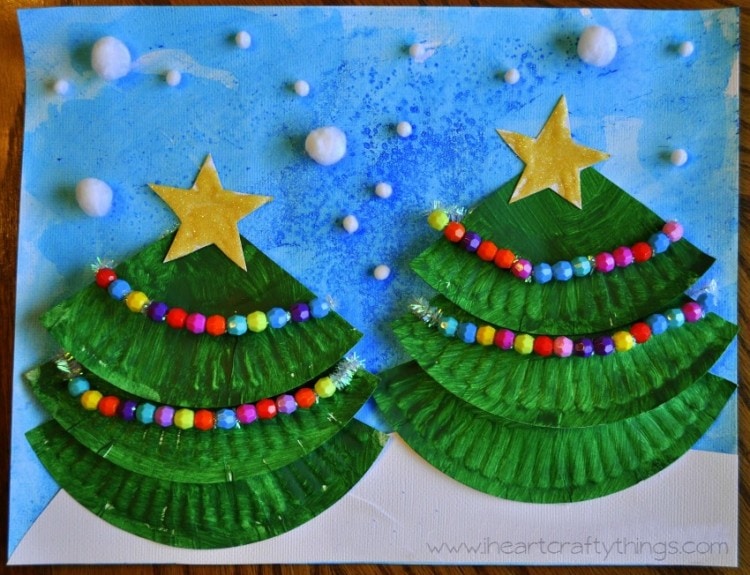
5.Cut each plate into thirds and glue pieces together in a layered effect
When your paper plates are dry, cut each plate into thirds. I did this part for my kids. Then have them glue each piece together in a layered effect.
6. Attach beaded strands to the trees and glue trees onto background paper
Before gluing the trees to our paper, we took the beaded strands, laid them across the tree, and then bent the ends behind the tree to hold them in place. (hope that makes sense). You can always hot glue them down also. Then we glued our trees onto our background paper.
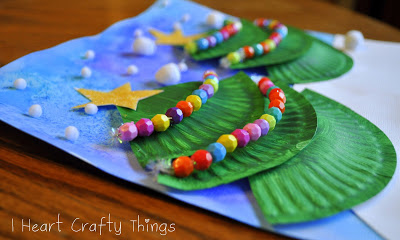
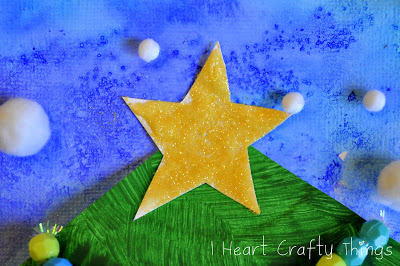
7. Cut out some stars, decorate them with Glitter Shakers and glue onto the top of trees
After gluing the trees to the paper I knew our scene needed something else so I turned to more of my supplies – Glitter Shakers and white Pom’s.
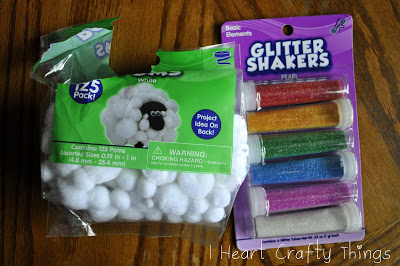
I cut some stars out of white cardstock and the kids saturated them with glue and gold glitter. I had never used the Glitter Shakers before but they are a new favorite! There small size made them easy for kids to handle and control. I was able to pour all the excess glitter back into the tube when we were done so I didn’t have any waste. Next we glued the stars onto the top of trees.
8. Add some white Pom’s
To complete our project we glued some of the small white Pom’s all over the top of our page to act as snow falling. The project is such a piece of art! All of the items popping off the page really make it something special!!
My toddler was able to help with this craft in so many ways. She helped paint the paper plates green and painted the entire background in watercolors by herself. She was a huge help in sprinkling the salt all over the paper as well. She is an expert at putting the beads on the shimmer sticks, and we are getting so much practice with hand eye coordination with her putting the tiny pom’s on all the glue dots. So what I’m saying is, don’t be afraid to tackle a big project like this with a toddler!