A windy day can often put a damper on many outdoor plans that one may have. You can turn it around by using a kite, however, as this is one object that can make the most out of a windy day!
Kites can come in many different shapes, sizes and color schemes, and it can be just as fun choosing the perfect kite as it can be to fly one.
Learning how to draw a kite is also a great way to design your very own one, and that can also be loads of fun!
By the end of the tutorial in front of you, you will be able to do just that!
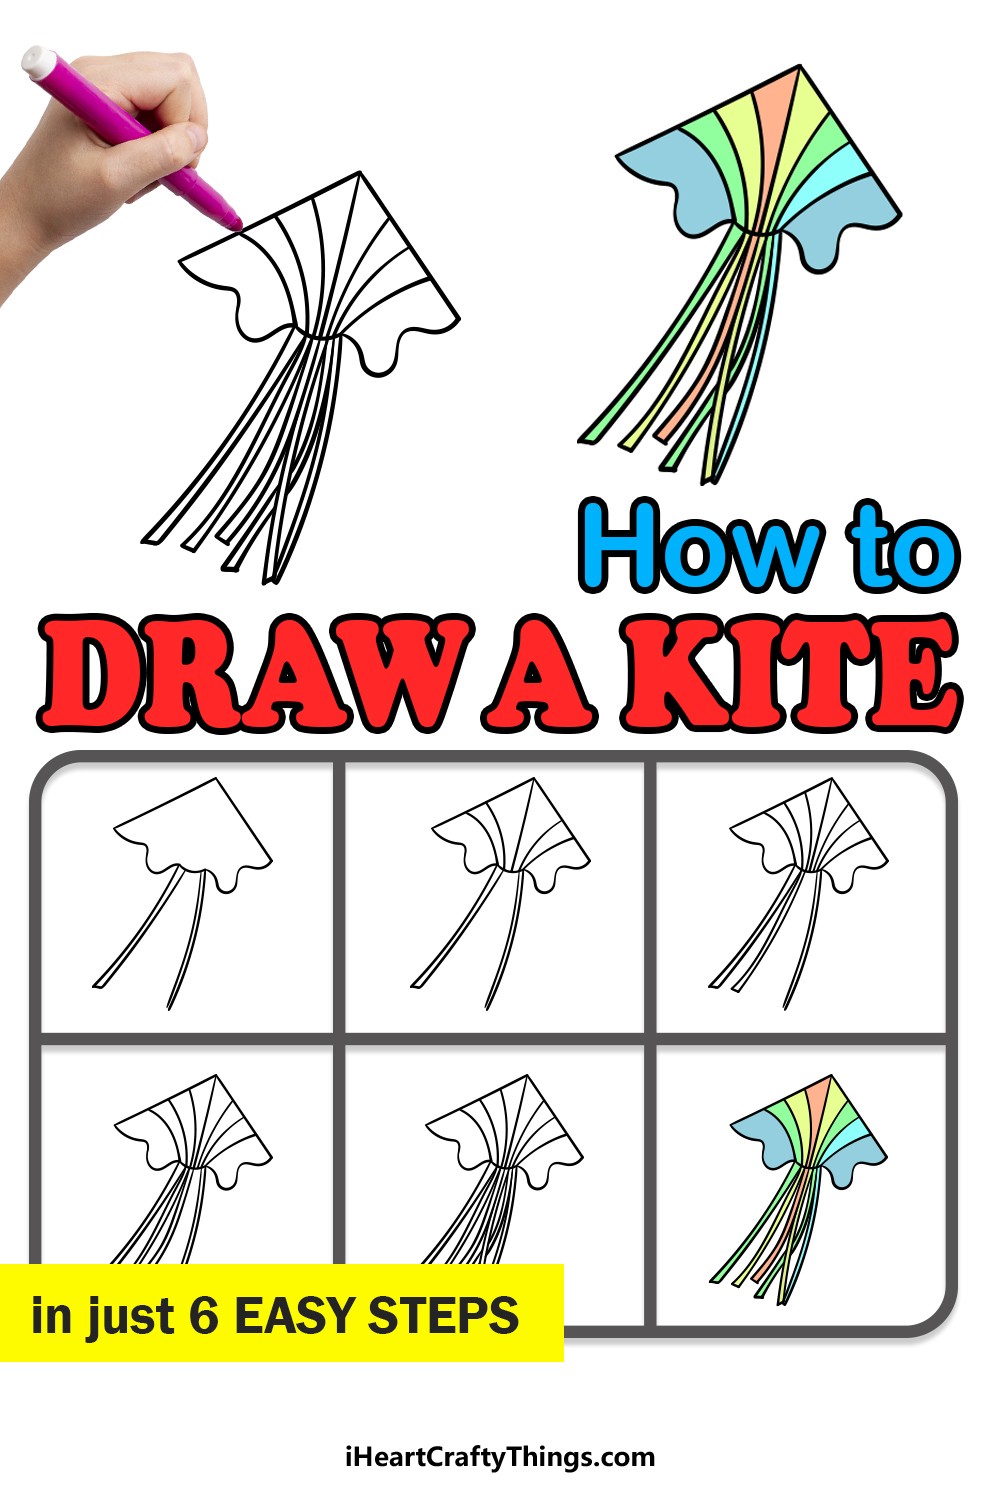
Get ready to have lots of fun as you work through this step-by-step guide on how to draw a kite!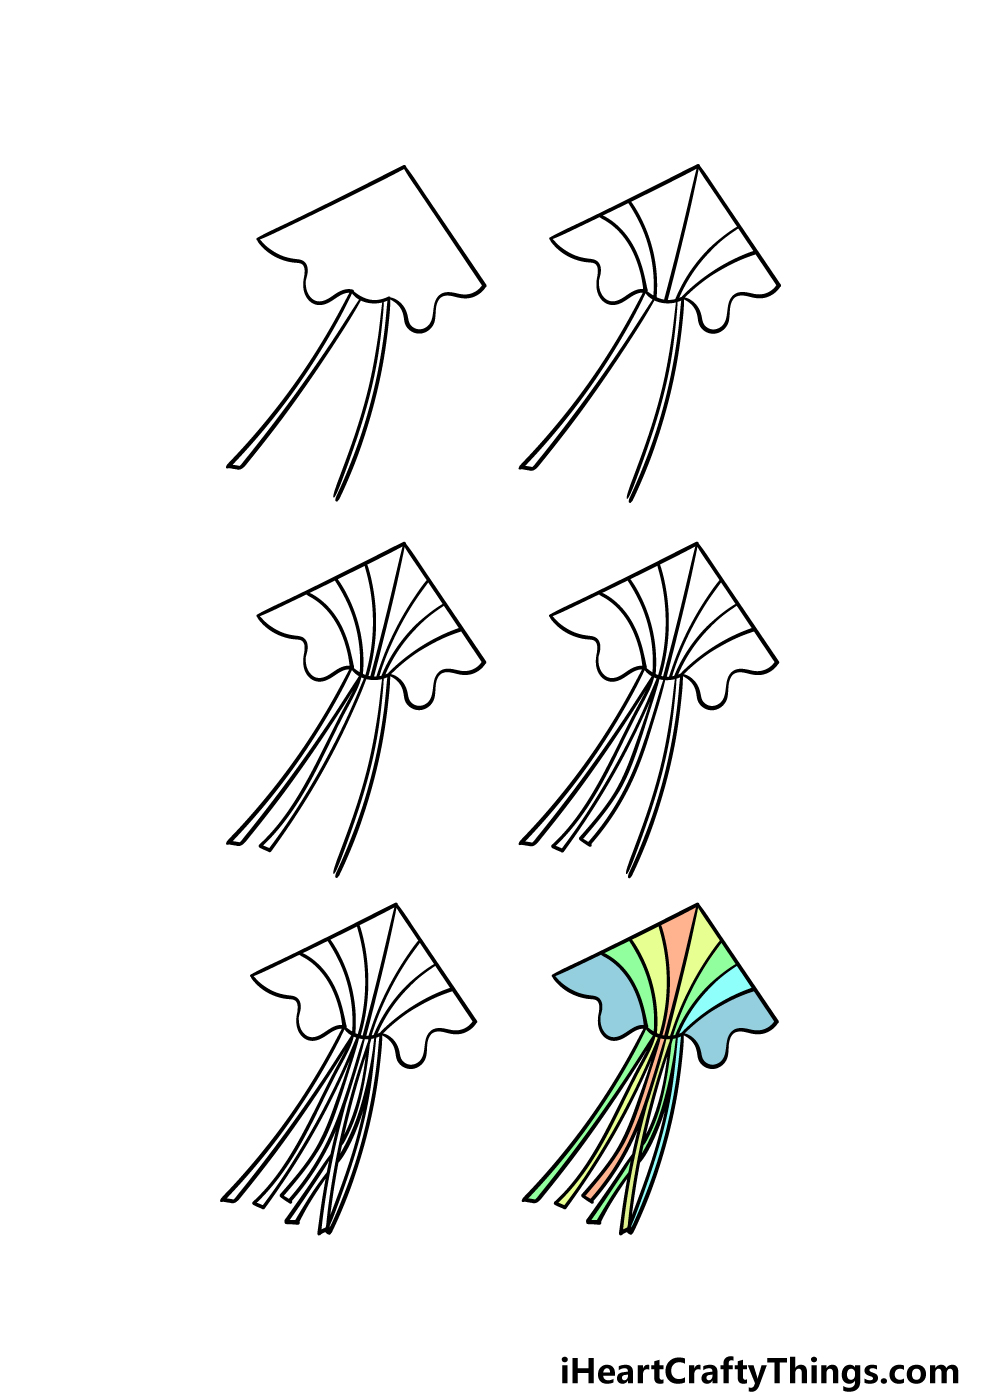
How to Draw A Kite – Let’s Get Started!
Step 1
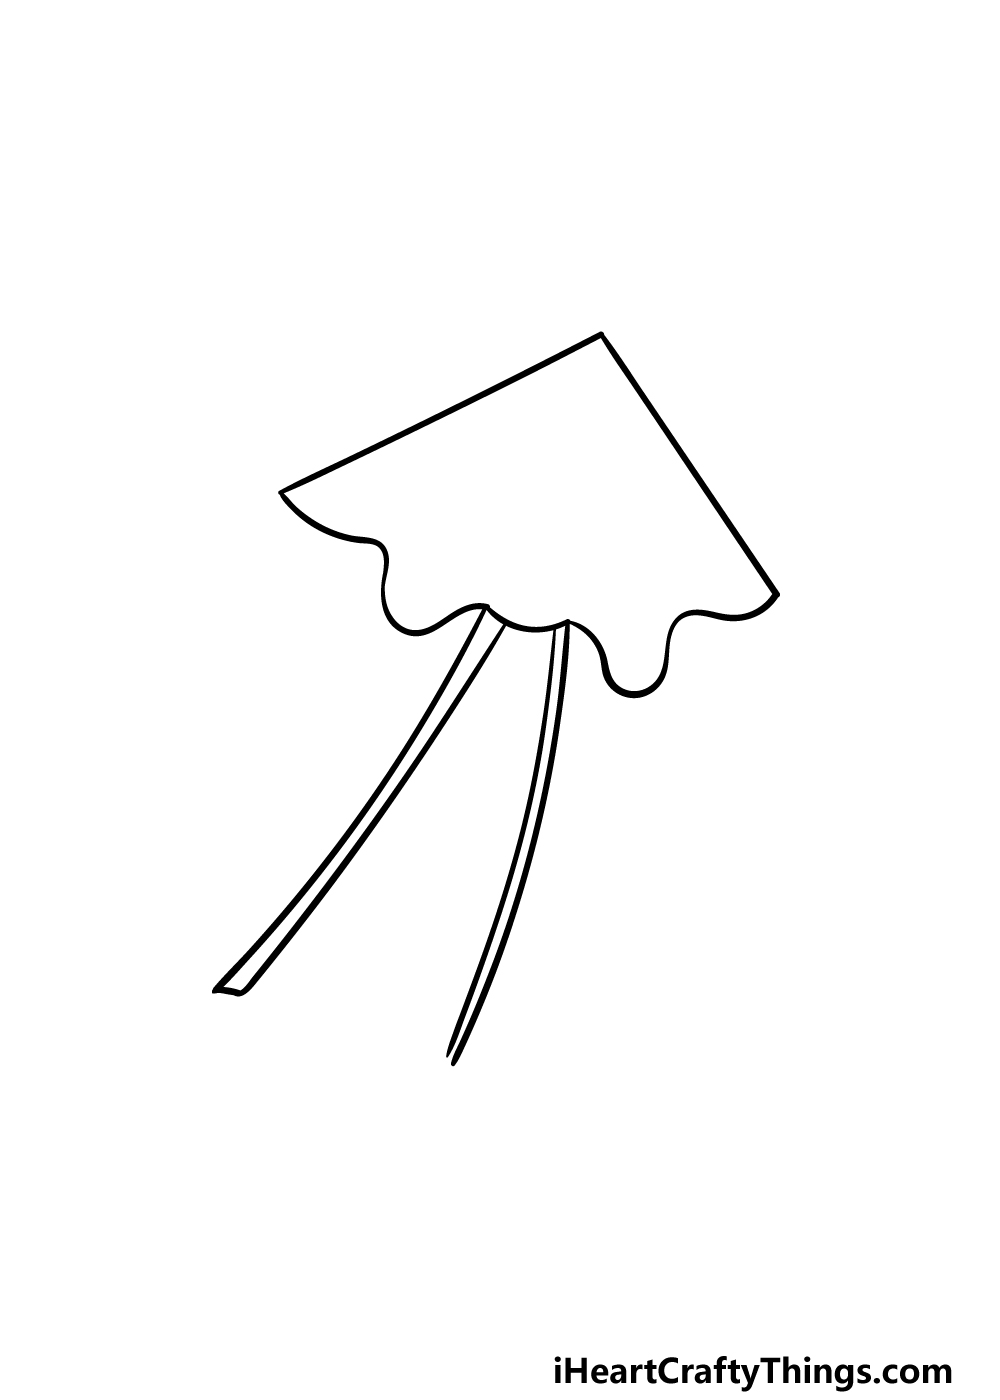
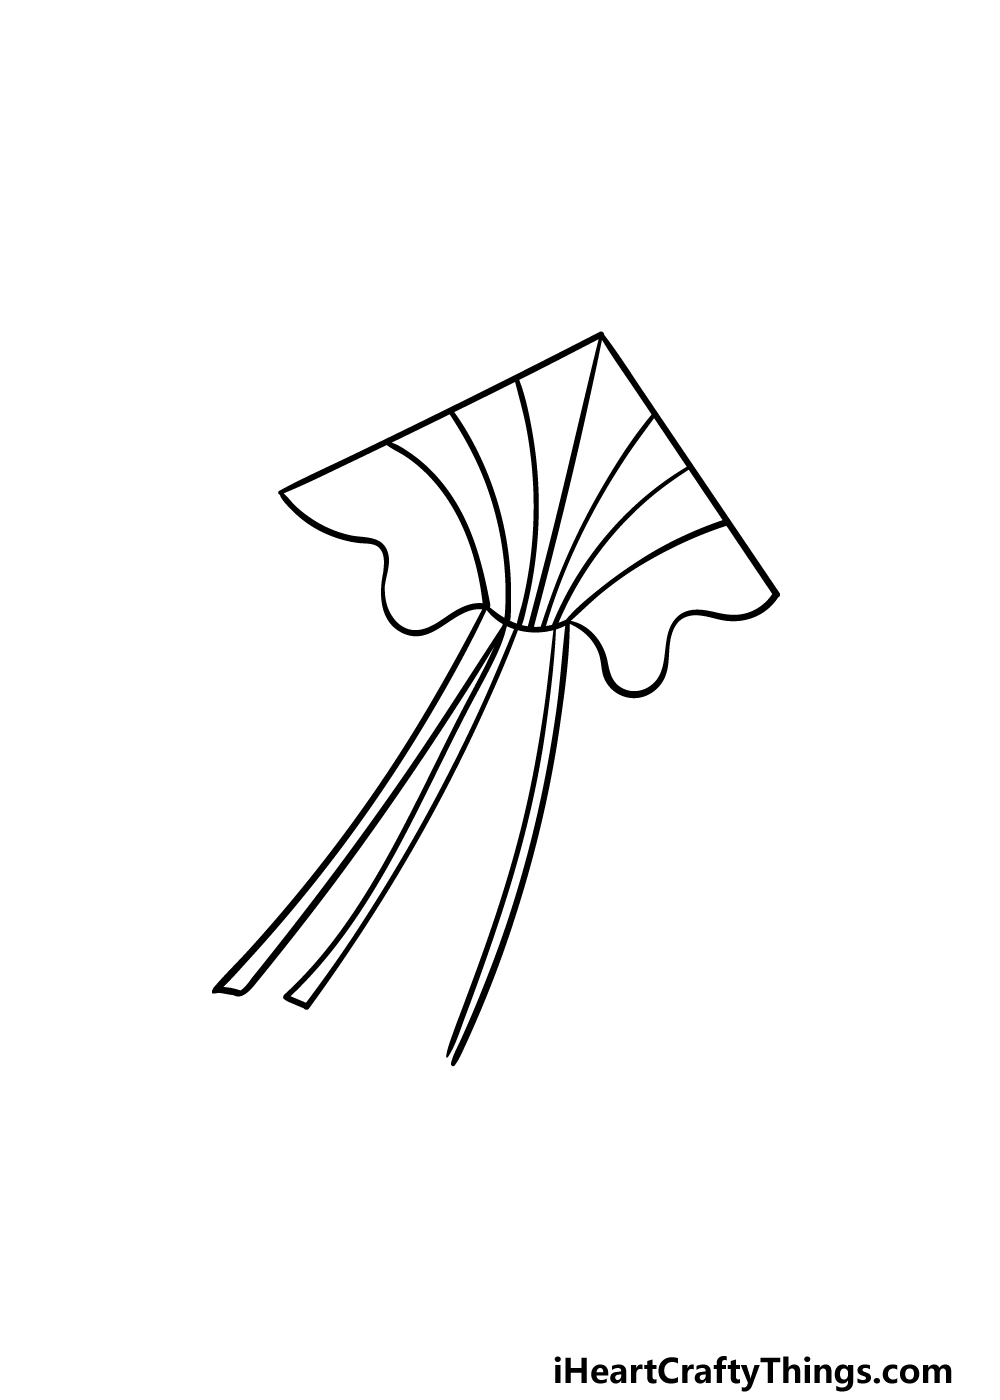
As we work through this guide on how to draw a kite, we will be drawing one that is similar to the shape of a manta ray.
You will also be able to use what you learn in this guide to draw your very own kite designs! You can start by drawing two straight lines connecting to form a sharp tip at the front of the kite.
Then, we will be using some curved and wavy lines for the base of the kite.
Finally, you can also start drawing a tail for the kite, and you can do this by drawing some long, thin rectangular strips coming off of the base of it. Then it will be on to step 2!
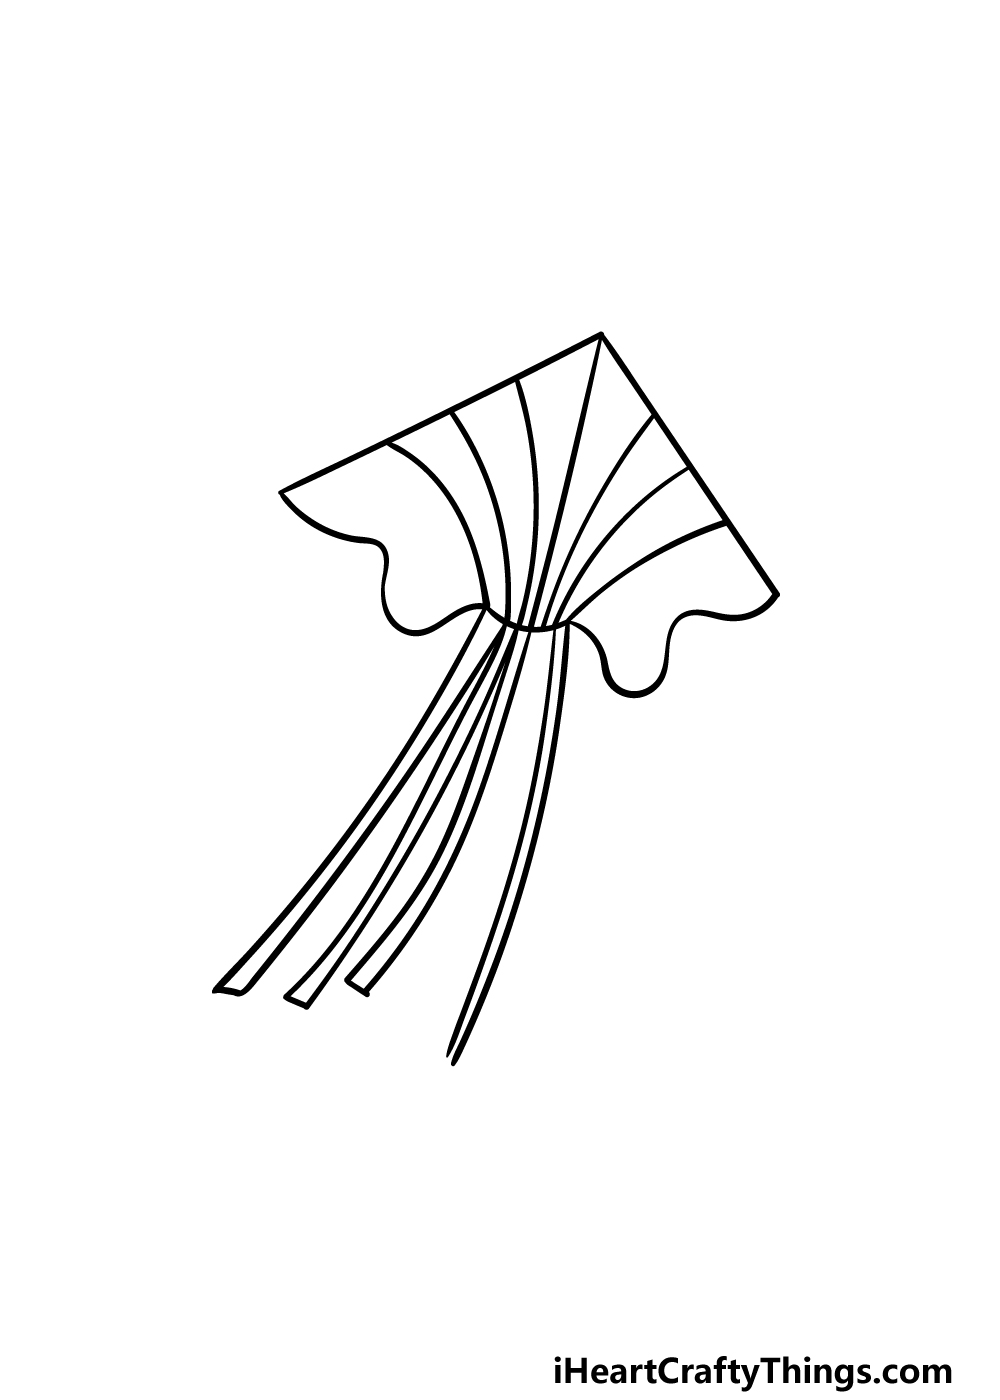
Step 2 – Now, draw some decorative detail onto the kite
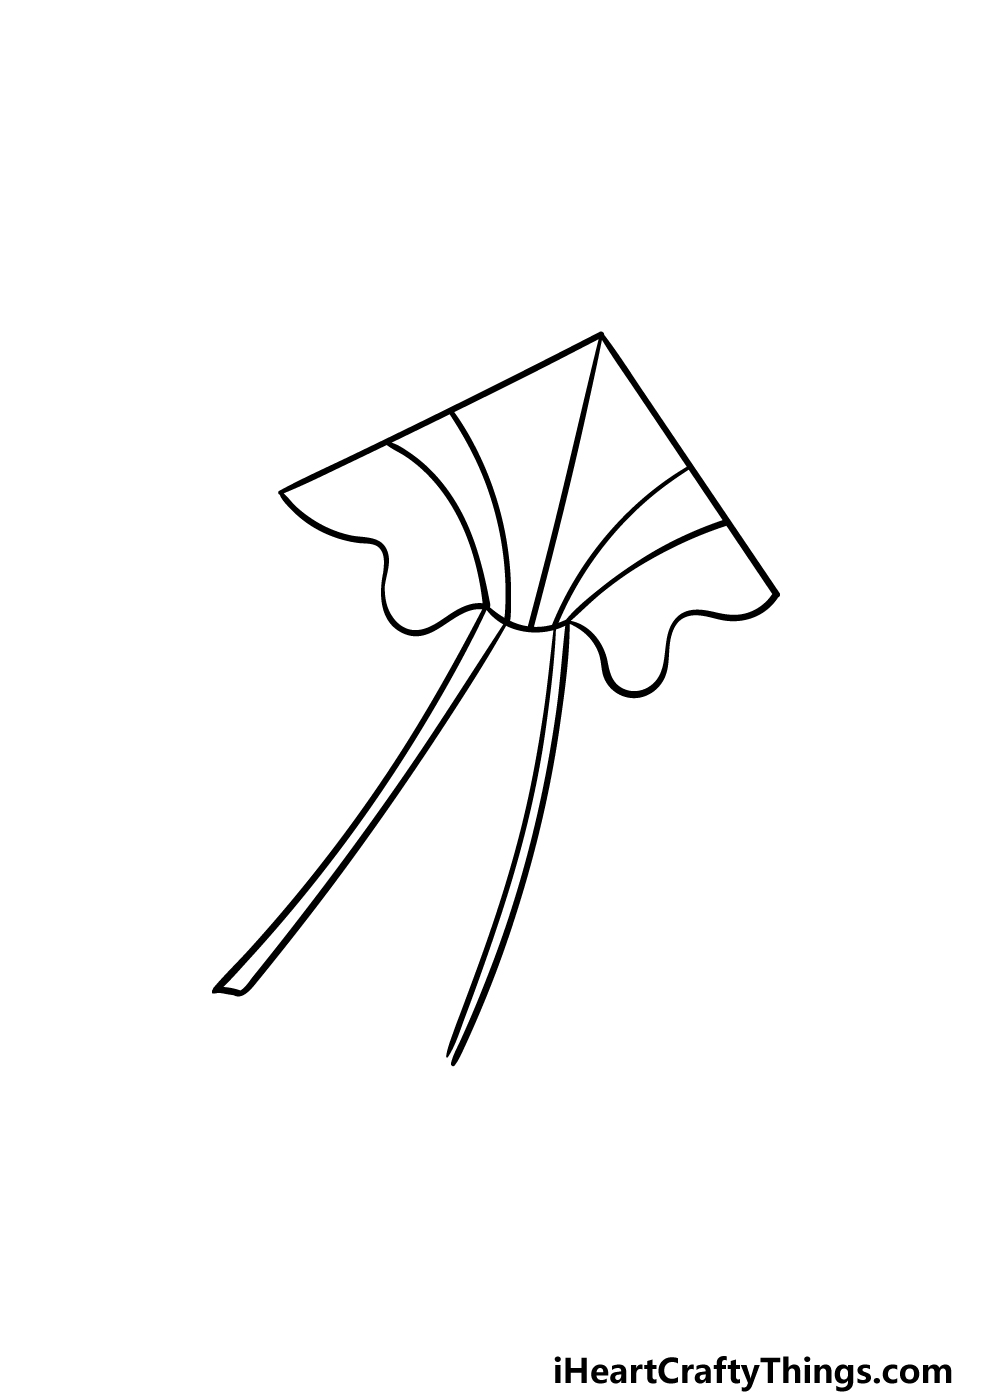
Moving on to this second step of your kite drawing, you can now draw some decorative details onto the surface of it.
We will be showing you just one design that you can go for in this guide, but you can also create a new design if you would like!
To complete our design, we will be drawing some curved lines curving up from the base of the kite that you drew in the previous step.
With these curved lines, it will create an almost rainbow-like effect for the kite. Once you have drawn these details, we shall then move on to step 3 of the guide.
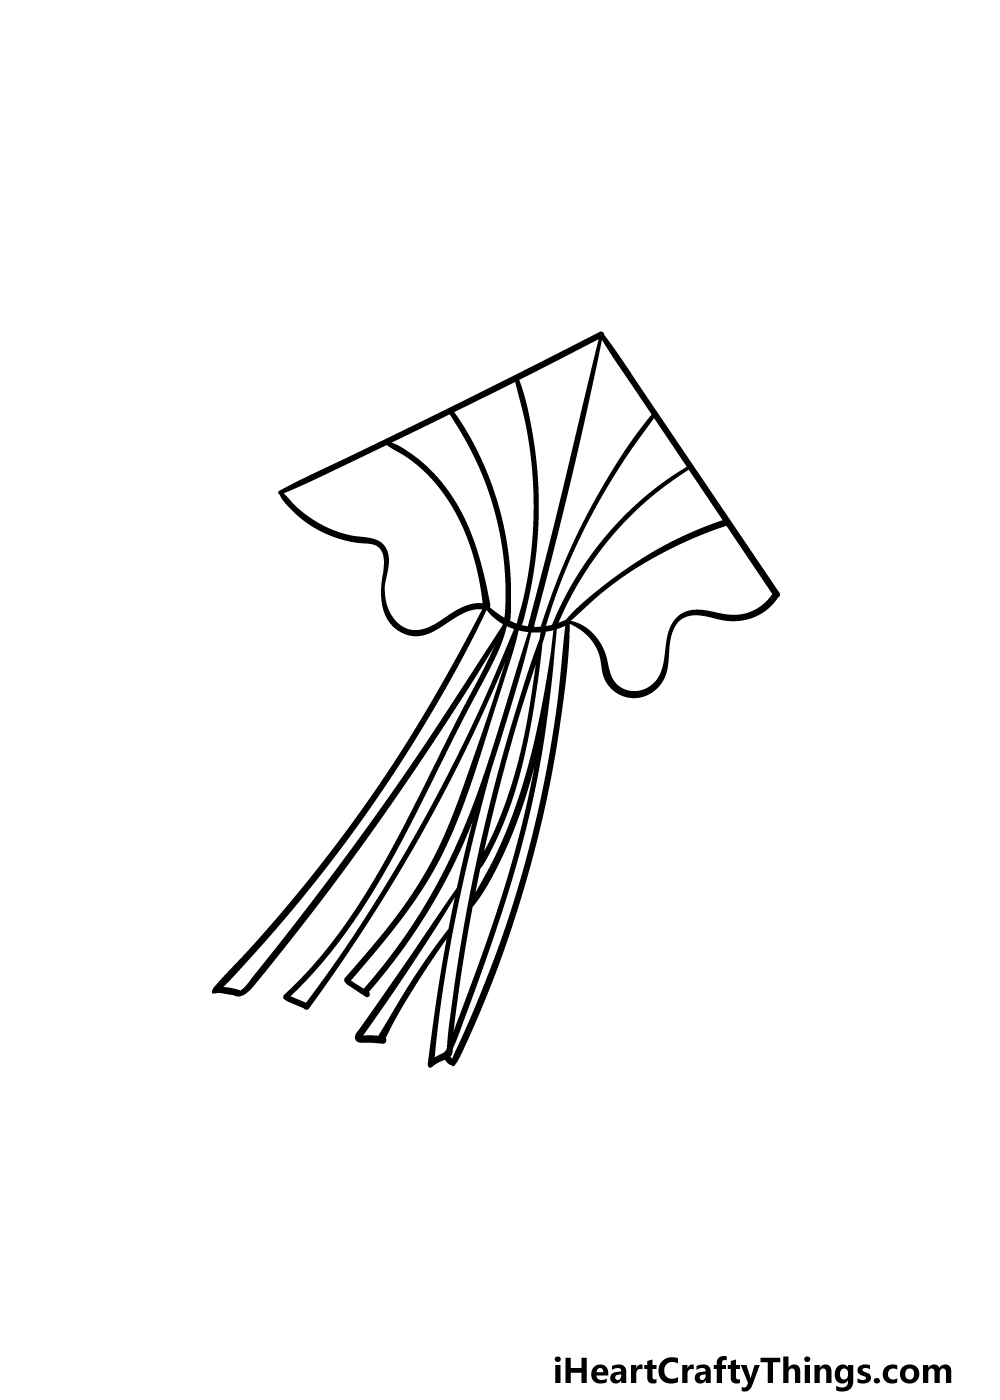
Step 3 – Next, draw some more details and another piece of the tail
We will keep things pretty simple in this third step of our guide on how to draw a kite.
For this and the next few steps, you shall be adding on more details that are similar to the ones that you have already drawn.
For now, you can draw some more curved lines to the pattern on the surface of the kite that you started drawing in the previous step.
Once you have drawn these, we will then finish off this third step by drawing one more strand of the tail trailing behind the kite.
Step 4 – Now, draw another strand of the kite tail
For this kite drawing, we want it to look nice and full, so for that reason we shall be adding some more strands to it as we start to finish off this picture.
This fourth step of the guide should be another simple one for you to do! All you need to do for this one is draw one more of those rectangular strands that you have been drawing for the tail so far.
Once that is drawn, we shall move on to the final details of this kite in the next step, so let’s go to add those final touches when you’re ready!
Step 5 – Add the final details to your kite drawing
You will soon be coloring your creation in, but first we have a few final touches to add in this step of our guide on how to draw a kite.
The main aspect that we shall be focusing on will be to finish off the tail of the kite.
Once again, we shall be drawing some more of those thin rectangular shapes, but for this step we shall have these new ones twisting over each other a bit.
When you have drawn the rest of the tail, you will then be ready to draw your own final details and elements. There are many ways that you could go about doing this!
One idea would be to draw your own pattern or picture design onto the body of the kite.
You could also draw a line attached to it and create a background with some clouds for a few more ideas. How will you complete this drawing?
Step 6 – Finish off your kite drawing with color
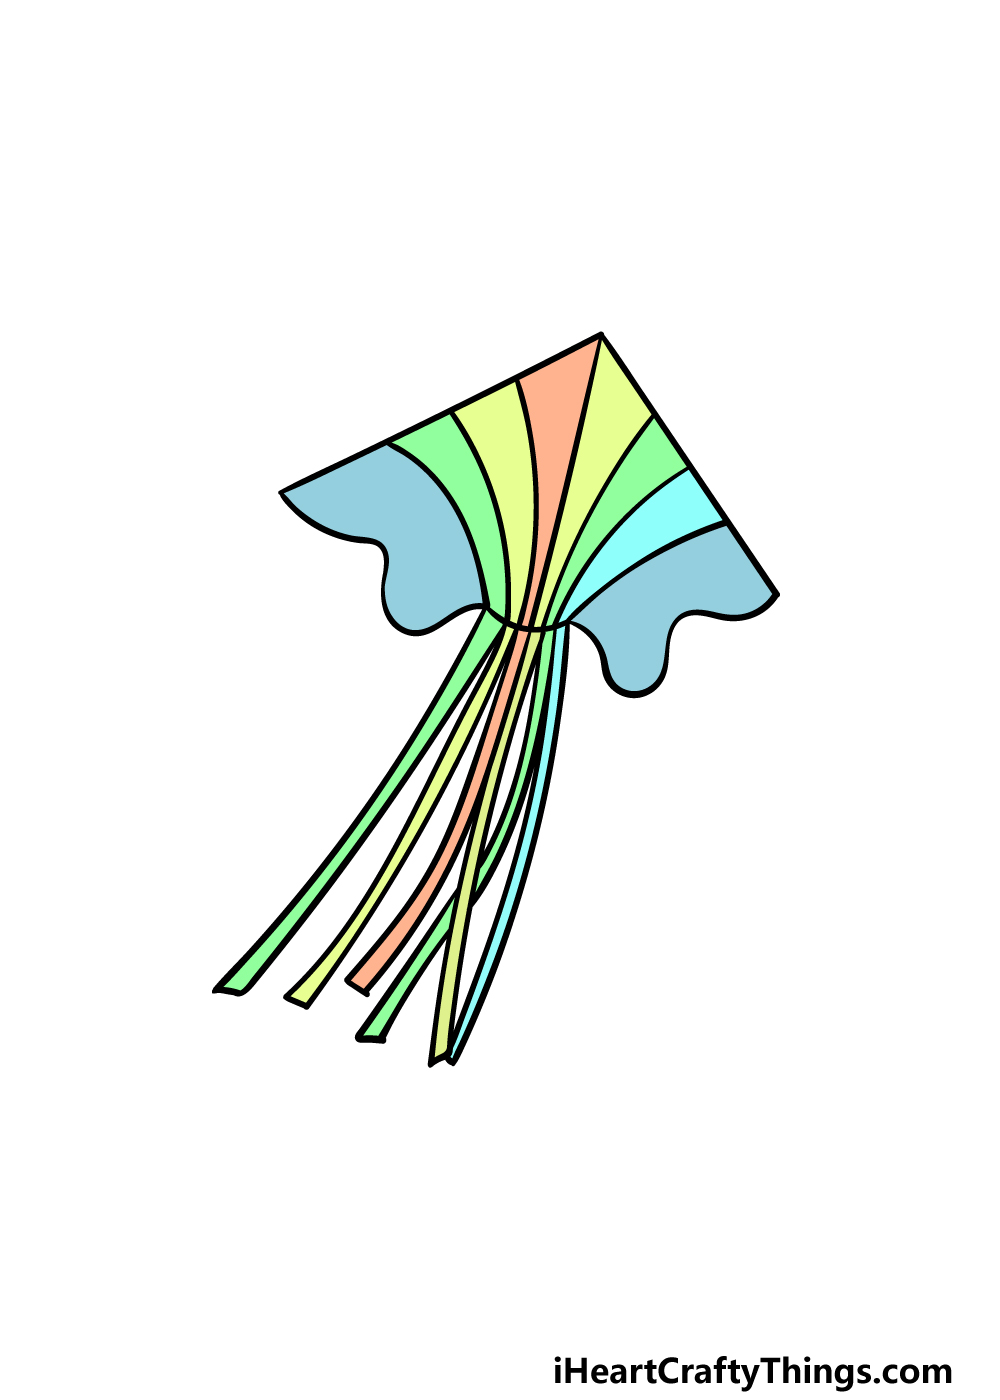
Now it’s time to have some fun coloring in your kite drawing! In our example image, we went with a combination of bright colors for each section of the pattern on the kite to create a vibrant image.
You could use some similar colors for your own drawing, or you could express your creativity and use some unique colors of your own!
You can also achieve some unique colors by changing up the art mediums that you use, so this is a great opportunity to experiment and see what happens.
We know that it will look amazing, and we can’t wait to see what you come up with!
4 More Ways To Make Your Kite Drawing Unique
Help your kite sketch take off as we make it even cooler with these 4 ideas to try!
This drawing of a kite that we created in this guide has a really cool and interesting shape. While it looks great, there are many other kite shapes that you could also depict!
Kites are often diamond-shaped, and many can even be shaped like famous fictional characters.
There are so many to choose from, and this is your chance to design your very own awesome kite design!
Can you think of some cool shapes and designs you could use?
If you can’t decide which of your kite design ideas to go with, you could incorporate multiple designs into your drawing! Even in real life, it’s always even better when you see lots of kites in the sky.
It would create a lovely scene filled with different shapes and colors, and you could have lots of variety. There’s no limit to how many kites you could have in the image, so add as many as you like!
Even the best kites need someone to fly them, and so it would be fun to add a human character to your kite drawing.
This person could be drawn in a simple cartoon style if that is what you’re comfortable with.
If you were to do this, you could draw a random character or even base it on someone real such as you or someone you know. This would be a great way to personalize your picture!
Finally, you could show where the kite is being flown by adding a background to your kite sketch. Kites can be flown in many places, so you could go for all kinds of settings.
Maybe the kite is being flown at a beach with waves and ships in the background. Or, you could show it being flown in a field with some trees and houses. ‘
This would also be a great tip to combine with some of the previous ones, and you could create all kinds of cool scenes!
Your Kite Drawing is Complete!
You have finished all six steps of this guide on how to draw a kite, and now you have an awesome kite design of your very own!
By working through the steps in this guide and taking it slowly, you can overcome any of the challenges that such a drawing may present.
Then, once you have mastered this drawing you can take it even further by adding some details and ideas of your very own to personalize it even further.
You could even create an entirely unique kite design of your own. We will be very curious to see how it turns out!
When you have finished this guide and are ready for a new one, you can find some great drawing guides on our website. We upload new ones often, so keep checking in to never miss out.
Please also remember to share your finished kite drawing on our Facebook and Pinterest pages so that we can admire the finished product!