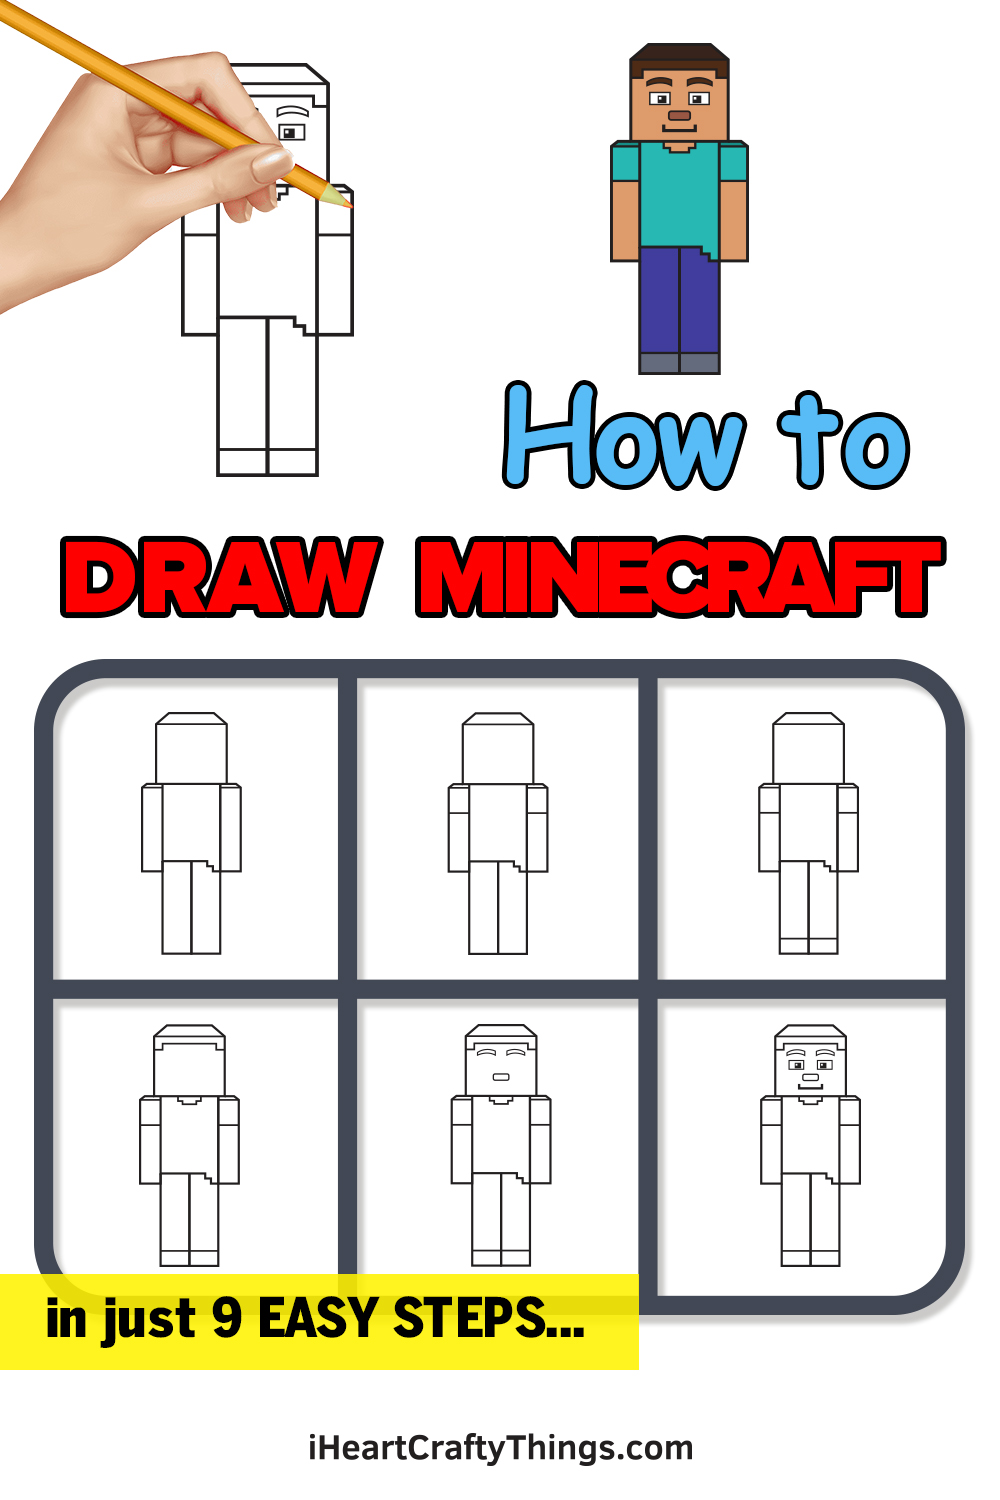
Anyone can easily make a Minecraft drawing by working on this guide for kids! Allow me to show you how to make this Minecraft character that you can customize.
Minecraft was an unexpectedly huge hit when it first released in 2009. It was made by a very small team and became an overnight sensation.
Even now, it’s still popular with kids and adults alike. Anyone can have fun in the game, as the simple blocky style allows you to easily express your creativity.
The character we will create in this guide will be simple and easy for you to change. You could make all sorts of characters from this basic one, and you could also add some background details, weapons and other props.
The only limit is your imagination, so let’s get started and have fun with it!
Watch And See How To Make Your Minecraft Drawing
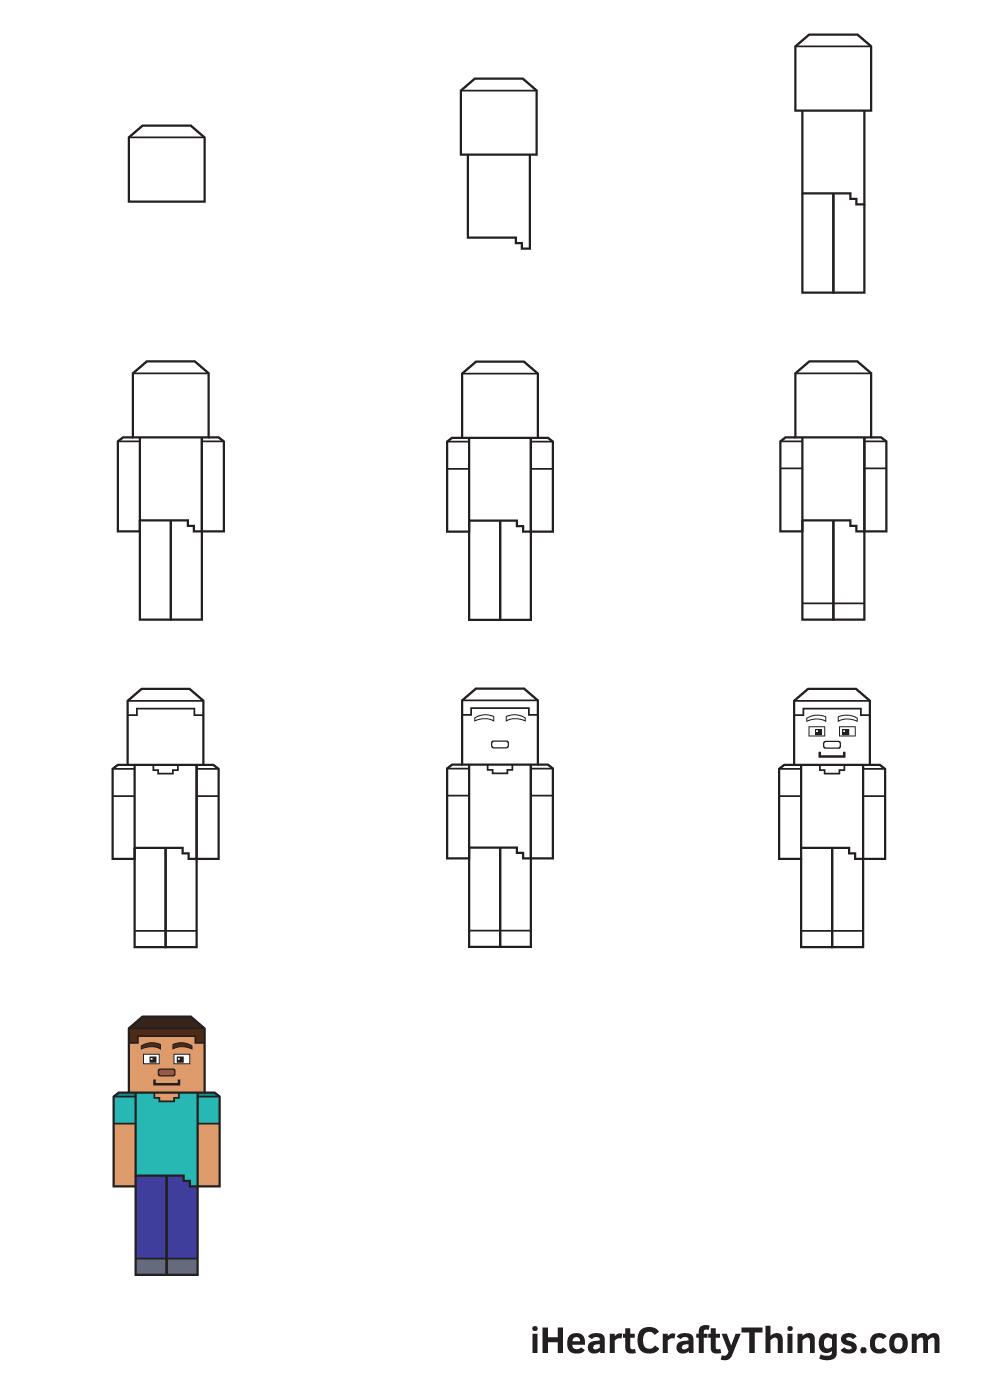
How to Draw Minecraft – Let’s get started!
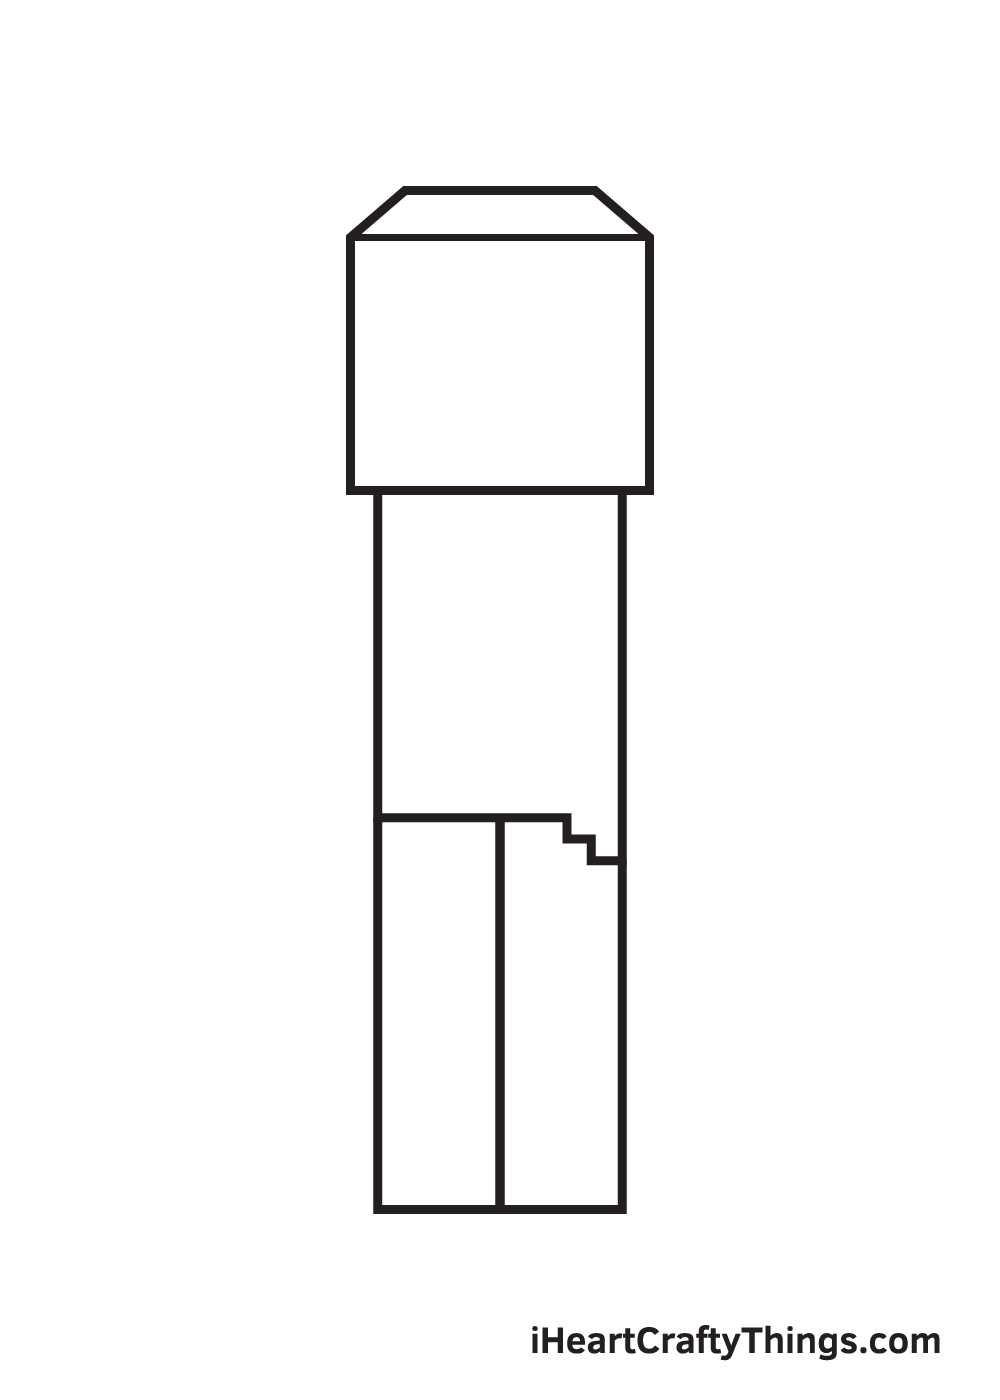
Step 1
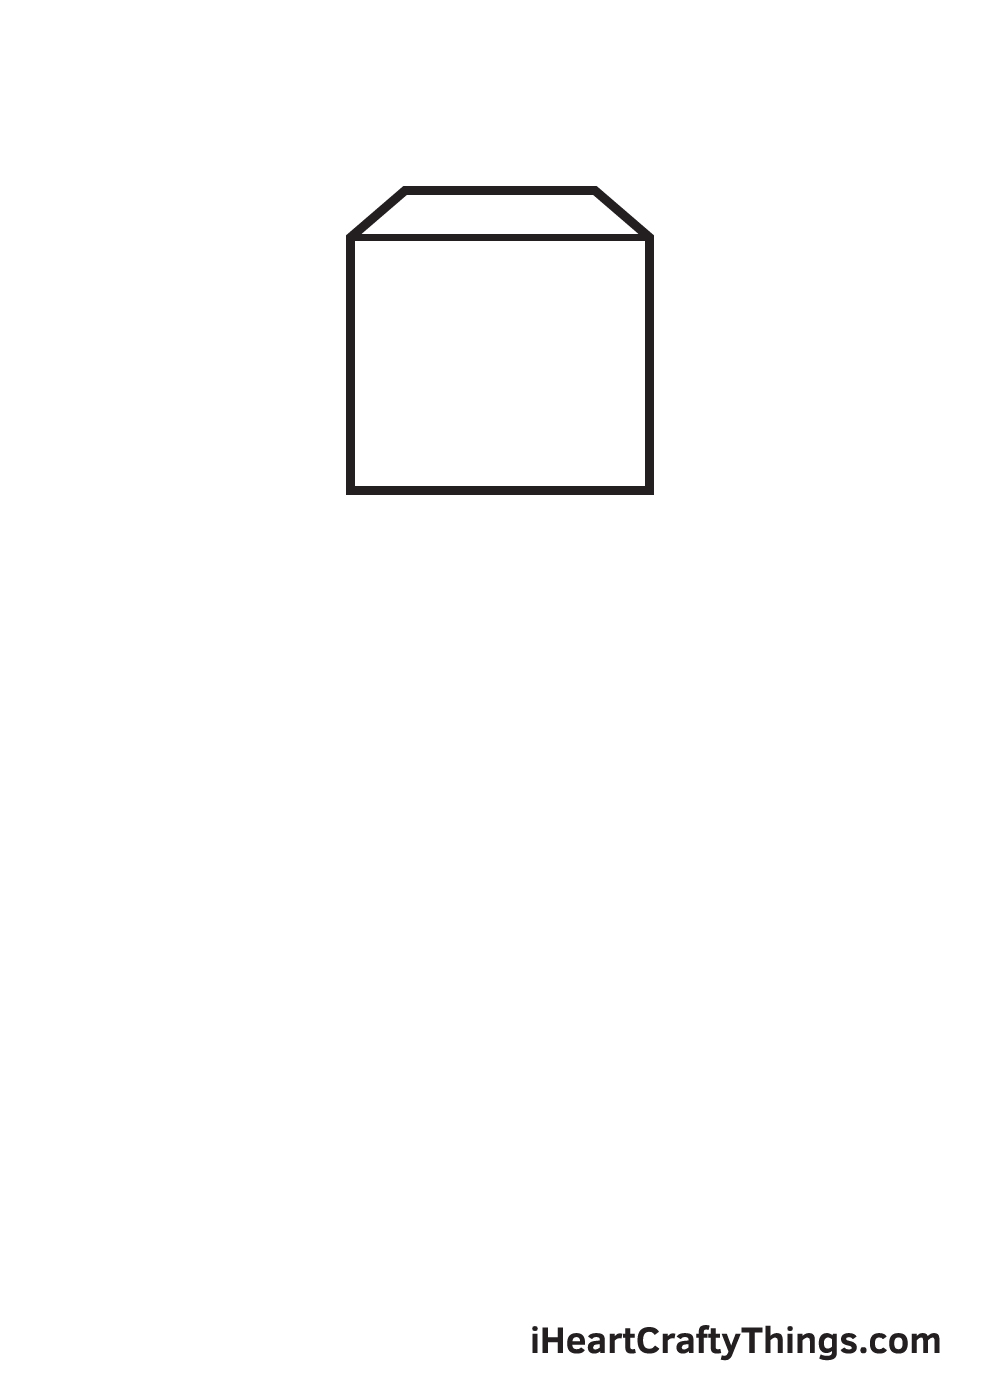
Starting on the upper portion of your paper, draw a box with a dimension at the top. Begin by drawing a flat square shape to create the front part of the box.
Then, draw an upward diagonal line headed towards each other on both upper corners of the box.
Now, finalize the figure by drawing a horizontal line connecting both endpoints of the two diagonal lines we drew just now.
Drawing a Minecraft character is heavily dependent on straight lines, so feel free to use a ruler if you need assistance in drawing straight lines. This will help you draw even lines perfectly and easily.
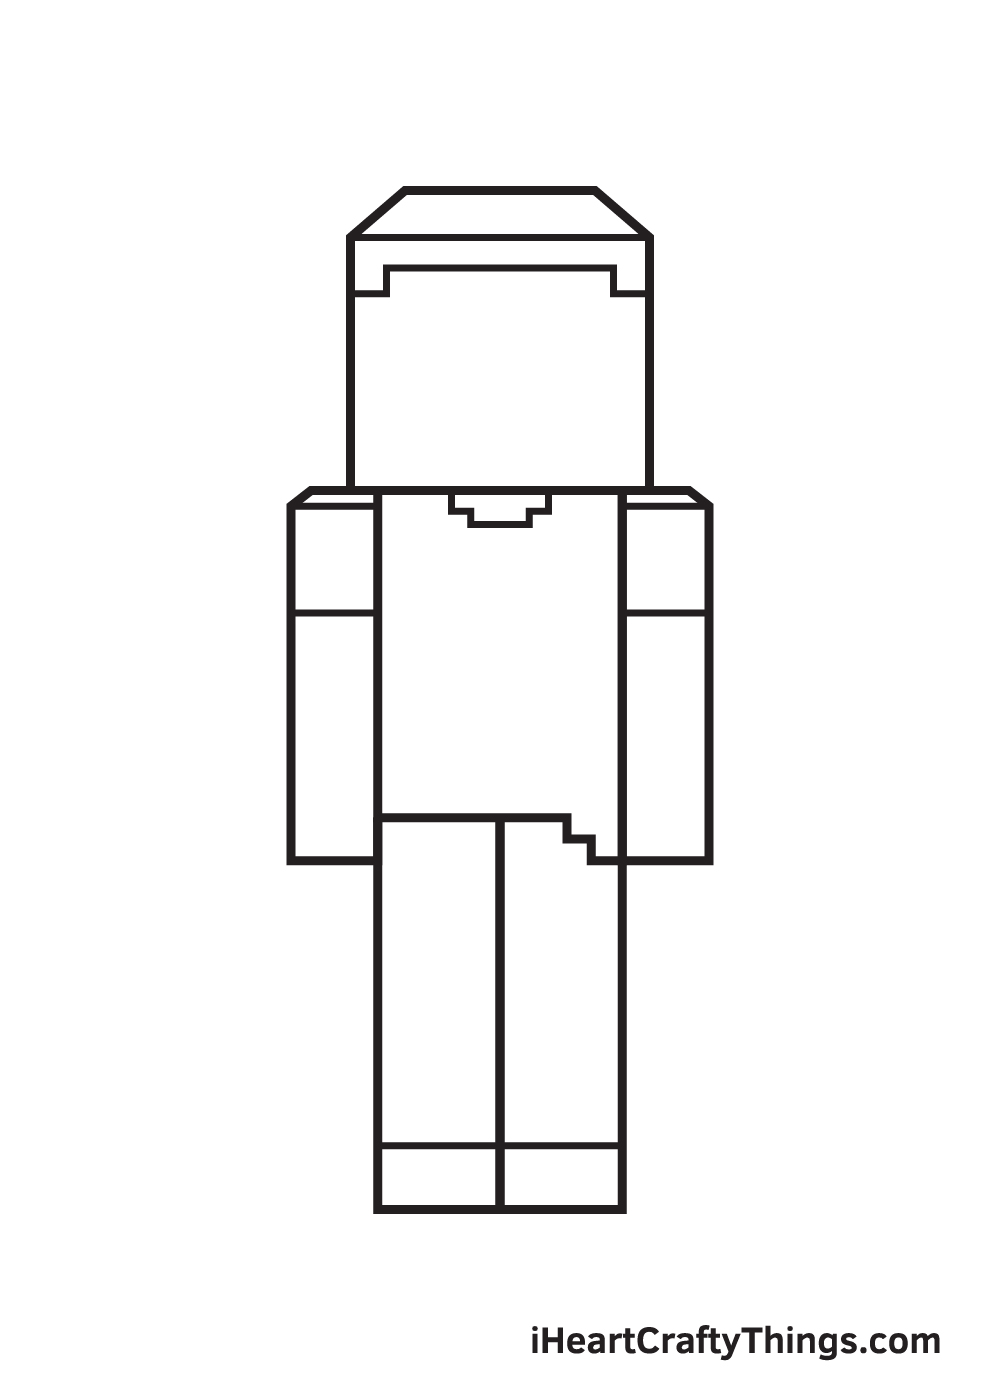
Step 2 – Outline the Character’s Head and Torso
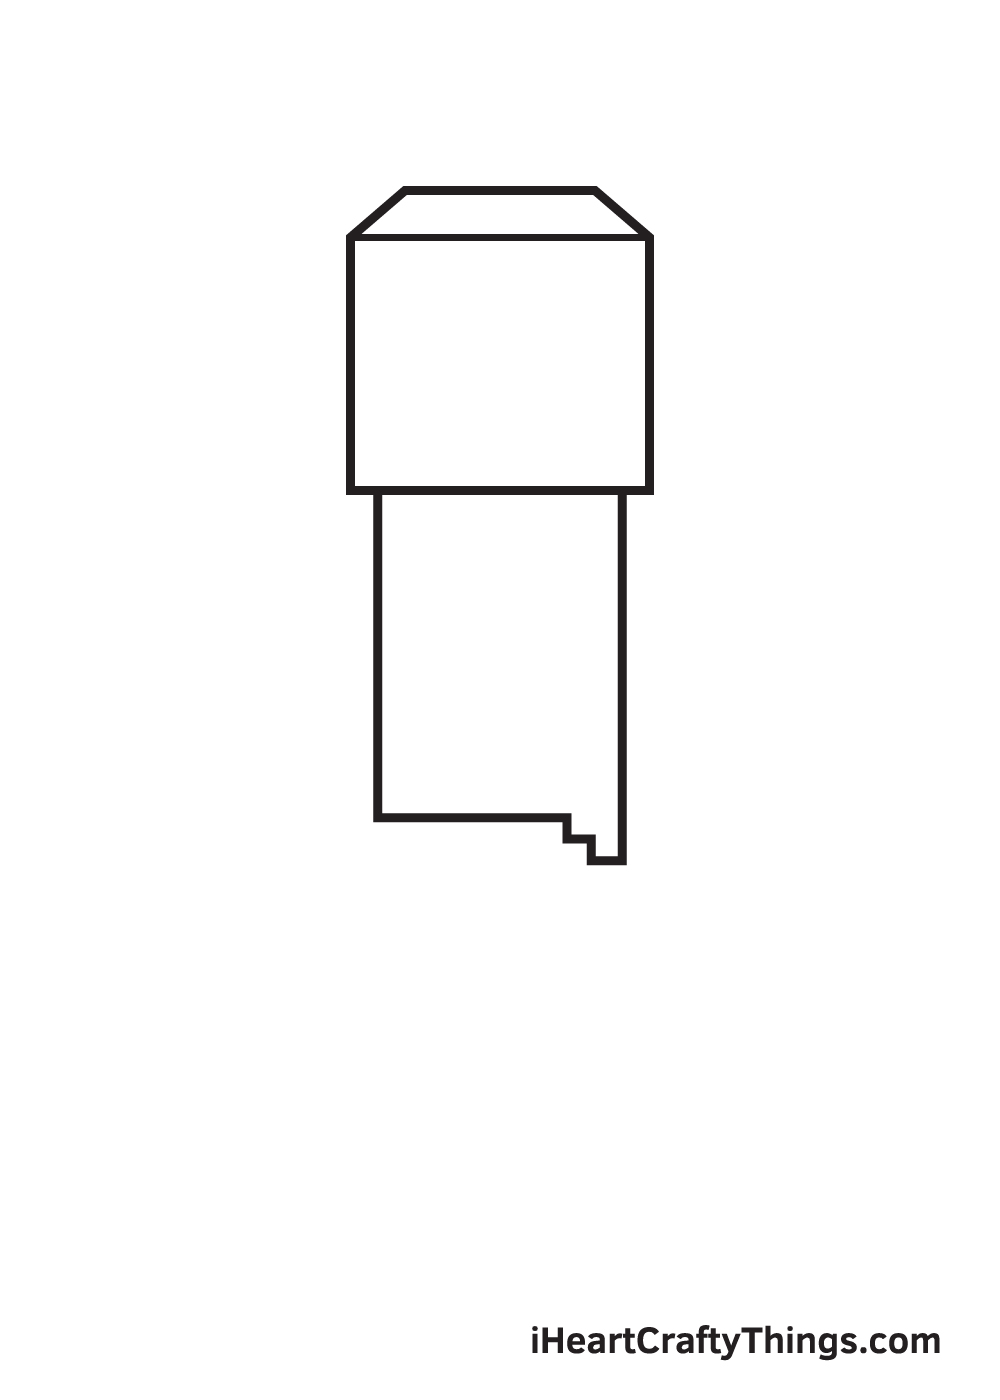
Create the upper body of your character by drawing an upright rectangular shape right underneath the head.
On the lower right corner of the body, right before the horizontal line intersects with the vertical line, draw a short vertical line going down then draw a short horizontal line going right.
Now, repeat the same step until you have two figures of similar shape and size.
When drawn correctly, it should look like a downward two-step stairs. Don’t forget to add this pattern as it is one of the most distinct features of Minecraft characters!
Remember, the width of the body should be slightly smaller than the width of the head.
Step 3 – Afterwards, Draw the Character’s Legs
Create the legs by drawing a vertical line on both sides in line with the outline of the torso. Then, draw a horizontal line at the bottom connecting both endpoints of the vertical line.
Afterwards, draw a vertical line across the lower body of your character, creating a division between the left and the right leg.
Step 4 – Next, Draw the Character’s Pair of Arms
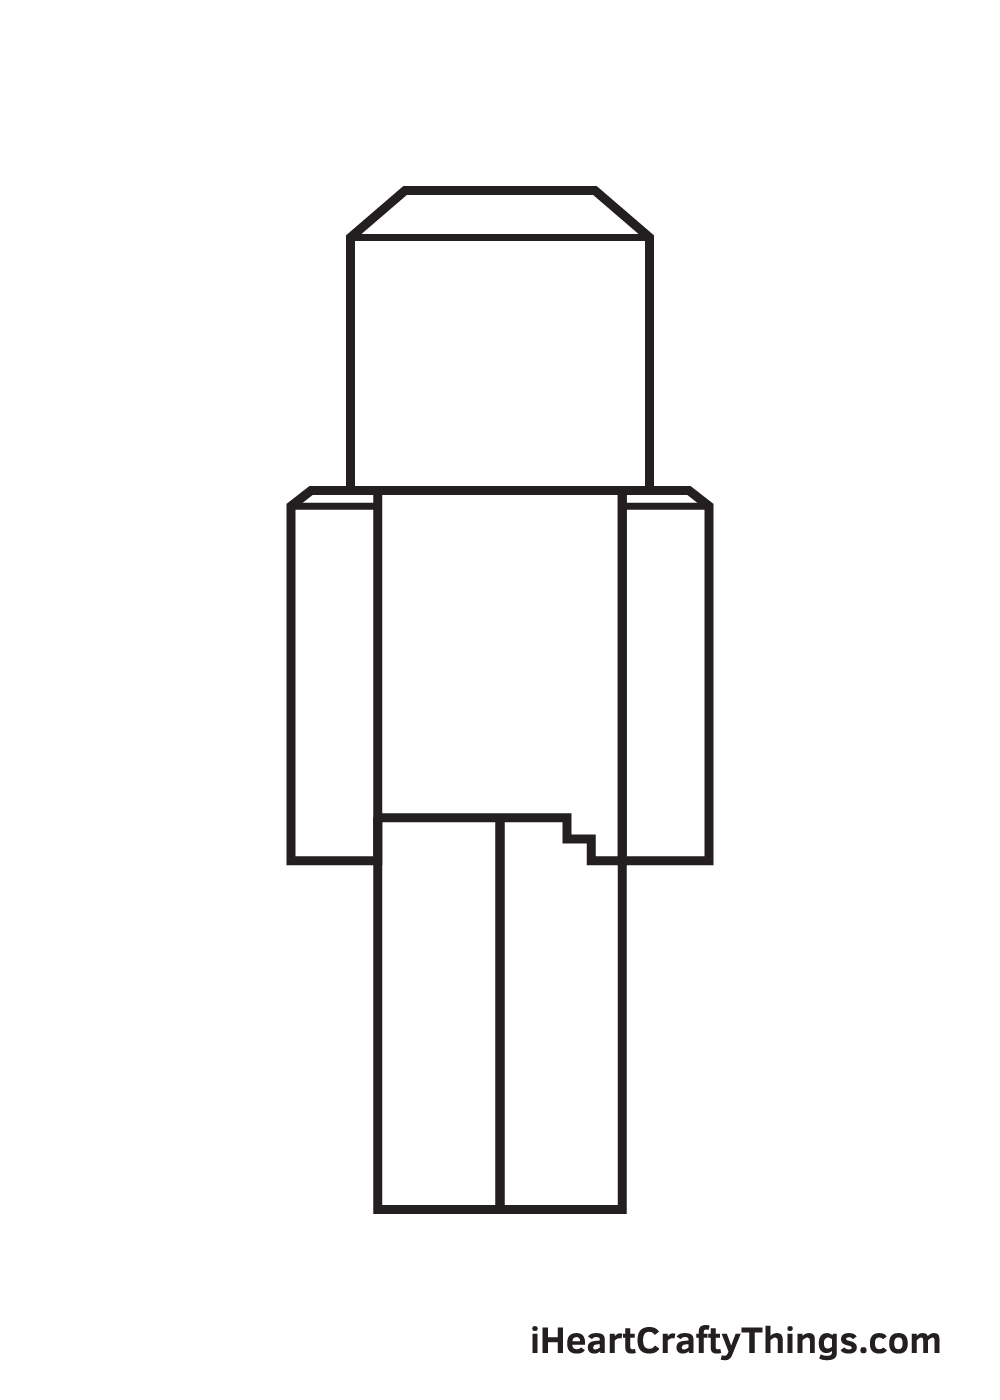
Draw an elongated standing rectangle shape on each side of the upper body. This forms the left and the right arm of your character.
Don’t forget to add dimensions at the top of both arms! This creates an illusion of depth and makes your drawing appear three-dimensional, as how Minecraft characters should be.
Step 5 – Outline the Shirt Your Character is Wearing
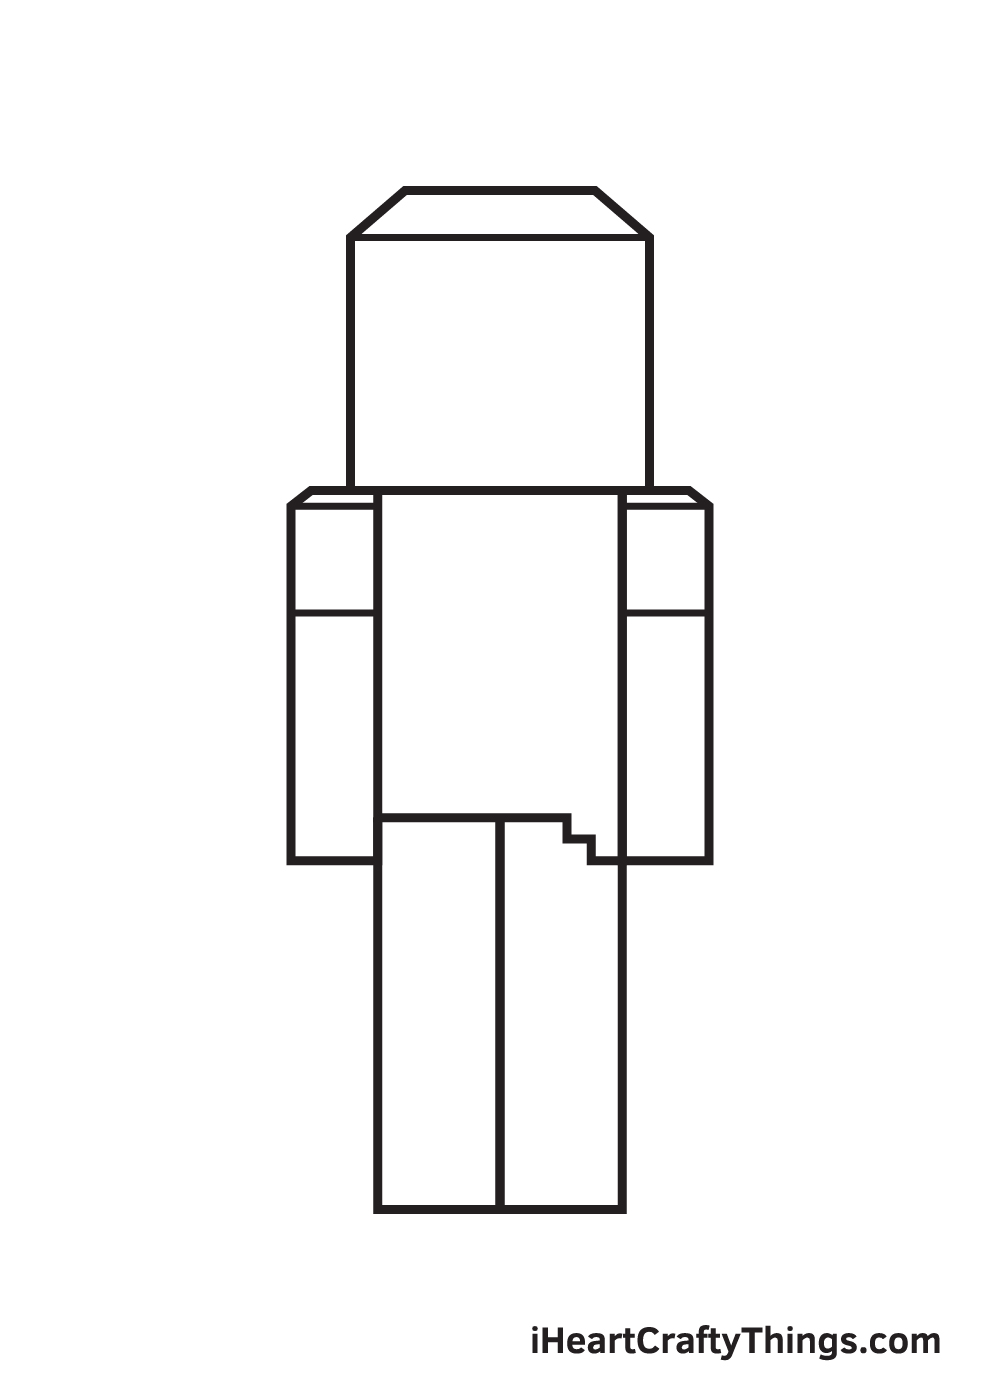
Draw a vertical line on the upper part of both of your character’s arms. This outlines the sleeves of the shirt your character is wearing.
Thus, the spot where you will draw the line depends on how short or how long you want the sleeves to appear to be.
Step 6 – Then, Outline Your Character’s Trousers
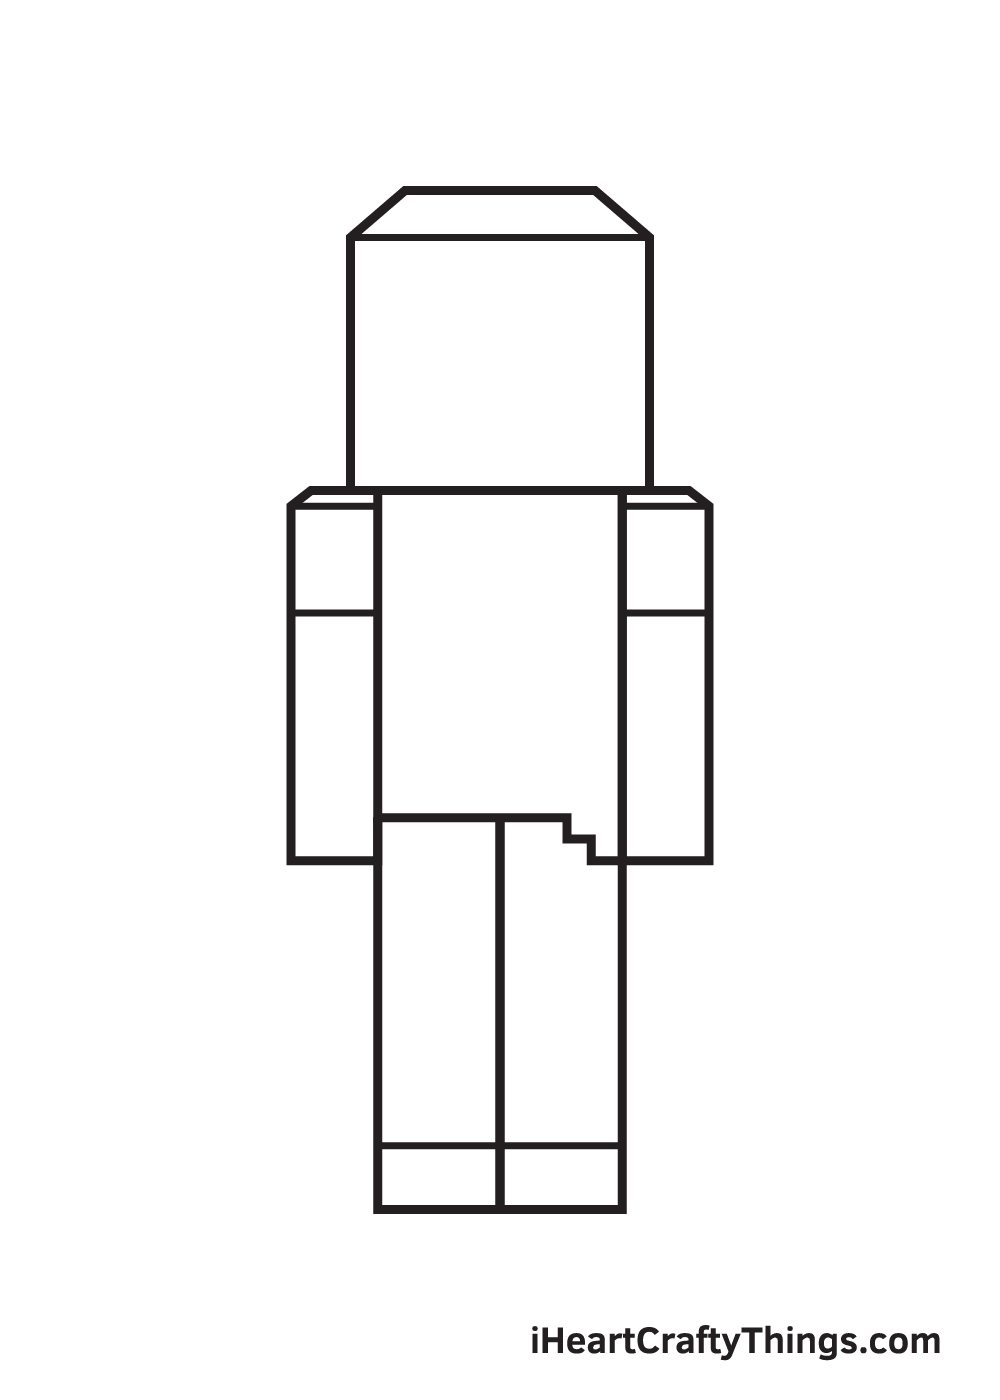
Draw another vertical line on the bottom part of each leg. It’s quite similar to what we’ve drawn in the previous step. This time, however, these lines outline the hem of the trousers.
Similar to the shirt, you can make the trousers look short or long, depending on your preference.
If you prefer long trousers for your character, then use the illustration as a guide and place the line at the bottom. Otherwise, feel free to draw the hem on the upper part.
Step 7 – Draw the Hair of Your Minecraft Character
Create the hair by simply drawing an outline of the hairline at the top of your character’s head.
You can opt to draw the hair similar to how we’ve done ours or create a unique hairstyle. Either way, we’re sure your drawing will turn out beautifully!
Step 8 – Now, Draw the Eyebrows and the Nose
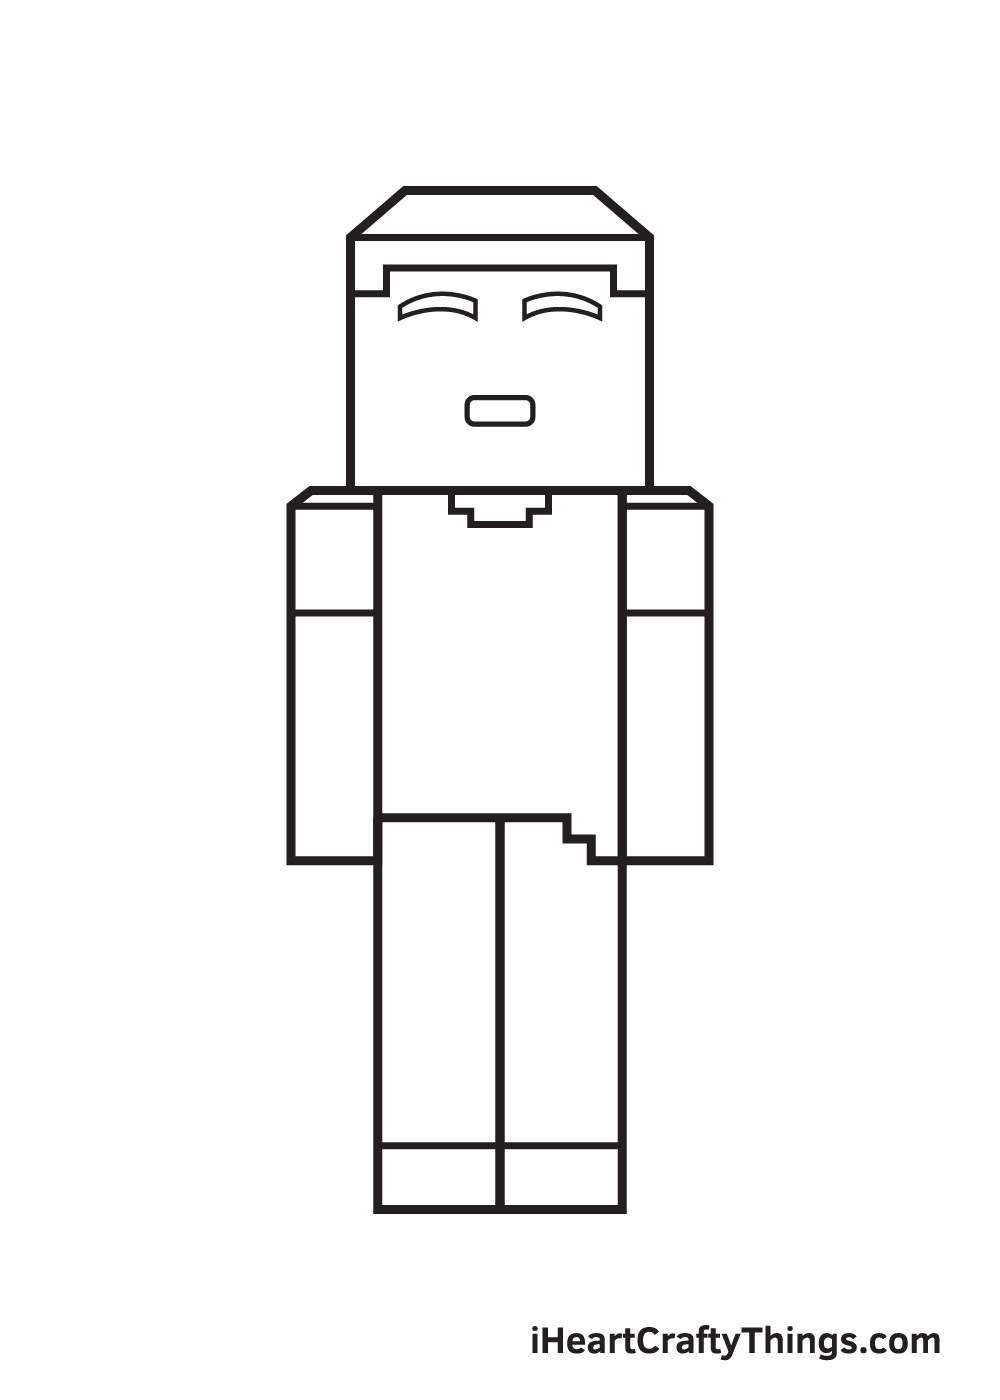
In this step, we will now start drawing your character’s facial features. Begin by drawing an arched or curved eyebrow on both sides of the face.
Do your best to make the eyebrows as even and as aligned as possible.
After you finish drawing the eyebrows, let’s move on to the nose. Simply draw a rectangular shape with round edges to form your character’s nose.
If you’re feeling more creative, why not try experimenting with different shapes to create a unique nose structure?
Step 9 – Complete Your Character’s Facial Features
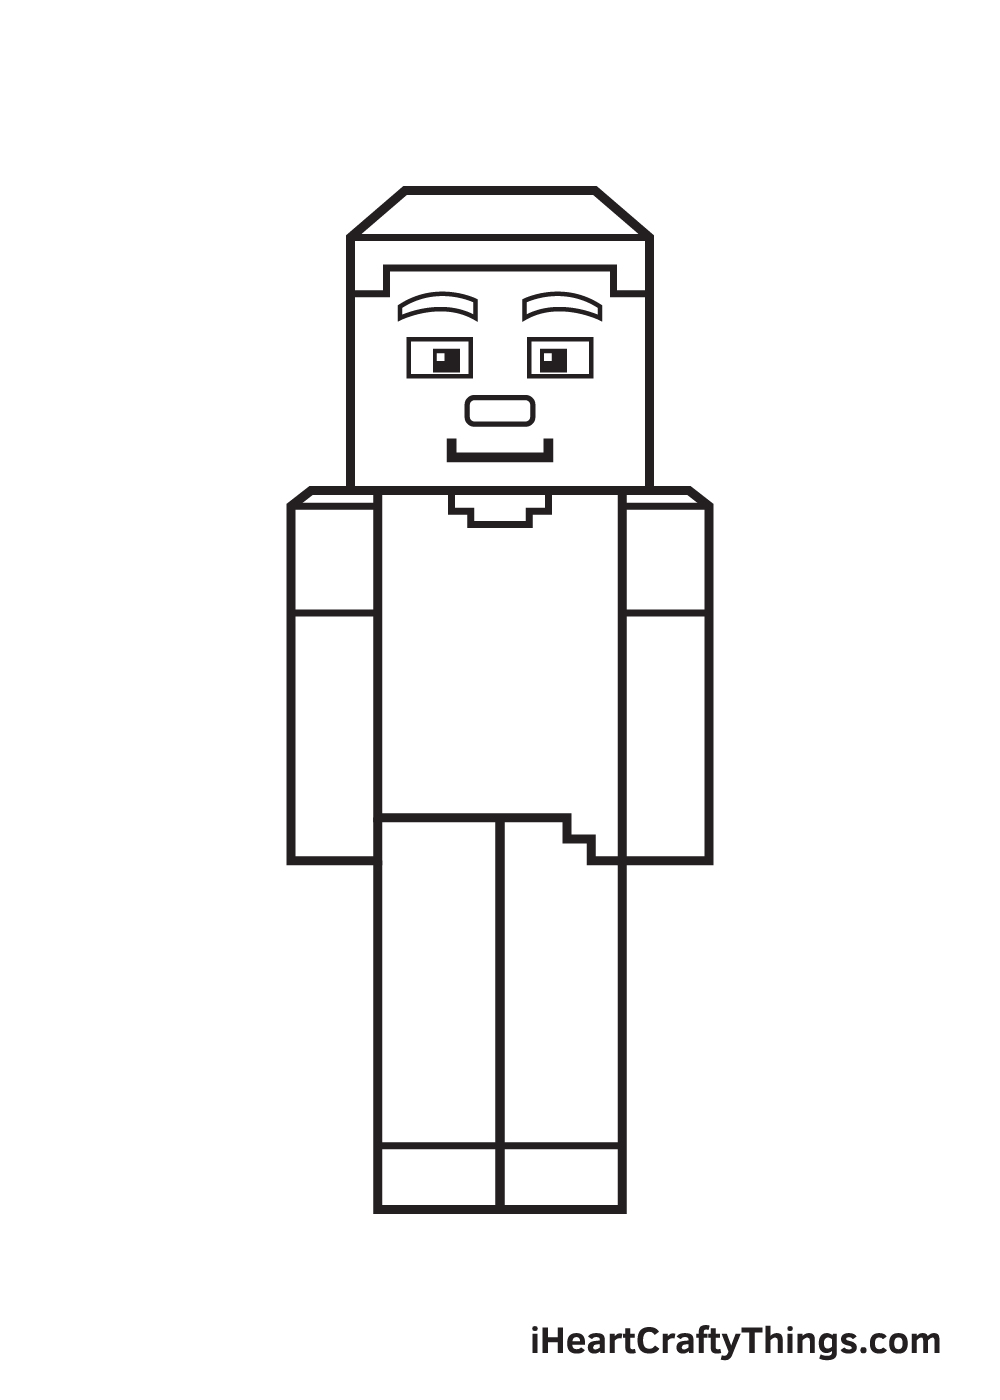
To complete the look, draw a rectangle shape underneath each eyebrow to form a pair of eyes. Then, draw a small square shape within each eye to create the iris.
Shade the entire iris while leaving out a tiny dot inside unshaded to create a dramatic effect!
Then, draw a horizontal line with a vertical line at both ends at the bottom to add a wide smile on your character’s face.
Now that we’ve finished drawing a Minecraft character, it’s time for the most fun part, which is choosing the colors and filling in the colors of your drawing!
As you can see in the illustration, we used a customized skin tone color for the character’s complexion. Then, we colored the shirt with light blue and the trousers with a darker shade of blue.
Characters in Minecraft come in a wide range of colors. This gives you a lot of color options to choose from when coloring your drawing!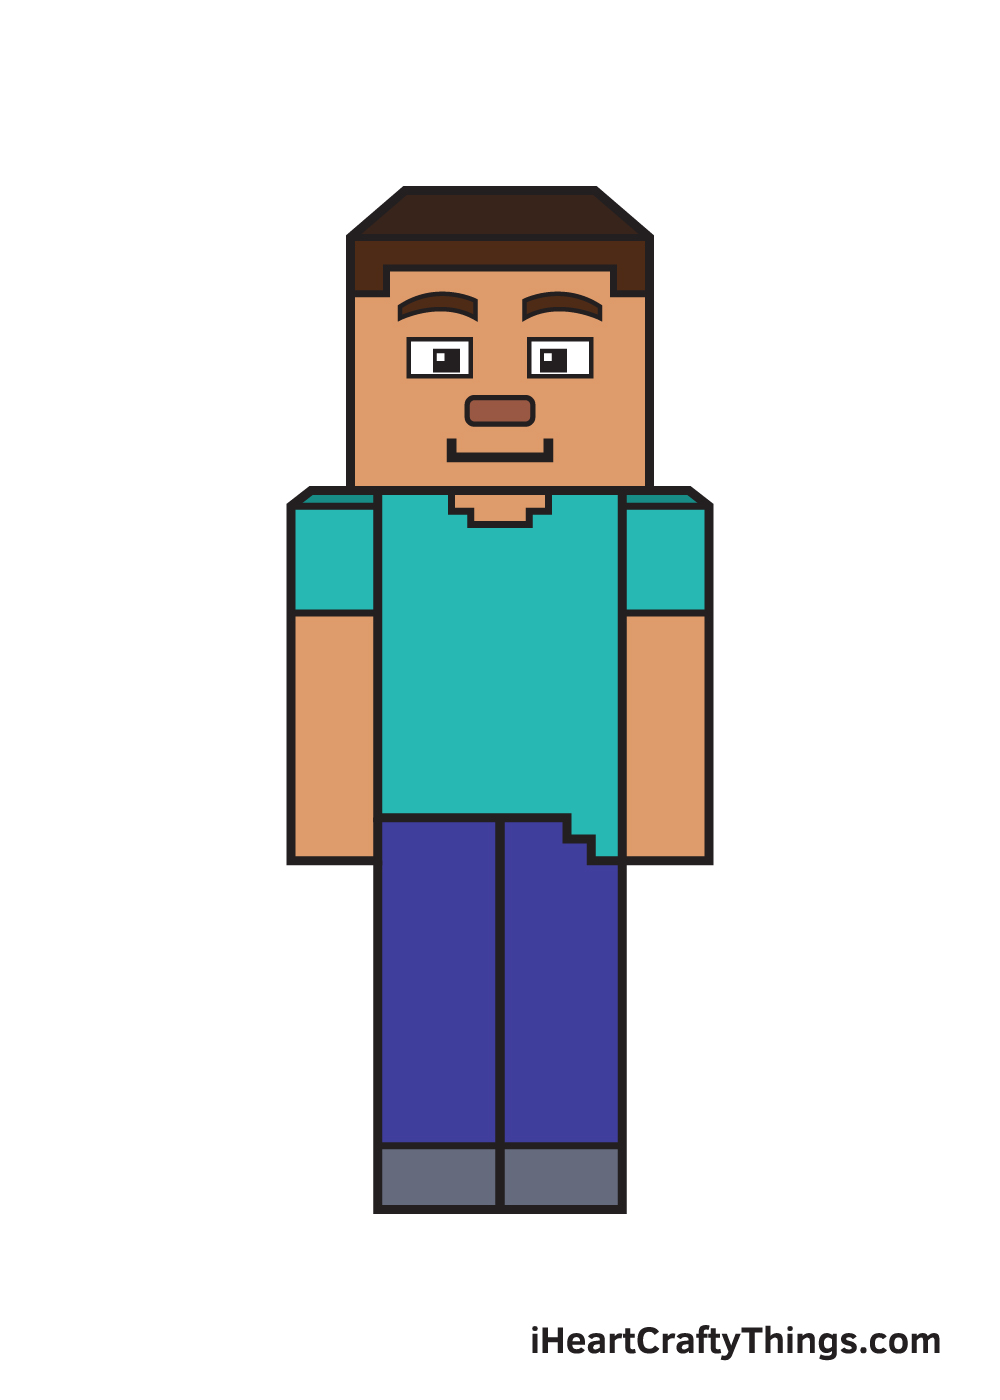
5 Tips To Make Your Minecraft Drawing Even Better!
Show off your creativity as we make this Minecraft sketch even better with some tips.
The character we created in this Minecraft drawing is a pretty standard design. Minecraft characters can come in any appearance you can imagine, so you could change a lot of details.
These could be as simple as the details on his hair, clothing, face and other areas. Even small changes can drastically alter the look of this character.
What are some changes you could make?
When you have finished customizing this drawing of Minecraft, you could give them a friend to explore with. If you follow the steps of the guide and change a few details, you can have a second unique character.
You don’t have to stop at 2, and you could fill the page with as many characters as you like!
Another way you can customize this character is by giving them some accessories to hold or interact with. Minecraft is filled with ideas for various accessories!
If you want an iconic option, you could draw the famous Minecraft pickax in his hand. Or maybe you could add some blocks of various resources or other valuable materials.
What are some accessories from the game or beyond that you could use here?
The pose we created for this Minecraft sketch is pretty basic, as that makes it easier to learn. Once you have mastered the design and made your changes, you could change his pose.
This could be as simple as raising an arm or making it look like they are walking. You could also go for some more dynamic poses to show off the adventure he is on!
The Minecraft game is all about exploring amazing locations, and you could use them as background settings for this Minecraft drawing.
Pretty much every biome you can think of can appear in the game, so you could represent any one you like! Whether it’s snowy terrain or a harsh desert, you could create a really cool background.
What background would you choose?
Your Minecraft Drawing is Complete!
If you enjoy playing the game Minecraft, then we’re sure you’ve had a lot of fun with this step-by-step Minecraft drawing tutorial.
This guide gives you complete freedom to customize your drawing as well as its colors to help you hone your artistic skills.
In this tutorial, we learned how to draw a human being in Minecraft. There are a lot of other characters in Minecraft.
Which Minecraft character would you like to learn how to draw next? Let us know and we’ll do our best to cater your requests.
Once you’ve finished your masterpiece, don’t forget to take a picture of it and share it on our Facebook page and on Pinterest.
We’re excited to see your incredible Minecraft drawing!