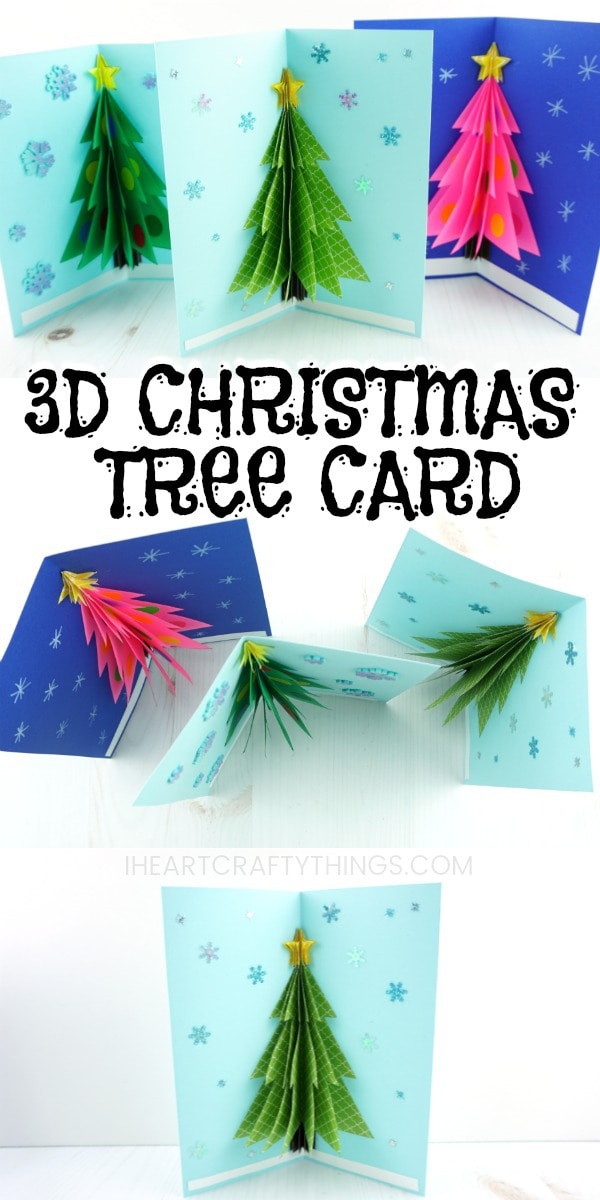
If you are looking for a simple and creative way to make a DIY Christmas card with your kids, you’ve come to the right place! In this post learn how to make this gorgeous 3D Christmas card with our helpful template, step-by-step tutorial and video. See printable instructions at the bottom of this post.
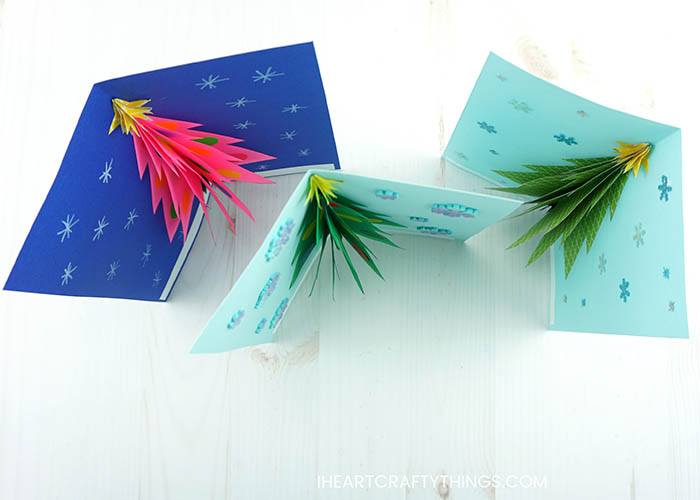
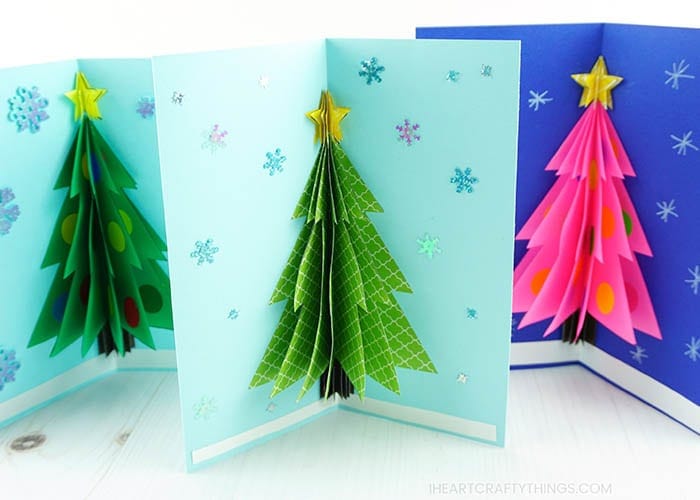
The 3D Christmas trees on the inside of this DIY Christmas card are a welcome and colorful surprise when opening the card. The card itself also adds some fun and festive holiday decor when left open and put on display on a table or shelf for others to see.
This post contains affiliate links to the products mentioned. I Heart Crafty Things is a participant in the Amazon Services LLC Associates Program, an affiliate advertising program designed to provide a means for sites to earn advertising fees by advertising and linking to amazon.com.
Supplies needed:
- 3D Christmas card template <—- Get the Template HERE
- blue and white cardstock (or color of your choice), cut into 8 1/2″ x 8 1/2″
- round stickers
- embellishments (snowflake sequins, snowflake stickers)
- white chalk marker (optional)
- scissors
- glue stick
- glue
Instructions:
1. Print out template
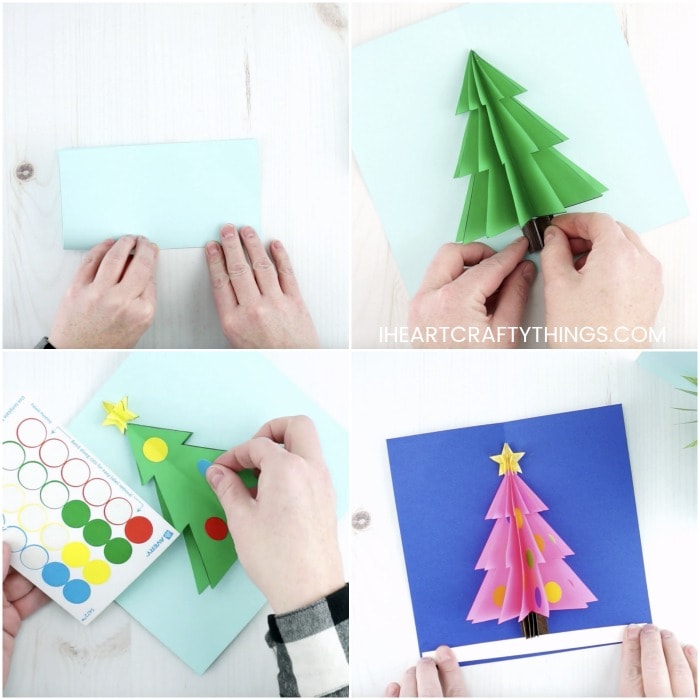
Begin by downloading the 3D Christmas Card template. Print it out and use it as a pattern to trace the different pieces on your colored paper or print the template directly on colored paper.
2. Cut out shapes
Use your scissors to cut out the six Christmas trees, tree trunks and stars.
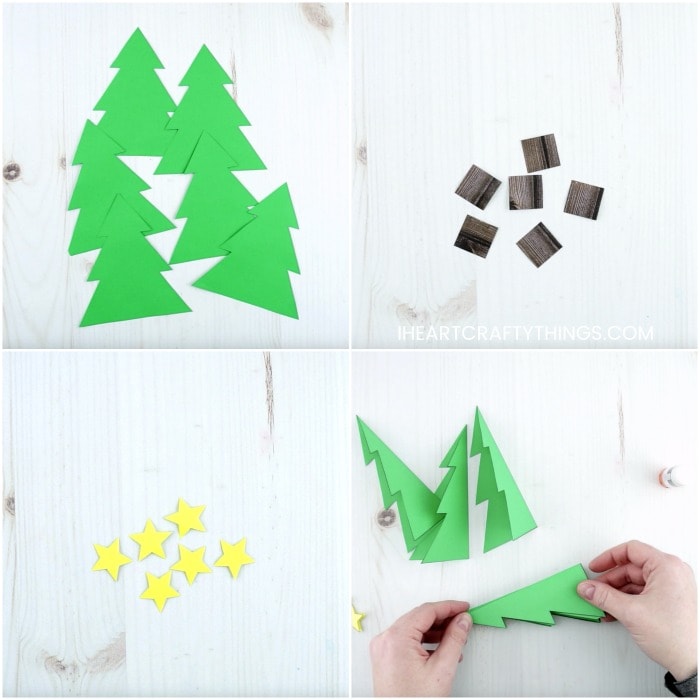
3. Fold all shapes in half
Carefully fold all of the Christmas tree pieces, tree trunk pieces and star pieces in half.
4. Glue tree pieces together
Use your extra strength glue stick to add glue to one side of one of your Christmas tree pieces. Then line up another Christmas tree on top of the glue. Continue gluing all the Christmas tree pieces together one on top of the other.
5. Repeat the same with other shapes
Repeat step 4 using the tree trunk pieces and star pieces.
6. Glue details to the card
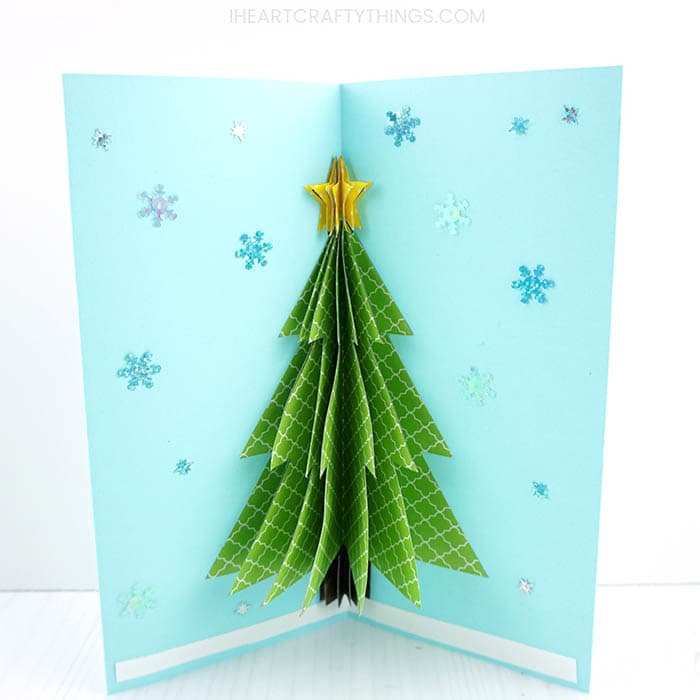
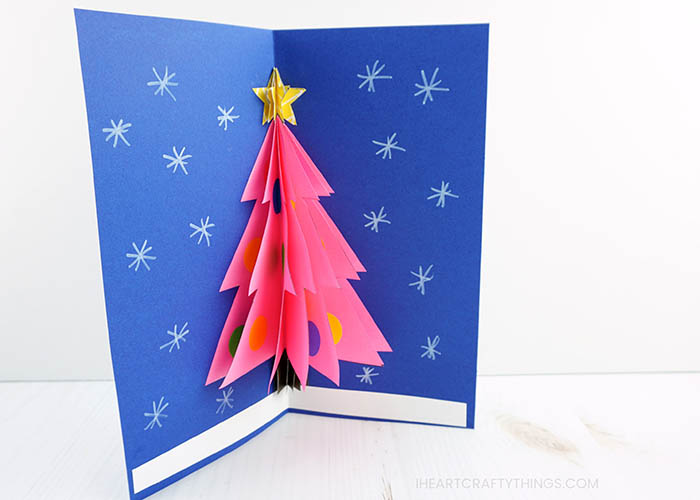
Cut a piece of blue cardstock in an 8 1/2-inch by 8 1/2-inch square. Fold it in half and then open it back up. Add glue to the back of the 3D Christmas tree, tree trunk and star and glue them along the inside folded seam of the open card.
Now it’s time to add details to your 3D Christmas Card!
7. Decorate with stickers
A simple way to add ornaments to your Christmas tree is by using Avery round stickers. They have a plethora of different colors to choose from so you can use primary colors or neon colors. Add the stickers to each different section of the 3D Christmas tree.
8. Glue white strip to the card
Cut a strip of white paper or cardstock to place at the bottom of your 3D Christmas card. Fold the white paper in half and then glue it at the bottom of your Christmas tree.
Add embellishments to your 3D Christmas Card
You can use a variety of different materials to decorate the inside of your card. We went with snowflakes to give our 3D Christmas cards a wintery feel. For snowflakes you can glue on snowflake sequins, use snowflake stickers, or you can use a chalk marker to draw snowflakes around the inside of your card.
To finish your 3D Christmas card, use markers or pens to write “Merry Christmas” or any holiday message on the front of your card. Then fold your card in half and place it in a large envelope for the recipient.
When the card is opened the recipient will be delighted by the 3D effect of the Christmas tree inside. The best part, they can put the card on display somewhere in their home to add to their festive decor.