Looking for a fun way to explore primary and secondary colors with your children? This simple color mixing activity is a great way to combine both science and art at home or school when learning all about colors.
Kids will have a blast with this hands on activity mixing together colors and using them to create a beautiful color wheel craft. Make sure to grab our free color wheel printable template to make prep for this activity super simple too.
We used acrylic paints in this fun color mixing activity. We have a huge collection of the acrylic paints in our crafting supplies and I love them.
These we have are also water based and non-toxic so they are perfect for all of our kids arts and crafts projects like the color mixing activity we are sharing today.
We also have a video tutorial inside this post you will find helpful before getting starting on this playful learning activity.
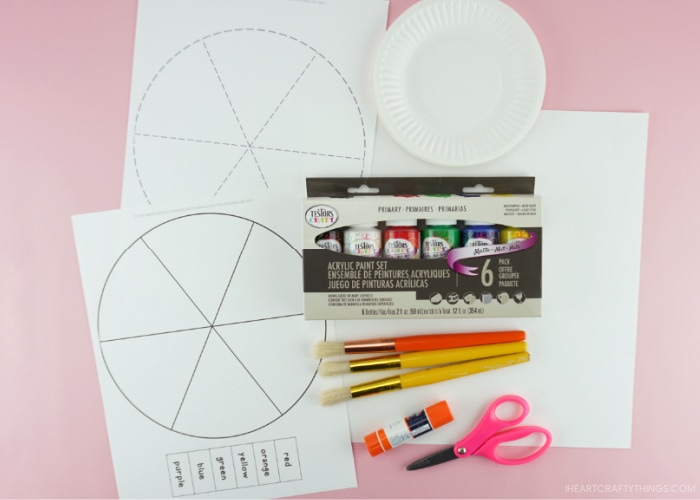
Supplies Needed:
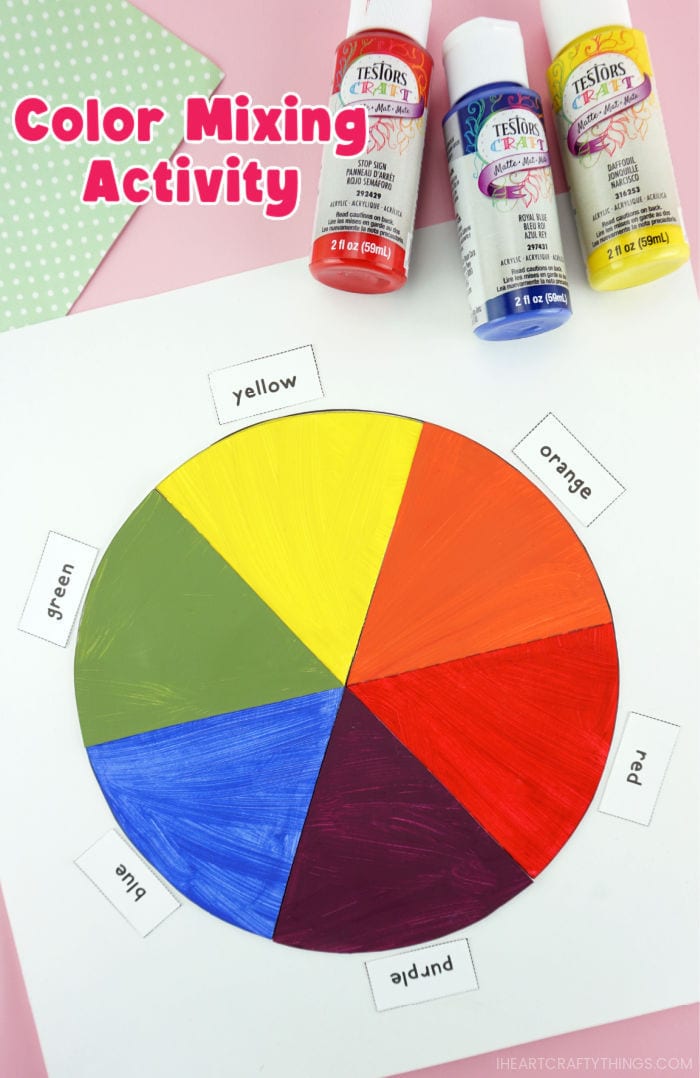
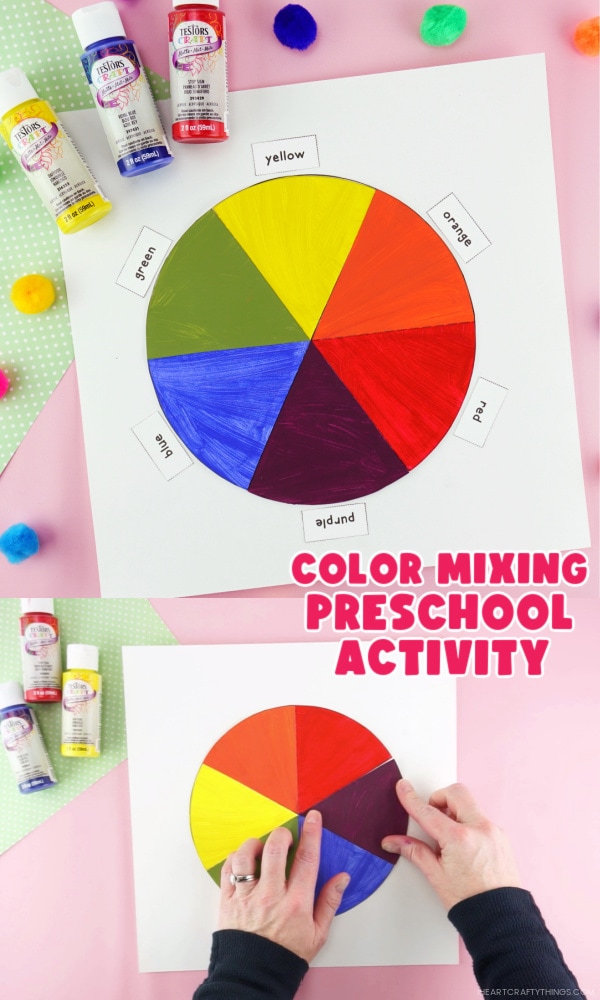
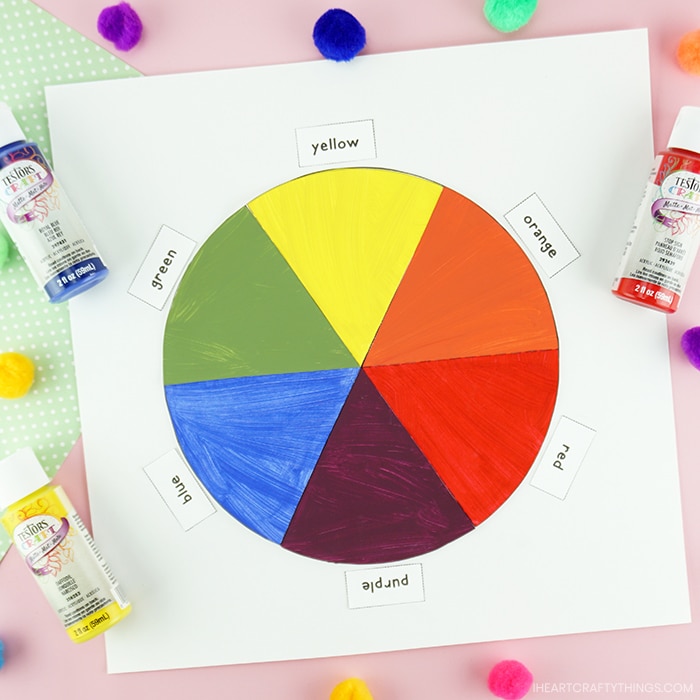
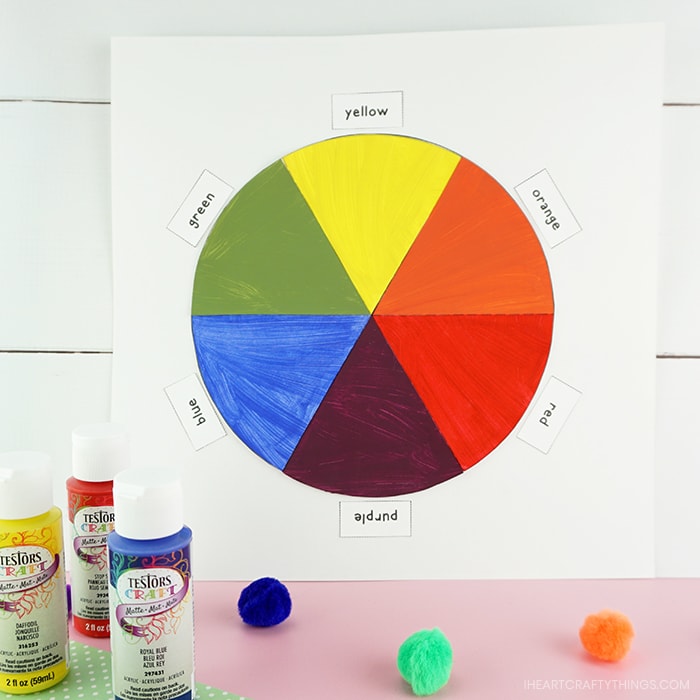
- Color Wheel Template Printable (printed on white cardstock)
- Primary Acrylic Paint Set
- paintbrushes
- 12-inch x 12-inch white cardstock paper
- paper plates (for mixing)
- scissors
- glue stick
How to set up activity:
1. Print out template
Download and print out both pages of the color wheel printable template on white cardstock paper and gather the rest of your supplies.
2. Cut out along lines
Have children cut out along the dashed lines of the first page of the template, cutting out each individual piece of the color wheel. Set aside the second page of the template to use later.
3. Prepare supplies for painting
Set out three pieces from the color wheel template, along with three paper plates and three paintbrushes. Cover your surface with a sheet of paper or a placemat to protect it from paint.
4. Choose paint colors
Get out the red, yellow and blue paint bottles from your Acrylic Paint Set. Discuss with your preschoolers or children how these are the three primary colors.
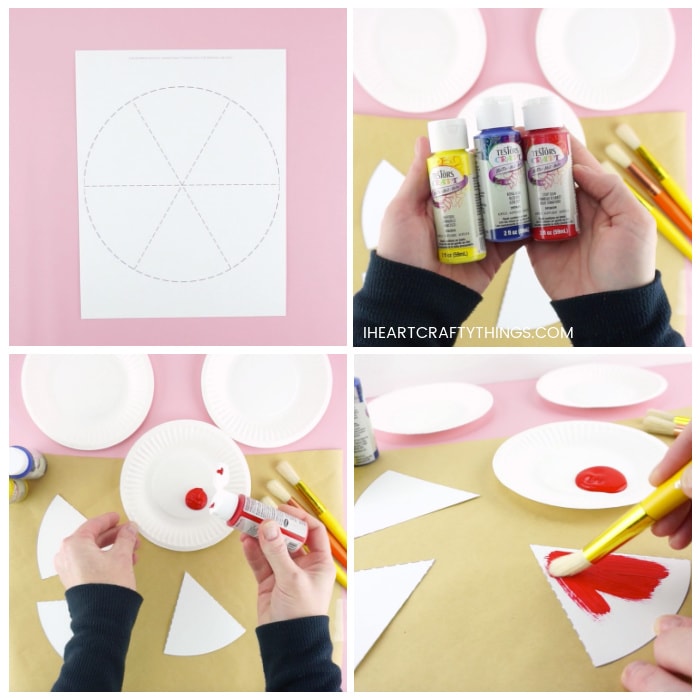
5. Paint the wheels
Pour some red paint onto a paper plate. Use a paintbrush to paint one of the color wheel pieces red. Then pour yellow and blue paint on the other two paper plates and use a paintbrush to paint a piece of the color wheel with the blue paint and another piece with the yellow paint.
6. Let it dry
Set each of the painted color wheel pieces aside to dry completely.
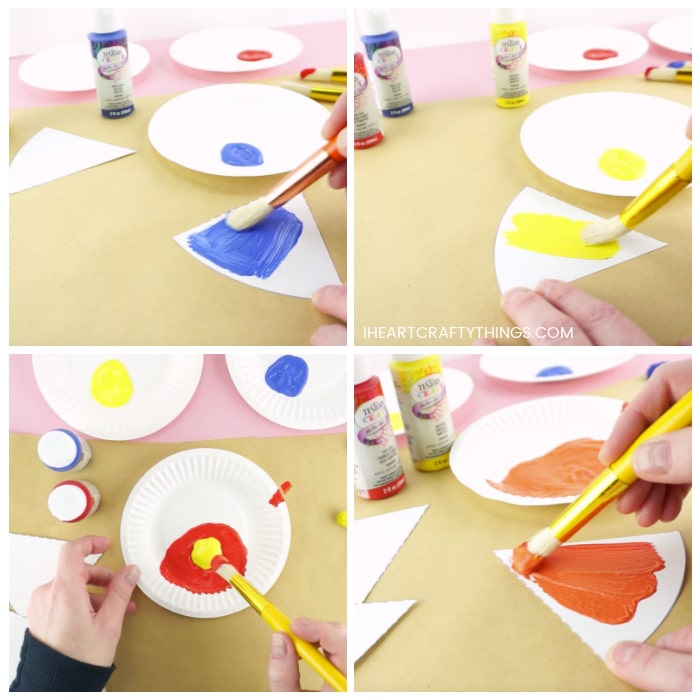
Now comes the fun part of mixing the primary colors together to create secondary colors.
7. Create orange color
Start with your paper plate that has red paint on it. Pour some yellow paint on top of the red paint. Use the paintbrush to mix the red and yellow paint together to create orange paint.
8. Paint the wheel orange
After creating your orange paint, paint a section of the color wheel template with it and then set it aside to dry with the others.
You might find as you mix the colors together that you need to add a little bit more of one of the colors to achieve the shade of color you desire. This is another great way to explore colors and shades of colors with children.
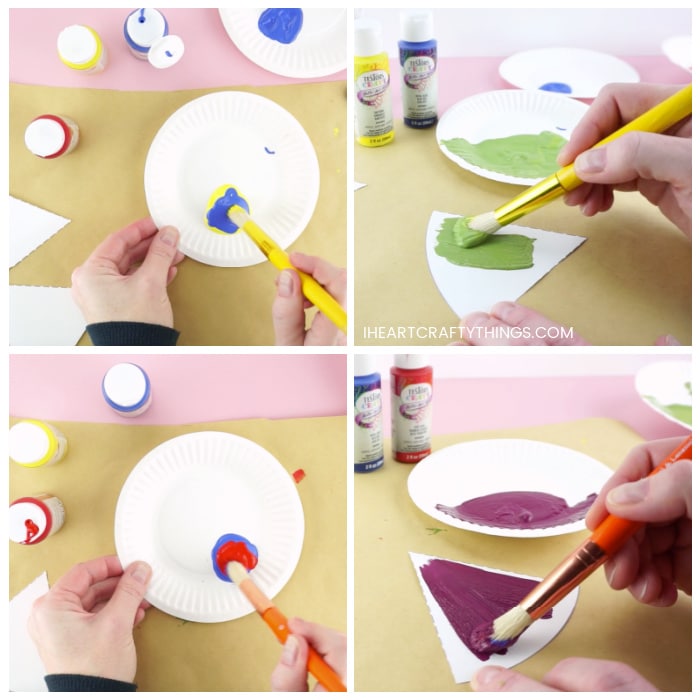
9. Create green color
Pour blue paint onto the paper plate with yellow paint on it and mix them together with a paintbrush to create green paint.
10. Paint the wheel green
Paint a section of the color wheel template with the green paint and then set it aside to dry with the others.
11. Create purple color
Pour red paint onto the paper plate with blue paint on it and mix them together with a paintbrush to create purple paint.
12. Paint the wheel purple
Paint a section of the color wheel template with the purple paint and then set it aside to dry with the others.
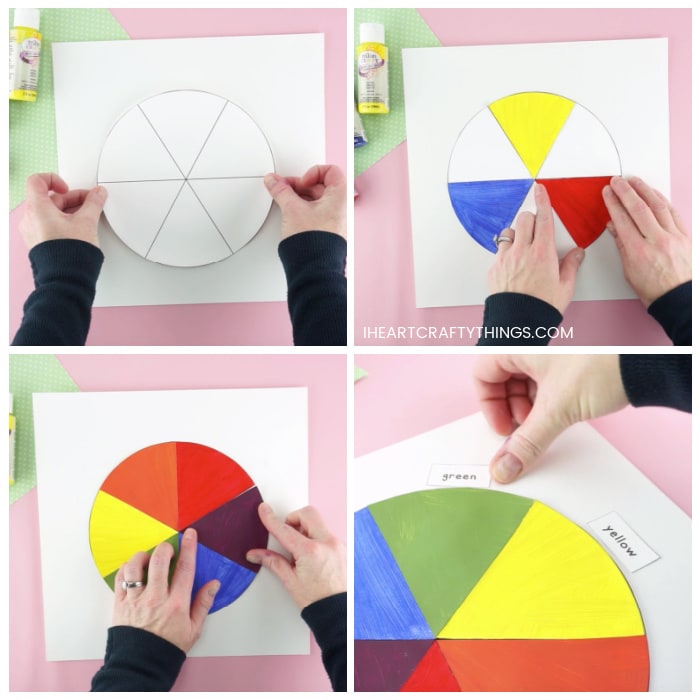
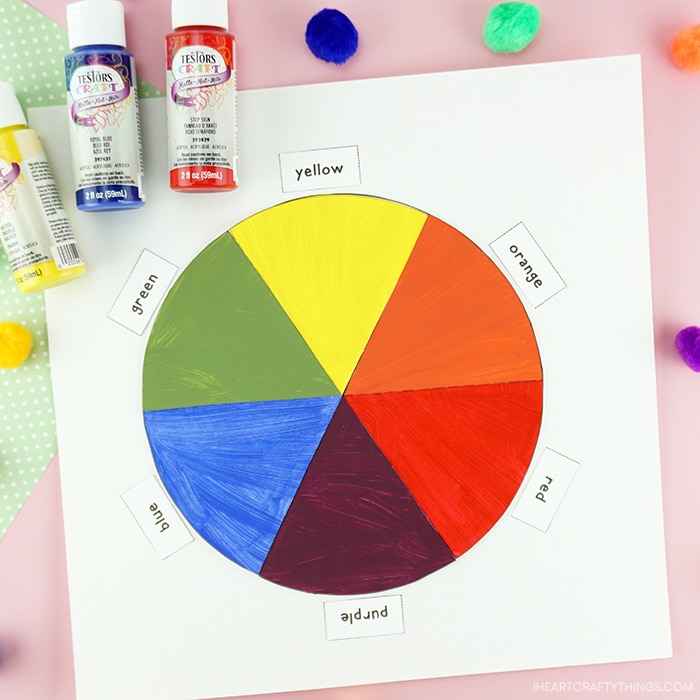
After each of the painted color wheel pieces have dried completely, you can assemble the color wheel together.
13. Cut out color labels
Cut out the color wheel template and the color labels on the second page of the printable template. Add glue on the back of the color wheel and glue it in the center of a 12-inch by 12-inch sheet of white cardstock paper.
14. Glue red, yellow & blue to the wheel
Add glue on the back of the red, yellow and blue painted pieces and glue them on the color wheel, leaving an empty space between them for each of the secondary colors.
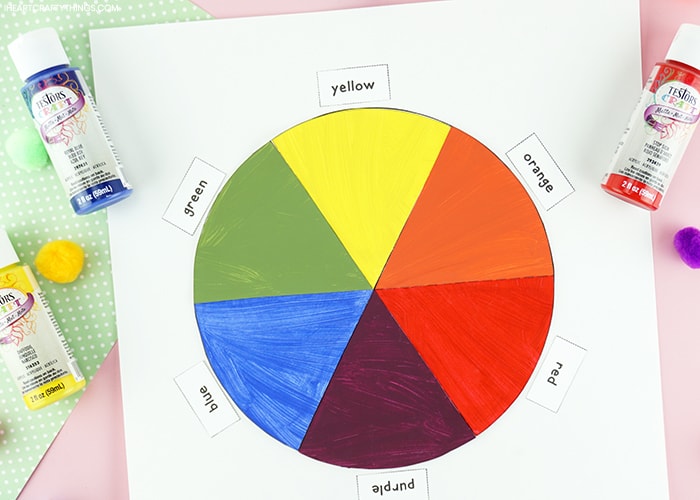
15. Glue remaining pieces to the wheel
Now add glue on the back of the orange, green and purple painted pieces and glue them on the color wheel between the correct colors on the wheel.
16. Add labels to the correct color
Finish your color wheel craft by gluing each of the color labels on the correct color around the wheel.