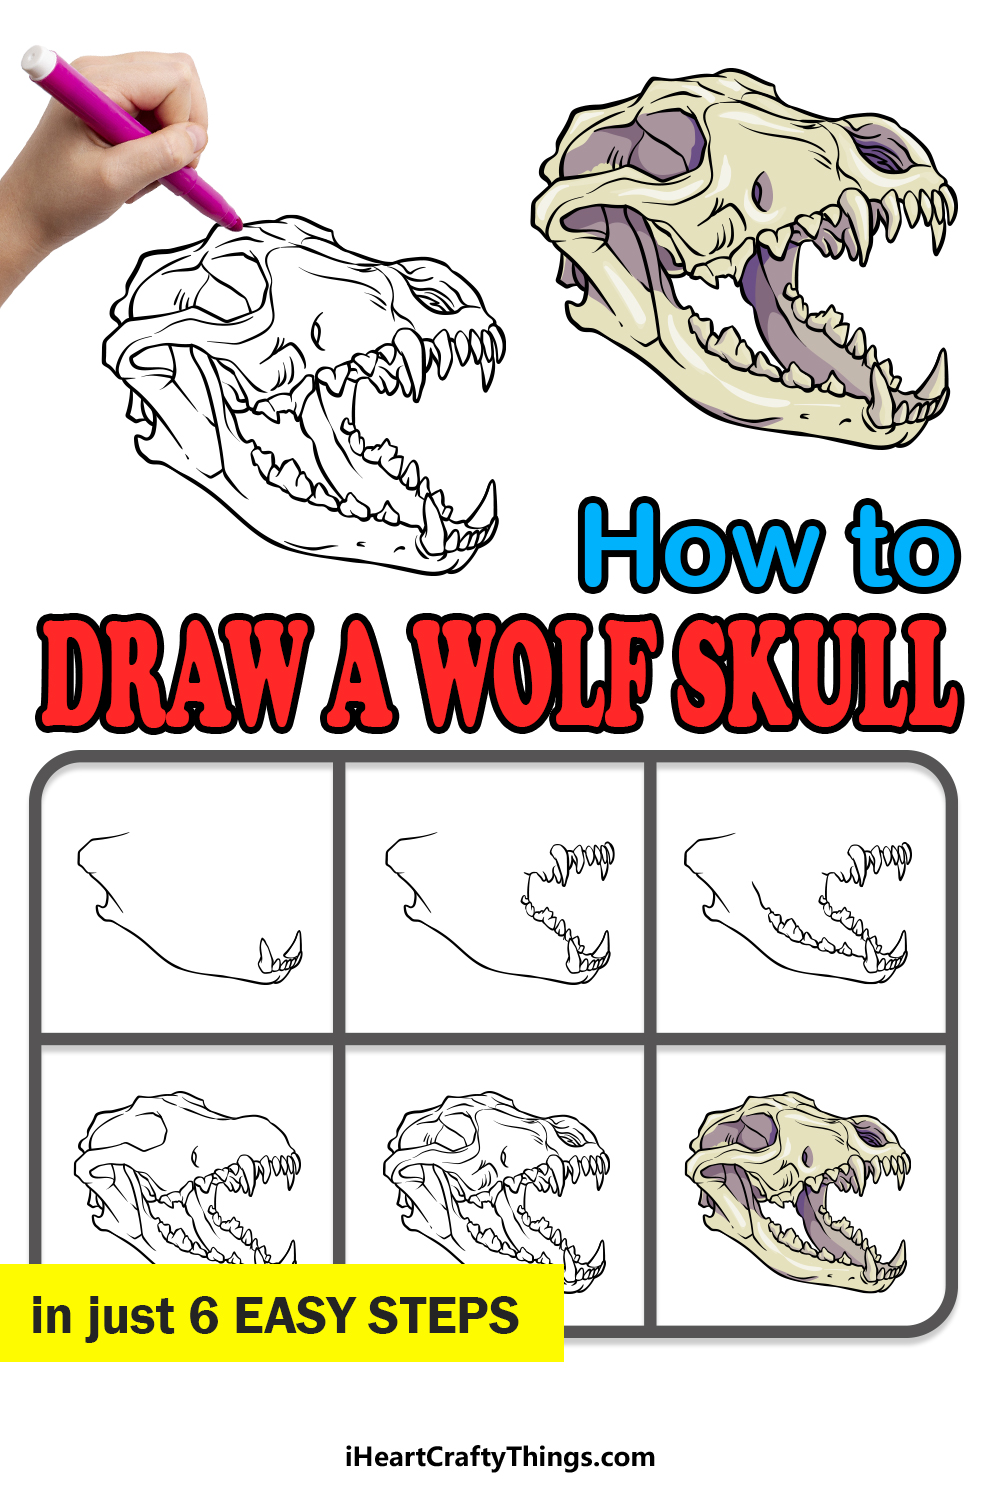
When out in the wild, there aren’t many animals more intimidating to encounter than a wolf.
Much like any creature that has a skeleton, they also hide a lot of detail beneath the surface, and the skull of a wolf is equally as intimidating looking as the snarling head of a living wolf!
This skull is very detailed, and while this means it looks cool, it also makes it harder to learn how to draw a wolf skull.
While it may be a bit tricky to draw, that doesn’t mean that it has to be impossible, and this is what this tutorial is here to help with.
Our step-by-step guide on how to draw a wolf skull in just 6 steps will show you how easy and fun it can be.
Make This Wolf Skull Drawing A Bit Easier By Preparing
There are no two ways about it, this wolf skull drawing we will be creating is a bit intimidating! Not only is it quite detailed, but it has a lot of shapes and proportions that need to look just right or it will look off.
The steps in this guide will take you through the process, but it could still prove to be a real challenge. No need to worry, however, as we have a few more tips you can use to make it easier!
First of all, we would suggest looking at as many pictures of wolf skulls as you can. You should find some online or in some textbooks. Finding ones at similar angles to this one would be ideal, but any would do.
Try to pay attention to the smaller details and shapes of all sections of the skull. See how they relate to one another and how the shapes differ.
Then, you can translate that into your drawing as you work through the steps. Next, we would suggest trying out some practice runs.
Use a pencil and some spare pieces of paper and try sketching out the wolf skull. It can star very simple, and then you can progressively incorporate some more details.
Once you feel confident with your sketches, you will have a better idea of what this drawing will demand of you. Then, when you start the actual steps of this guide, you will be better prepared.
Lastly, just take it slowly and don’t be afriad of making mistakes or having to start over. No one will see your failed attempts, so have fun with it and just do the best you can do!
Now that you’re a bit better prepared, let’s dive into the guide.
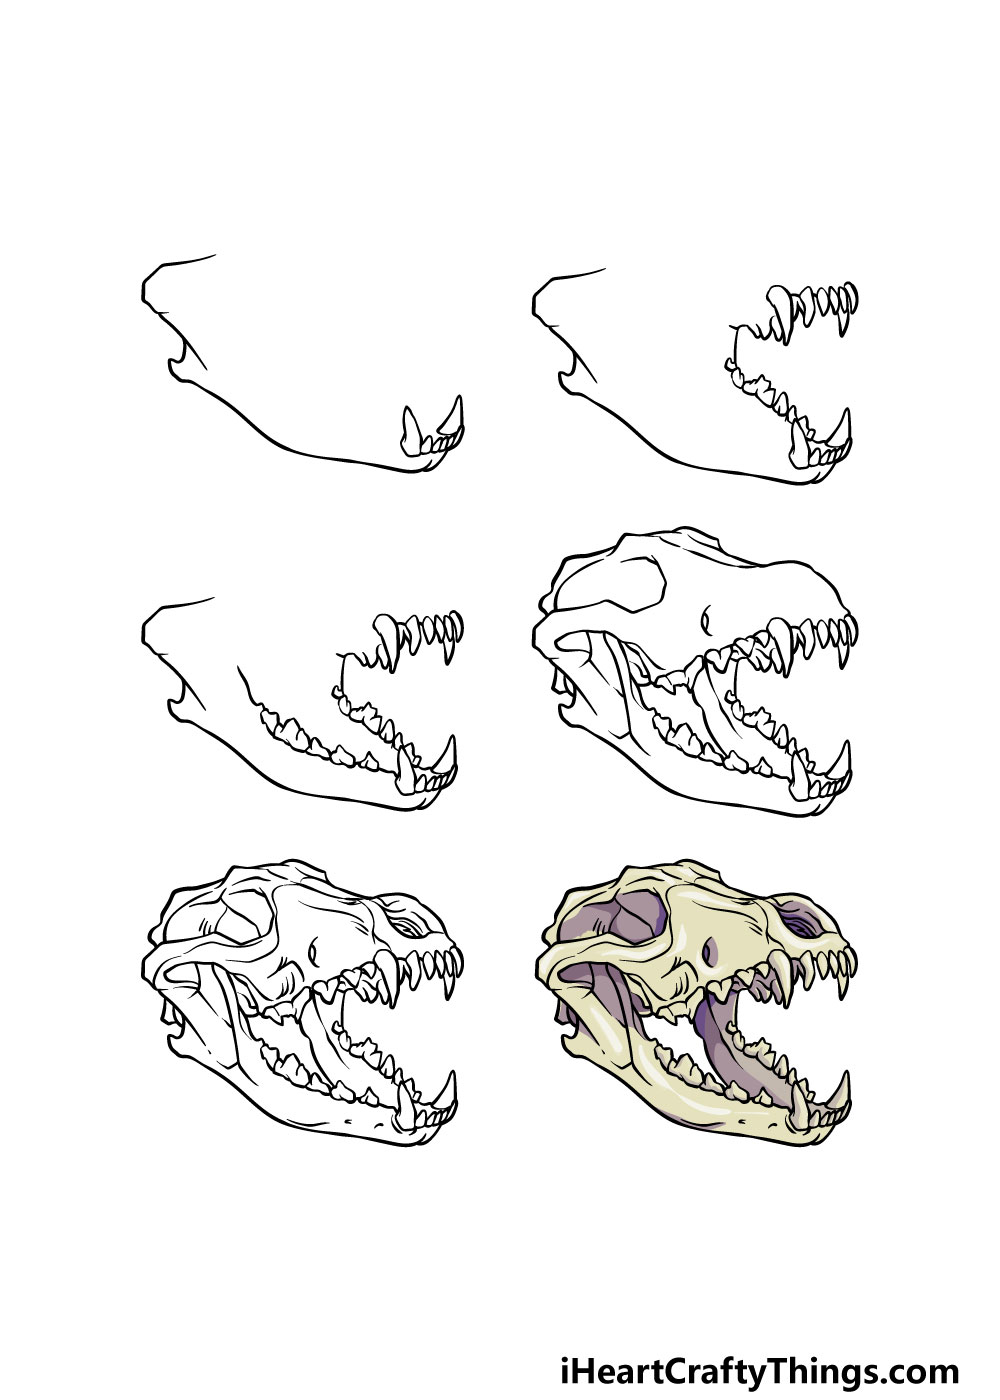
How to Draw A Wolf Skull – Let’s Get Started!
Step 1
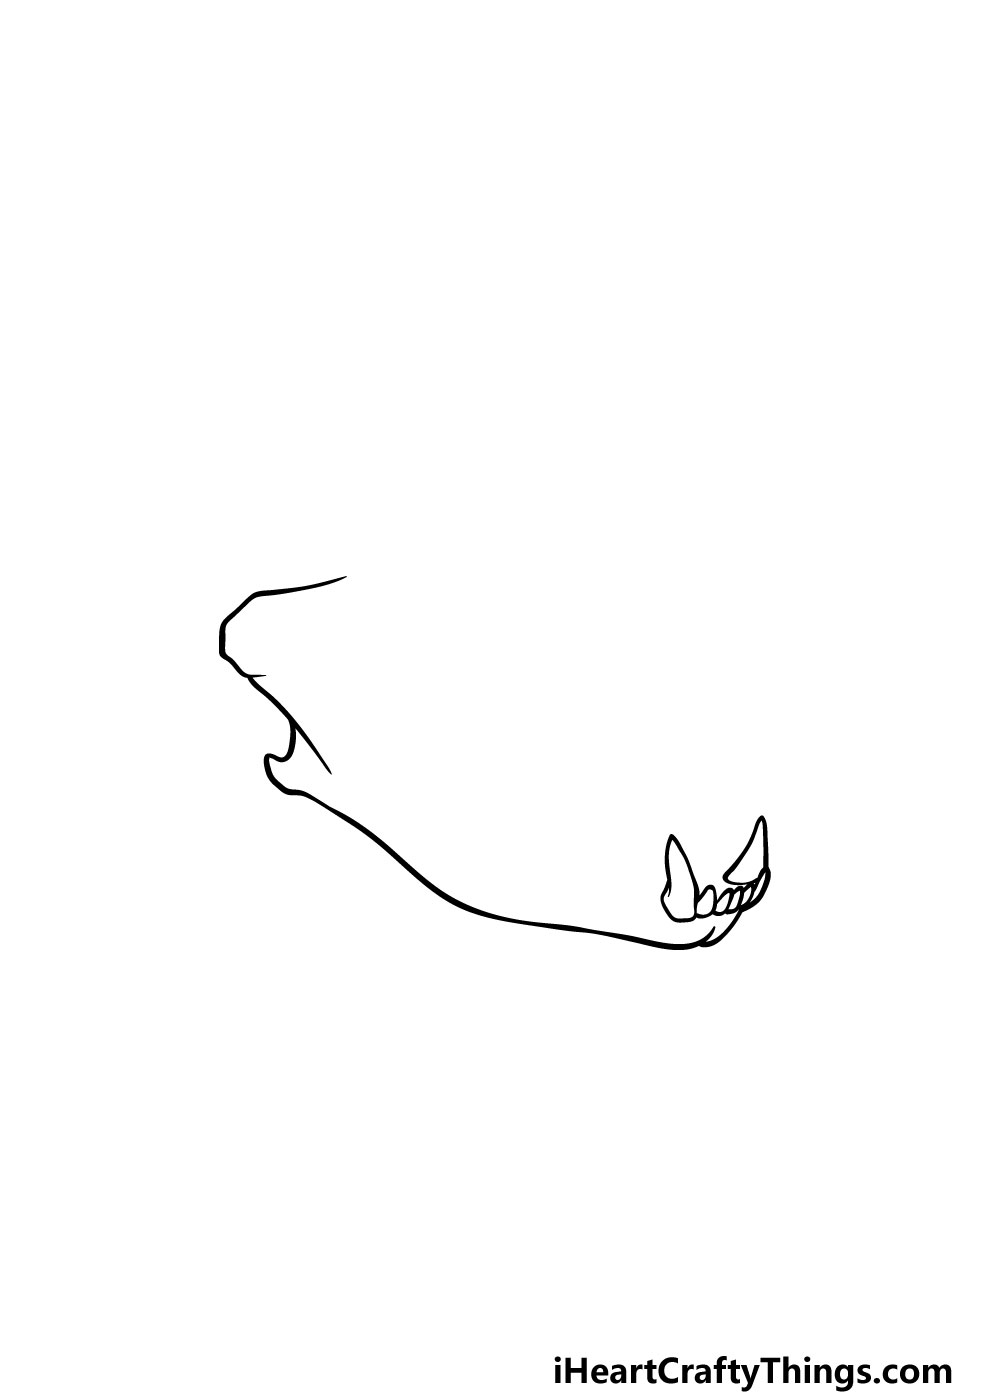
In this first step of our guide on how to draw a wolf skull, we shall start with the outline for the bottom jaw as well as the first teeth for the skull.
First, use a curved, angular line for the top of the back of the bottom jaw. Once that line is drawn, you can then start to draw the base of the jaw.
This will have a sharp line at the back of it, and then will extend into a long, slightly curved line.
Then, you can start drawing the teeth at the front of this bottom jaw. There will be two large, tall teeth on the outer edges of this section, and then there will be several smaller pointy teeth in between them.
Then it will be on to step 2!
Step 2 – Now, draw some more teeth for the wolf skull
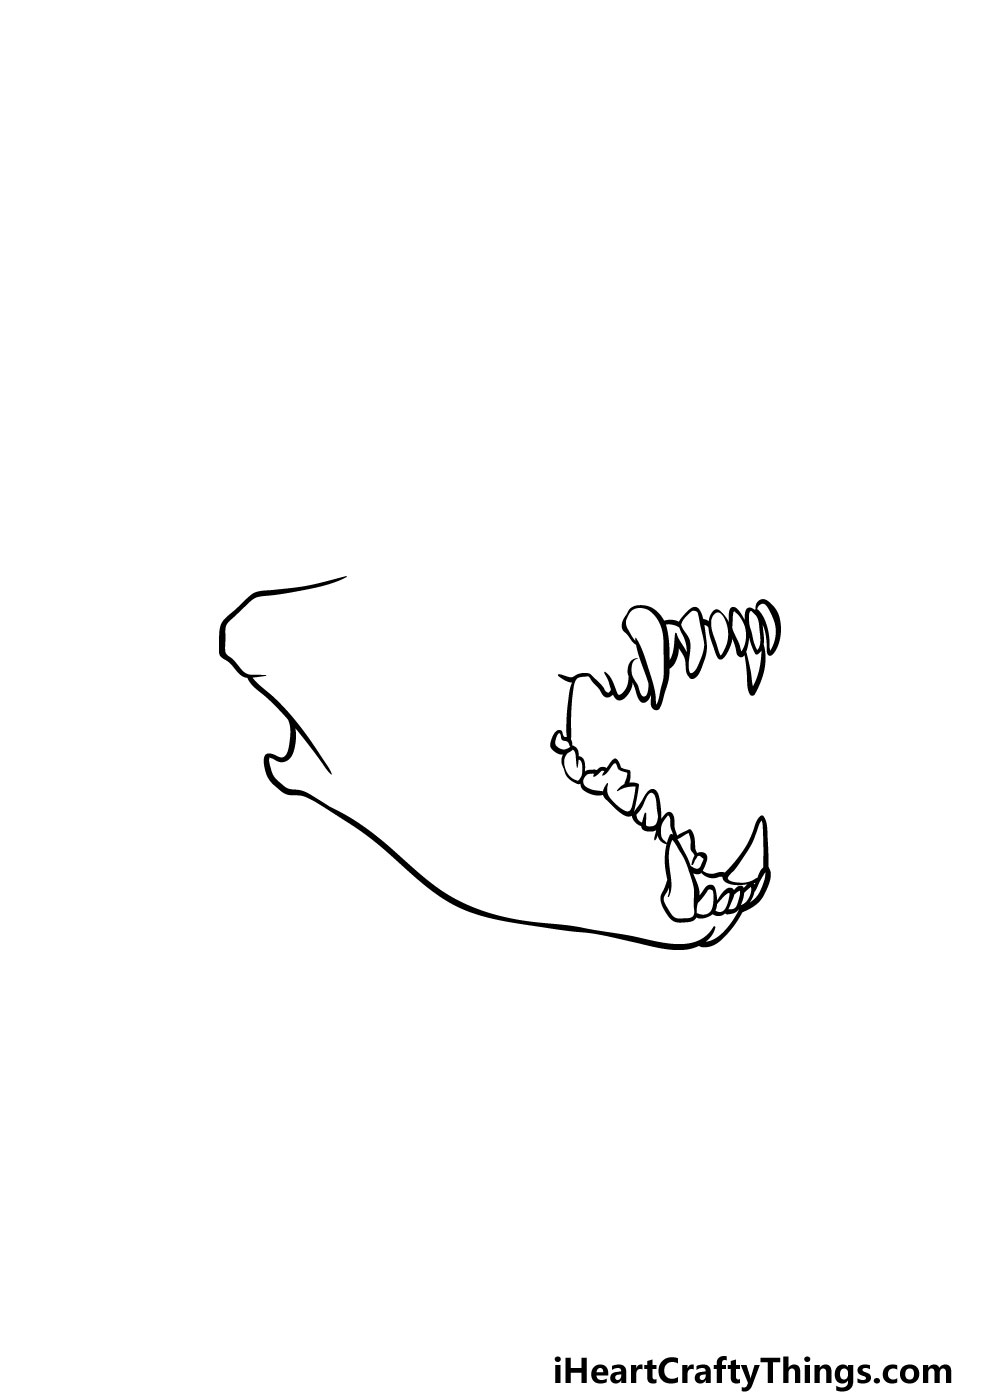
Now we will be drawing some more pointy teeth for your wolf skull drawing.
For now, we will be drawing the teeth on the right-hand side of the mouth, and we will be drawing the rest of the bottom row along with some of the teeth on top.
Unlike the teeth at the front of the mouth that you drew already, these teeth will not be uniform in shape and size.
Using the reference image to guide you, you can draw each individual tooth on this bottom row of the jaw.
Then we will be drawing some outlines for the teeth in the top row before you finish off by drawing some larger teeth for the top center of the jaw.
Step 3 – Next, draw some more teeth for the bottom row of the jaw
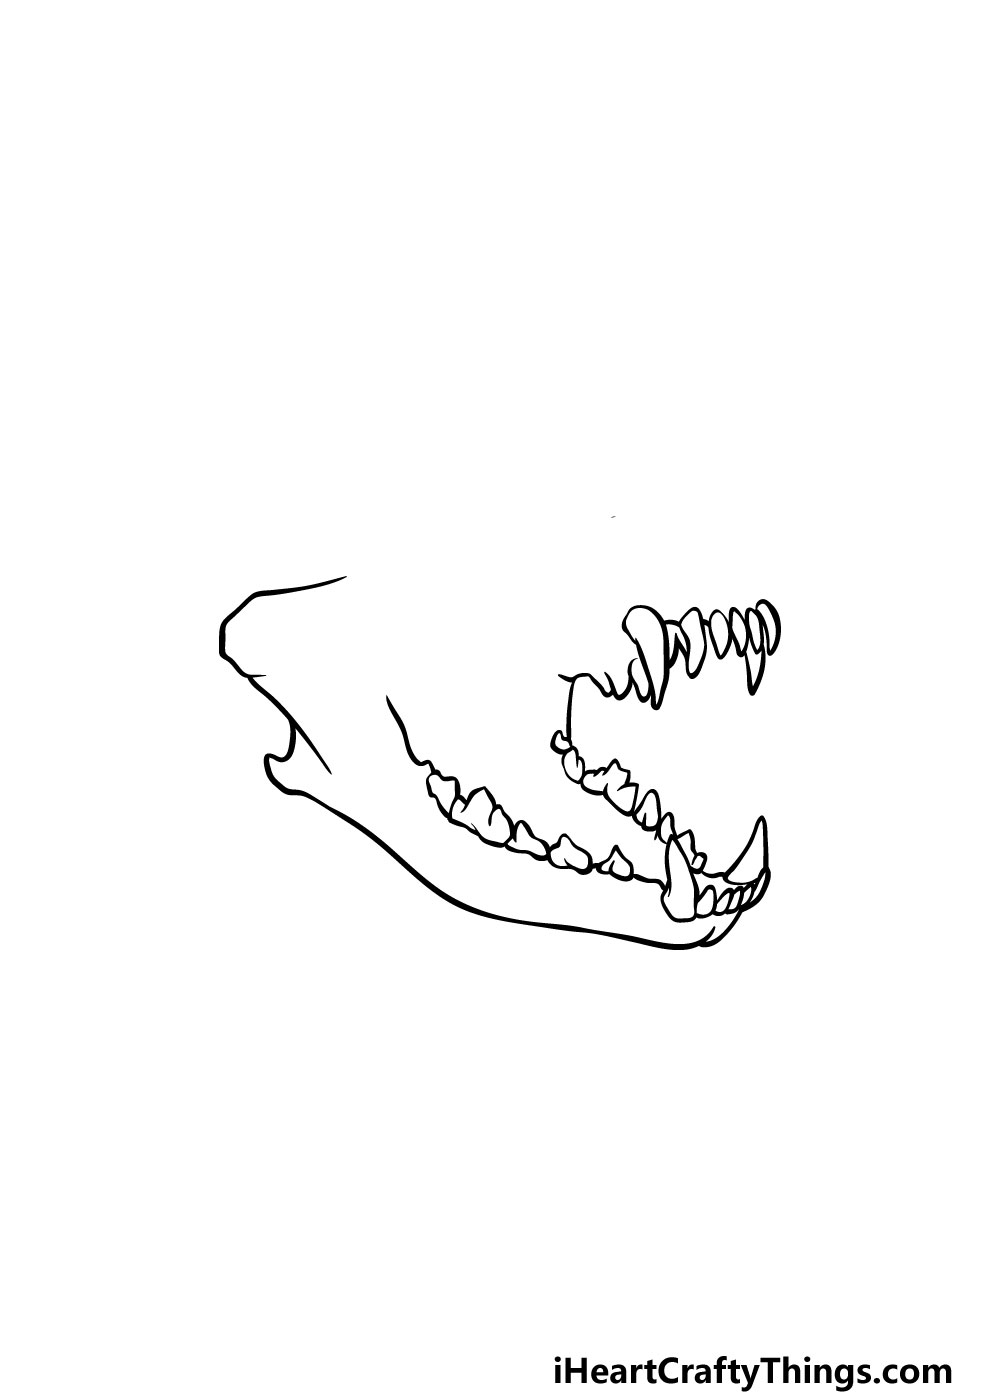
This third step of our guide on how to draw a wolf skull will see you adding the rest of the teeth for the other side of the bottom row of the jaw.
Much like the other side, these teeth will also be of varying sizes and shapes.
These sizes and shapes will be very similar to the other side, you you can try to replicate those ones that you drew in addition to following our reference picture.
Then you will be ready to move on to step 4, so let’s proceed!
Step 4 – Now, draw more of the skull outline
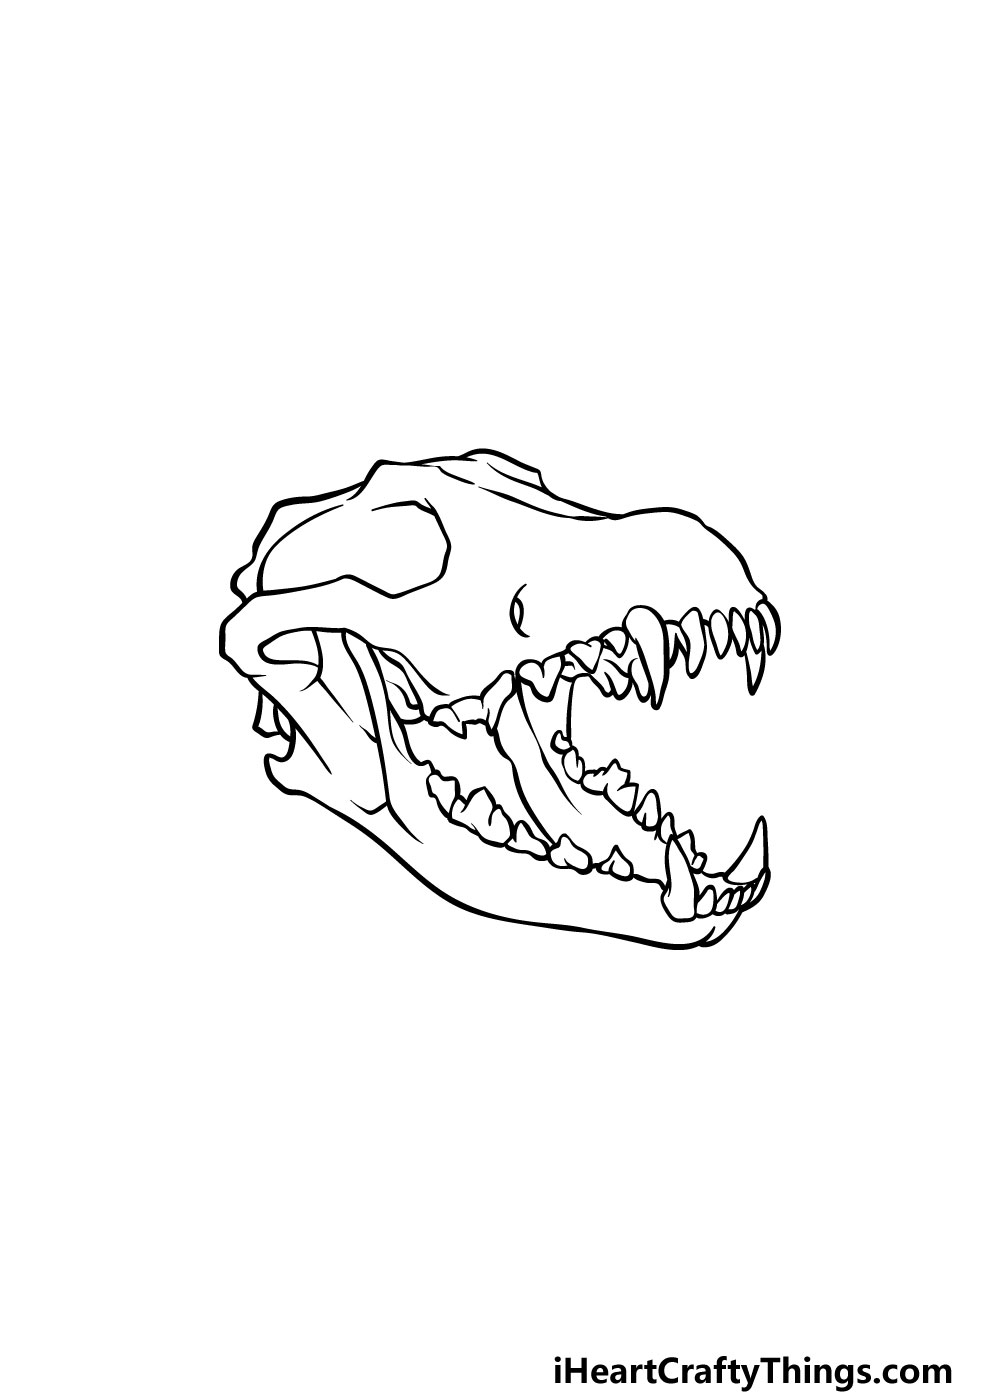
We will be adding quite a lot to your wolf skull drawing in this fourth step.
It may look a bit intimidating, but as long as you follow the reference image closely then you should have no problems drawing it! First, draw the rest of the teeth on the upper left-hand side of the sloping jaw.
Then, once all of these teeth have been drawn you can draw the outline for the top of the skull. This will require a combination of rounded and angular lines, and the eye socket can also be drawn at this time.
Once all of these lines have been drawn and you have the general outline for the skull, you’ll be ready for the final details in the next step!
Step 5 – Add the final details to your wolf skull drawing
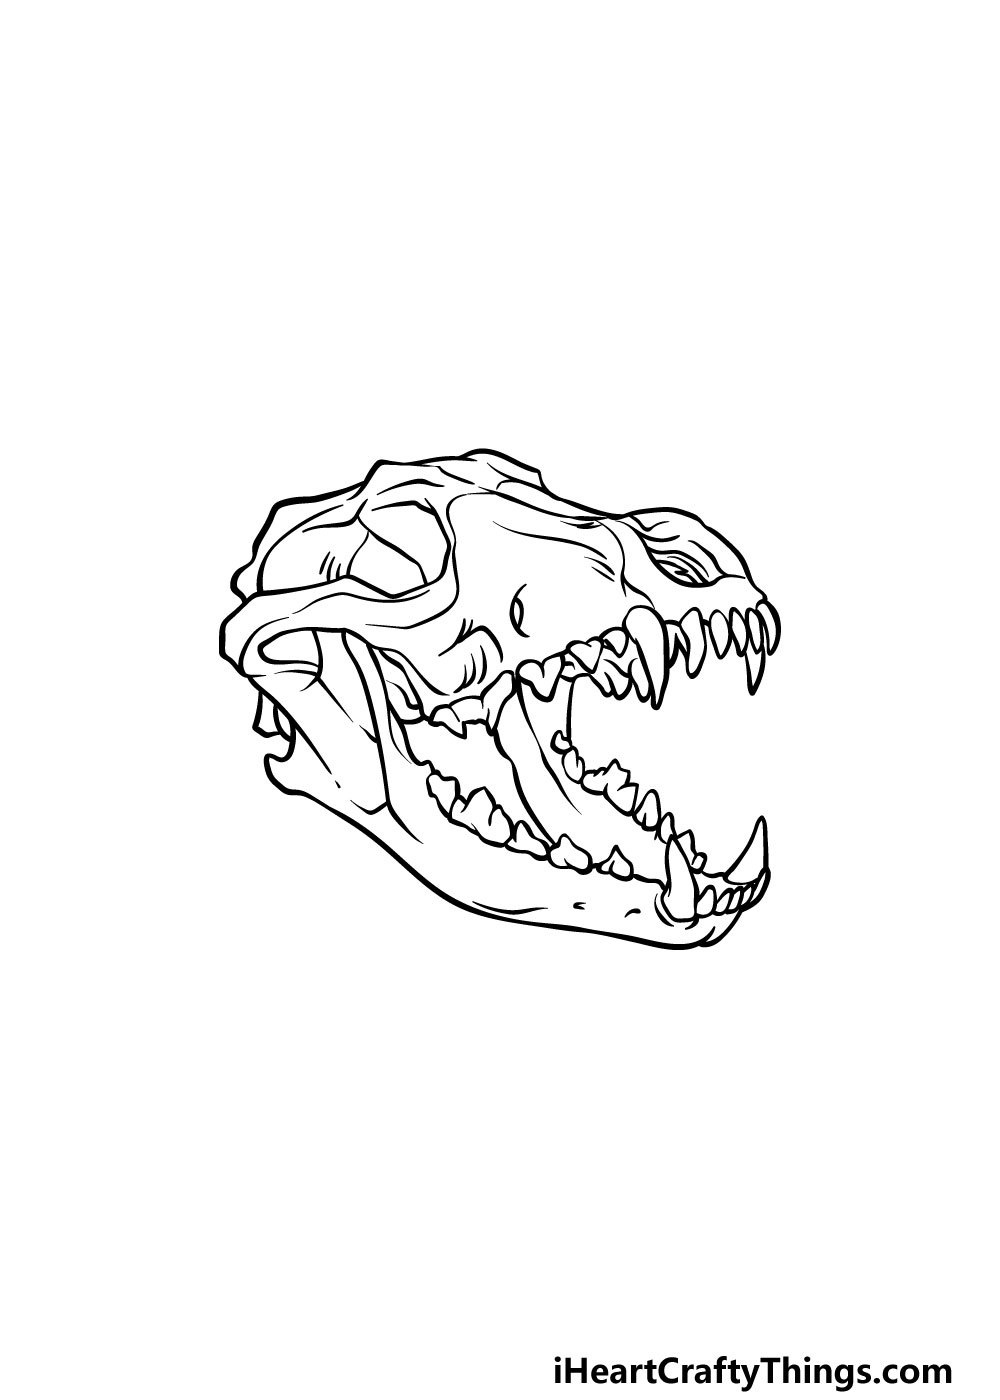
Now you’re ready to add the final details and touches in this fifth step of our guide on how to draw a wolf skull.
To do this, we will be adding a lot of line details throughout the skull to add some more definition to it.
These details will go in pretty much every area of the skull. In addition to adding more definition, they will also provide some more depth to areas like the eye socket and nasal cavity.
When you have finished all of these details, you should feel free to draw some more of your own! This could include drawing a background, adding more parts of the skeleton or incorporating it into a cool design.
How will you finish off this wolf skull?
Step 6 – Finish off your wolf skull drawing with color
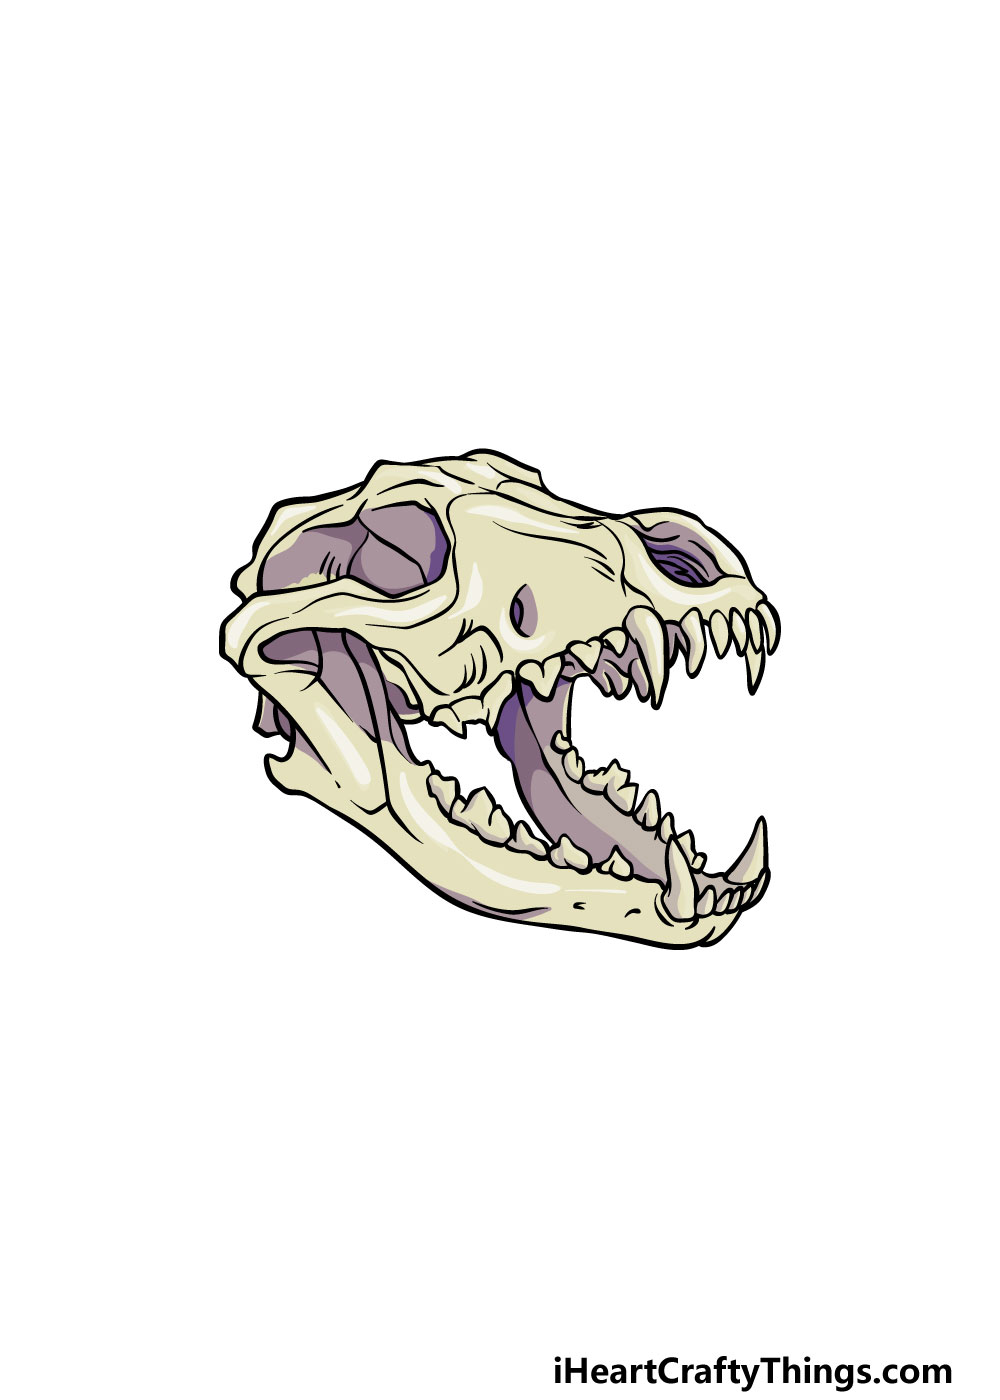
This is the final step of this wolf skull drawing, and in it you can finish it off by incorporating some colors.
In our reference image, we went for a more realistic look for the skull.
To do this, we used some shades of beige for most of the wolf skull, and then we incorporated various shades of grey for some shading details for the skull.
If you like this more realistic look, then you could use these same colors for your own drawing. Once you have chosen the colors you would like, which art tools and mediums will you pick to finish it off?
Here’s how you can make your wolf skull drawing even better…
Make this awesome wolf skull sketch even more amazing with these tips!
For this wolf skull drawing, we stuck to just showing the skull. You could make things more interesting by drawing more of the wolf’s skeleton!
This would be tricky to do with just your imagination, so you may want to look up some pictures of wolf skeletons online. If you were to do this, do you think you would try some kind of cool pose with the wolf skeleton?
This drawing of a wolf skull looks really cool, but there are also many other animal skulls that would look cool with it! You could make a skull collection by adding some more skulls to the image.
It’s another tip where we would suggest checking out some pictures online to help you out. There are so many cool-looking skulls you could choose to include, and it would make for a really interesting picture.
What are some other animal skulls you could add to this picture?
Adding a background is a great way to enhance any drawing, and it would be great to create one for this wolf skull sketch! There are lots of different settings you could go for, so let’s cover a few ideas.
For one idea, you could make it look like this is part of an exhibit at a museum. Or maybe it could be mounted as a trophy.
These are just a few of the ideas you could go for! What are some other background settings you could use for this wolf skull?
In the guide, we showed you some realistic colors for this wolf skull drawing. If you want to recreate these colors, there are certain art tools and mediums you can use to make it easier.
The milder the mediums the better! We would highly recommend using watercolors or other paints, as they would be perfect for the bone texture.
It would also potentially be fun to use some more stylistic and bright colors! Which approach will you take?
Your Wolf Skull Drawing is Complete!
The wolf has a really cool and detailed skull, and we hope that you enjoyed replicating it in this guide on how to draw a wolf skull!
By following the steps in this guide, we hope that drawing this incredible skull was made easier and more fun for you to take on.
Don’t forget that you can also add some of your own ideas for details, additions and colors.
You could also go for a more stylistic look by using some bright colors, so be sure to have fun with it and experiment!
We hope that you will visit us on our website to enjoy the many drawing guides we have for you. We upload new ones often, so keep checking in!
Please also go ahead and share a copy of your finished wolf skull drawing on our Facebook and Pinterest pages so we can see how it turned out!