There are many different utensils that are used for preparing and consuming all manner of food.
Each different kind has its own uses and features, and each one has been specifically designed to best suit whatever its main purpose may be.
Spoons are some of the most versatile utensils, as they can be used for everything from baking and measuring to being used to eat more liquid-based substances.
We may all be familiar with this tool, but learning how to draw a spoon can still be a bit tricky.
That’s what we’re here for, however, so if you read through this guide then you should have no problems with it!
Our step-by-step guide on how to draw a spoon in just 6 easy steps will show you how you can recreate this useful utensil.
How to Draw A Spoon – Let’s Get Started!
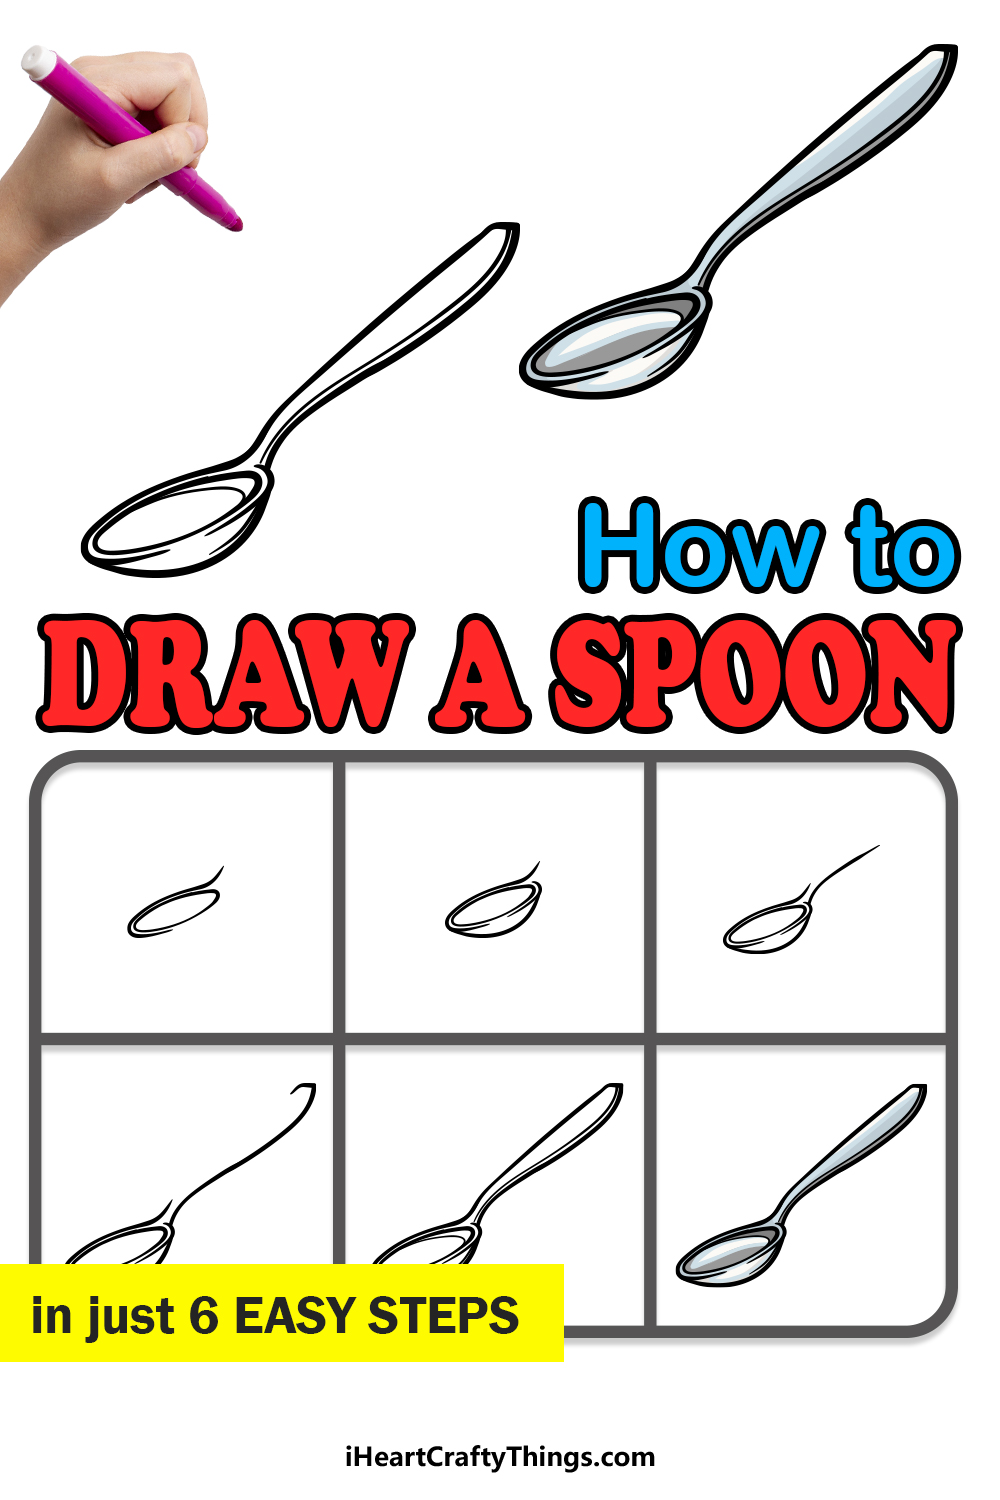
Step 1
This guide on how to draw a spoon will begin with arguably the most important part of it; the part that holds whatever the spoon is being used to eat or prepare.
This will also be quite an easy step to do, and you can start by drawing a horizontal thin oval shape.
Then, start another line above this oval that curls tightly around the perimeter of the oval. It will only be surrounding the top half of the oval for now, but we will draw the rest soon.
Once you have it looking as it does in our reference image, you can then move on to step 2!
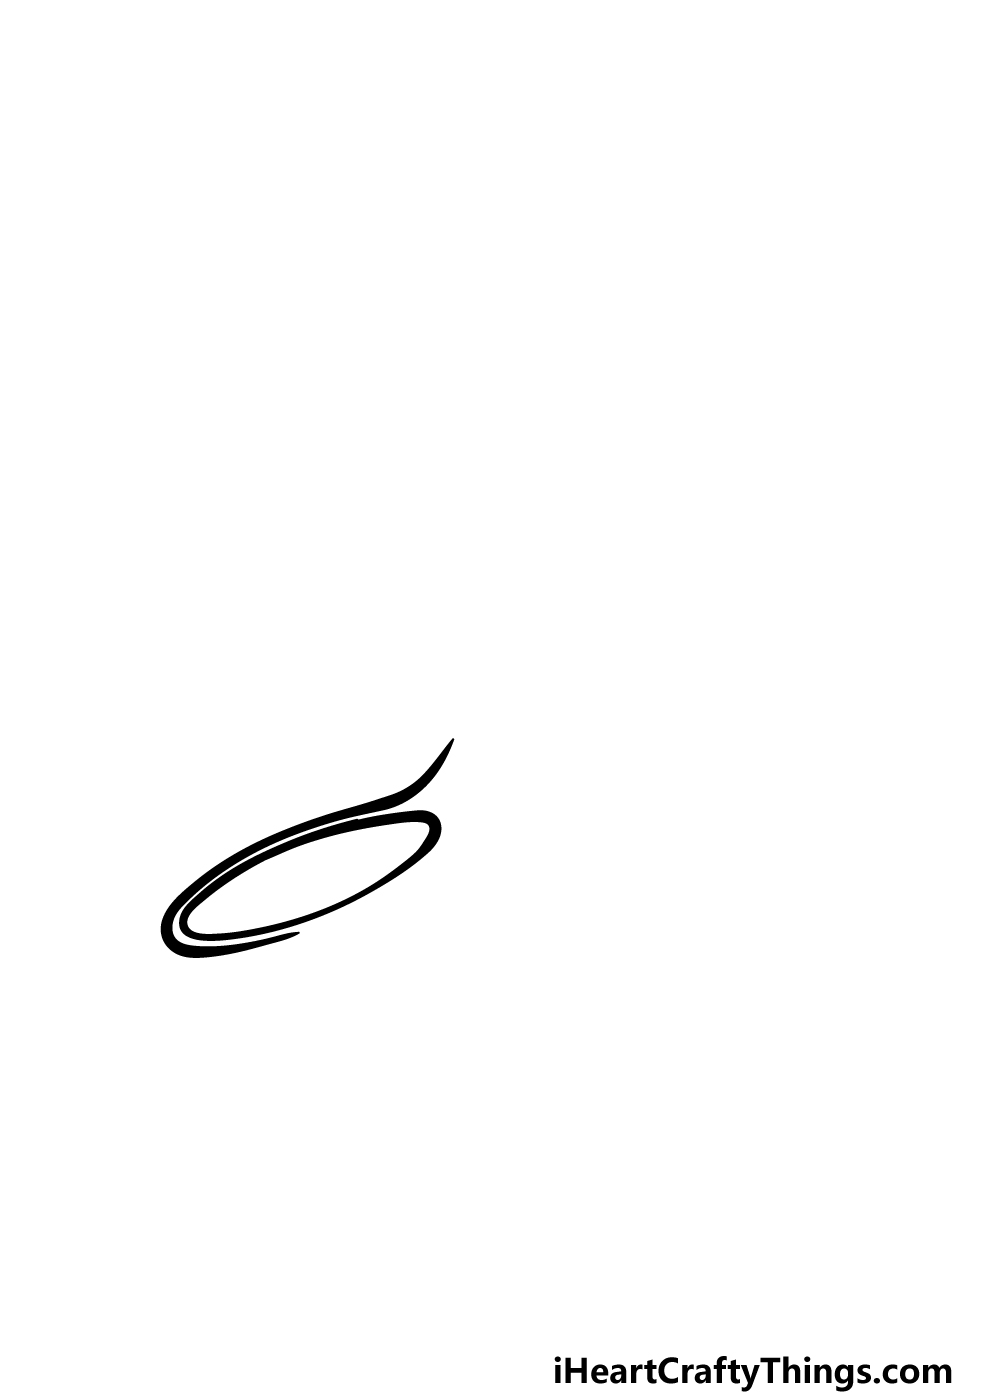
Step 2 – Now, draw the base of the spoon
For this second step of your spoon drawing, we will be drawing the base of what is known as the bowl of the spoon.
It’s easy to see why it’s called this, as it functions as a tiny bowl that contains whichever substance it’s being used for.
To draw this bowl, simply draw a curved line beneath the oval that you drew previously, and this will connect to a small rim around this oval.
That’s all there is to it for now, and then you can carry on this drawing in the third step.
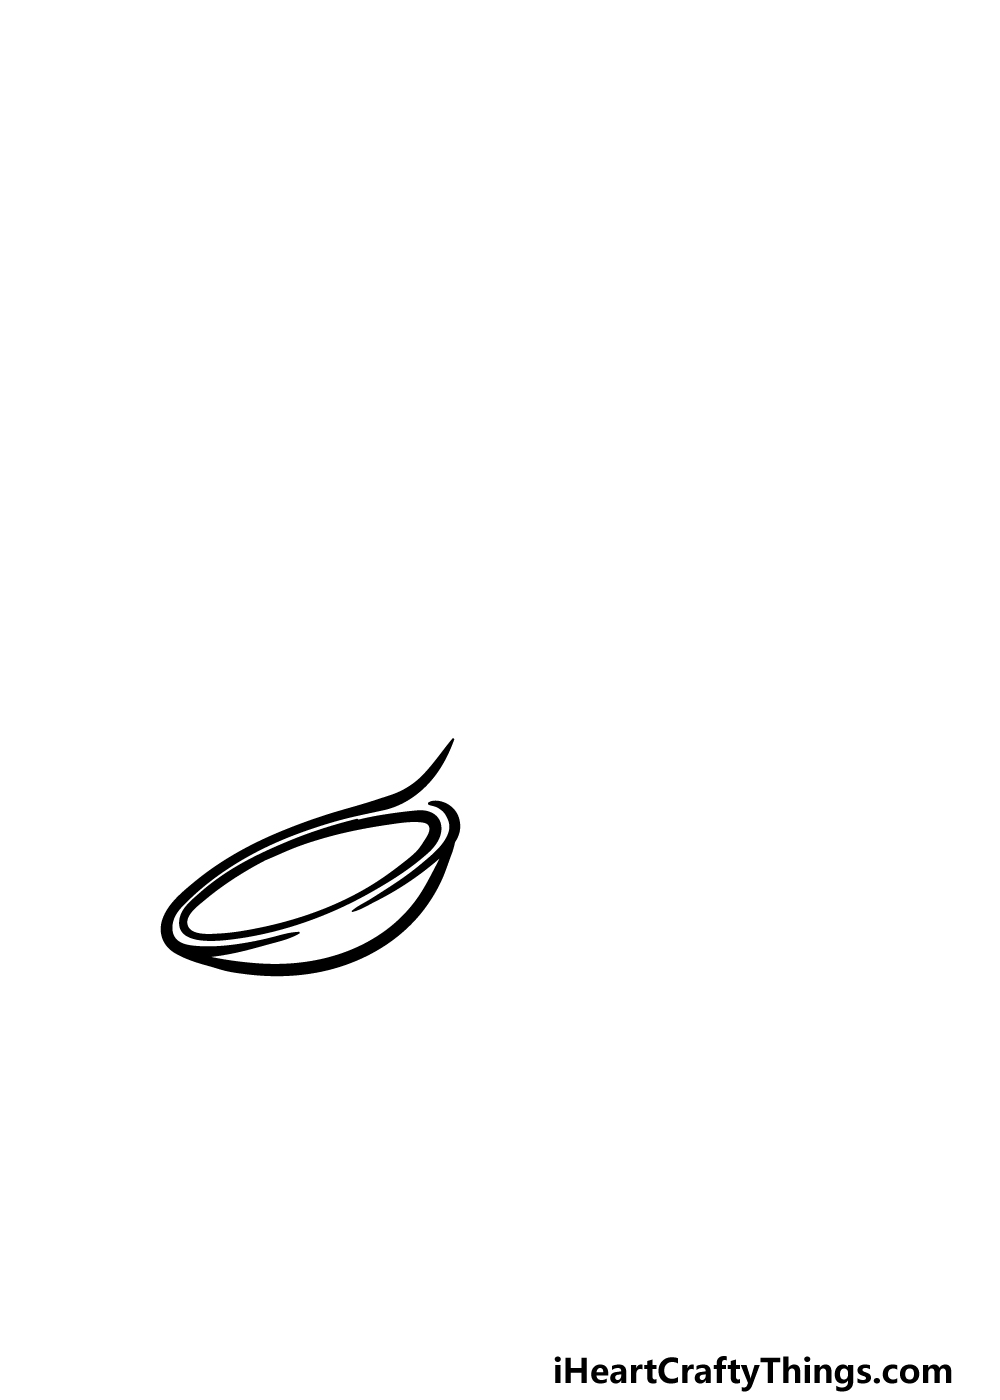
Step 3 – Start drawing a curved handle for the spoon
Continuing with this guide on how to draw a spoon, we will start drawing the handle of the spoon.
This should be another simple step for you to do, as all you need to do is draw a line moving away from the spoon. This line will be slightly curved, but it should be pretty smooth despite this curve.
We will only be drawing half of this side of the handle for now, but we will draw more of it very soon.
Step 4 – Next, draw the end of the spoon handle
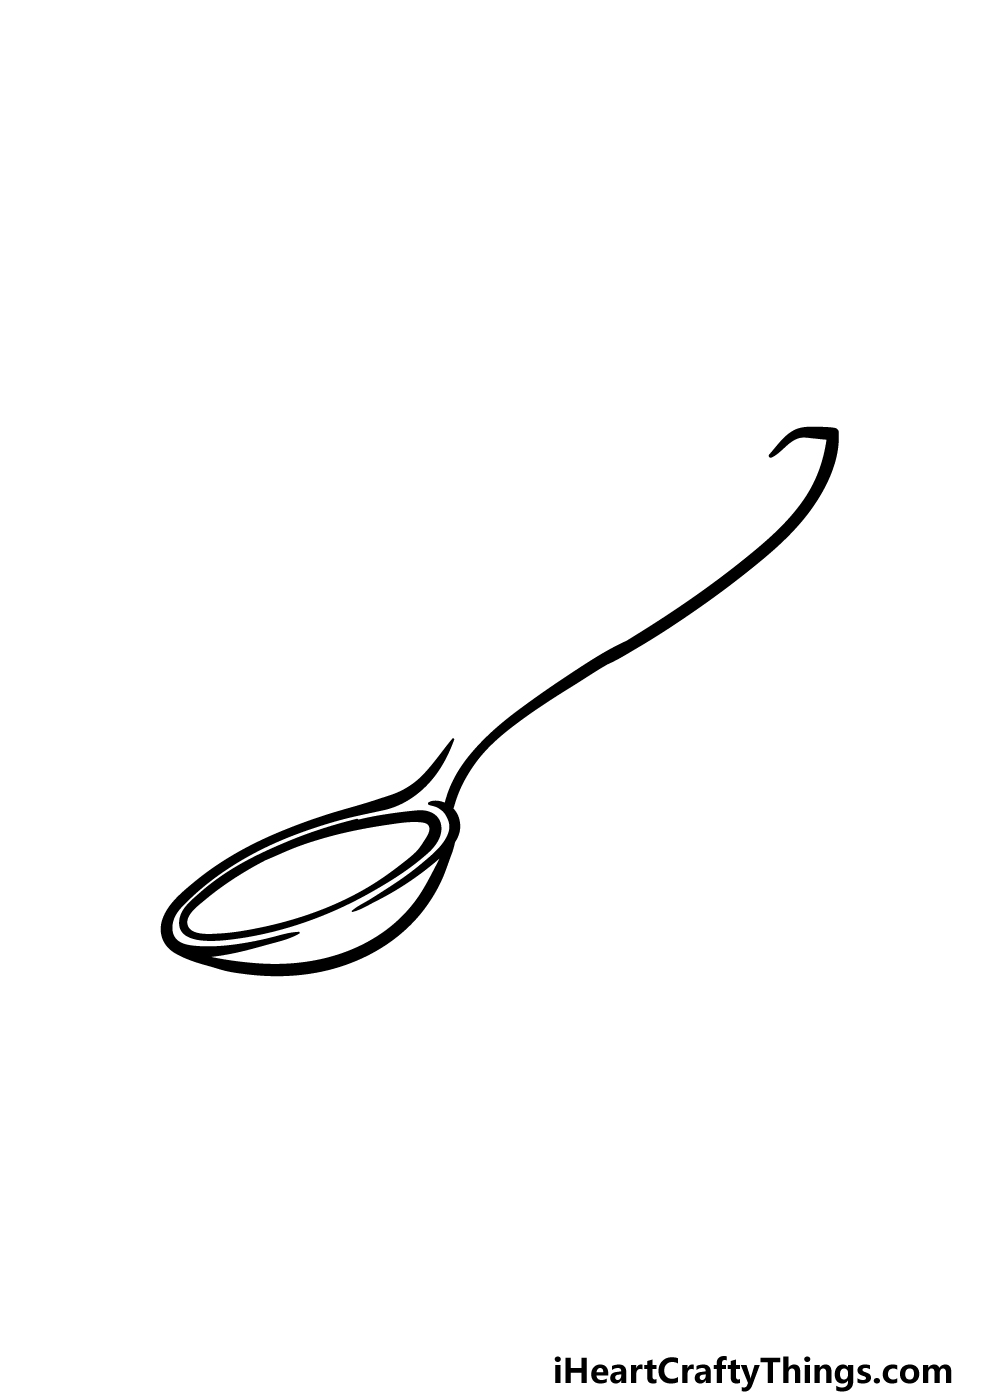
You can now finish drawing the tip of the handle that you started in the third step of this guide.
Simply extend the line that you drew in the last part of the guide, and then at the end you can curve it in on itself.
In our example, we gave it a bit of a sharp edge, but you could make it more rounded if you prefer. You could even draw a small oval near the end for a hole that you would hang the spoon from.
Once you’re happy with how it looks, you can then move on to some final details in the next step of the guide.
Step 5 – Add the final details to your spoon drawing
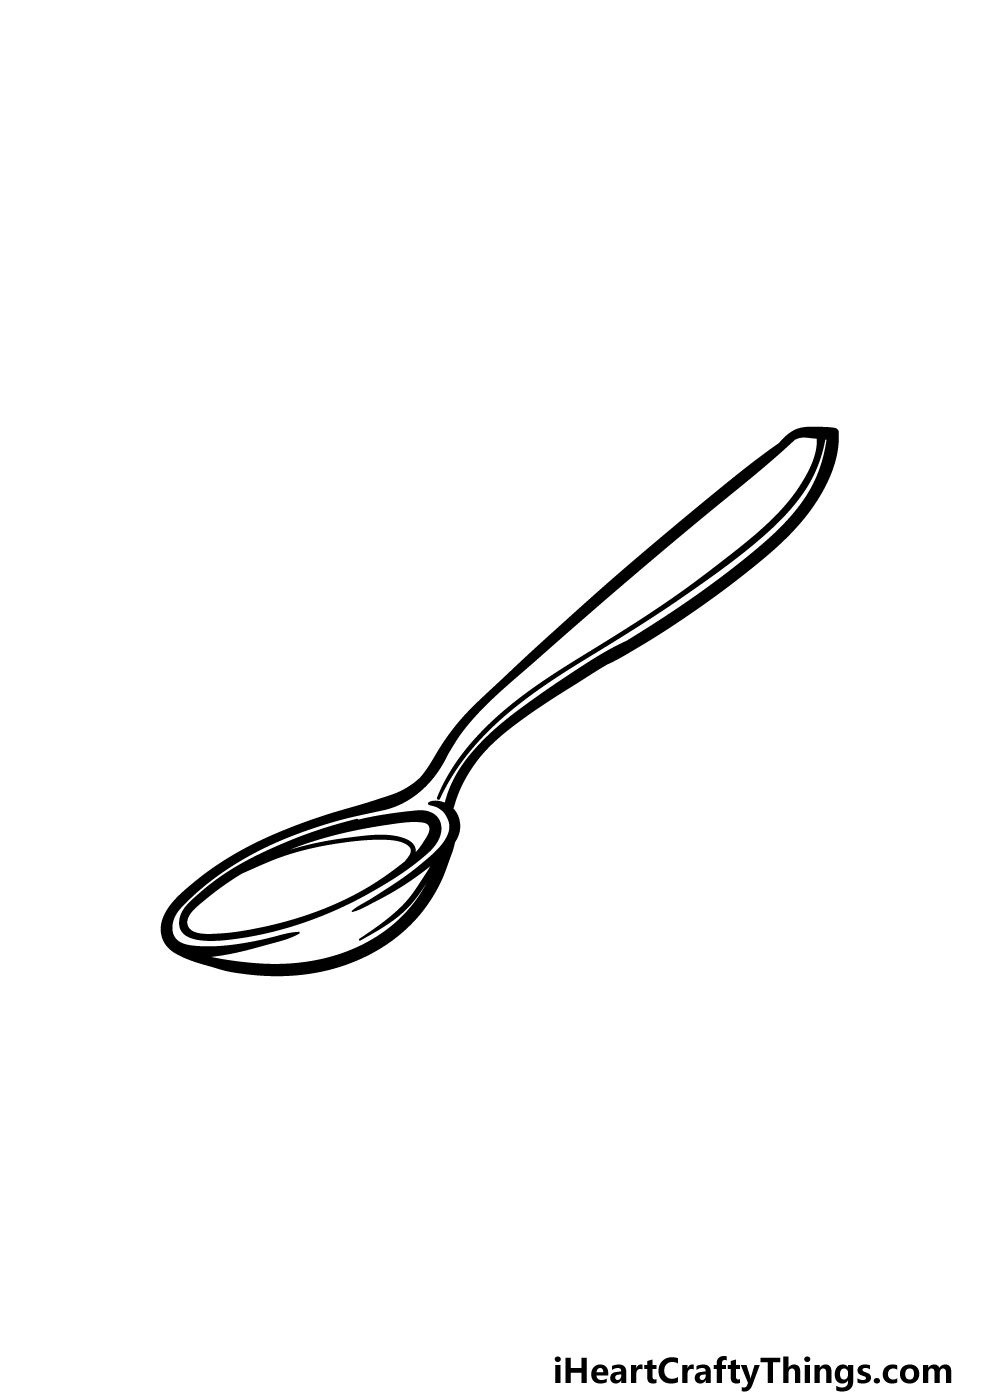
Now you’re ready to finish off the final details in this guide on how to draw a spoon. Once you have drawn these details, you’ll be ready to finish it off with some colors in the final step of the guide.
First, you can complete the outline by finishing off the rest of the spoon handle until it connects back near the bowl of the spoon.
Then, it will simply be a matter of drawing some more details.
These will include a rim along the handle of the spoon, and then you can draw a curved line inside the bowl to show that there is something contained within.
You can also really finish this image off by adding your own details and elements. These could include a background, and could also draw what this spoon would be used to eat or prepare.
How will you finish it off before adding some color?
Step 6 – Finish off your spoon drawing with color
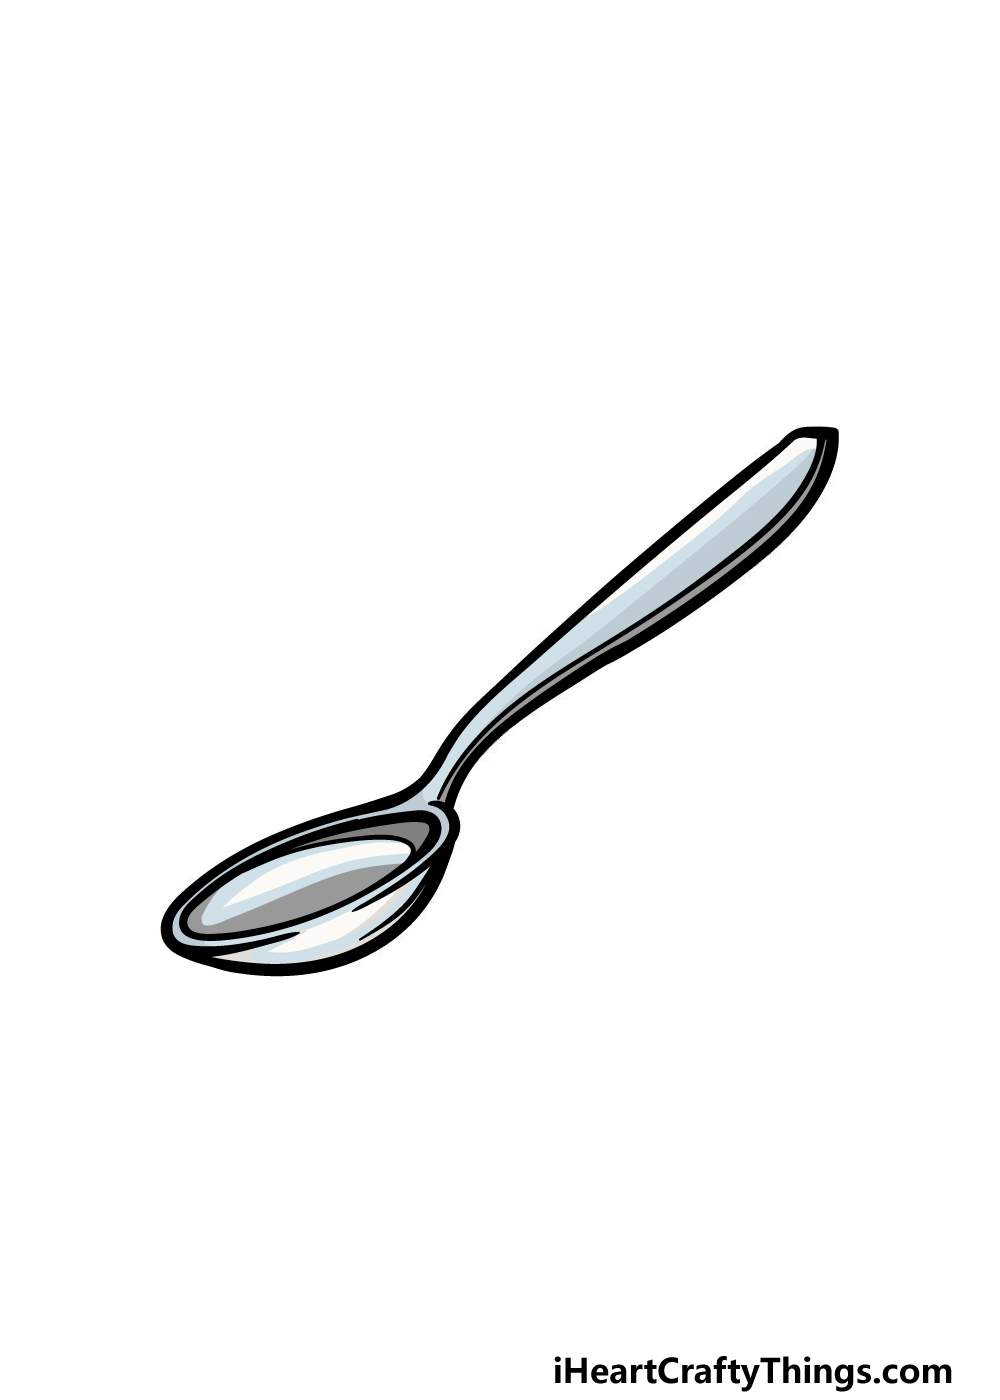
This is the final step of your spoon drawing, and in it we shall complete it with some color. In our reference image, we went with some grey shades to give the spoon a metallic look.
This is just one approach that you could take, however, as spoons can be made from many different substances.
Some of these include plastic or even wood, so you have a lot of options with how you could color it in.
Choosing your colors is just a part of it, however. You can also get the desired look for your spoon by changing up the art tools and mediums you use.
What do you think you’ll use to finish off your drawing? We can’t wait to see what you choose!
3 More tips to make your spoon drawing easy!
Find out how you can make your easy to draw spoon even easier with these 3 tips!
A spoon can come in many different shapes and sizes depending on what they’re being used for.
The one we created for this spoon drawing is a fairly simple one, but there are some surprisingly tricky details included.
If there is a different kind of spoon that you would find easier to draw, then you could recreate that instead! This could be done by changing just a few details or even just removing some.
Do you think there is a type of spoon that you would find a lot easier to draw? You could even try out a few different variations until you find one you like to draw the most.
If you were trying our first suggestion but are still struggling, you may want to bring in a model. You will probably find all kinds of spoons in the drawers of your kitchen, so that is a good place to start!
Once you have some spoons to use, you can use the real things along with the steps in our guide to make your drawing of a spoon much easier. This would also help with creating different spoon variations.
When you have completed it, you could try this trick with other utensils to create a nice collection!
You may think that adding more details to your spoon sketch would only make it harder. This can be the case, but it can also be used as a trick to make it easier!
What we mean is that additional elements can help to hide some areas you may struggle with. For example, let’s say you struggle to draw the bowl section of the spoon the most.
There are ways that you could hide this portion of the spoon! For example, maybe the spoon could be in a bowl of cereal.
That way you would only have to draw the handle of the spoon. That way, you would also have a more complete scene for your artwork!
Your Spoon Drawing is Complete!
That will conclude this guide on how to draw a spoon! You’ve probably used or encountered a fair amount of spoons in your life, but despite this familiarity it can still be surprisingly hard to draw one.
That’s why we tried to break it down for you during this guide, and by doing so you can get all of the frustration out of the way so you can focus on the joy of creating.
Finishing the guide is just the beginning, as once it’s done you can keep things going with your own ideas and creativity.
We mentioned a few ideas such as drawing a background or adding some extra details, and you can also change up the colors and art mediums you use. What other ideas do you have for this image?
You can also head to our website to find many more awesome drawing guides like this one when you’re ready for a new drawing challenge.
Please also be sure to share your finished spoon drawing on our Facebook and Pinterest pages for us to admire!