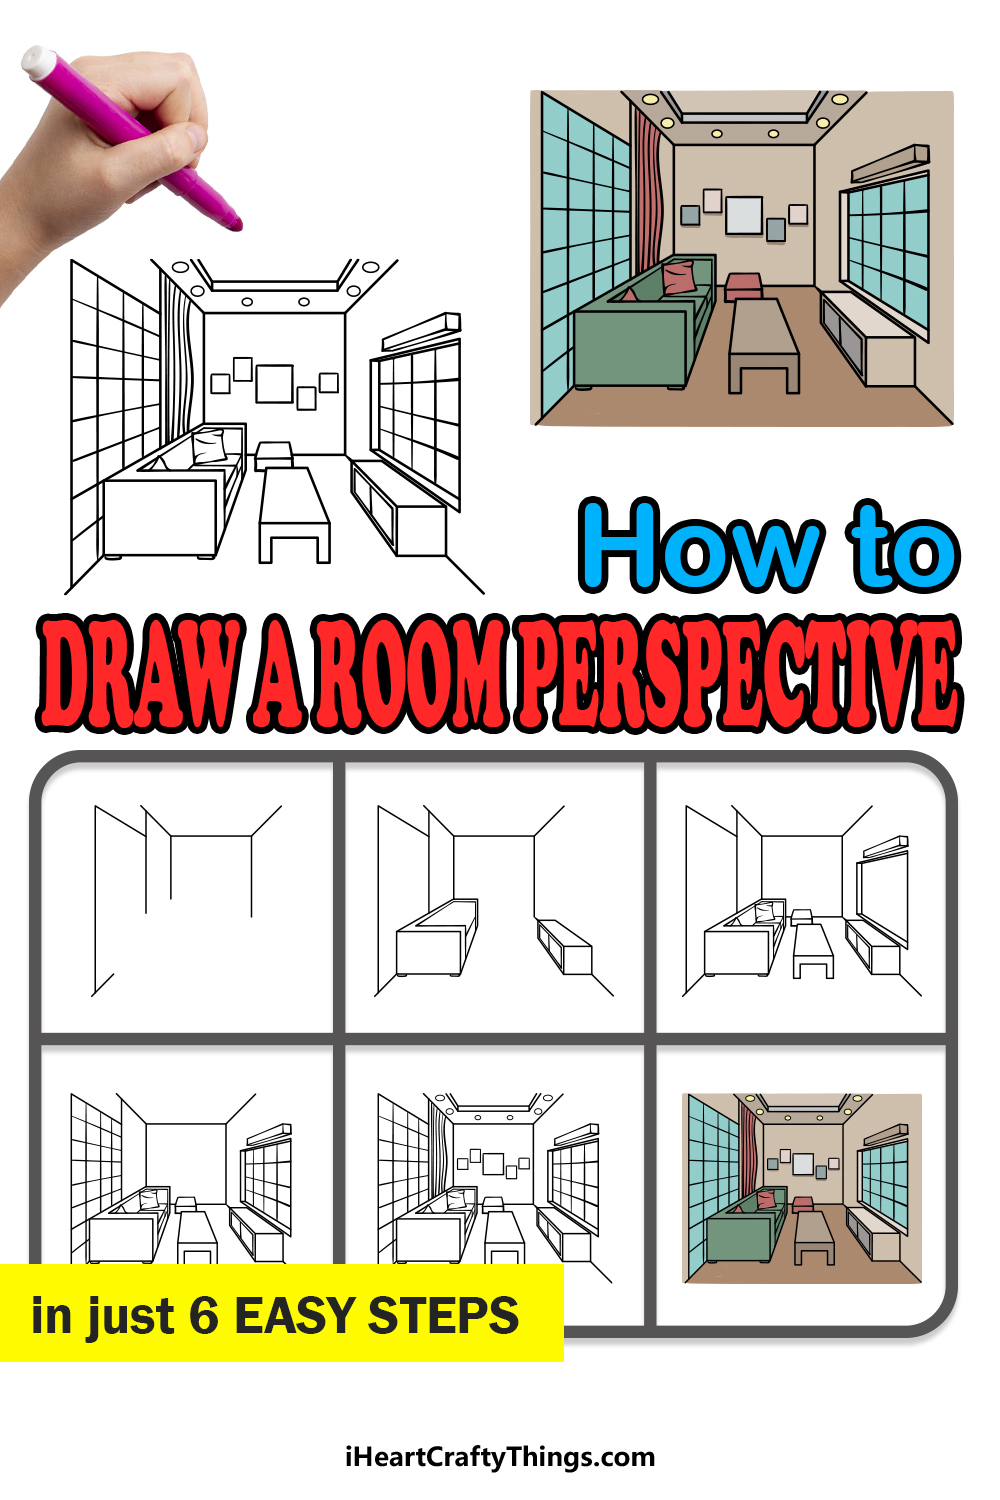
If you think about it, drawing any kind of space is like creating an illusion, the reason for this is that you are making it look like there is a 3D space with depth on a completely flat drawing surface.
As you may imagine, pulling off this illusion can be harder than it looks, but it can be made much easier when you know what to do!
With these tricks in your arsenal, learning how to draw a room perspective can be much easier than you may expect.
By the end of the tutorial we have prepared for you, you will know exactly how you can create this artistic illusion!
We hope that you enjoy working with us on this guide on how to draw a room perspective in just 6 fun and easy steps!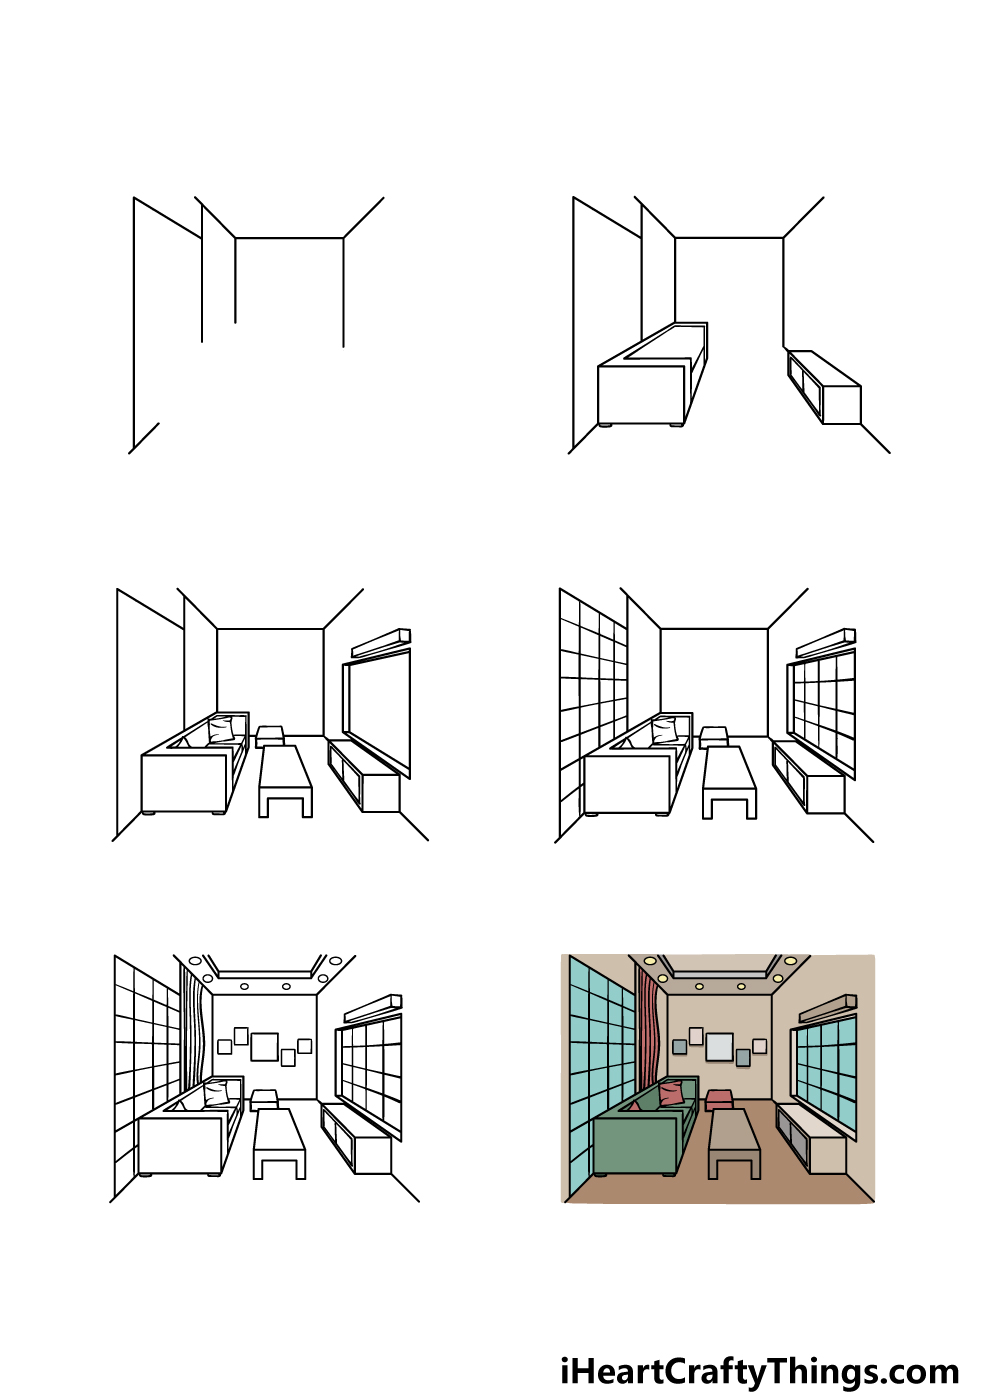
How to Draw A Room Perspective – Let’s Get Started!
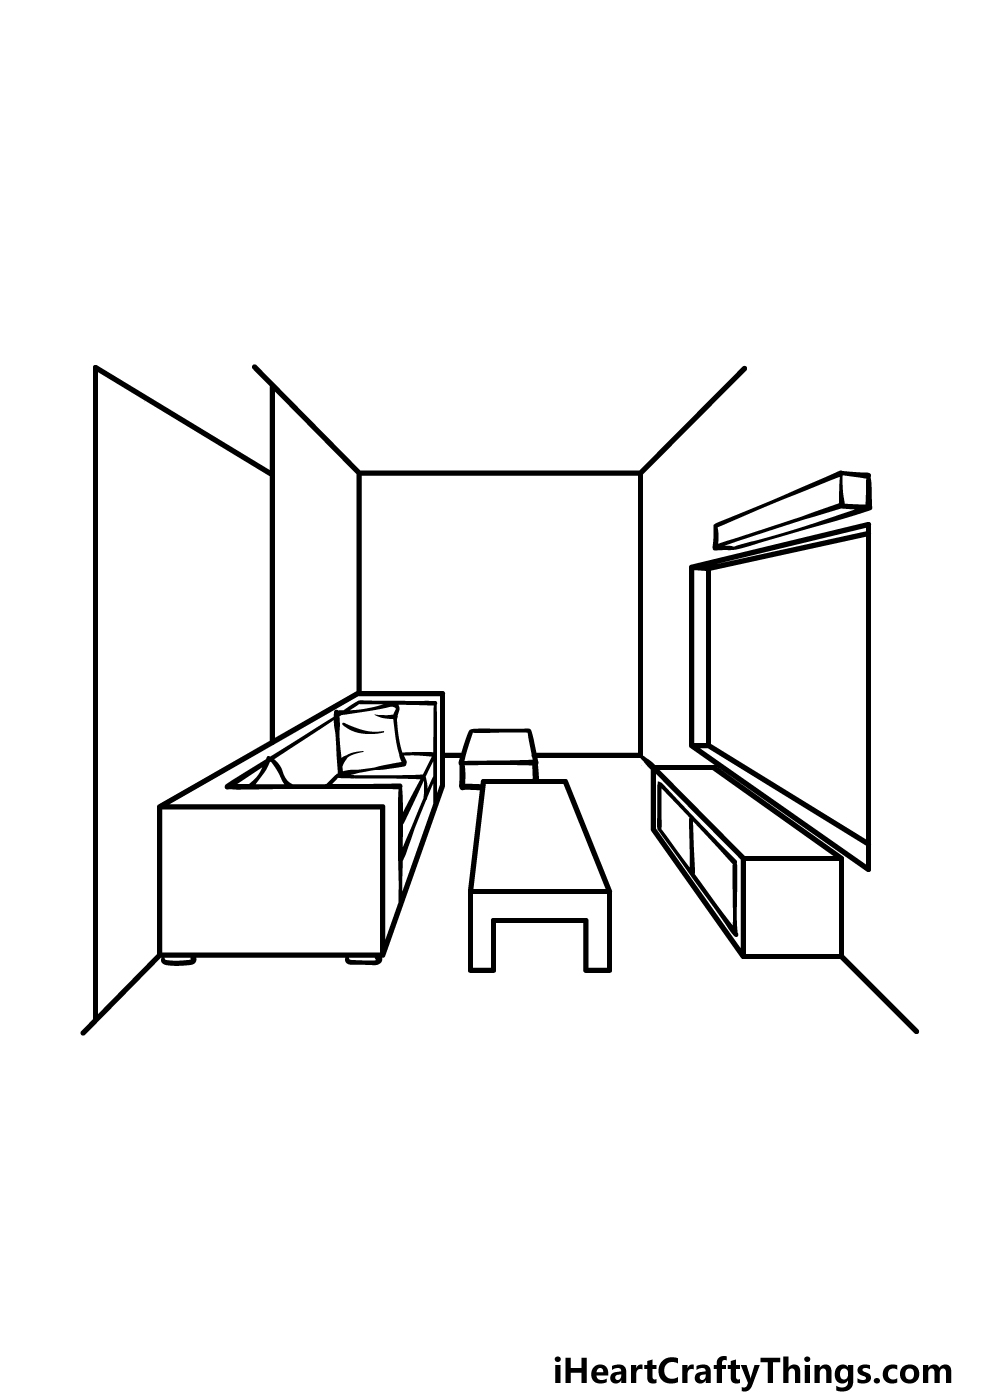
Step 1
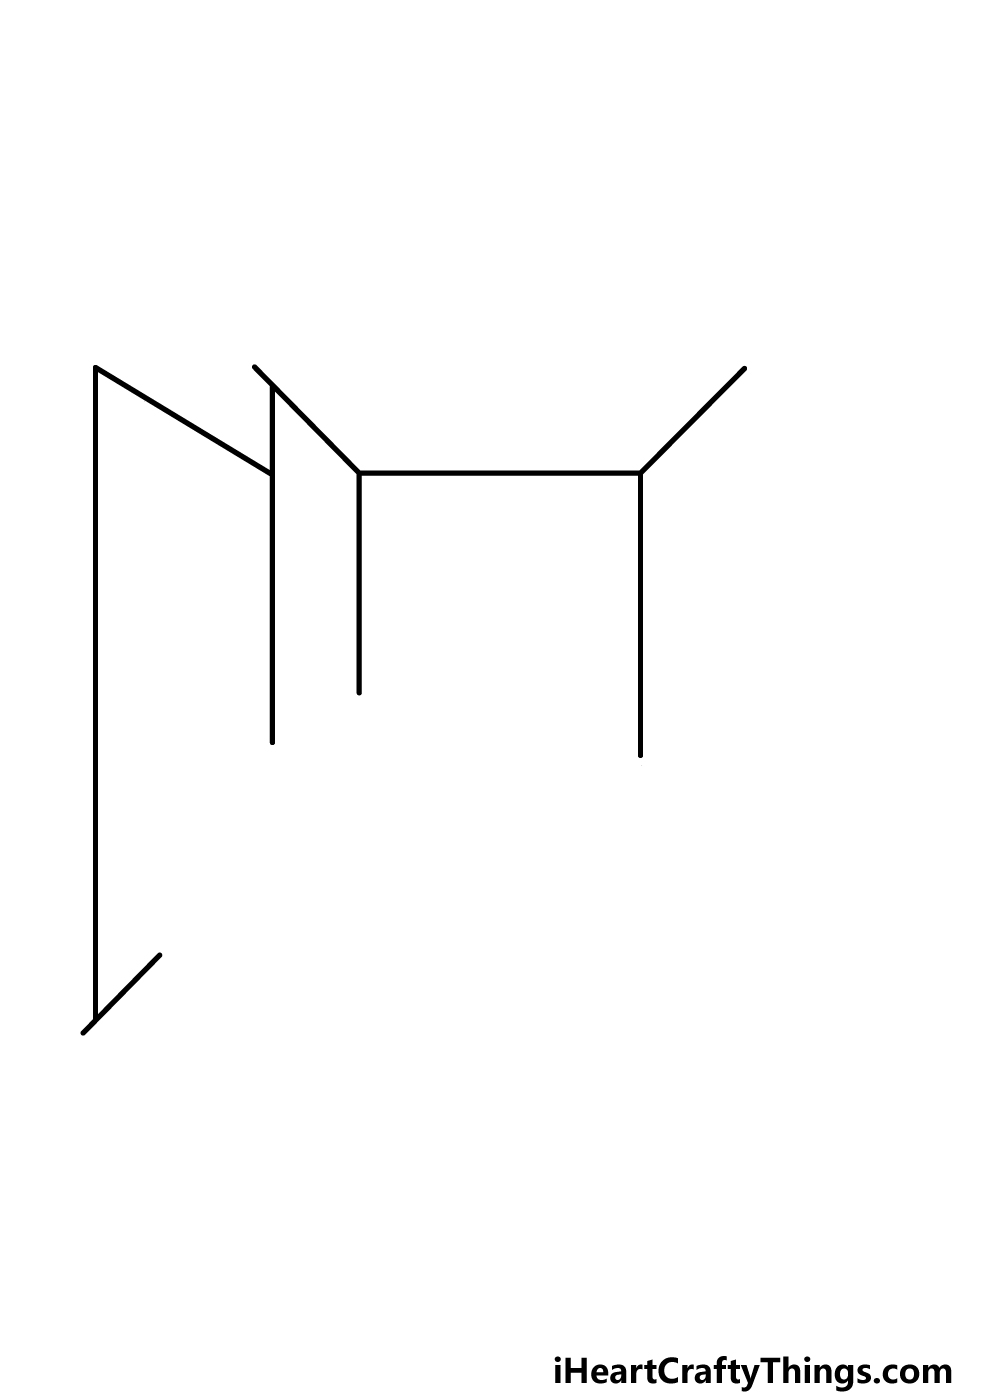
Before you begin this guide on how to draw a room perspective, there are a few drawing tools that would really make this process much easier for you to take on.
The main tool you’ll definitely want to have on hand will be a ruler, as there will be many straight lines and measurements to create for this portrayal.
You may also want to have a pencil handy if you normally draw with a pen, as this will help you if you have to draw any elements where making a mistake could be an issue.
When you have everything you’ll need, we can begin the first step! For now, we shall be drawing some simple straight lines.
In this first part, you should try your best to copy the lines exactly as they appear in our reference image, and this is a part where you may want to start off with a pencil.
When you have drawn the lines as they appear in our example, you will then be ready for the second part of the guide.
Step 2 – Now, draw some furniture for the room
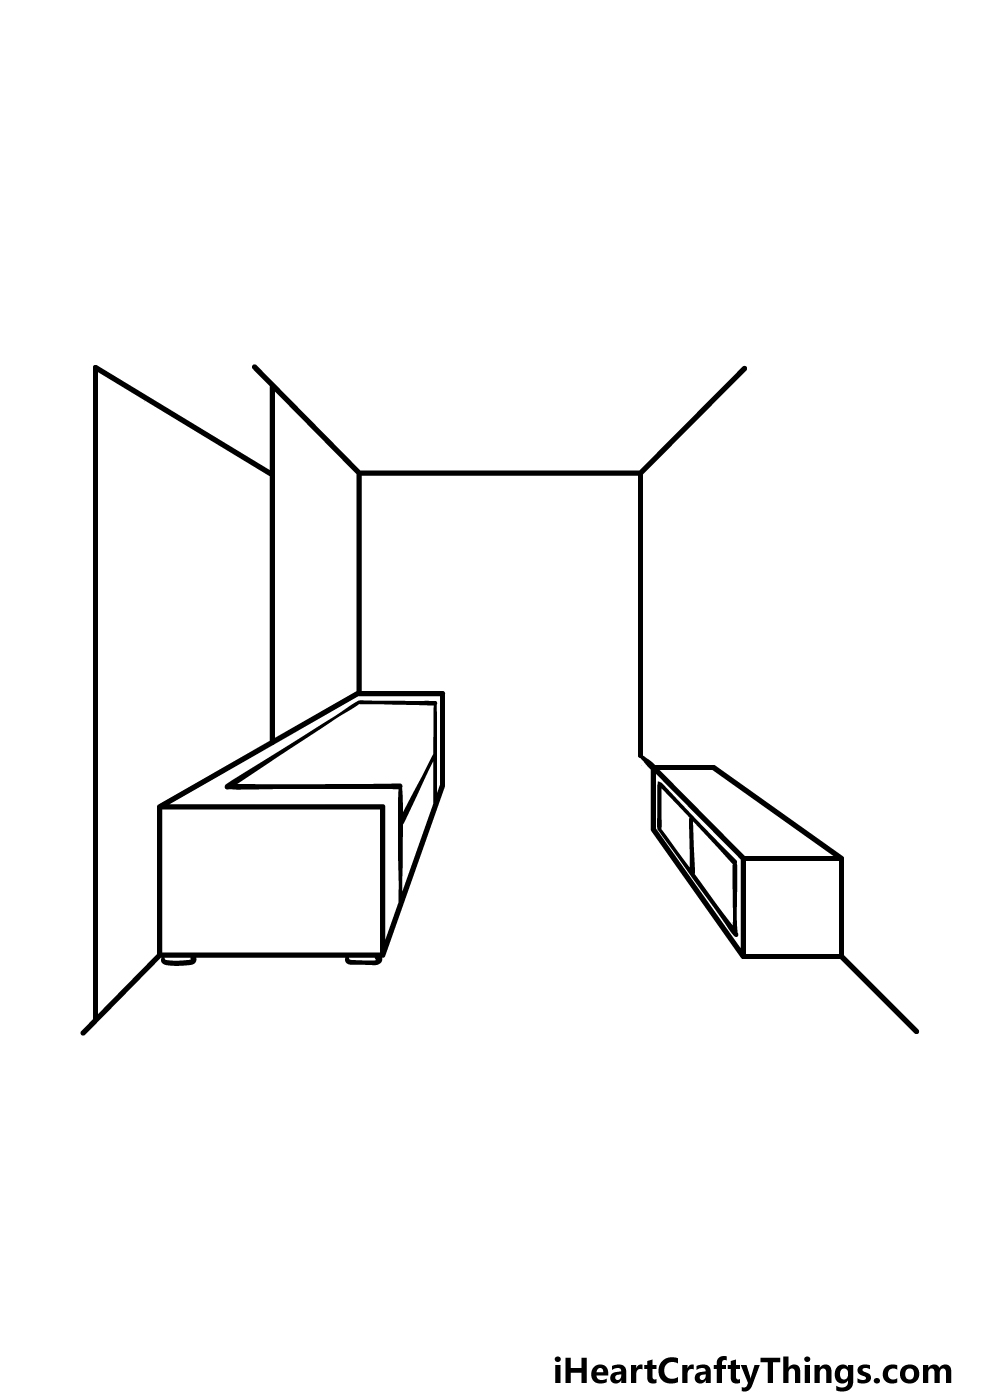
The lines that you drew in the previous part of this room perspective drawing will be there to create the illusion of depth for the image.
Everything else that we draw will be drawn in accordance to these lines to contribute to the illusion.
With your ruler, you can draw a rectangular, modern-looking sofa on the left-hand side of the image. You can then draw a rectangular small cabinet on the right side of the picture.
With these pieces of furniture, you will then be ready for the third step of the guide.
Step 3 – Draw some more furniture and details
Continuing with this guide on how to draw a room perspective, we will be adding some more pieces of furniture along with some details for the furniture that’s already there.
First, draw a flat, long rectangle for a small table at the center of the image. This will then have some squared legs on it. There will also be another smaller footstool above this.
Then, draw some small, elegant pillows and small details onto the sofa from the previous step. Finally for this step, we will be drawing a window on the right-hand side of the image.
This will be rectangular in shape, and in will have a thinner rectangular portion above it. With these elements drawn, we can keep adding some more in the fourth step of the guide!
Step 4 – Next, draw some more details for the room

Now we will be adding some more details to the elements that you have already drawn so far in this part of your room perspective drawing.
Using your ruler, we will be drawing a grid pattern on the rectangular section on the left-hand part of the room, and we will draw another grid onto the window.
Even for details like this, you’ll want to angle it so that it contributes to the depth illusion for the room.
With these parts drawn, we will keep adding some final details and elements in the next step of the guide.
Step 5 – Add the final details to your room perspective drawing

This fifth step of our guide on how to draw a room perspective will see you adding some final details and elements to the image.
First, draw some wavy lines for a stylish section on the left-hand side of the room. Then, draw a series of squares and rectangles onto the far wall of the room.
Finally, we will add some straight lines onto the roof, and you can finish that off by adding some small circles for some lights embedded there.
When all of these details are done, you can then add some details and elements of your own!
This is your chance to let your inner interior designer out, so what will you do to finish off this awesome design?
Step 6 – Finish off your room perspective drawing with color
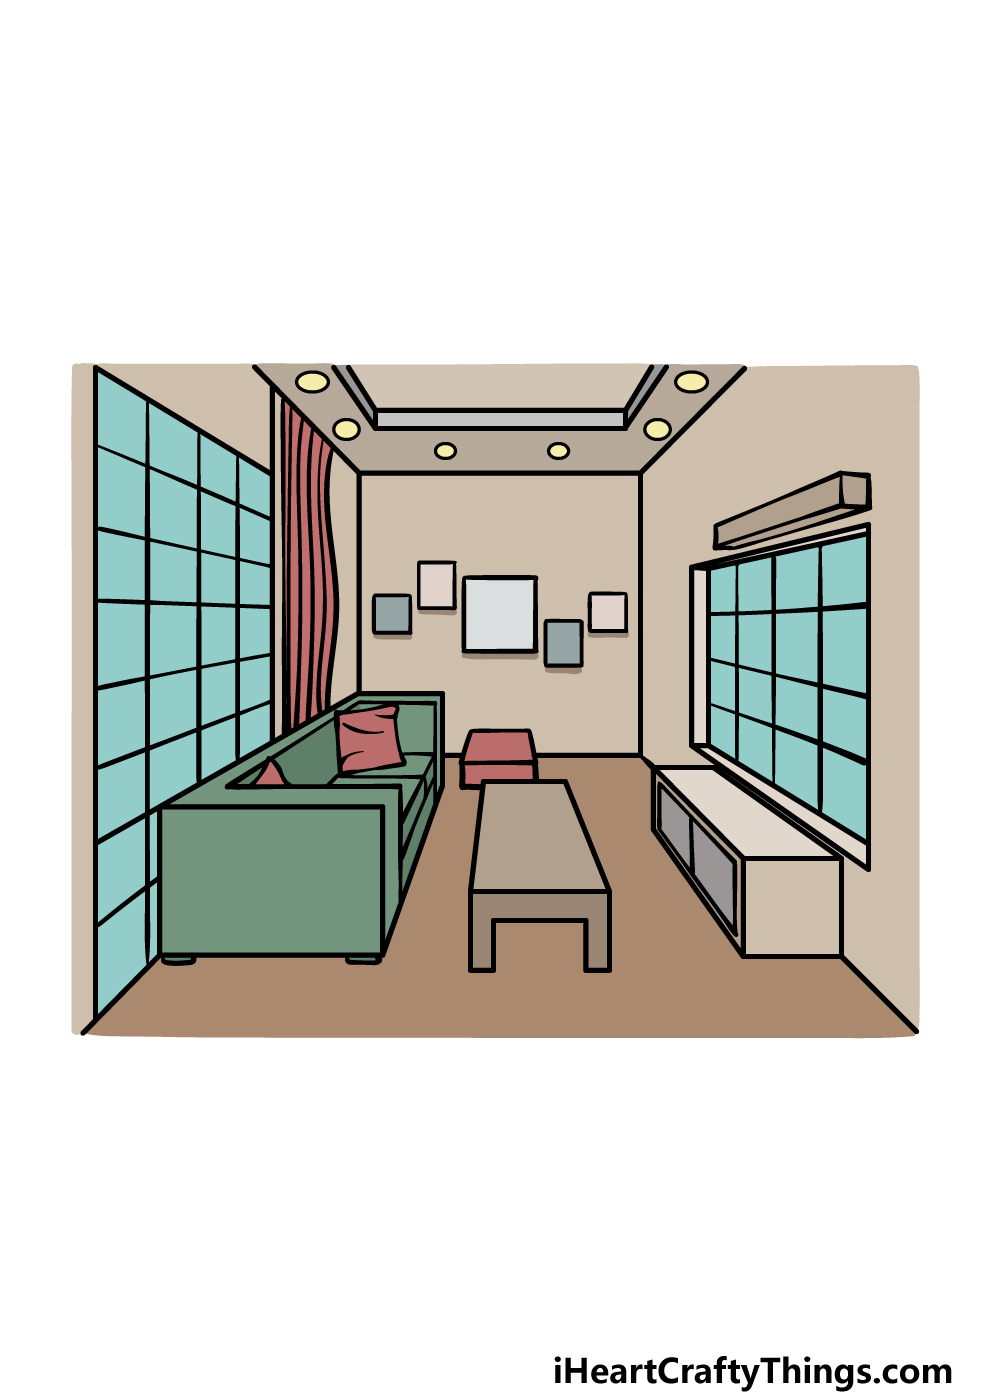
We created a rather modern, sleek design for this room perspective drawing, and this was reflected in the colors we picked for our example image as well.
We kept the colors a bit colder and muted in our reference image, and while you could go for a similar look you could also express your own color creativity with any other shades you love!
What colors, art mediums and other tolls will you pick to finish off this amazing room perspective drawing?
5 Tips To Make Your Room Perspective Drawing Even Better!
You’ll want to make room in your life for these tips for your room perspective sketch!
The drawing of a room perspective that we created in this guide has some really modern looking furniture. You could change this furniture to a design that you may prefer!
You may like more antique furniture or maybe some that is cozier. It could be based on the furniture in your own living room if you need some inspiration!
What sorts of furniture do you think would look good in this room?
The far side of the wall in this room has some blank squares. These look like they could be artworks, so you could draw some pictures on these squares!
They could be photos of people, landscape images or maybe some expressive modern art. This would depend on what kinds of pictures you would like to have on the wall!
Similarly to the previous tip, you could add some features to the large windows on the walls. This would be a great way to show a bit of the view that could be enjoyed from within this room.
Once again, you could use your own living space as inspiration and portray the view you have from a window in your own house!
The objects in this room perspective drawing are somewhat limited. You could add some more to build up the living space a bit!
For example, you could shed some light on the subject by adding some lamps to the scene. Objects such as plants, clocks or vases would also look great in this room.
What other features could you add to the room?
A room like this would be pointless without people to enjoy the space. You could fix this by adding some people to this room perspective sketch!
They could be drawn in a simple style, and you could base them on real people you know. It could also be fun to draw yourself lounging in this room!
What do you think the characters would be doing in this room?
Your Room Perspective Drawing is Complete!
Now that you have finished this guide on how to draw a room perspective, and you now know a bit more about how to create this drawing illusion!
It can be a bit tricky to pull off, but we hope that the steps in this guide made it a fun and easy task for you to overcome.
You have mastered this design now, but you can still keep it going in a few ways. Some ideas would be to draw other details or change things around to create a different style for the room.
How will you finish off this image?
When you’re ready to have some more drawing fun, you can check out our website for some more drawing guides to enjoy.
We have a huge selection with more on the way, so keep checking in to never miss out!
We would love to see how your room perspective drawing turned out, so please share your creation on our Facebook and Pinterest pages for us to see.