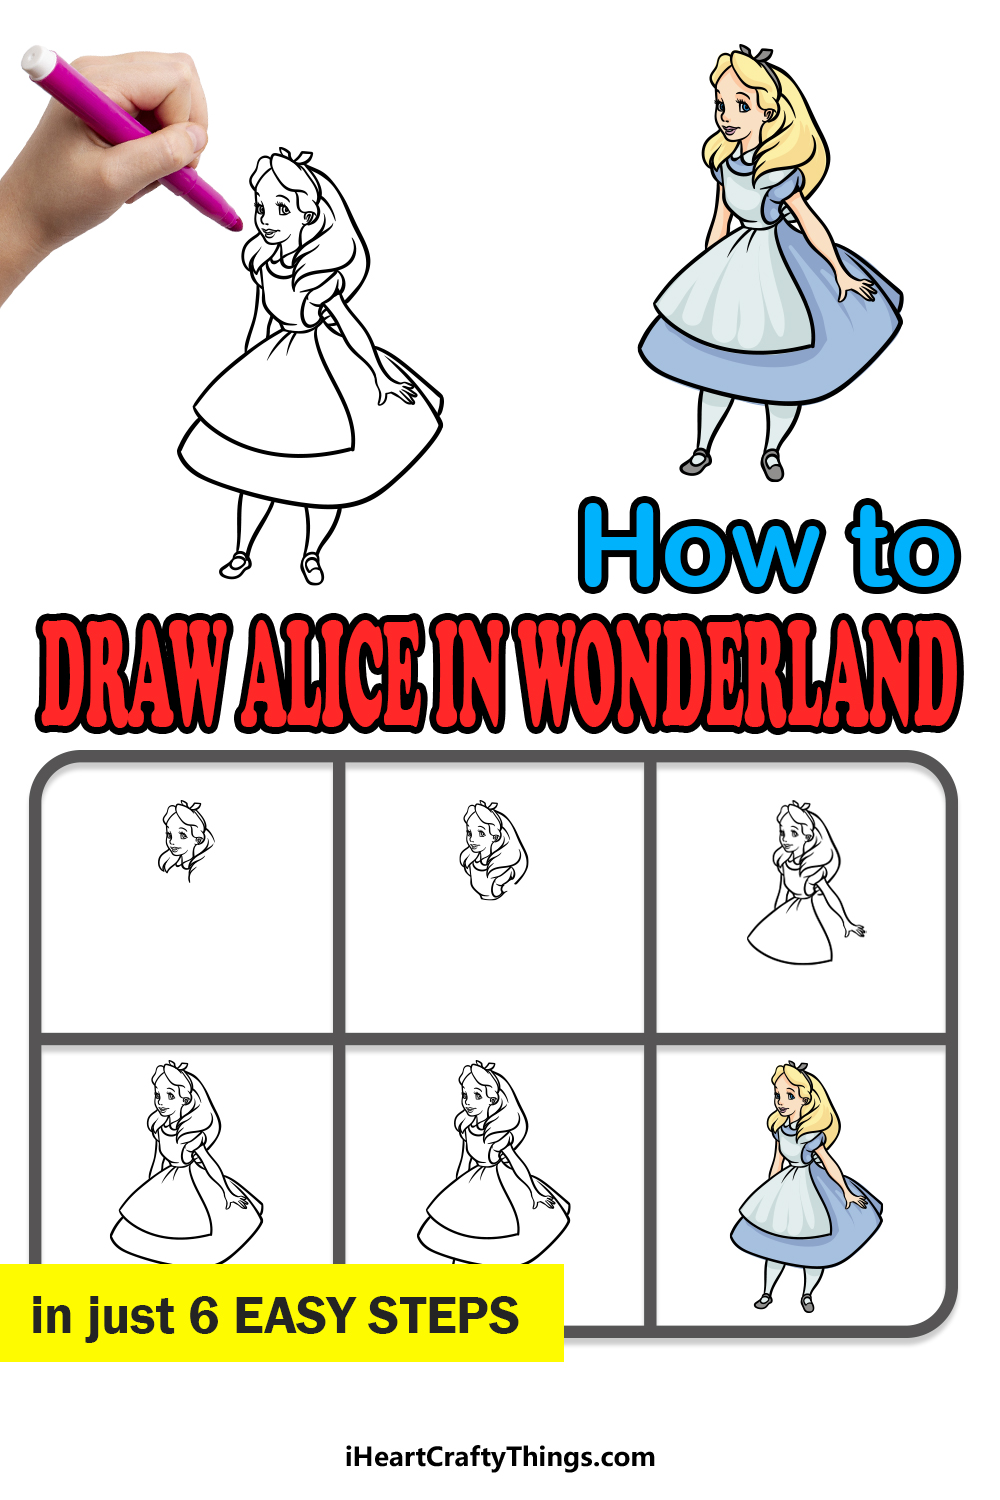
Alice in Wonderland is one of the most beloved Disney films ever released.
It came out in 1951 as an adaptation of the classic books by Lewis Carroll, and the film was a huge hit with audiences that remains popular to this day.
At the center of this bizarre and charming story is Alice herself, and she is a character that millions of people around the world love.
Learning how to draw Alice in Wonderland is a great way to show your admiration for this iconic animated character.
If you love this movie and this character, then this will be the perfect guide for you!
Our step-by-step guide on how to draw Alice in Wonderland in 6 steps will show you how to easily draw this wonderful character.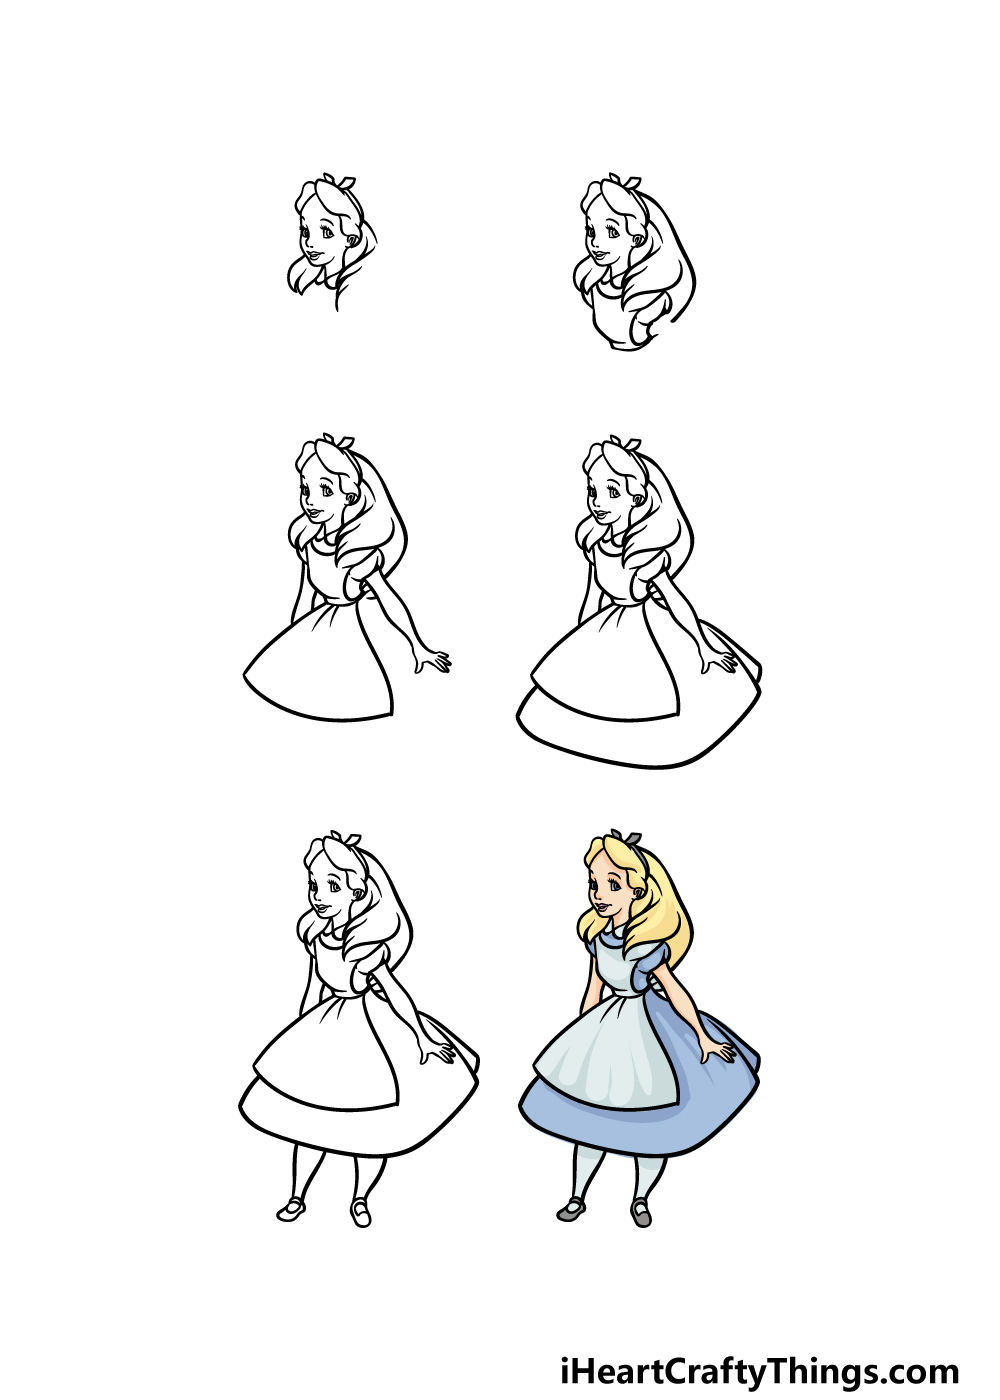
How to Draw Alice in Wonderland – Let’s Get Started!
Step 1
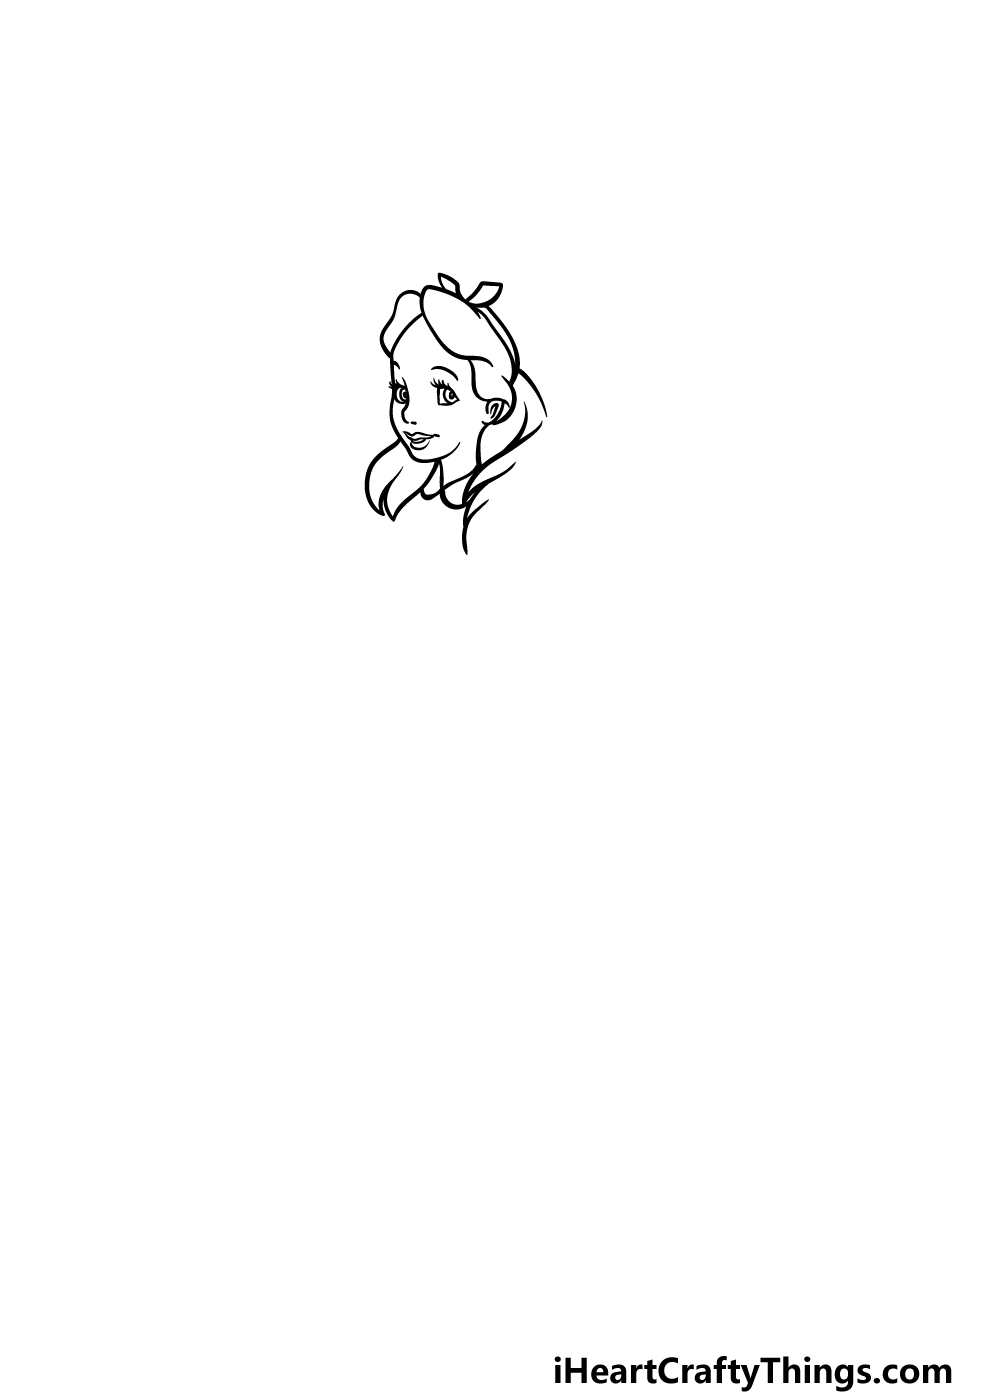
Alice was drawn in the classic Disney animation style of the time, and that is worth keeping in mind as we start this guide on how to draw Alice in Wonderland.
To begin the guide, we will be drawing her face and head.
This style of animation was actually quite detailed, so you may want to try and replicate the lines exactly as they’re drawn in our reference image.
You can start by using some curved lines for the outline of her face, and this will include drawing her facial features to achieve the calm expression in our image.
Then, use some more curved lines for her distinctive hairstyle. Finish off by drawing the front of her collar and the ribbon in her hair and we can then move on to the second step.
Step 2 – Now, draw some more of her hairstyle as well as her chest
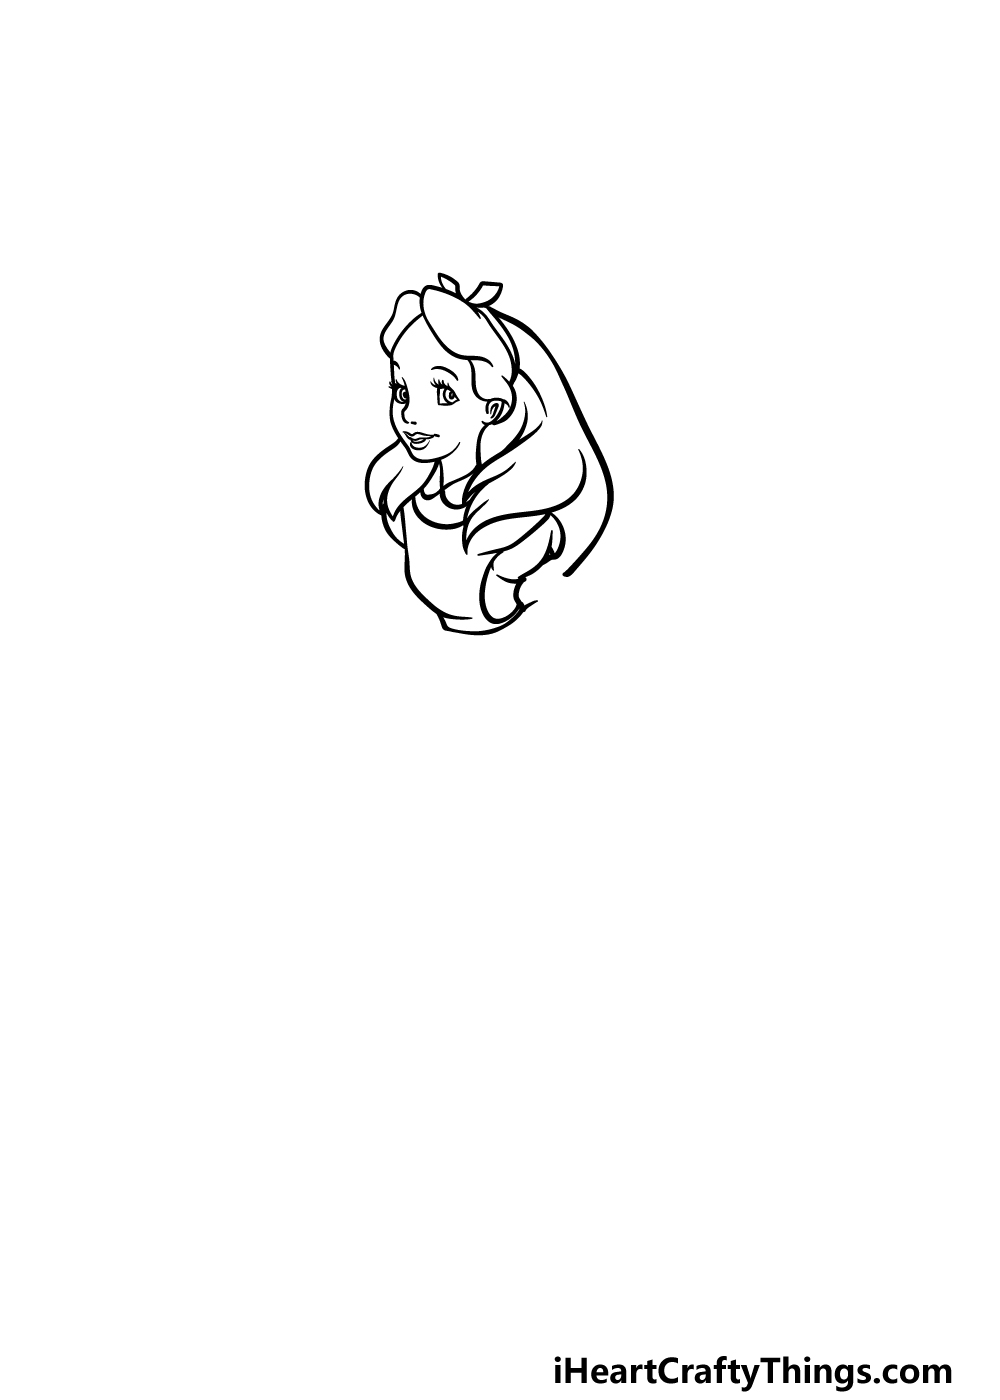
We will continue adding to her distinctive hairstyle in this part of your Alice in Wonderland drawing. Use a curved line coming out from the back of her head to have her hair flowing down to her back.
That will finish off her hair for now, and you can then start drawing her chest. Use some more curved lines to draw the front of her dress and the top of her apron over it.
Then, use some more curved lines for her small waist.
Once you have drawn these aspects as they appear in our reference image, it will be on to step 3!
Step 3 – Next, draw more of her apron and her arms

For this third step of our guide on how to draw Alice in Wonderland, we will be drawing the front of her apron as well as her arms.
First, we will use some more curved lines for the sides of her apron flowing out from her waist.
You can use another curved line for the base of the apron, and then you can finish it off by adding some crease lines coming down from the waist of her apron.
When you have finished her apron, we can start adding her arms. The arm on the right will come out of the sleeve there, and much like the rest of the image it will be fairly detailed and specifically proportioned.
The majority of the arm on the left will be obscured by her waist, and once you have drawn that arm you will have completed this step!
Step 4 – Draw the rest of her dress
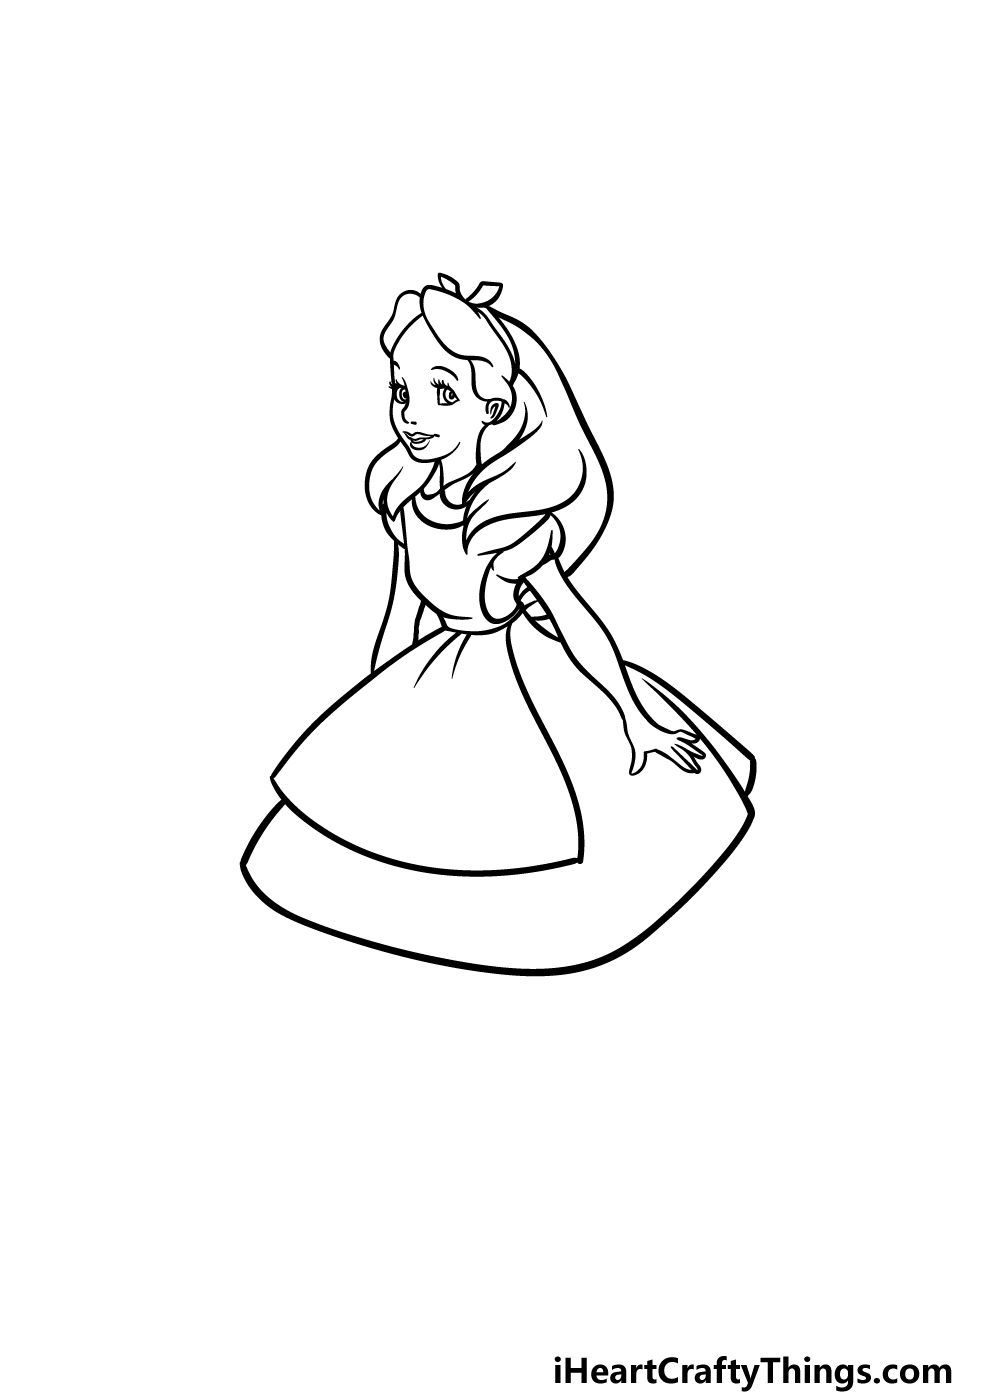
This Alice in Wonderland drawing of yours is looking great already! In this fourth step we shall be finishing off the skirt of her dress, and this should be a fairly easy step to do.
The left side of the skirt will start from underneath her apron and curve to the right. Then it will bend upwards again so that it can end at her waist.
We will then just have a few final details and elements to add in the next step, so let’s move on!
Step 5 – Add the final touches for your Alice in Wonderland drawing
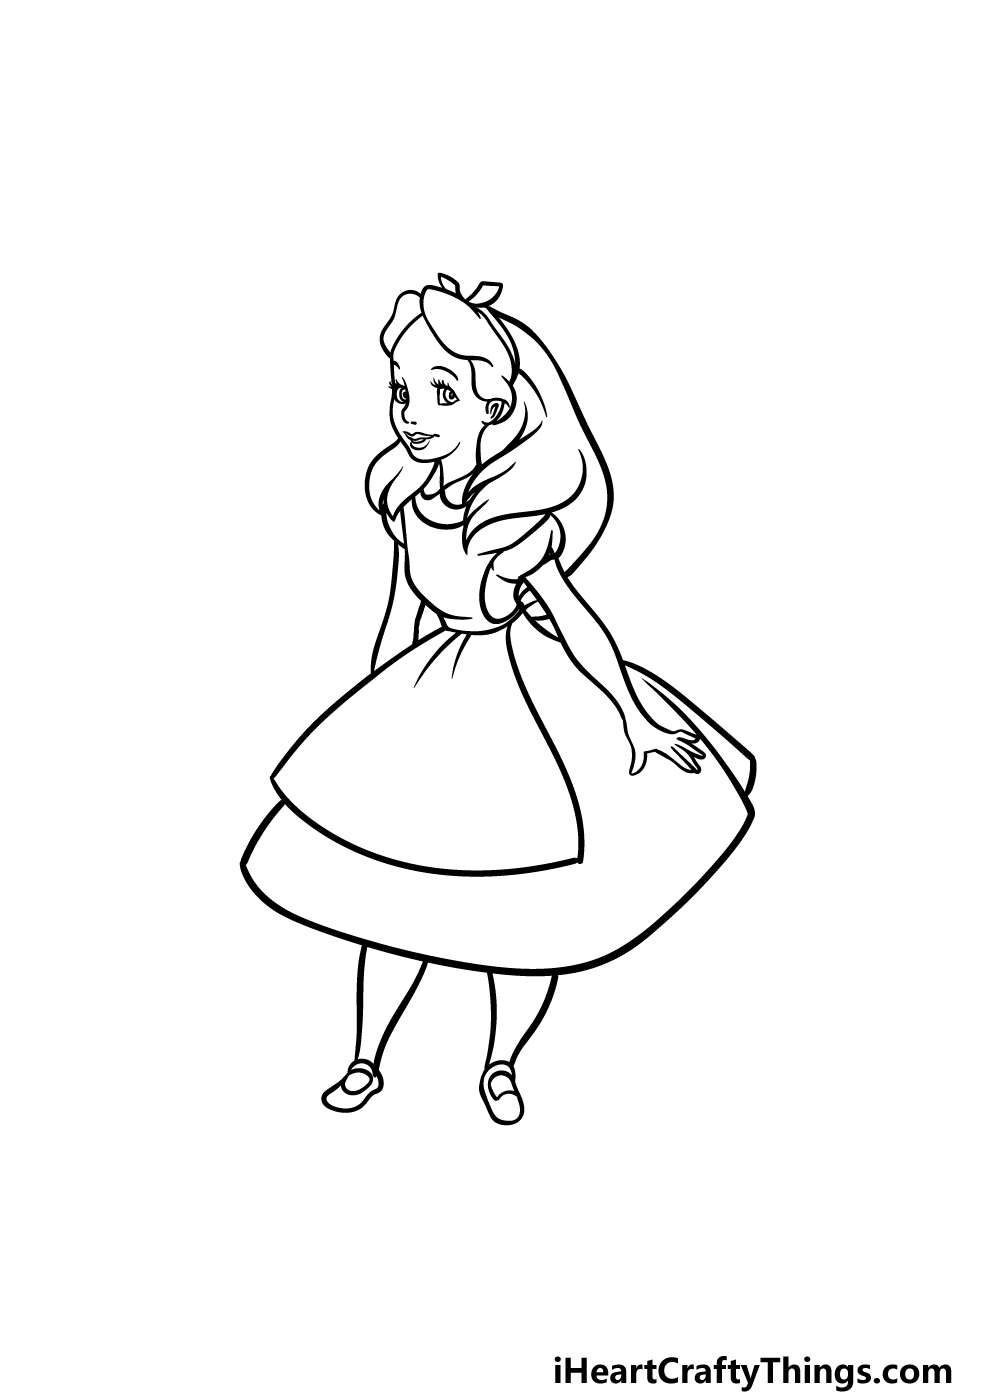
Before you add some whimsical colors to your picture, we have a few final elements and details to add in this step of our guide on how to draw Alice in Wonderland.
The main thing that we will be adding are her legs, and they will extend down from the base of her skirt.
Her legs get thinner the further they go down, and they end in some rather old-fashioned-looking shoes.
Once the legs are complete, you’re ready for the final step! You could also add even more to the image before you do that, however.
One of the best ways to do this is by adding a background, and one idea would be to draw your favorite scene from the film behind her.
What kind of setting would you like to put Alice in?
Step 6 – Finish off your Alice in Wonderland drawing with some color
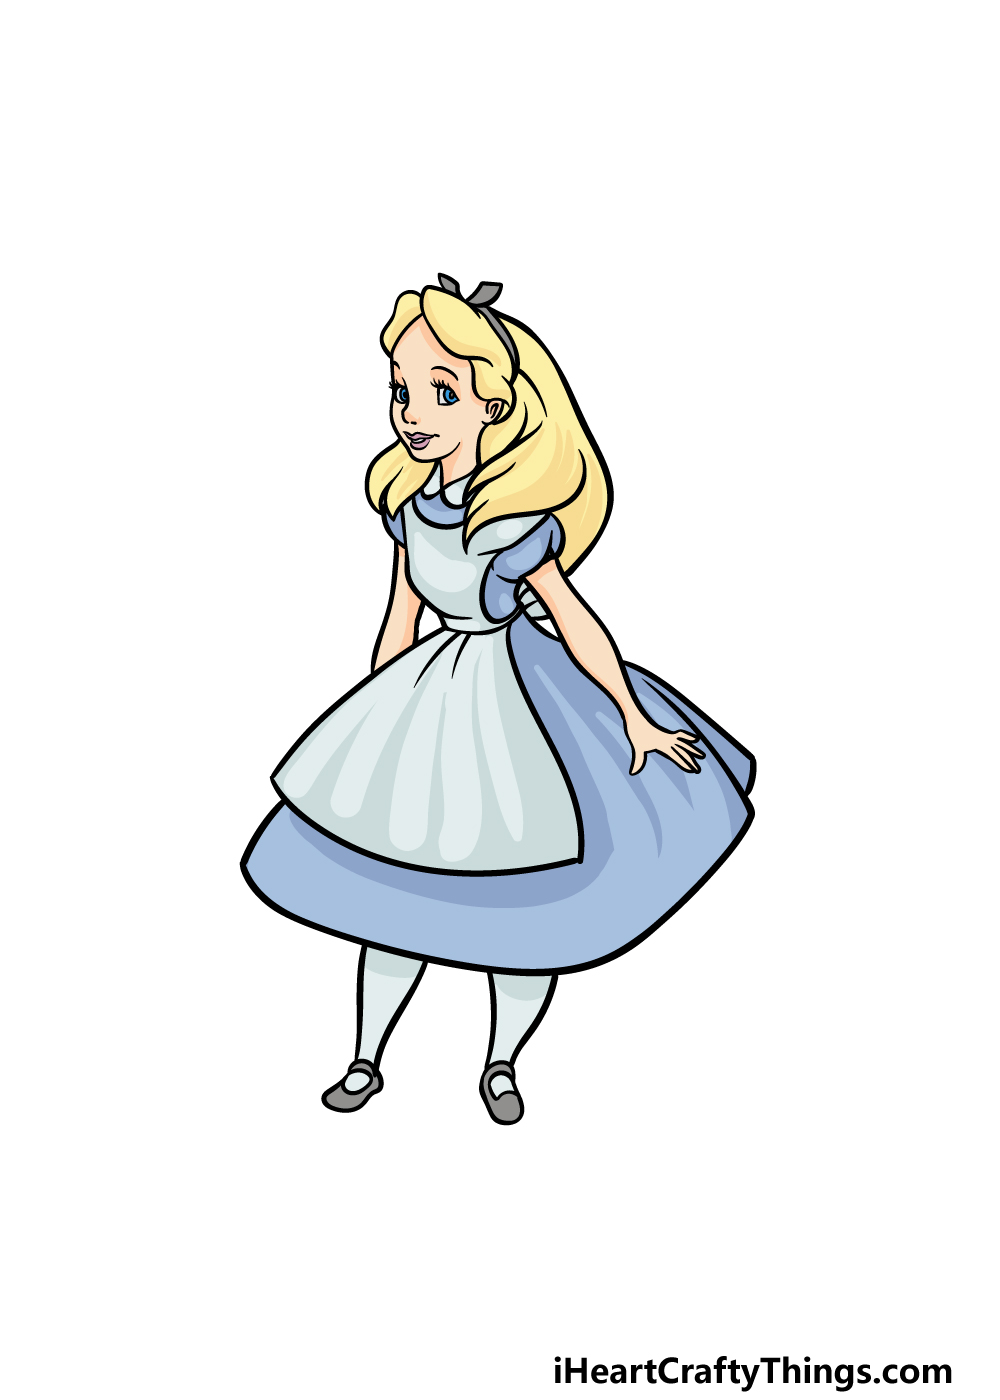
Now you are ready to finish off your Alice in Wonderland drawing with some great color! In our reference image, we went for Alice’s classic color scheme from the movies.
This means that there is some lovely light blue for her dress, while her apron is left white with some grey shading.
Her hair is also colored with a beautiful golden blonde and finally she has some bright blue eyes.
These are the colors that we chose to stay accurate to the films, but you could also add some color choices of your own!
Don’t forget to also color in any background details or extra elements that you may have added!
4 More Ways To Make Your Alice In Wonderland Drawing Unique
Create a magical artwork with these tips for your Alice In Wonderland sketch!
Alice is just one of the many incredible characters in the Alice In Wonderland series. You could make this Alice In Wonderland drawing even better by adding some more of these characters!
Some popular ones would include the Mad Hatter or maybe Tweedledee and Tweedledum. These are just a small selection of iconic characters that you could add to this drawing you have created.
We’re sure you may have some other favorite characters from the series, so what other ones could you add?
Another way that you could make this drawing of Alice In Wonderland even better would be to add some objects and accessories. Once again, you would have a huge selection of different things you could add!
For something small and simple, you could have Alice holding onto a teacup. This would hearken to the famous tea party scene from the stories.
Maybe she could have a deck of cards to reference the evil Queen of Hearts. What other props and accessories could you add?
In the Alice In Wonderland stories, Alice is sometimes shrunk or enlarged after drinking certain poses. This could be an interesting angle for this Alice In Wonderland sketch!
You could choose which of these states to depict her in and then have all sorts of fun playing with perspective. For instance, you could have some objects appear huge to her or show her towering over some buildings.
Finally, you can finish off this Alice In Wonderland drawing with some background details. This is a great way to put the finishing touches on the image!
The Alice In Wonderland stories are so imaginative and creative, so you could use any background ideas you have.
They could be based on scenes from the books and movies or you could create your very own environments. That would be a great way to take Alice on some brand new adventures!
What background settings can you think of to finish off the drawing?
Your Alice in Wonderland Drawing is Complete!
You have completed all 6 steps of this guide on how to draw Alice in Wonderland!
At the end of it, you have a wonderful picture featuring this beloved character, and we hope that this guide made it not only lots of fun but also easy for you to complete.
Don’t forget that you can also add some background details, extra elements and color choices to really make this your own!
This drawing guide is far from the only one we have for you, and you can find many more on our website. Be sure to check in often, as we upload new ones constantly!
Please also make sure to share your finished Alice in Wonderland drawing on our Facebook and Pinterest pages, as we would love to see it.