


It’s not as easy to learn how to draw water as you may think! That’s because it can take so many forms that depicting it in an effective way is easier said than done.
It’s with that in mind that I have designed this guide to make it so much simpler. I have this design of flowing water that you can follow along and replicate.
Each step will be explained by me so that you can discover for yourself just how simple it is. Once you have finished working through the guide, you can then take what you have learned and then apply it to your own designs and ideas.
You could even add a few details like fish or people swimming in the water, or you could create a full beach setting. The only limit is your imagination, so let’s begin!
Follow These Steps To Make Your Water Drawing
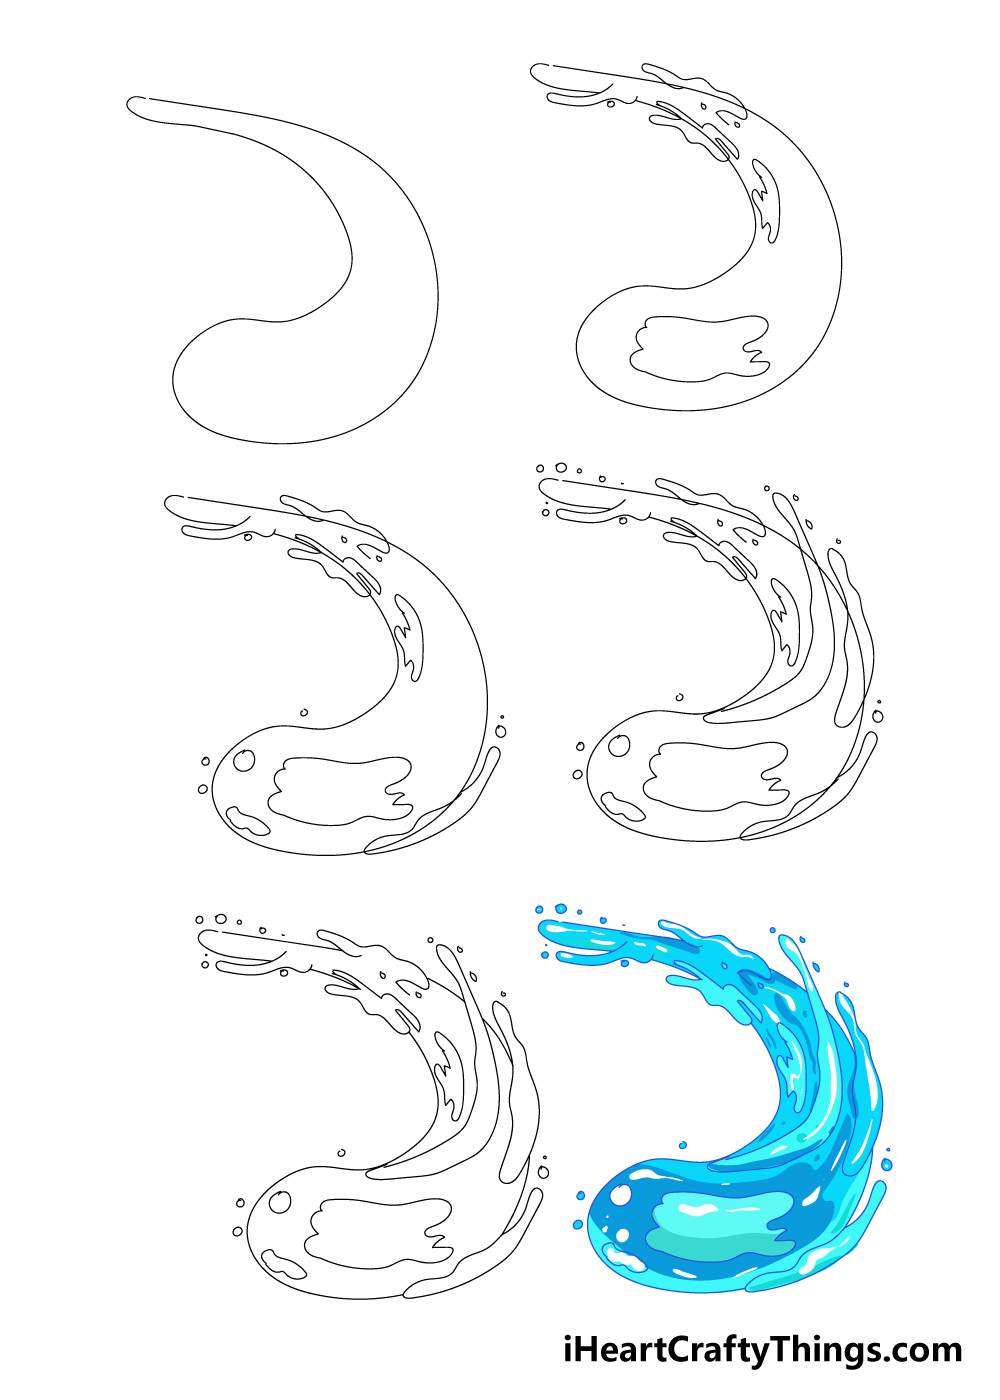
How to Draw Water – Let’s get Started!
Step 1
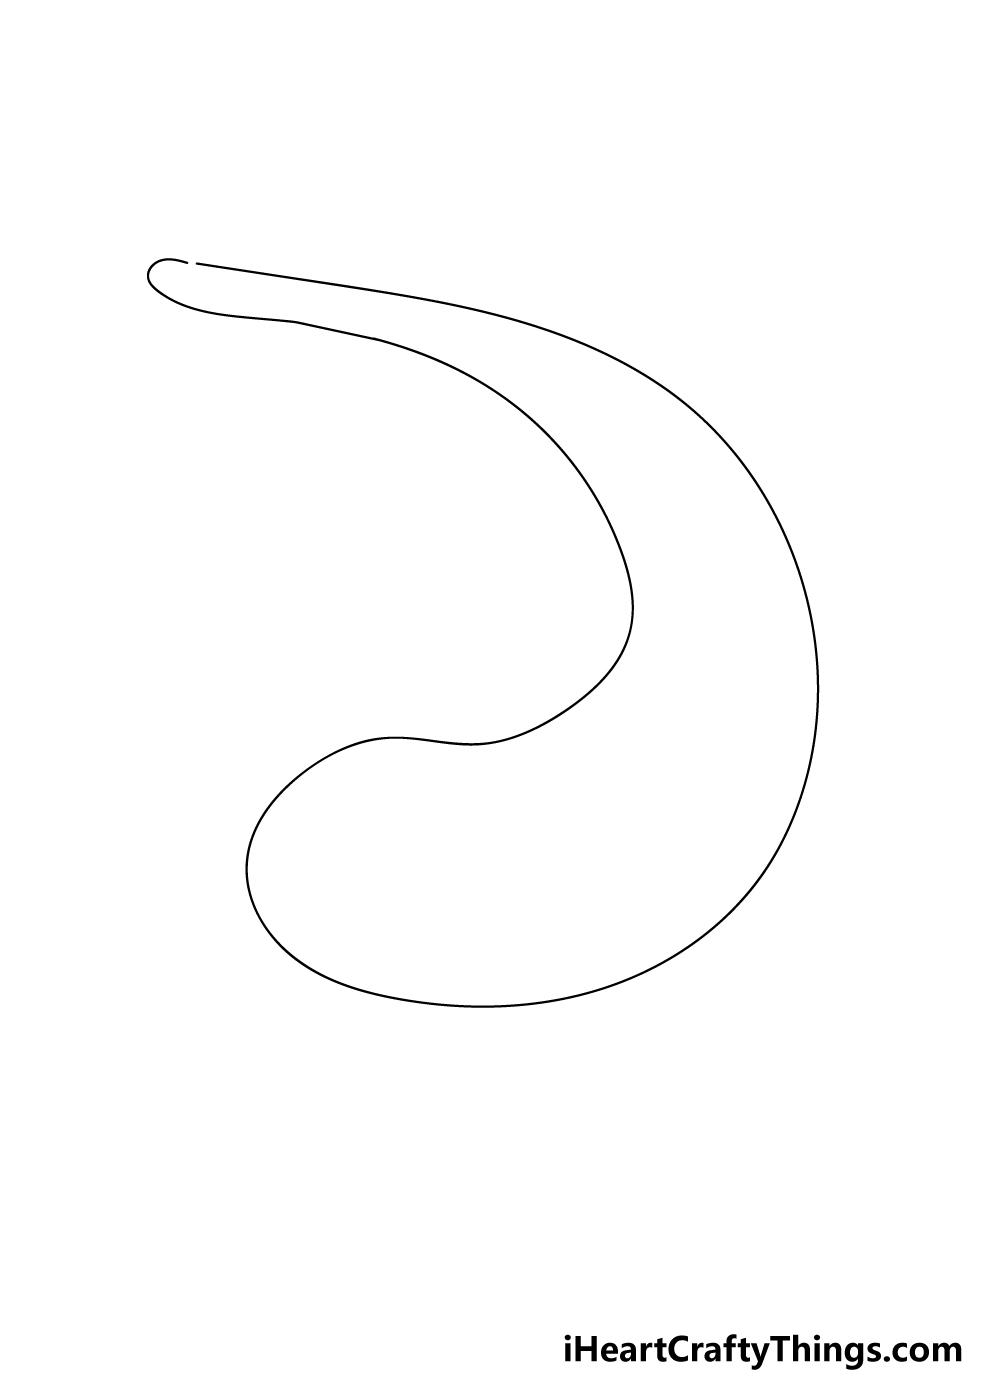
To get this guide on how to draw water started, we shall be drawing a shape that will guide you as you get started with the drawing.
For this step, you should use the lightest pencil you have, as you will be erasing this shape further down the line.
This shape will look like a large, backward letter C that is thin at the top and then gets thicker as it goes down until it gets to the large rounded end at the bottom.
Once you have the shape ready then you can move on to the next step!
Step 2 – Draw some inner details for your water
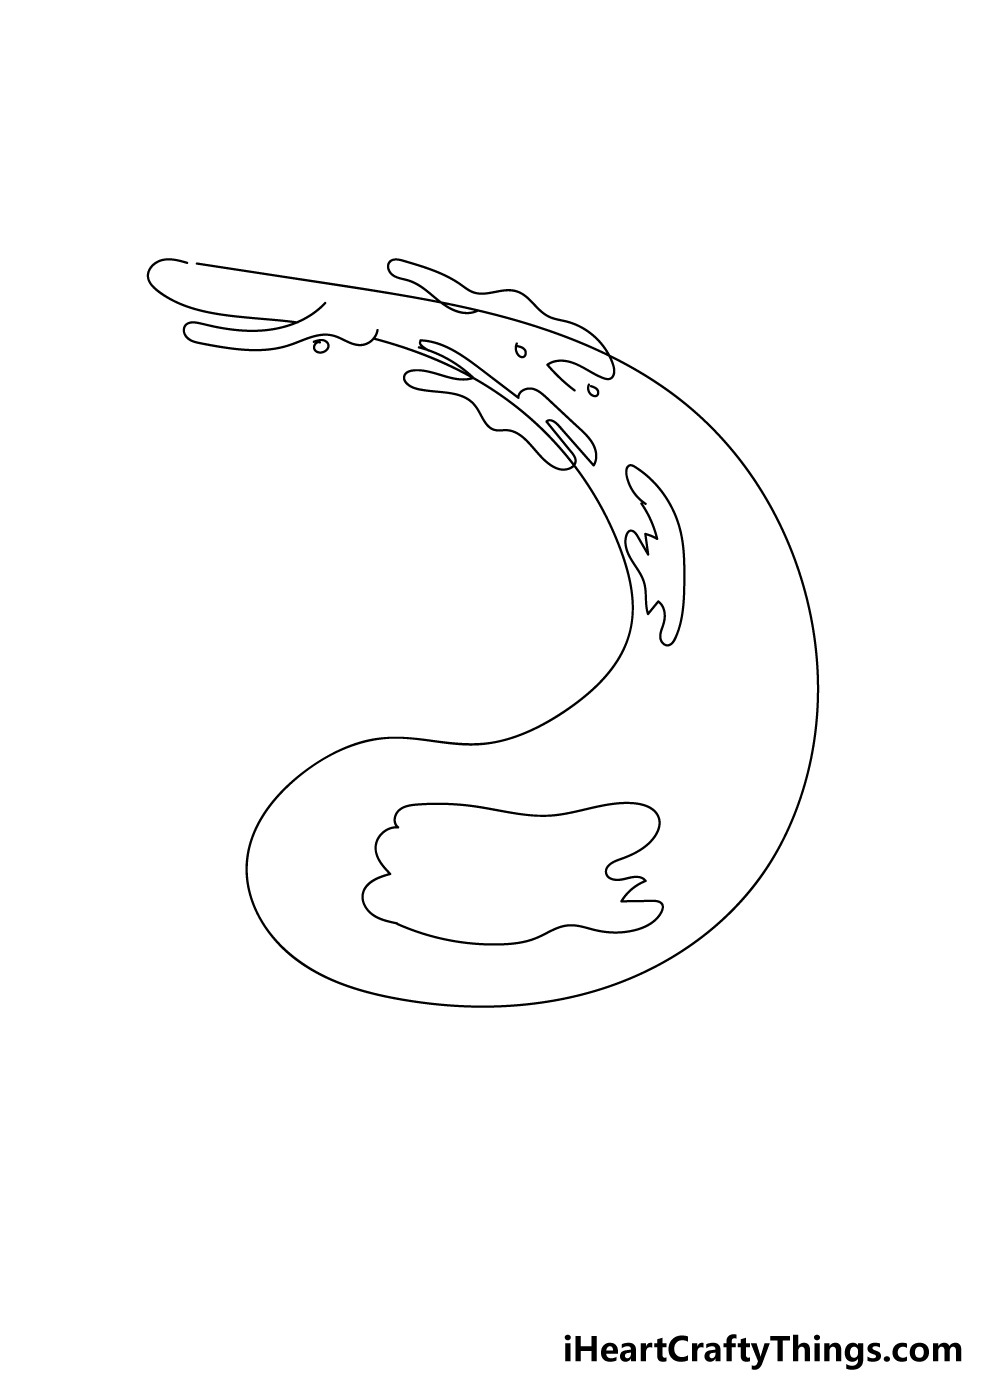
From this step onwards, we shall start adding layers of details to build up the look of water flowing.
You’ll be using the pencil shape that you drew in the previous step as your guide as you start adding smaller details inside.
This flowing water will be build up using lots of smaller shapes, and we will be keeping them within the pencil shape.
Using the reference image as your guide, you can add curved shapes inside that adhere to the flow of the shape. Some will extend out of the pencil shape as well.
Step 3 – Now, add some more small shapes inside of the water flow
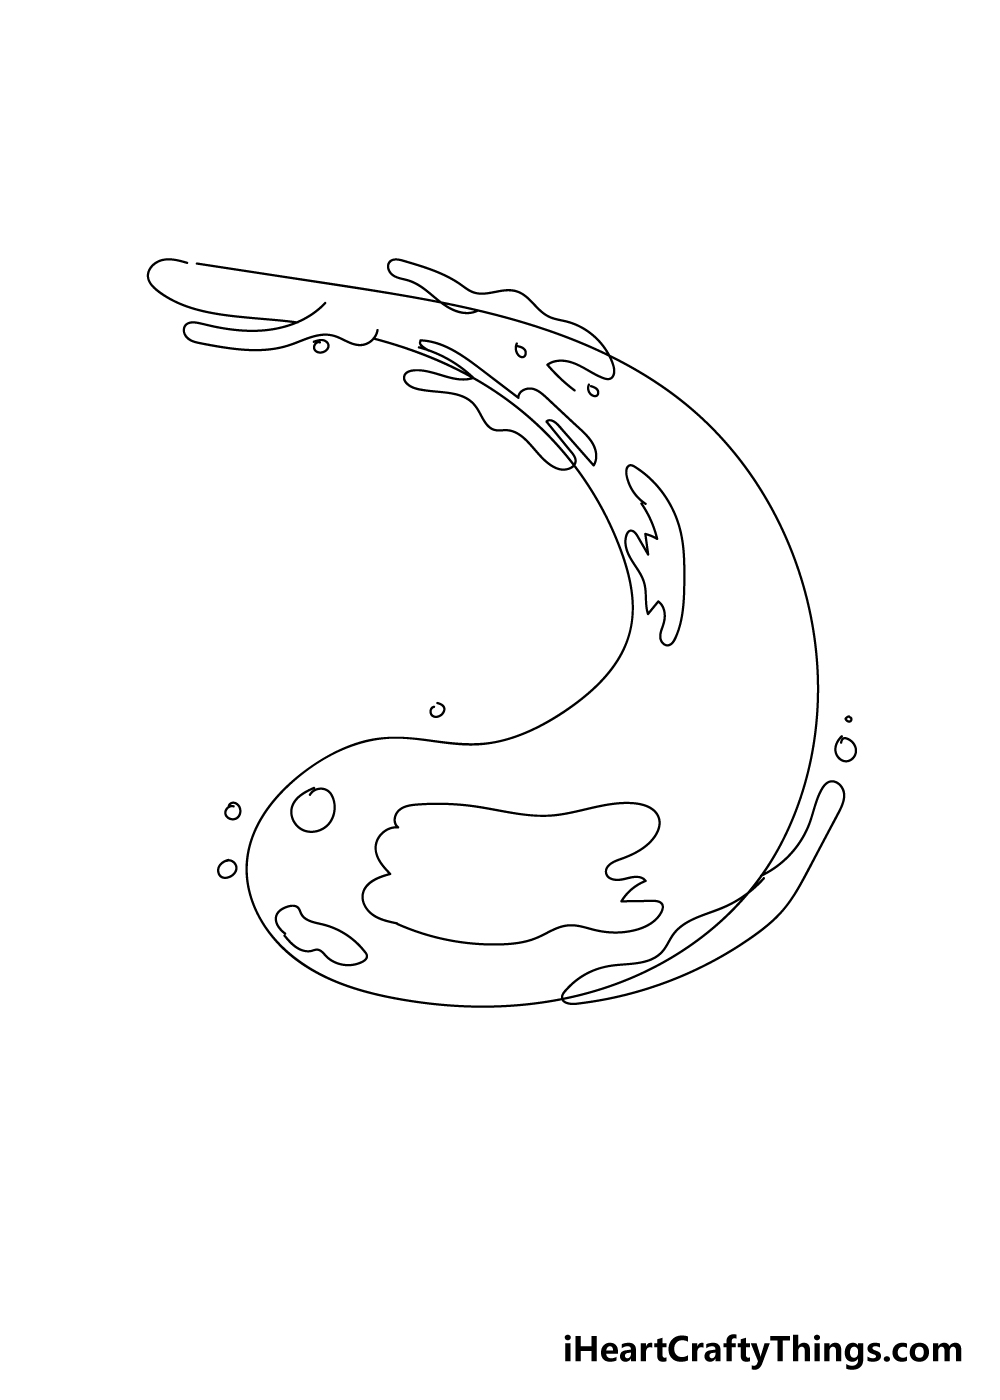
In this step of your water drawing, you will be adding more curved shapes inside your guide shape. In this step, you will add some thin, curved shapes that will extend out of the water flow.
You can also draw some small circles around the shape to show water splashing out of the shape. Once you’ve added these parts, it’s on to the next few steps!
Step 4 – Add some more shapes extending out from the shape
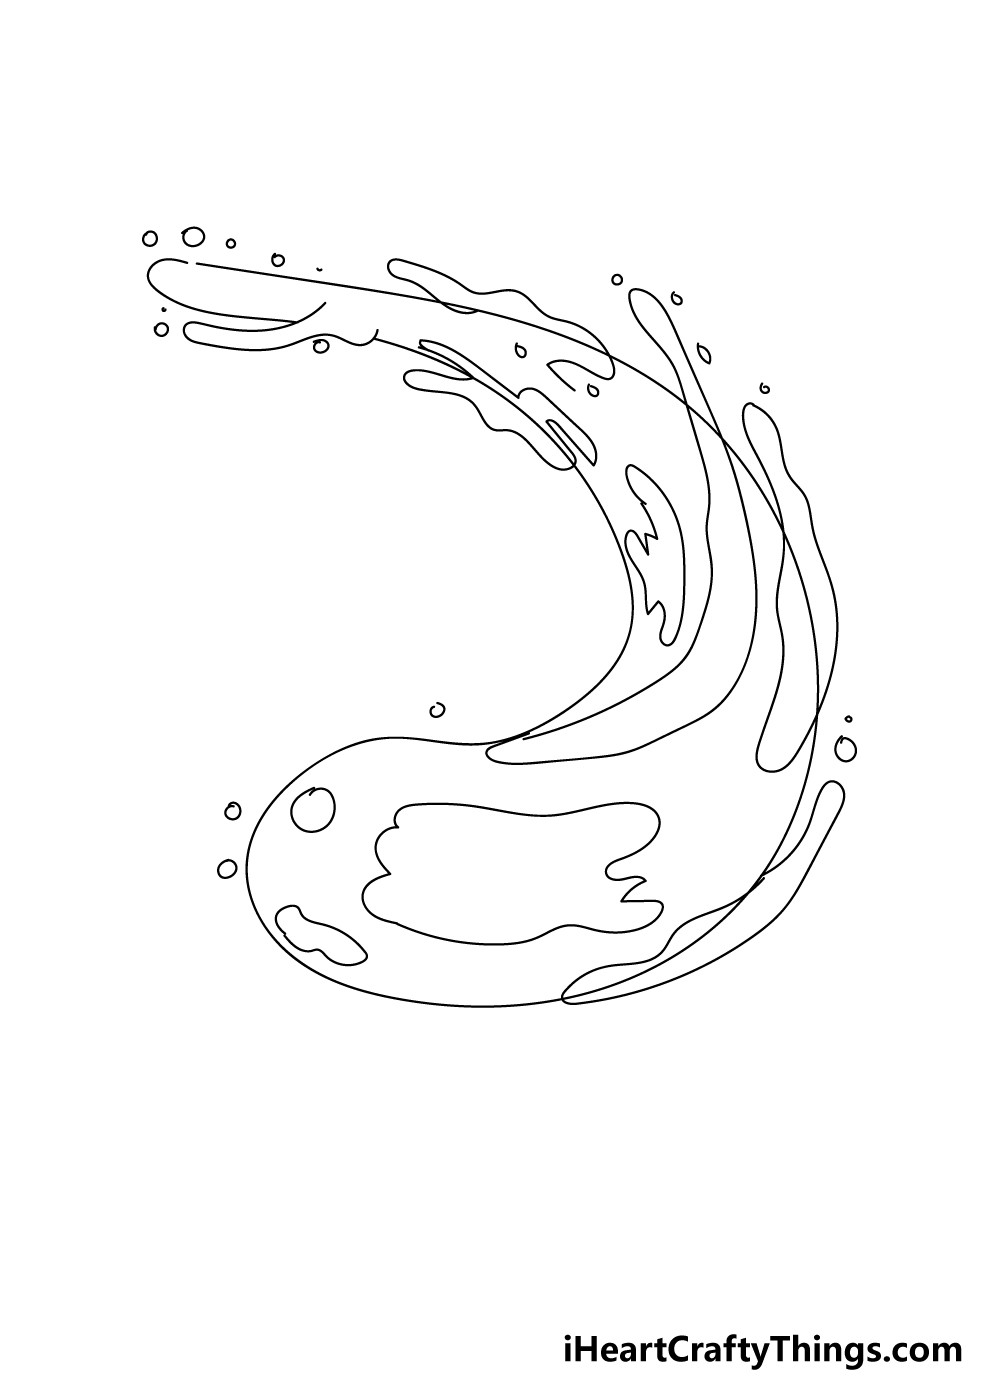
We shall keep on adding some more long, thin shapes in this step on how to draw water. These will extend out from near the center of the water flow and will also extend out of the main shape outline.
Also, don’t forget to add some more small circles around the shape to have more water splashing out.
Step 5 – Erase the lines that you won’t be needing
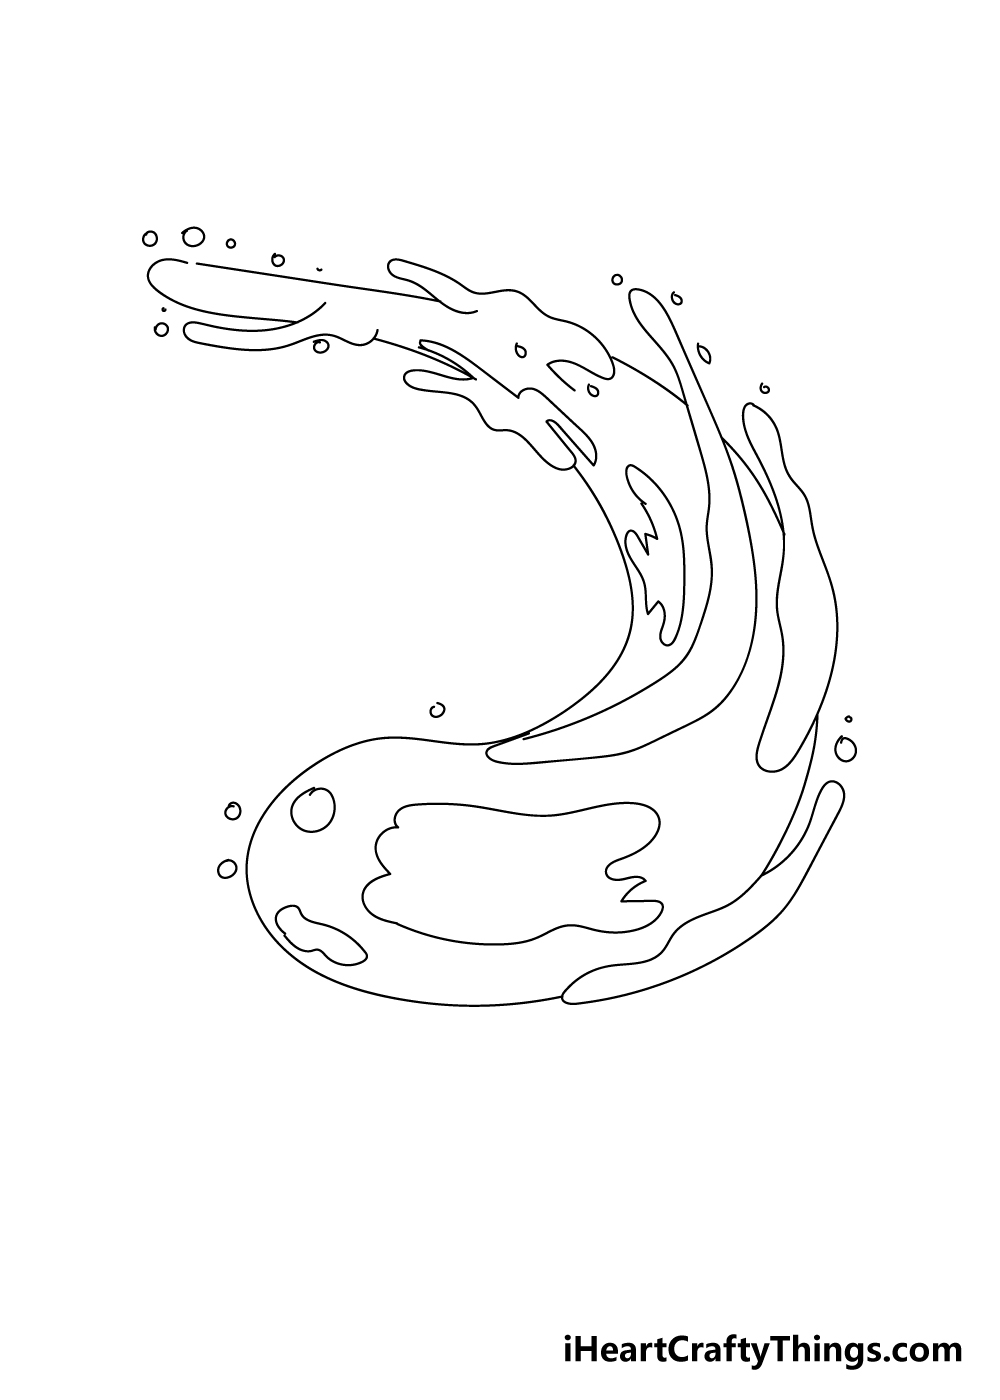
We shall be moving on to the coloring stage of your water drawing soon, but for now we shall finish off the final details and erase any lines we won’t be needing.
First, using the reference image as your guide, you can draw over some of the original shape from step 1.
Then, you can carefully erase any of it that you won’t be needing. Before you erase any lines, be sure to wait a few seconds for the pen ink to dry fully!
Before you move on, you could also add any extra details or elements that you like.
There are some fun ideas you could do, for example you could have a dolphin emerging from the water or maybe have the flow of water coming out of a faucet.
Those are just a few ideas out of many that you could go for, but what other ideas can you think of to finish off your drawing before coloring in?
Bonus: Use These Tips To Make Your Water Drawing Easier
You’re very near the end of this guide on how to draw water, and you’ve worked hard to get to this point! However, this is one of those drawings that may have seemed easy at first but proved to be a lot more complicated.
Even though it is a simple drawing of water, something we see every day, there are a lot of details and specific forms that need to be drawn.
There are a few ways that you could make it easier, and we wanted to share them before continuing. One way you could make it easier would tie into the next step where we color it in.
In the guide, we drew the outlines and details, and then we will add color in the next step. Instead of drawing these outlines, you may find it easier to use a paintbrush.
In fact, you may need a few paintbrushes of various sizes. You would also ideally need a few different shades of blue. Then you can represent the flow of the water with your brush strokes.
Another way to make it easier would be to draw the water in a more specific shape or form. For example you could draw the water in a glass.
This would be as simple as drawing two diagonal straight lines and a curved line on top. Then, you could add a few of the water details inside the ‘glass’.
This would help you to maintain the design we did in the guide but will make portraying the form of the water much easier. Drawing the design and details with a light pencil would also be a good way to prepare for the drawing.
Then, you will be ready to color in this drawing of water in the next step!
Step 6 – Finish off your drawing with some color
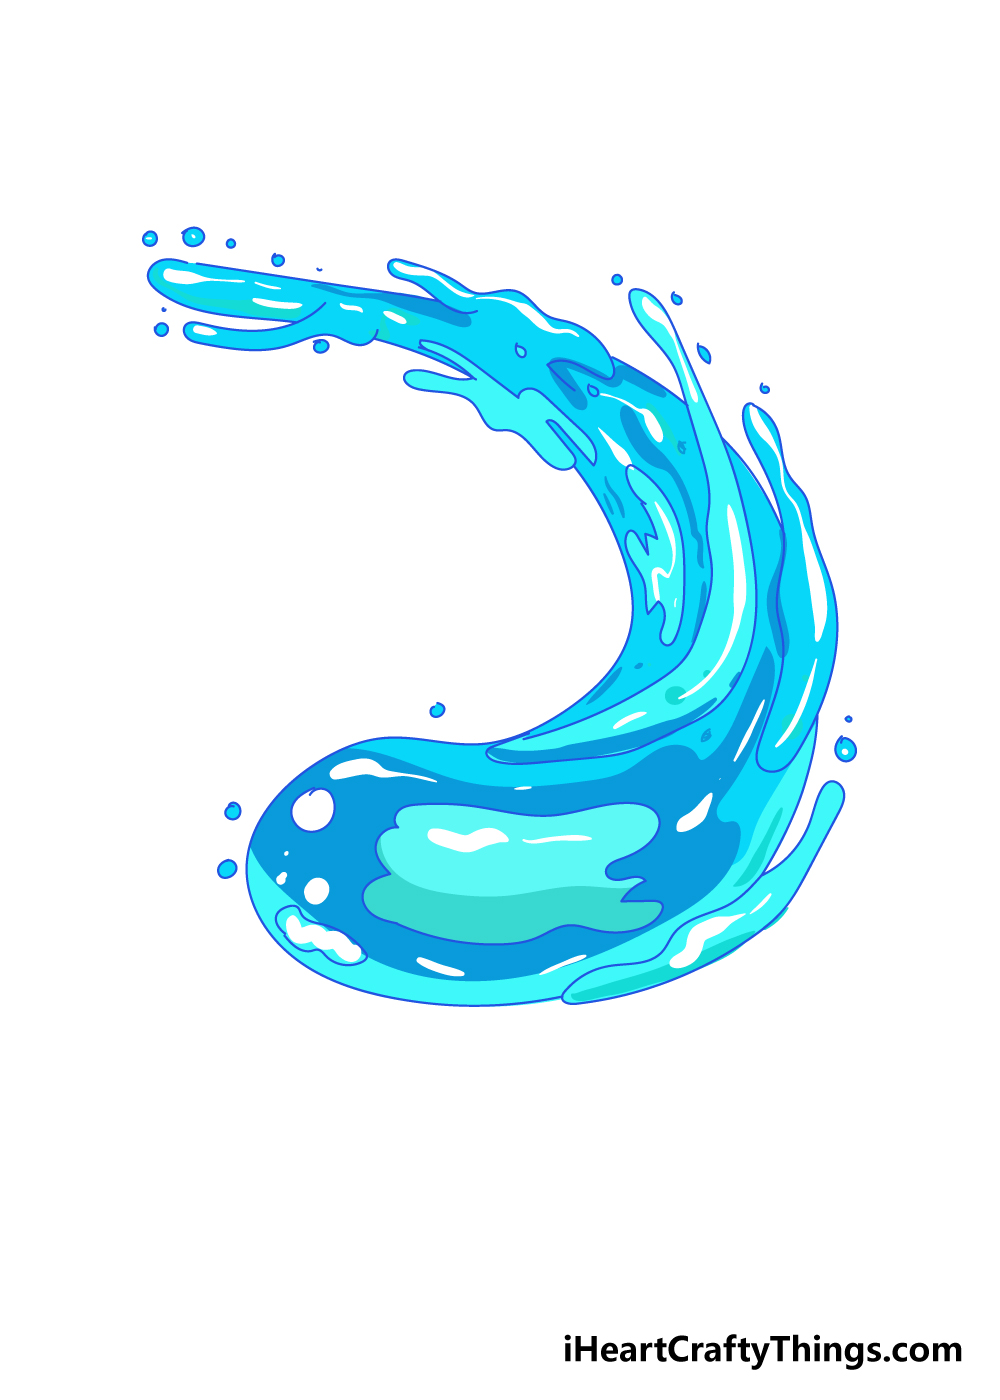
Now that you have reached the final stage of this guide on how to draw water, you can relax while having fun coloring your beautiful drawing!
As you can see in our reference image, we went with different shades of blue and white for our drawing to give it a fresh, cool look.
This is an approach that you could take as well, and it would be a great idea to use as many different shades of blue as you can!
If you would like a more stylistic image, however, you could also incorporate all manner of your favorite colors to this image.
It would look stunning as a technicolor mixture to really build the image up and make it pop!
No matter what you go for, you can also alter how the colors look with the art mediums that you use.
If going for a blue color scheme, I would use some watercolor paints to give a softer look to the image.
You could also use something like acrylic paints, colored pens or markers for a brighter, more vibrant image.
Which colors and art mediums will you use? We can’t wait to see what you choose!
4 More Ways To Make Your Water Drawing Unique
Go with the flow as we make this water sketch even cooler with these tips!
For this water drawing we created together, we have a flow of water that looks quite abstract. It’s a cool design, but you could also incorporate it into something more recognizable.
For example, you could turn it into a wave in the ocean or maybe water pouring from a bottle.
These are just a few ideas of how you can contextualize this flow of water, but there are many other creative ways you could do it!
What are some ideas for what you could turn this water into?
We like to compare things to their opposites, and you could do that with this drawing of water. We think it would look so cool to have a similarly shaped fire design compared to the water one.
This would be a great way to highlight the rivalry between these two elements, and you could use the guide to create the fire shape as well. How else could you show the difference between elements?
Water is also often associated with fish and other aquatic creatures, and they could be fun to add to this water sketch as well. You could draw some smaller fish in and around the water to begin with.
You may even want to add bigger creatures like sharks or whales, and you could even work in some mythical creatures.
There are lots of creative ways you could incorporate some sea life into your artwork and we can’t wait to see what you come up with!
It can be hard to depict water on a flat surface, but certain art tools and mediums can be used to make it easier. Paint is a common medium for depicting water, and you could use it with this water drawing.
Using long strokes of paint in flowing motions would be great for this image, and using the right colors would also make it look more realistic.
What are some other art mediums you could use?
Your Water Drawing is Complete!
That brings us to the end of our step-by-step guide on how to draw water! We created this guide to make this subject much easier for you to tackle.
Our goal was to not only make it helpful for you to use, but also lots of fun! We hope that you had a great time while learning how to draw this tricky subject matter!
Now that you have finished your awesome water drawing, you can start putting your own touches on it!
You could do this by drawing some fun extra details, changing up the design a bit or by getting creative with your colors and art mediums.
The fun continues on our website, where we have plenty of more awesome step-by-step drawing guides like this one for you to enjoy!
There is a guide for every taste and skill level, and we upload more guides all the time. Be sure to check in often to make sure you don’t miss out!
Once you have finished your water drawing, we hope that you will share it on our Facebook and Pinterest pages for us to admire! We’ll be looking forward to seeing how you tackled this guide!