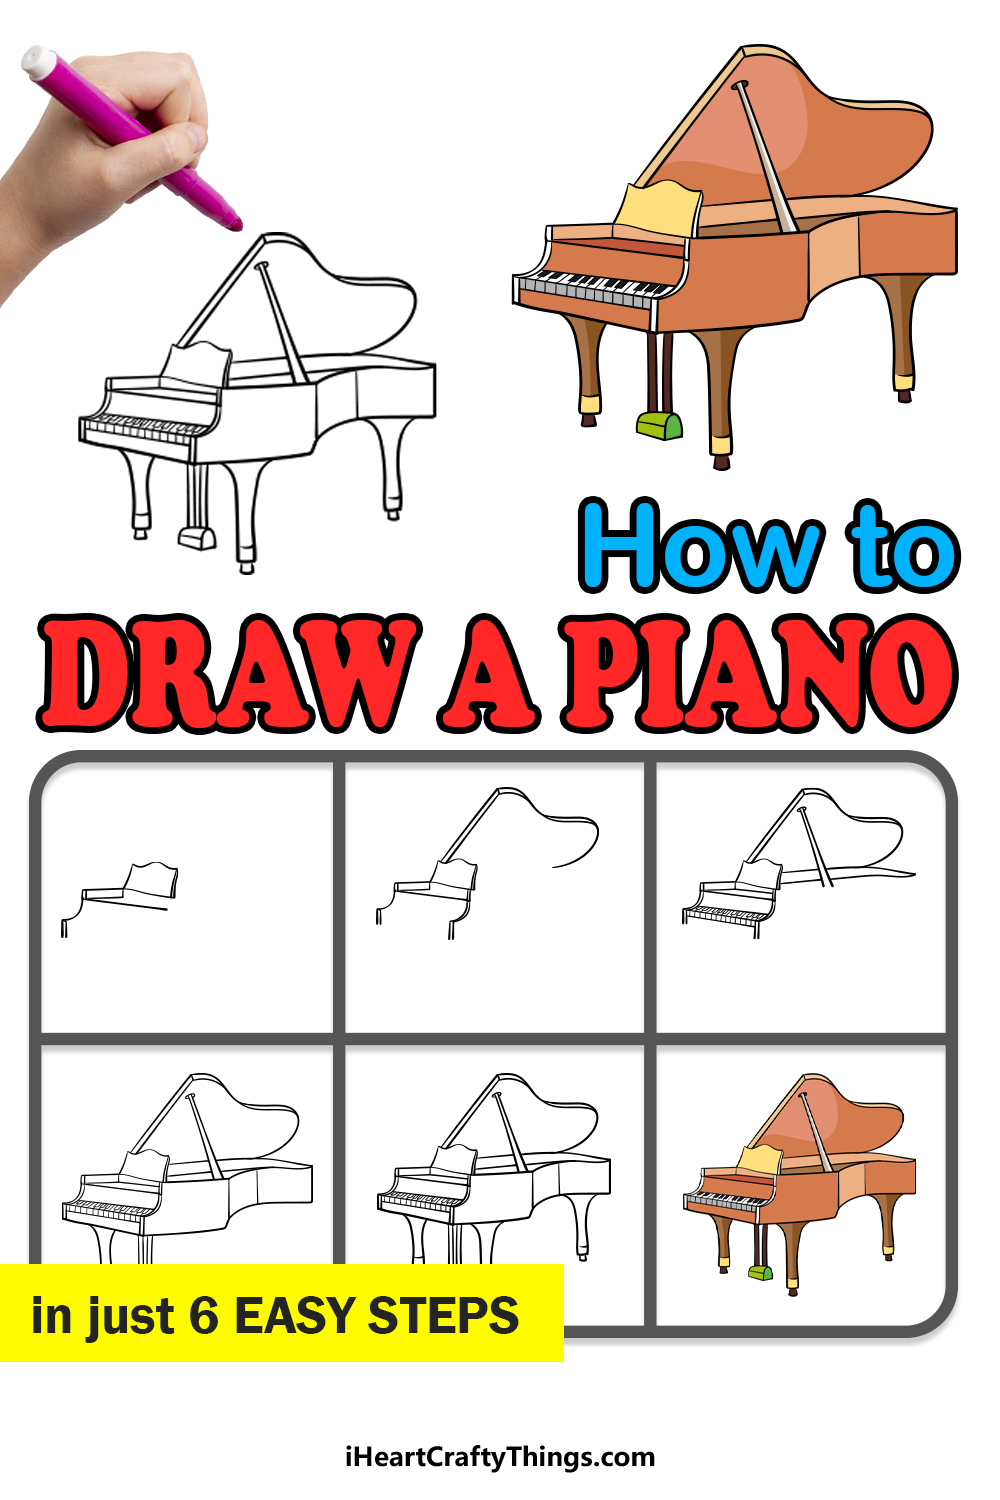
This guide on how to draw a piano will be perfect for any music enthusiast out there! This tutorial for kids will make it easy for anyone to recreate a detailed piano of their own.
The piano is one of my favorite instruments. When a talented player is at the keys it’s like a magic spell that puts everyone listening into a blissful trance.
Pianos are also beautiful in how they’re constructed, and the very sight of them is enough to make the viewer think of music. Of course, many people would like to take it even further and draw one, but it’s quite a challenge.
This guide will walk you through everything you need to know to recreate a piano in a detailed way. Then, you can even take it further and draw some additional details when you’re done!
Discover How To Make Your Piano Drawing
How to Draw A Piano – Let’s get Started!
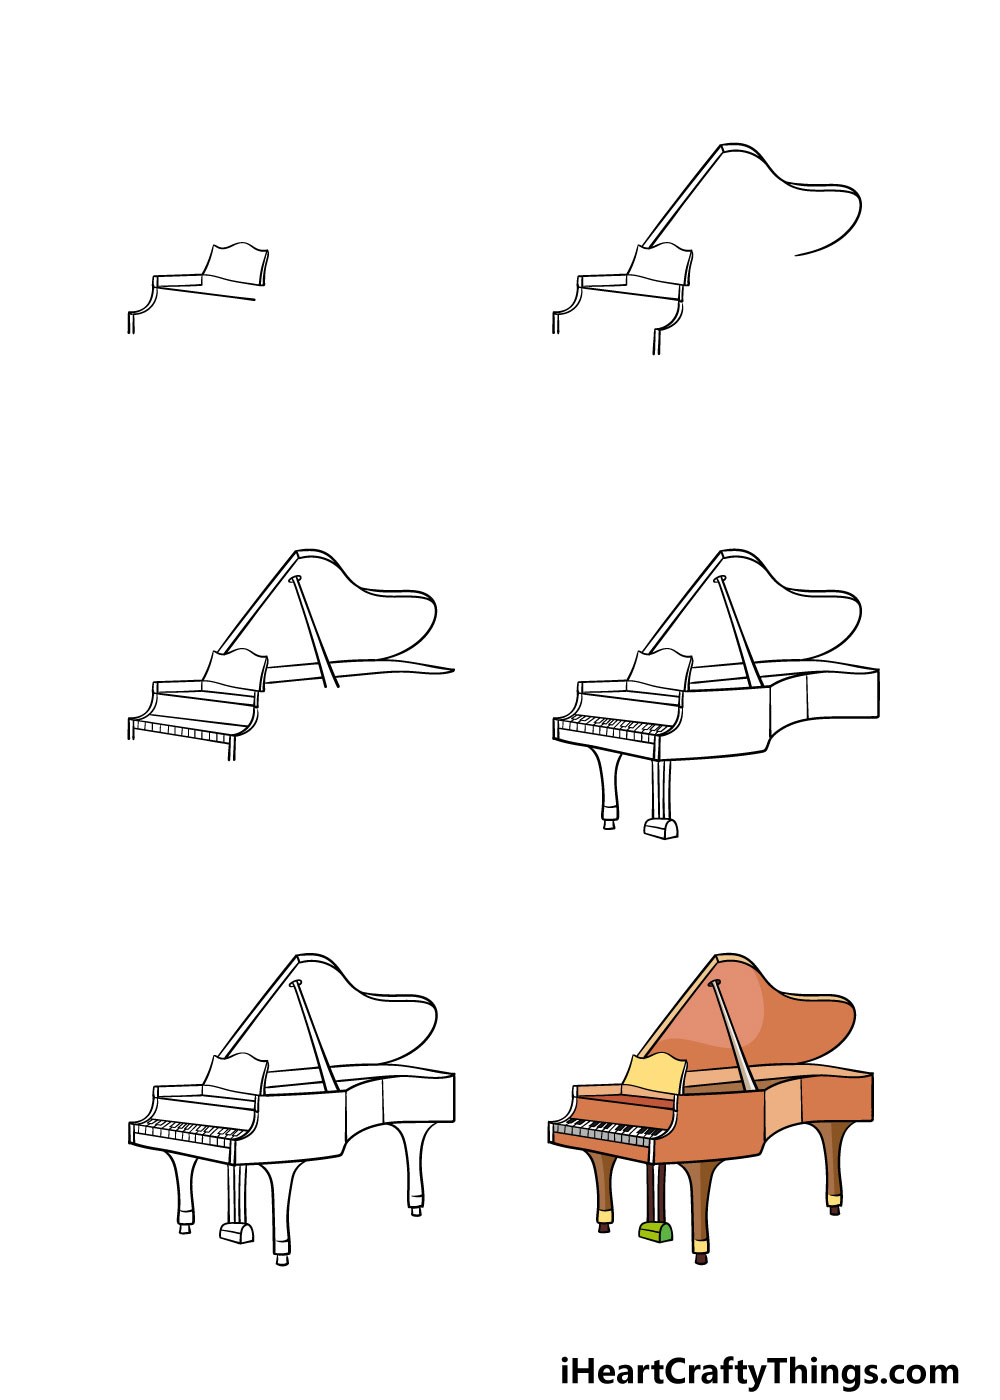
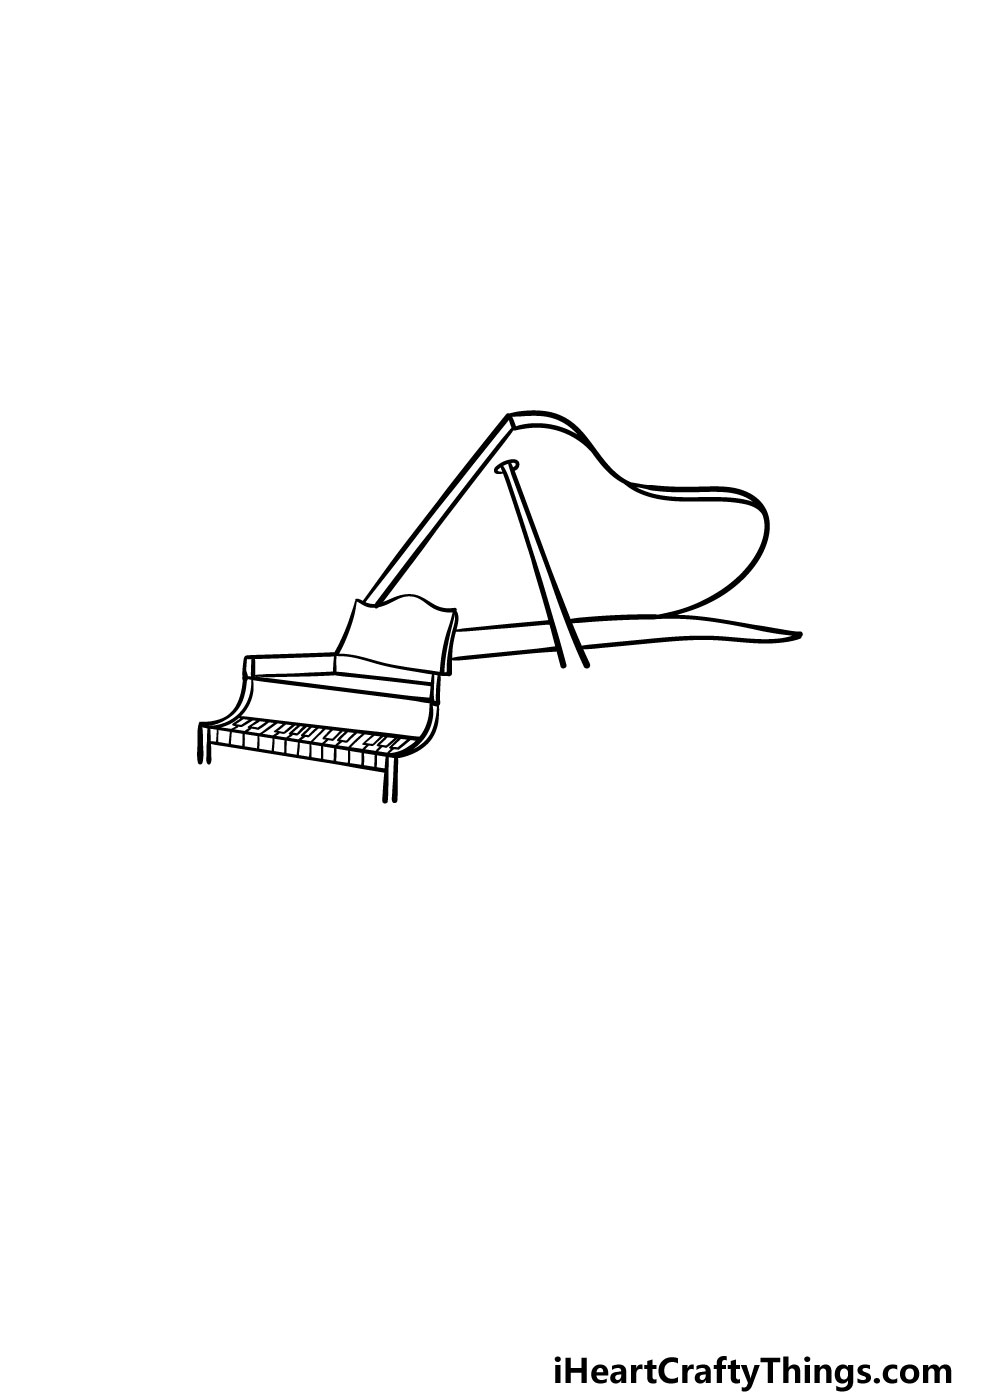
Step 1
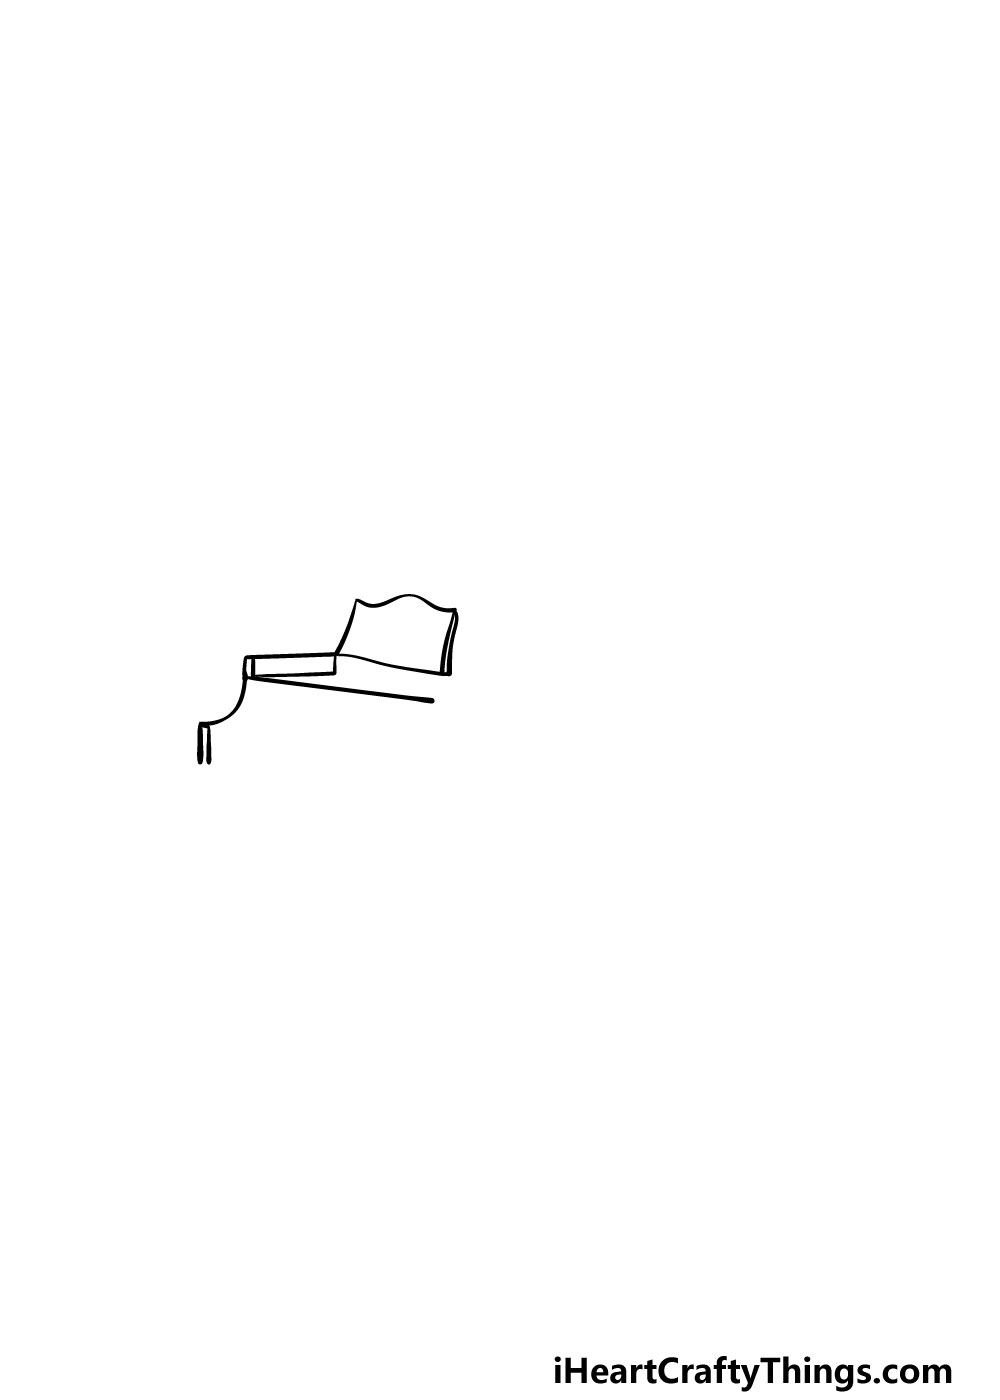
To get this guide on how to draw a piano started, we will begin with the top of the piano. First, you can start by drawing the music rack.
This is the small panel at the center of the piano that players can rest their sheet music on as they play.
Then, you will be using some straight lines below this for the shelf beneath it. This will also have a little ridge at the left-hand side of the shelf.
Then, you can use a curved line extending down from it for the side of the piano as it’s shown in the reference image.
Once you’ve replicated our reference image then you’re ready for step 2!
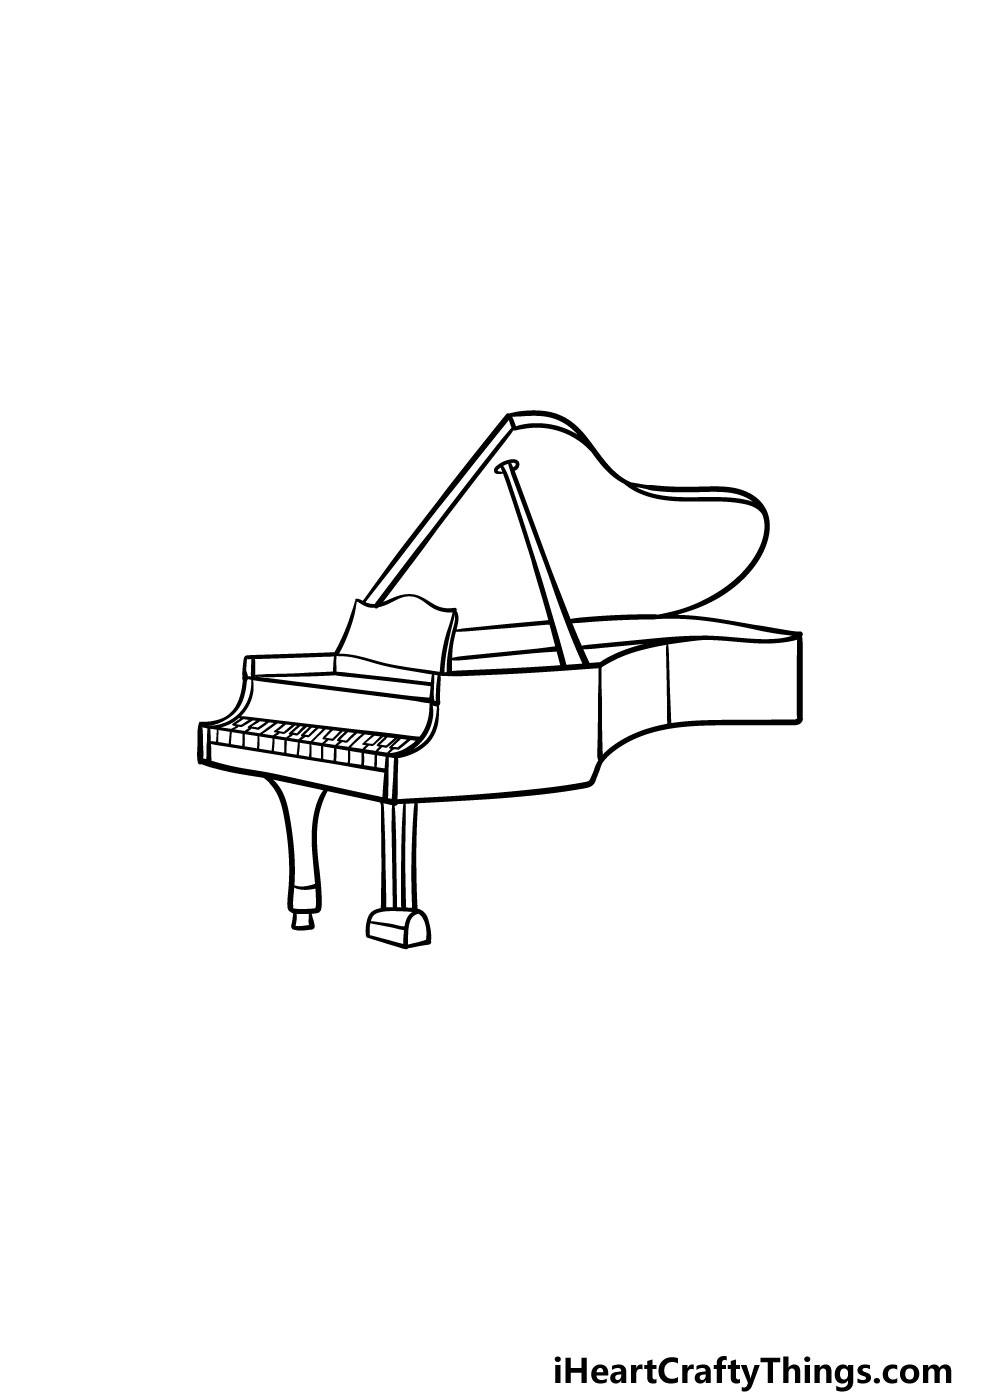
Step 2 – Draw the lid of the piano
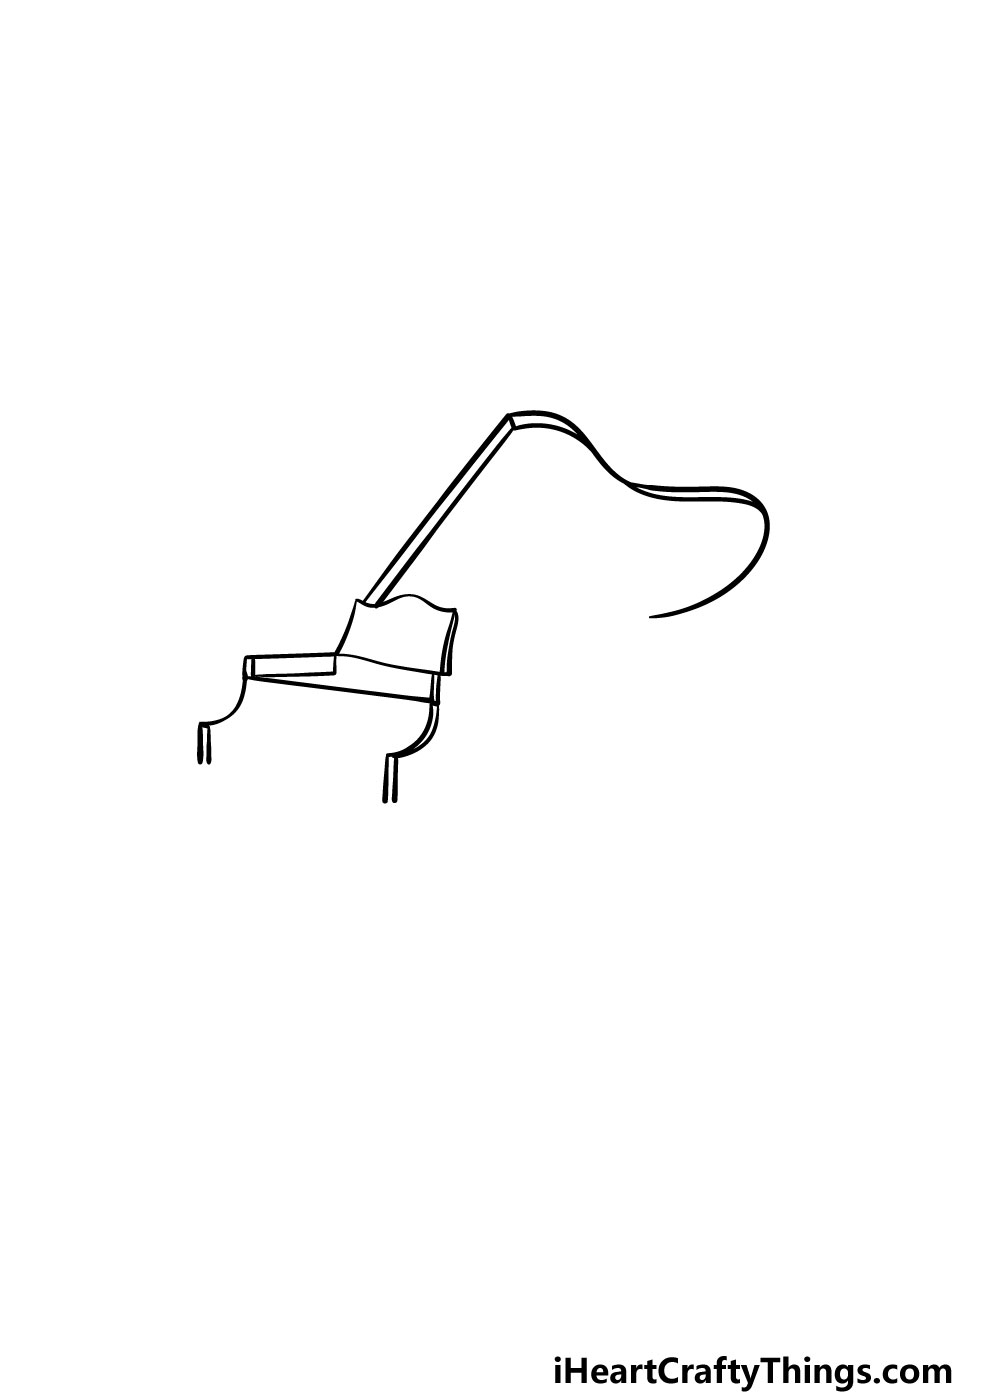
The kind of piano that we will be drawing has a large lid that can lower down to cover the strings of the piano.
We will be adding this element in this part of your piano drawing. To do this you will need some straight lines along with some curved ones to create the lid as it’s shown in our reference picture.
Finally, you will also be drawing a curved line down from the right-hand side of the shelf.
Step 3 – Now, you can draw the keys and other elements
It wouldn’t be much of a piano without some keys to play it, so we shall add them in this step of our guide on how to draw a piano.
To do that, you can use some straight lines to draw the many keys onto the piano where you see them in the reference image.
Before moving on, you can also add some more lines to finish the shelf that you started earlier. Also, you can draw the lid prop keeping the lid open in this step before you move on.
Step 4 – Next, draw the body of the piano
We will be working primarily on the body of your piano drawing in this step. The body will be made up of several sections, and you can build it using some curved lines.
You can also add the first leg and the pedals to finish off this step. With those elements there are just a few more final details to add before you start to color in your piano drawing!
Step 5 – Now, you can add the remaining legs
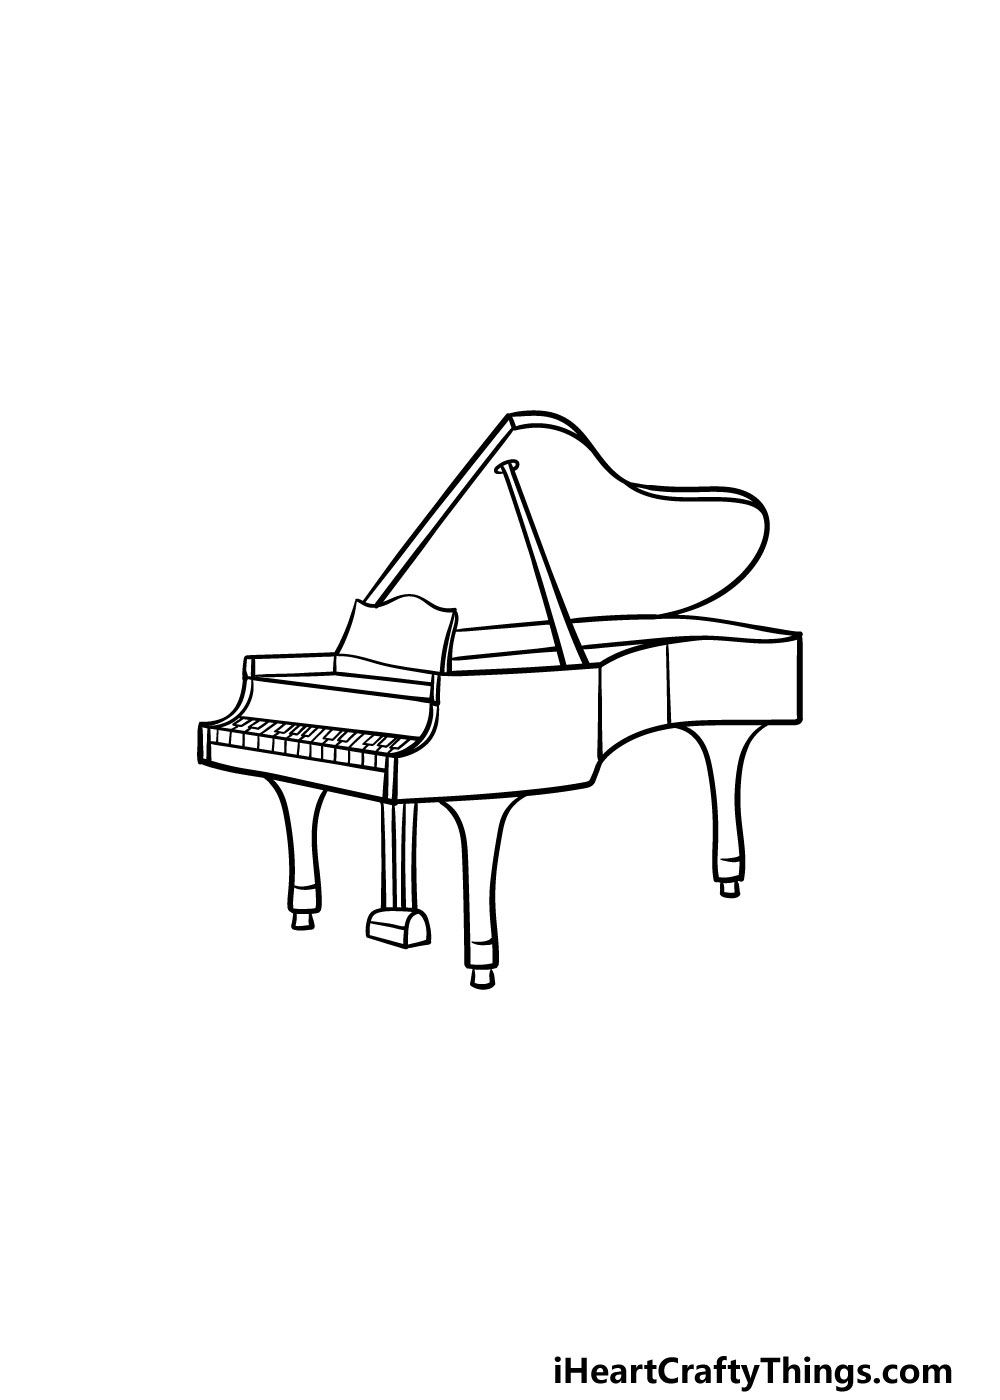
This step of our guide on how to draw a piano will see you drawing some final details and elements before the final step.
There are just two more legs to draw, and they will look very similar to the first one that you drew in the previous step.
Then, once you have finished these elements you have completed your drawing and are ready for the final step!
Before you move on, you can add some details of your own to this drawing first. Perhaps you could raw yourself sitting at the piano and playing it!
Or, you could look up pictures of your favorite instruments and draw them into the background to make this image look like a concert just waiting to happen.
There are also lots of fun smaller details and additions you could add to the piano to really make it your own, so be sure to have fun and be creative with it!
Step 6 – Finish off your piano drawing with some color
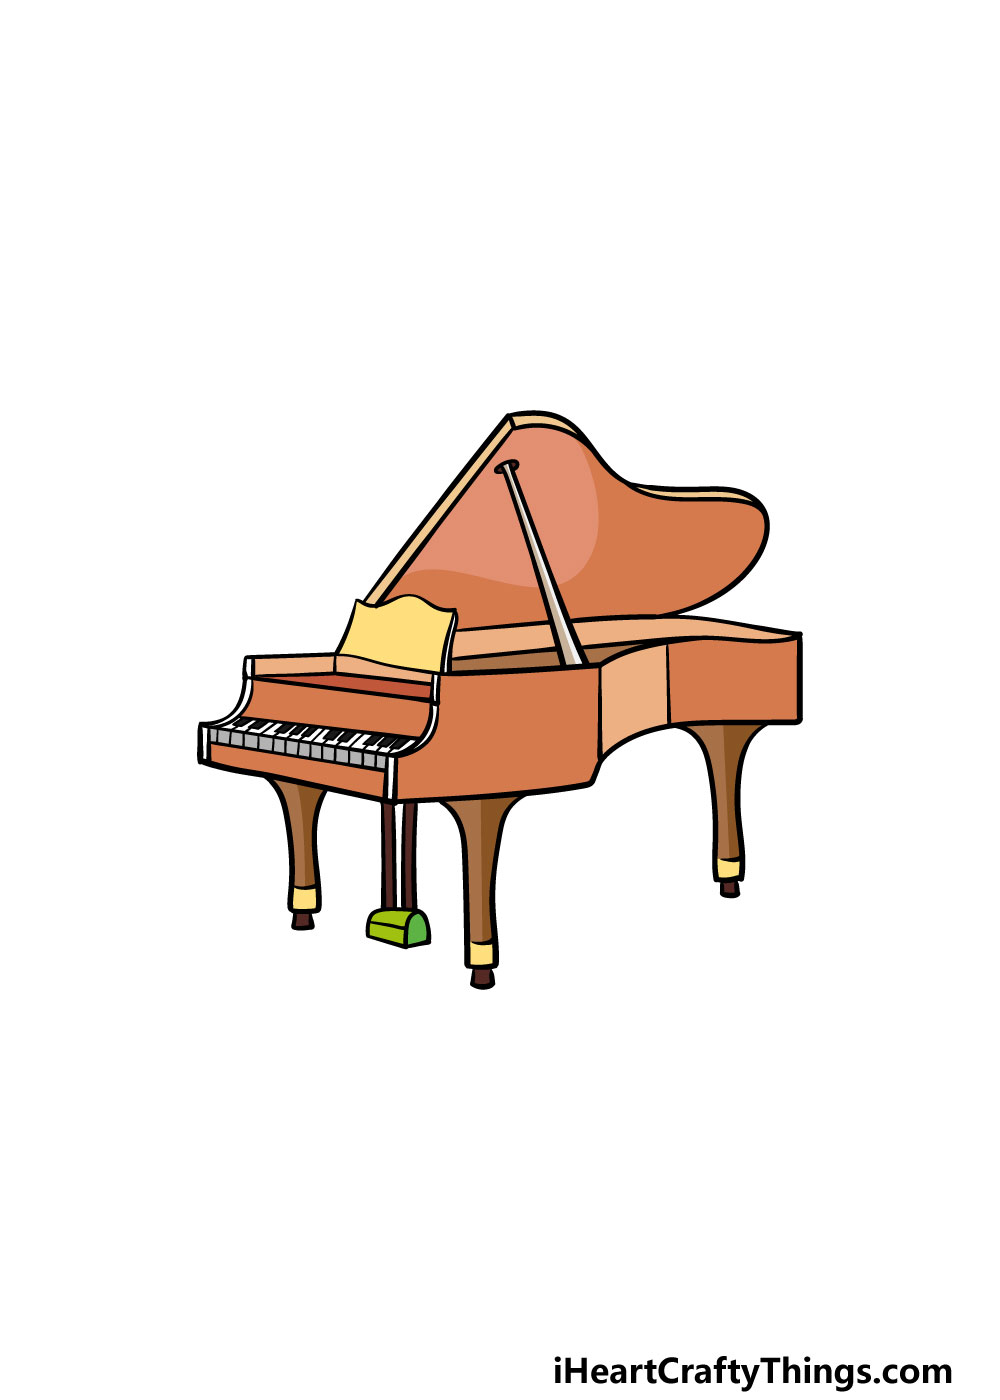
You have now reached the final step of your piano drawing, and this step should be lots of fun! This is the part where you get to take over and show us how creative you can be with your amazing color choices.
In our image, we went with a more muted collection of different shades of brown to color in the picture. We also added some yellow and green to some smaller elements for some extra variation.
While you could try to replicate our color choices, you certainly shouldn’t feel limited by them! You can use any colors that you may love to color in your piano drawing.
Pianos come in a huge variety of different styles and colors, so you have many options at your disposal as you color in.
You can also achieve the colors you desire using a variety of different art mediums and tools. For brighter, more vibrant tones you can use ones like acrylic paints, colored pens or markers for colors that pop.
Alternatively, watercolors, colored pencils and crayons are great for more muted, subtle colors. It’s completely up to you, so be sure to experiment and see what happens!
Do this to take your piano drawing to the next level
Make some colorful music as we show you how to make your piano drawing even better!
This piano sketch we have created together looks great already, but you could use some small details to make it even better. For instance, you could draw a book of music upon the stand that the player would use.
If you really want to get into it, you could take a fine pen or a really sharp pencil and draw some wood grain patterns onto the wood of the piano. These are just a few of the small but effective details you could add!
Having a piano is one thing, but you also need someone to play it! That would be a great thing to add to your drawing of a piano.
When doing this, you have a few options of how to do it. For example, you may have a favorite music artist who plays piano.
You could draw a picture of them sitting at the piano to show them playing it! That’s one idea, but you could also draw yourself playing it.
The person could be drawn in a simple cartoon style and it would still look great.
Whether you add a person or not, adding a background would be a great way to elevate this piano sketch. There are so many you could do, and a concert stage would be a great one.
The piano could also be in a park or maybe a cozy house for a few other ideas. Where would you like to put this piano for this picture?
Finally, we think it would look great for this drawing of a piano to have some more musical elements around it. For example, you could draw more instruments you love surrounding this one.
Or, you could draw some musical notes or chords around it. Another idea would be to write some lyrics of a song you love into the background to finish off the theme.
What other musical elements can you think of that you could add?
Your Piano Drawing is Complete!
With that, you have successfully completed this guide on how to draw a piano.
Drawing one of these incredible instruments can often be a challenging or frustrating endeavor, so we hope that with the help of this guide that you found it to be easy and fun!
Breaking down a new drawing into smaller, more manageable steps is usually the best way that you can make a new drawing easier to take on.
Now that you have completed this guide, you can still take it even further by adding your own details and elements!
We listed a few suggestions such as drawing someone playing the piano or adding a few instruments to the background. What else can you think of to add to this picture?
Our website is full of many incredible guides for you to enjoy, so when you’re ready for more then we hope to see you there!
We upload new guides all the time as well, so be sure to visit often so you never miss out!
Once your piano drawing is complete, we would love to see your incredible artwork! You can let us see it by sharing it on our Facebook and Pinterest pages for us to enjoy!
Here Is A Sketch Of A Piano To Inspire You!
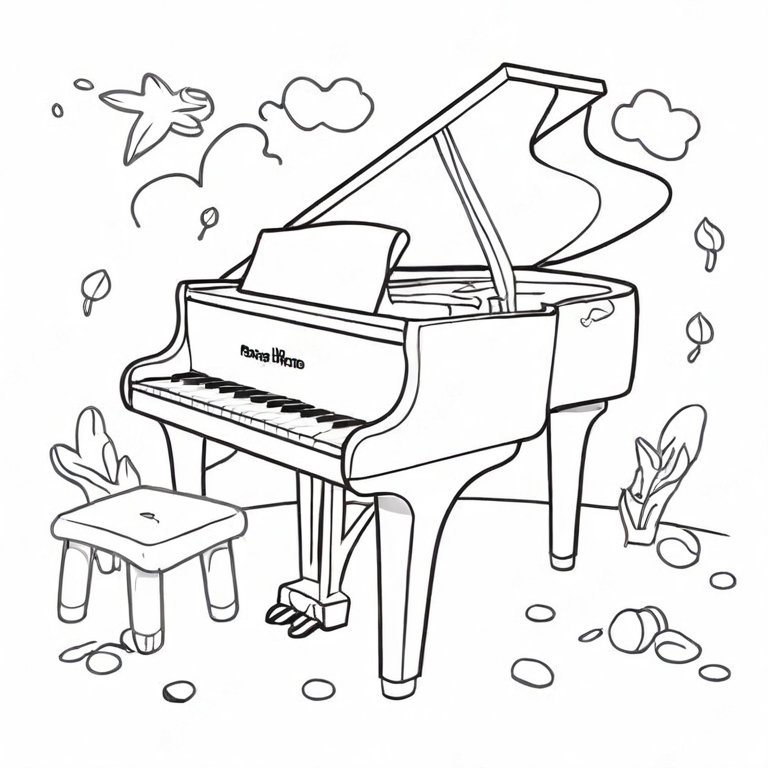
Pianos are such beautiful instruments, both in how they look and how they sound. This beauty is not always easy to portray in a drawing, though.
A bit of extra help is always handy when it comes to drawing something complicated like this piano. Our artist Amanda is here to help, as she has created this sketch of a piano for kids to help you.
The best part of this drawing is that it shows all of the details you will need to include to have an accurate portrayal of a piano.
They’re drawn in a simple enough way that it makes it easy to see how they should all look.
She also added some amazing extra details around the piano to make it look even more beautiful, and these can be tweaked and changed as you wish as well!