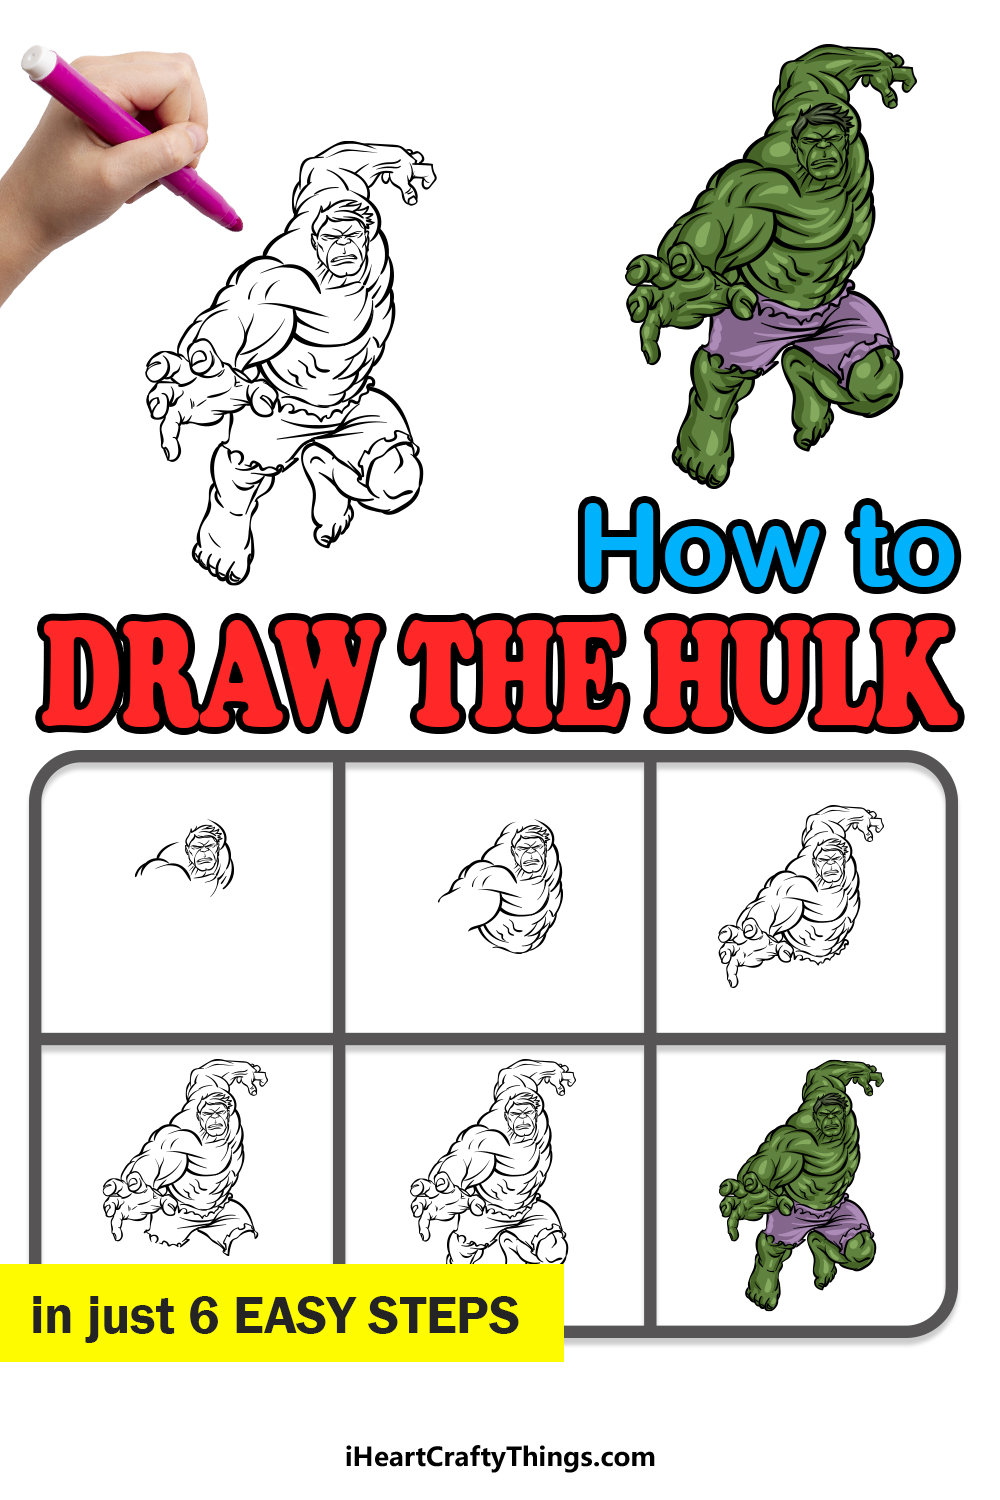
If you want to learn how to draw the Hulk, then this guide is for you! Soon you’ll be able to recreate this iconic hero.
There’s something about the Hulk that makes him stand out from other heroes. Most heroes get powers that they use with their usual abilities and knowledge, but Hulk’s alter ego loses all control as this monstrous force takes over.
He has immense power but also struggles to control it. In this guide, you will see how to make a depiction of Hulk on the rampage.
I will walk you through all of the steps so that you can see how to draw this detailed depiction of this classic character. Once you have finished the design, you can also create your own backgrounds and even add more characters.
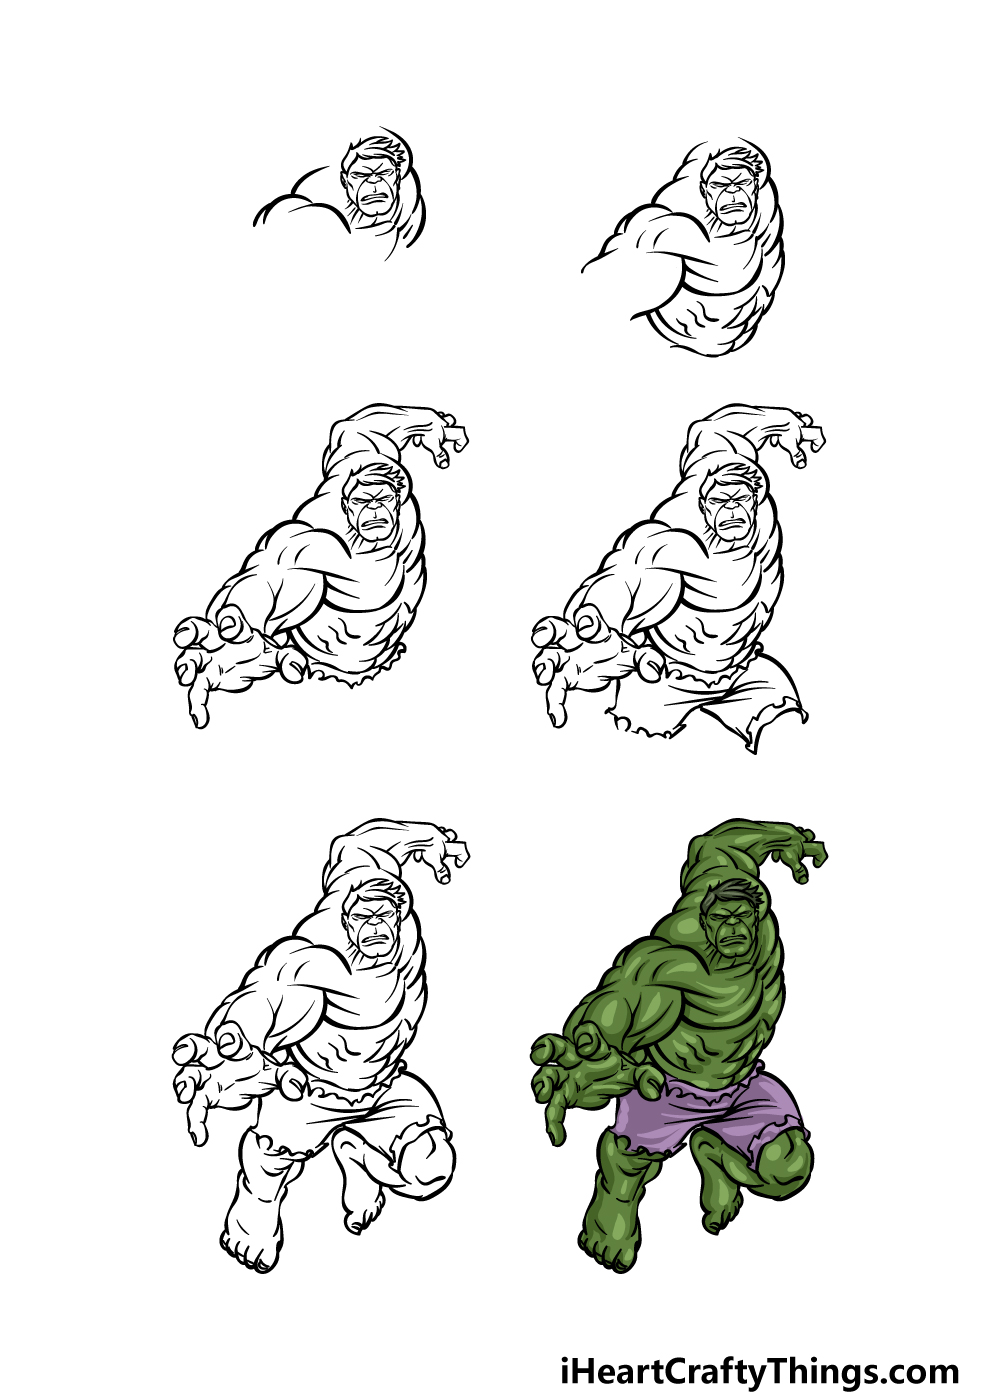
Watch These Steps To Make Your Hulk Drawing
How to Draw The Hulk – Let’s Get Started!
Step 1
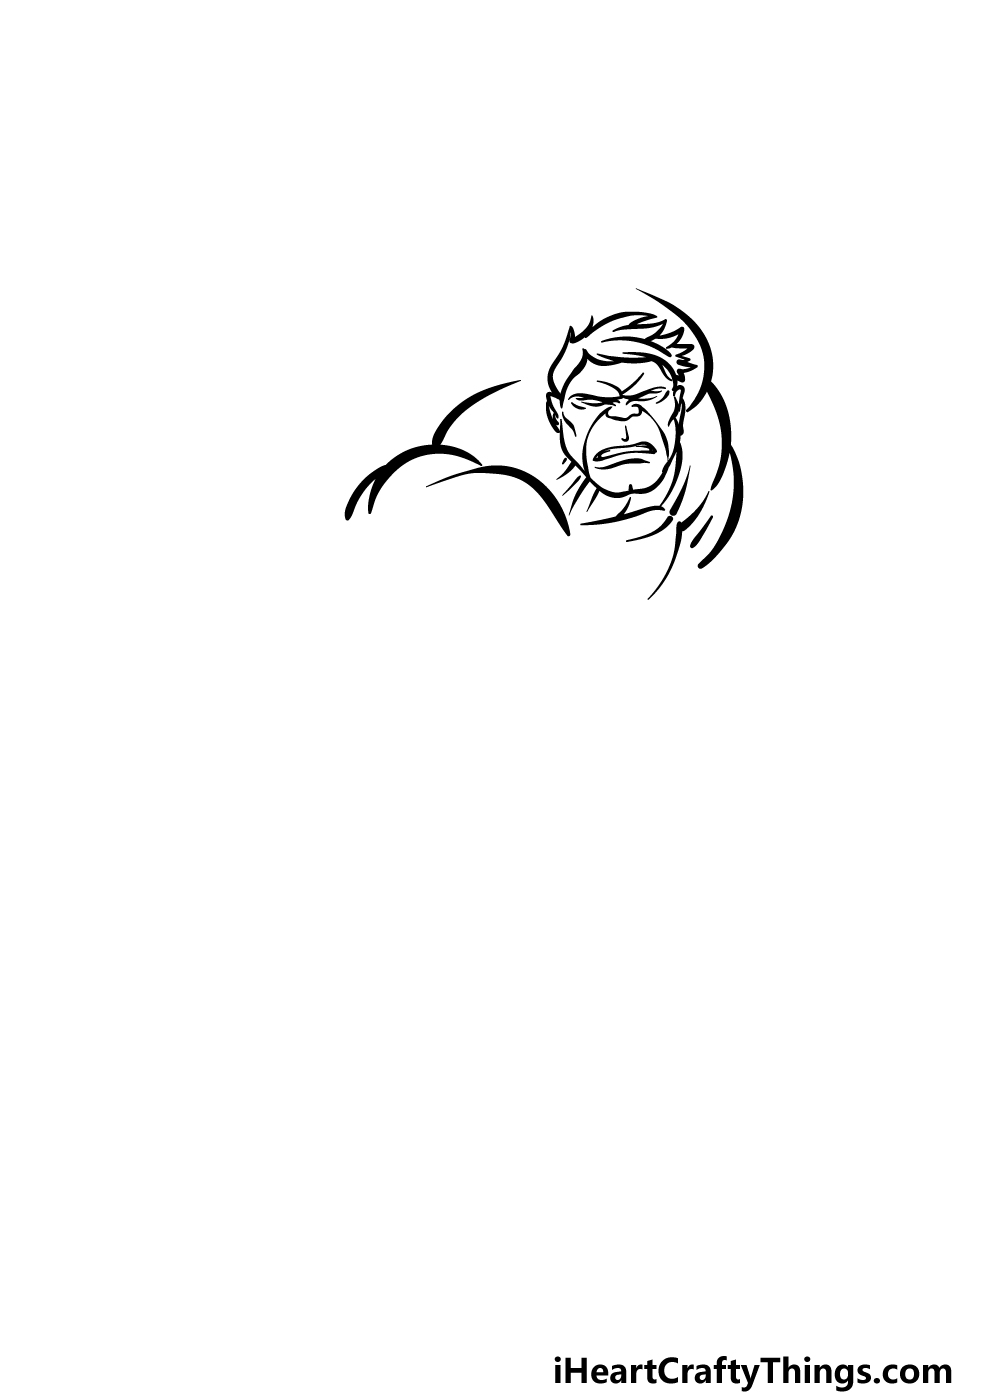
The Hulk is a character who’s known for being angry most of the time, and in this guide on how to draw the Hulk we will be portraying him on a characteristic rampage.
To get this started, we will begin with his face. You should start by using some curved lines for the outline of his cheeks and his chin, and then you can draw his ears on the side.
We will then use some more angular, pointy lines for his hair sitting messily on top of his head.
Then, you can draw his facial details. We will be using a lot of lines inside of his face to give him his angry expression.
You can then finish off this step by using more curved lines for his shoulders and the top of his chest. Then we can proceed to the next step of the guide.
Step 2 – Now, draw more of his arms and his waist
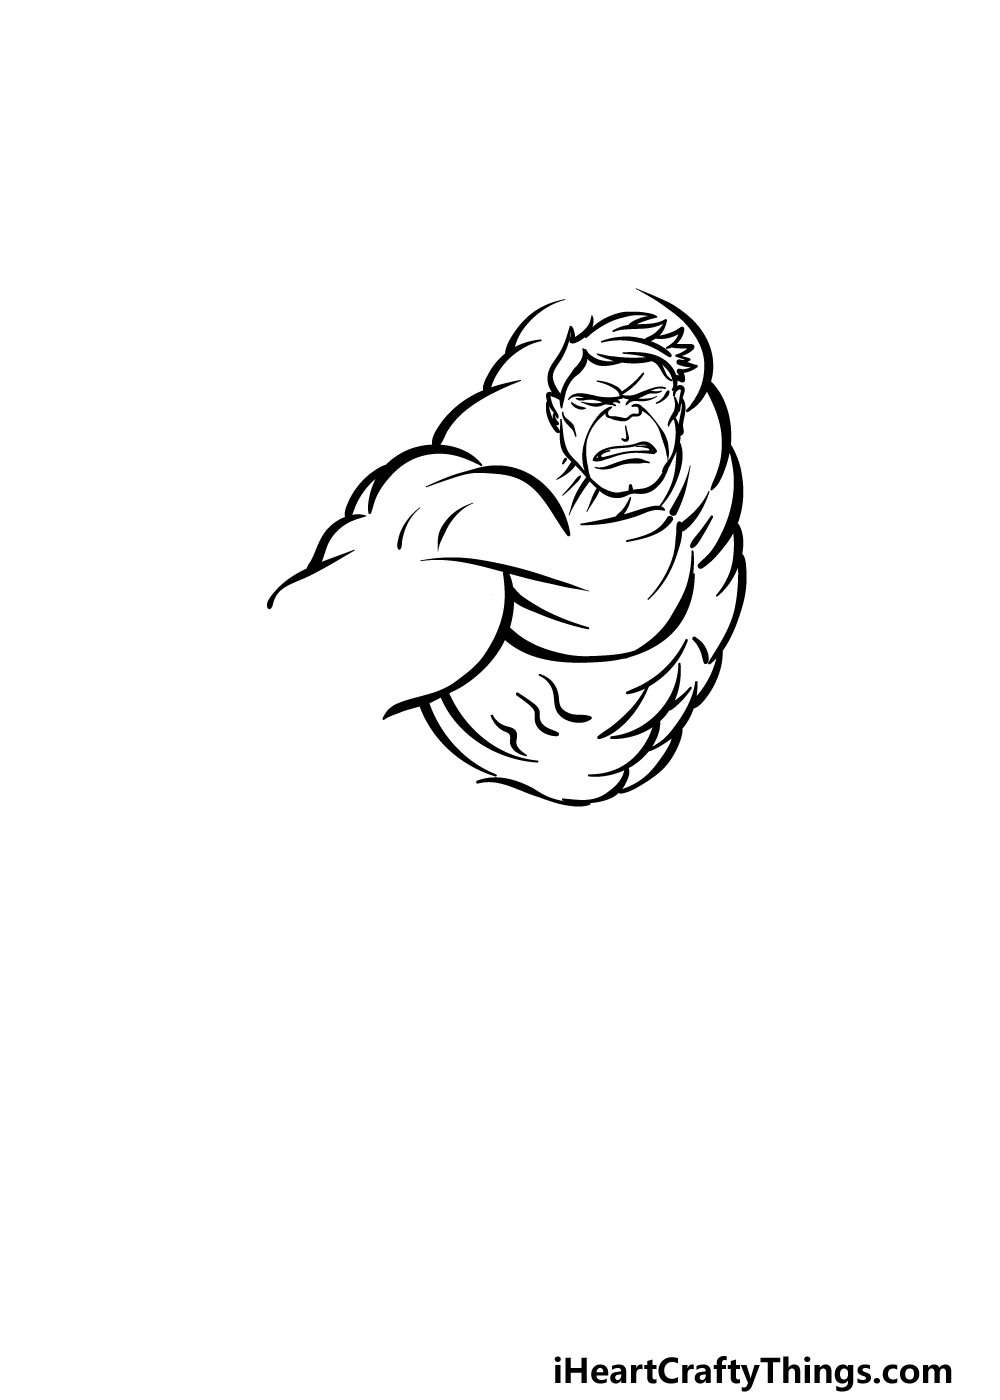
Now that you have his head and shoulders drawn, we can keep adding more sections to your Hulk drawing in this second step.
First, use some more rounded lines to add the start of his biceps attached to his shoulders. You can use some smaller curved lines connecting to one another for his back as well.
Finally, we will be drawing his waist. His waist will also have a lot of curved line details within the outline to make it look more muscular.
Step 3 – Finish off his arms in this next step
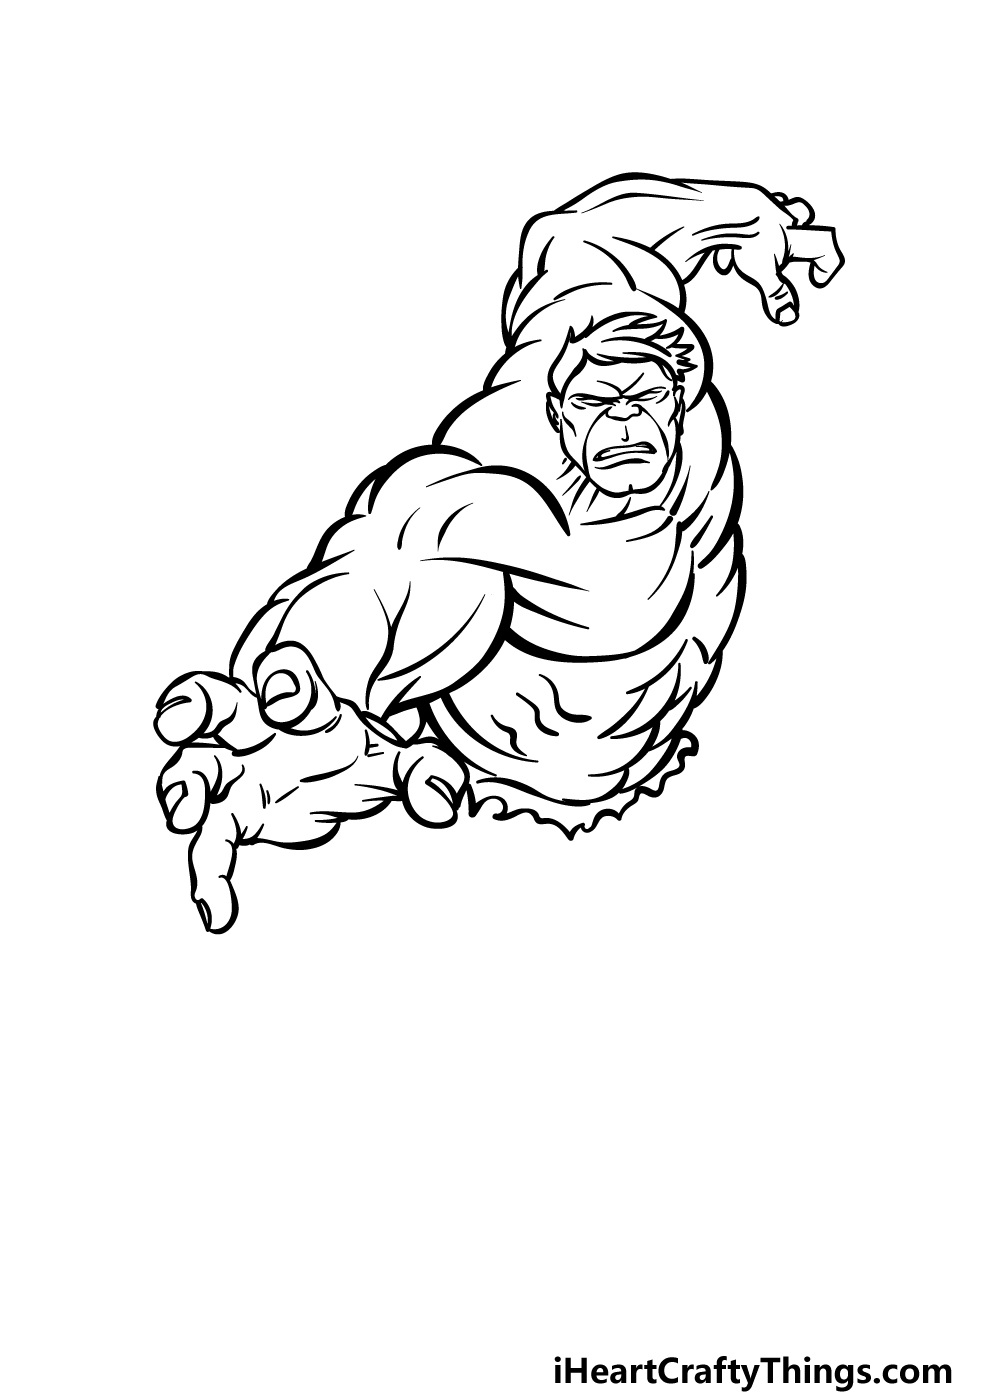
This third step of our guide on how to draw the Hulk will see you mainly focused on finishing off his arms and hands.
First, let’s draw the hand on the left. This hand will be reaching out towards the viewer and will also be the part of Hulk that is closest to us.
Because of this perspective, the hand will be highly detailed. When drawing it, you may want to closely copy the way it looks in our example.
His other hand will be reaching away on the other side of his body to show him mid-stride. You can finish off this step by using a more jagged line for the top of his ripped pants below his waist.
Then it will be time for step 4 of the guide!
Step 4 – Next, draw the rest of his pants
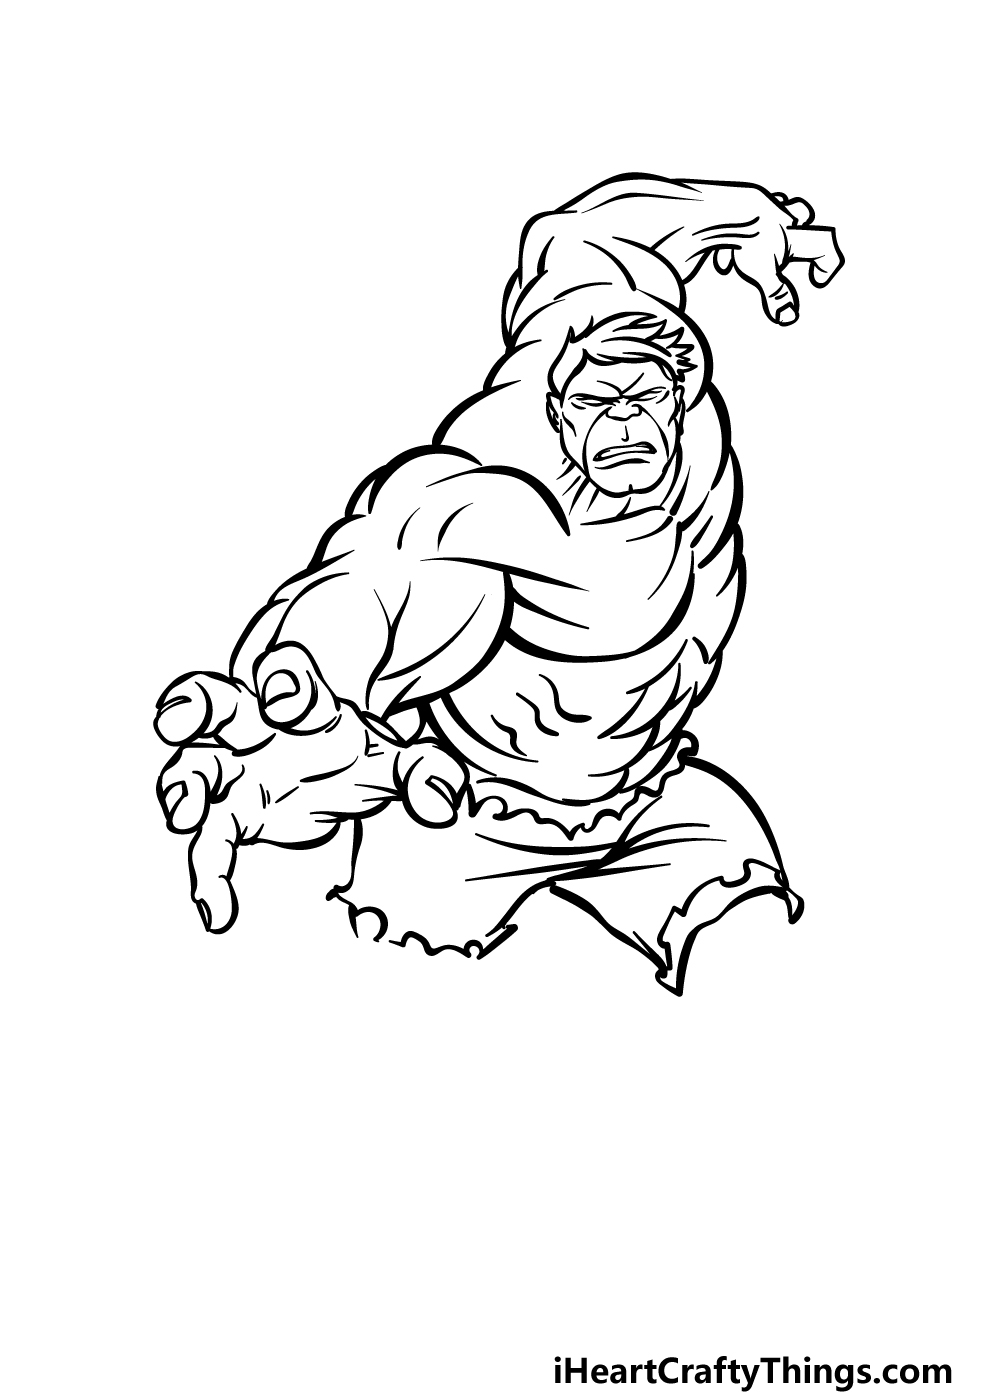
You started his pants in the previous part of this Hulk drawing, and in this fourth part we will finish them off.
One of the most recognizable aspects of his visual design is his purple pants that are ripped at the edges.
Use some smooth curved lines for the sides of his pants legs, and then use jagged lines for the ripped edges. These edges should look similar to how you drew the top of his pants earlier.
Once these are drawn, you will then be ready for the final details in the next step of the guide.
Step 5 – Add the final details to your Hulk drawing
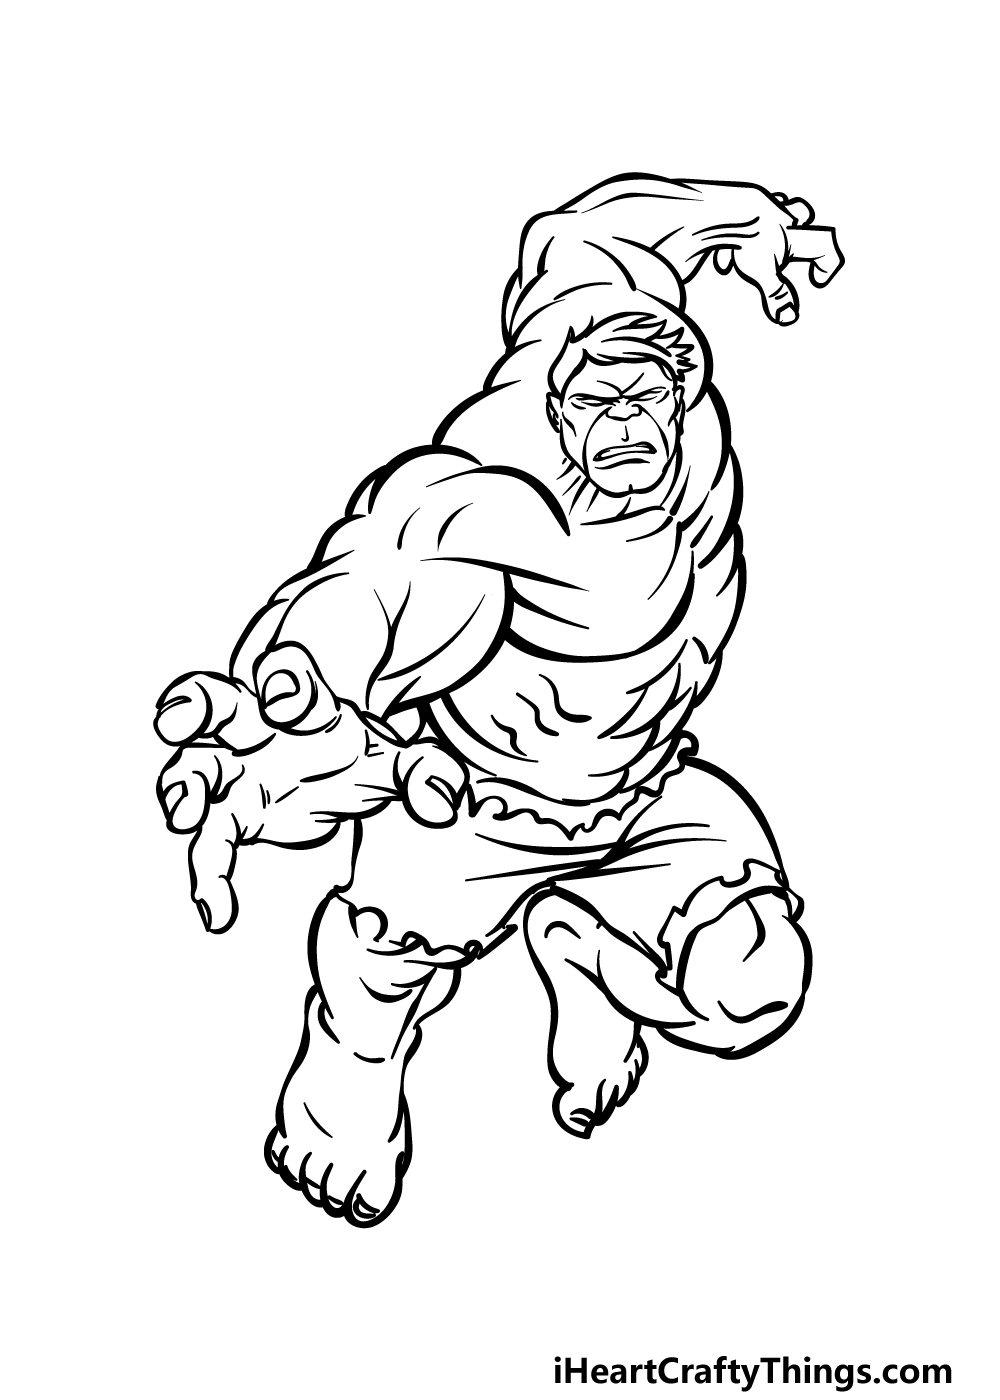
Before you finish off with the iconic color scheme for this character, we have a few final details to add to finish it off in this step of our guide on how to draw Hulk.
The main aspect will be his legs and feet, and you can start this by drawing his thick shin and foot extending out on the right.
The leg on the right will be bent over and extending backward to show that he is leaping towards something.
Once you have finished drawing his legs, you’re ready for the final step! Before proceeding you could also add some details of your own.
One idea would be to show the path of destruction he is leaving behind by drawing a background.
What setting would you place Hulk in if you went for this idea?
Step 6 – Finish off your Hulk drawing with color
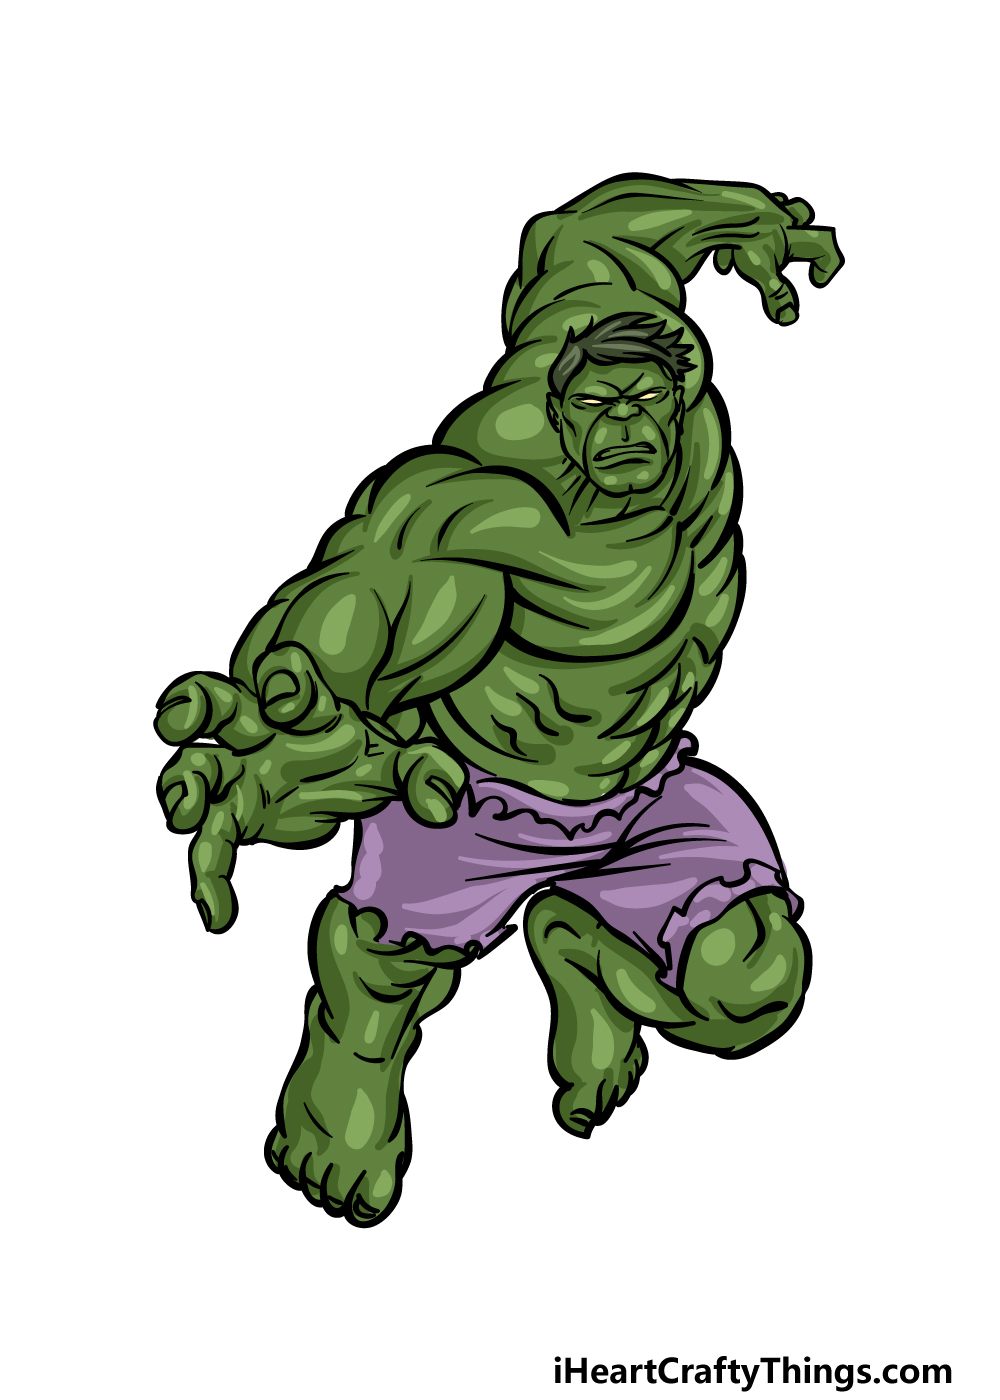
As we mentioned in the previous step of this Hulk drawing, this character has a rather distinctive and striking color scheme.
This character has a bright green body with bright purple pants, and these are the colors that we went with in our reference image.
Even though we stuck with these colors, we still created some variation by changing up the shades of the colors for some definition.
When coloring, you can also play around with the various art tools and mediums that you choose.
Will you go for a bright, striking medium or go for something lighter and more subtle? We can’t wait to see what you choose to go for!
4 More Ways To Make Your Hulk Drawing Unique
Transform this Hulk sketch into something even cooler with these 4 ideas to try!
The Hulk is the alter ego of scientist Bruce Banner. You could show this side of his character by adding Bruce to the picture!
If you were to do this, you could use a comic version of Bruce Banner or maybe go for one of the film versions. If you drew him next to Hulk, that would help to show the contrast between the two.
Which incarnation of Bruce Banner would you like to add to this picture?
In the comics and films that Hulk appears in, he will often fight alongside other heroes such as the Avengers. These could also be added to the picture for extra heroics!
Some characters you could use would include Iron Man, Captain America, Thor or Black Widow.
Once again, you could either go with their comic versions or the incarnations from the films or other media.
We gave you just a few heroes you could include, but you should be sure to add any of your favorite Marvel characters that you love!
Of course, every hero also needs a villain to fight against, and these could also be added to your Hulk drawing!
Once again, you would have many to choose from when looking at the comics and films.
For example, the monstrous Abomination would be a great choice, or you could recreate his famous moment with Loki from the first Avengers film.
What are some other Marvel villains you could include?
Finally, you could show where Hulk is having an adventure by adding a background for your Hulk sketch.
In the Marvel stories, New York is a common location, so that would be a good choice for the background.
It’s far from the only place, and you would have many other famous locations that you could choose from! You also don’t need to stick to places that have been used in the stories.
You could also take Hulk on a new adventure by creating a new location!
Your Hulk Drawing is Complete!
This hero may be known for being incredibly tough, but we hope that this guide on how to draw the Hulk wasn’t tough at all for you to take on!
There were a lot of details worked into this image, but as long as you take it slowly and follow all of the steps then you should have no problems overcoming the tricky aspects.
Now that you have succeeded in mastering this drawing, you can keep it going with your own ideas.
We mentioned drawing a background as one way of doing this, but what else can you think of to finish off this awesome picture?
There are many more cool drawing guides to enjoy on our website as well, so be sure to keep checking in, as we upload new ones often.
We also hope to see your Hulk drawing shared on our Facebook and Pinterest pages so we can see how it turned out!