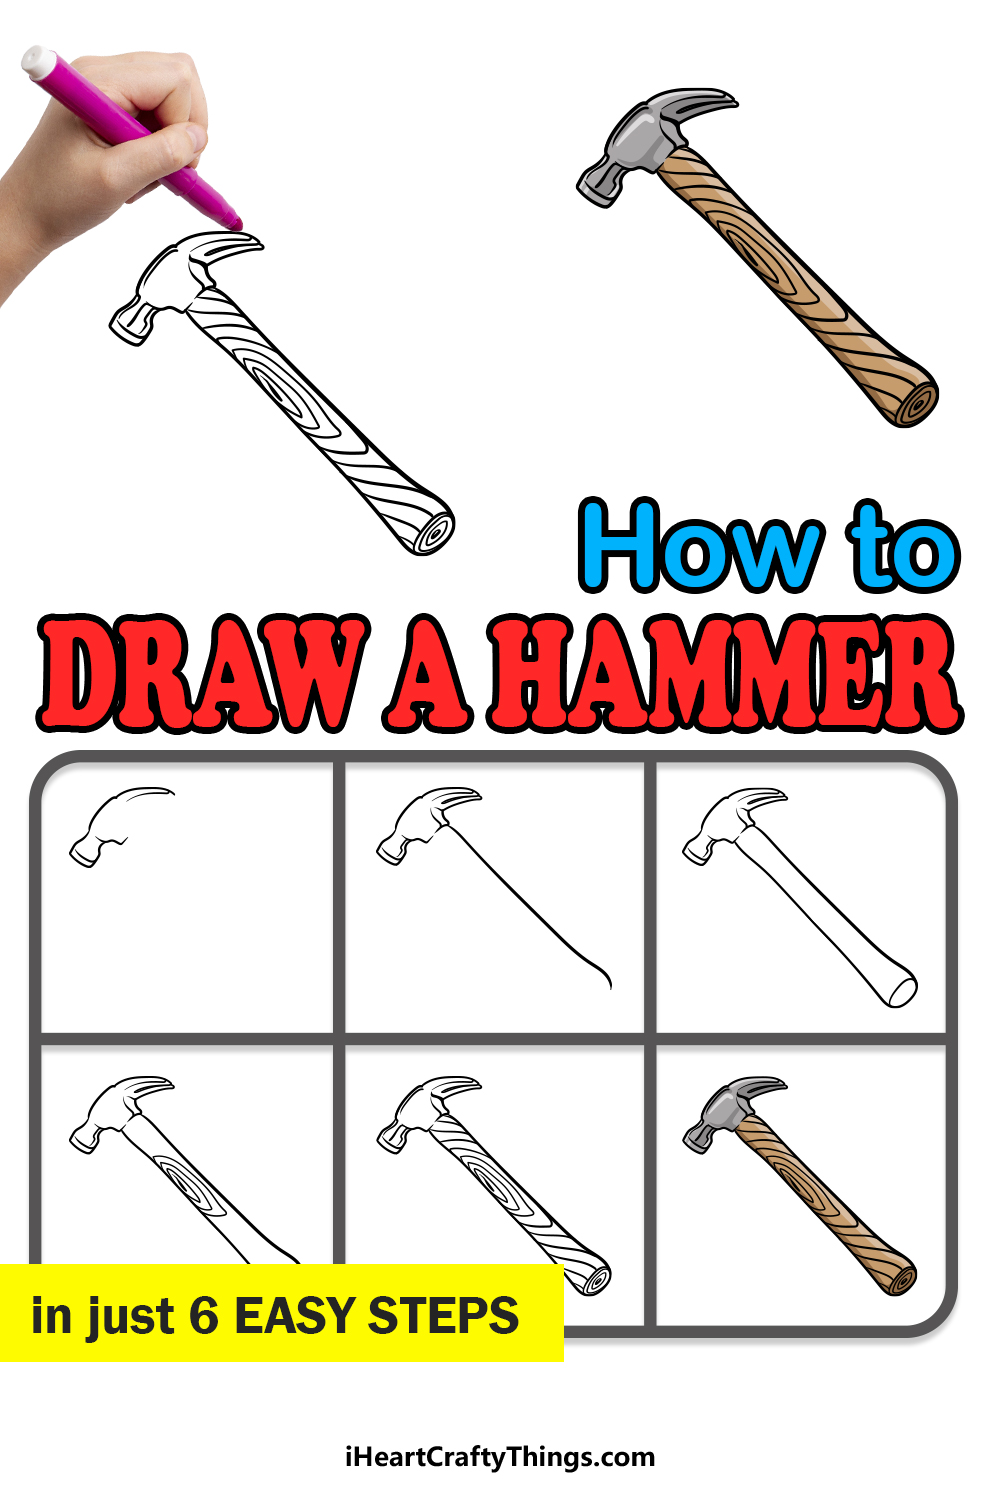
When taking on any project that needs even the most basic construction, you will almost certainly have to include a hammer in your toolbox.
Hammers are incredibly versatile and useful tools to have in your arsenal, and they can be used in a variety of different situations.
Hammers can also come in a few different varieties, and while it is a simple object it can still be challenging to learn how to draw a hammer.
If you would like to know how it can easily be done then this will be the perfect tutorial for you! You’ll definitely want to read all the way to the end of this guide to see how it’s done.
Our step-by-step guide on how to draw a hammer will show you just how fun and easy it can be to recreate this object.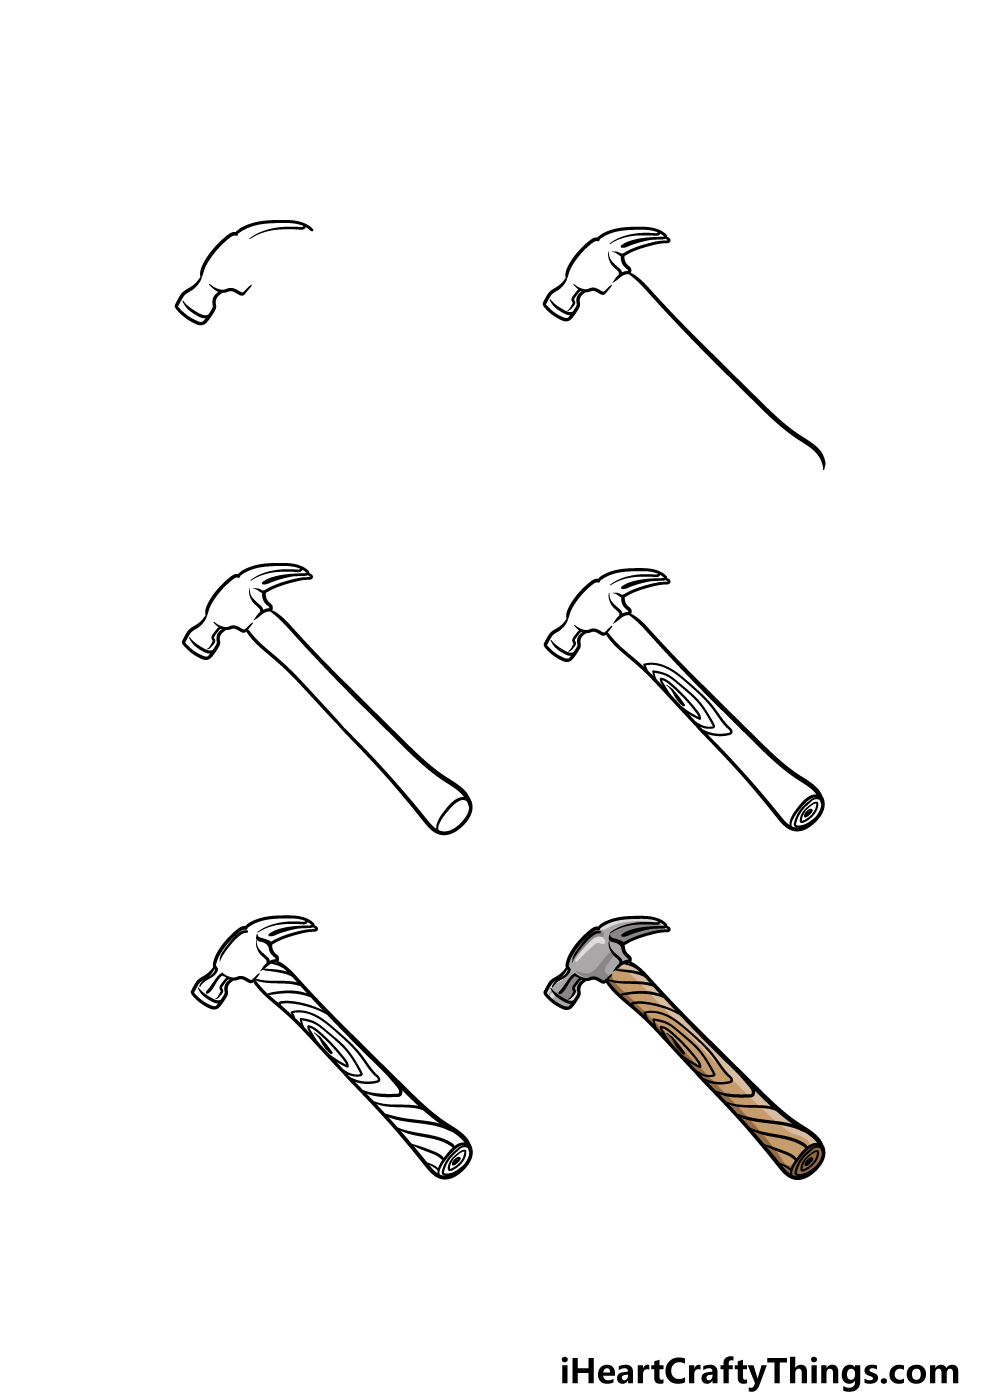
How to Draw A Hammer – Let’s Get Started!
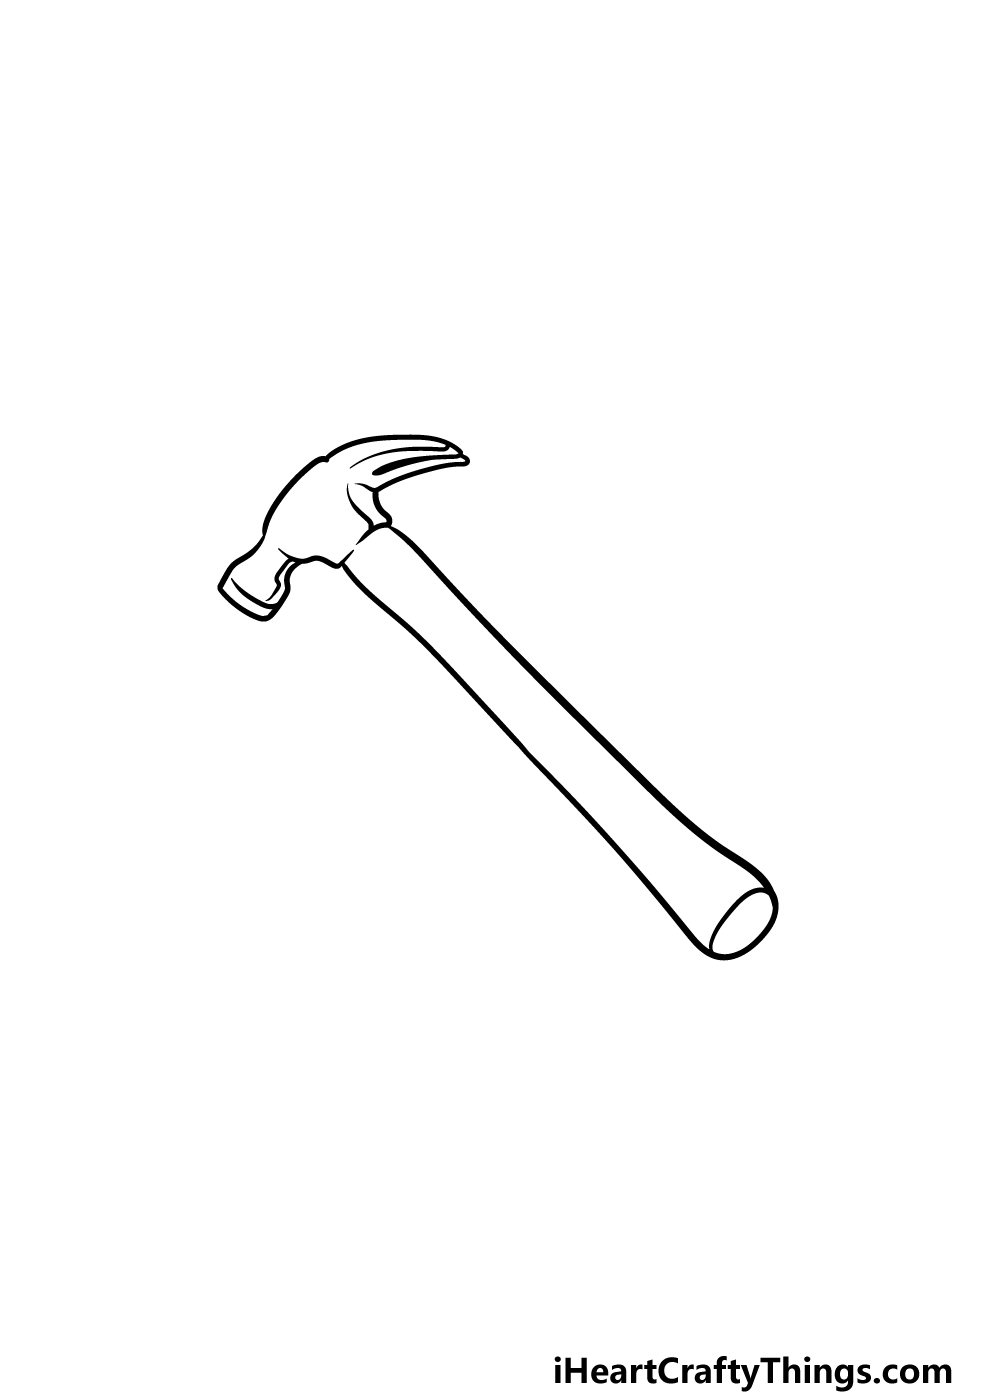
Step 1
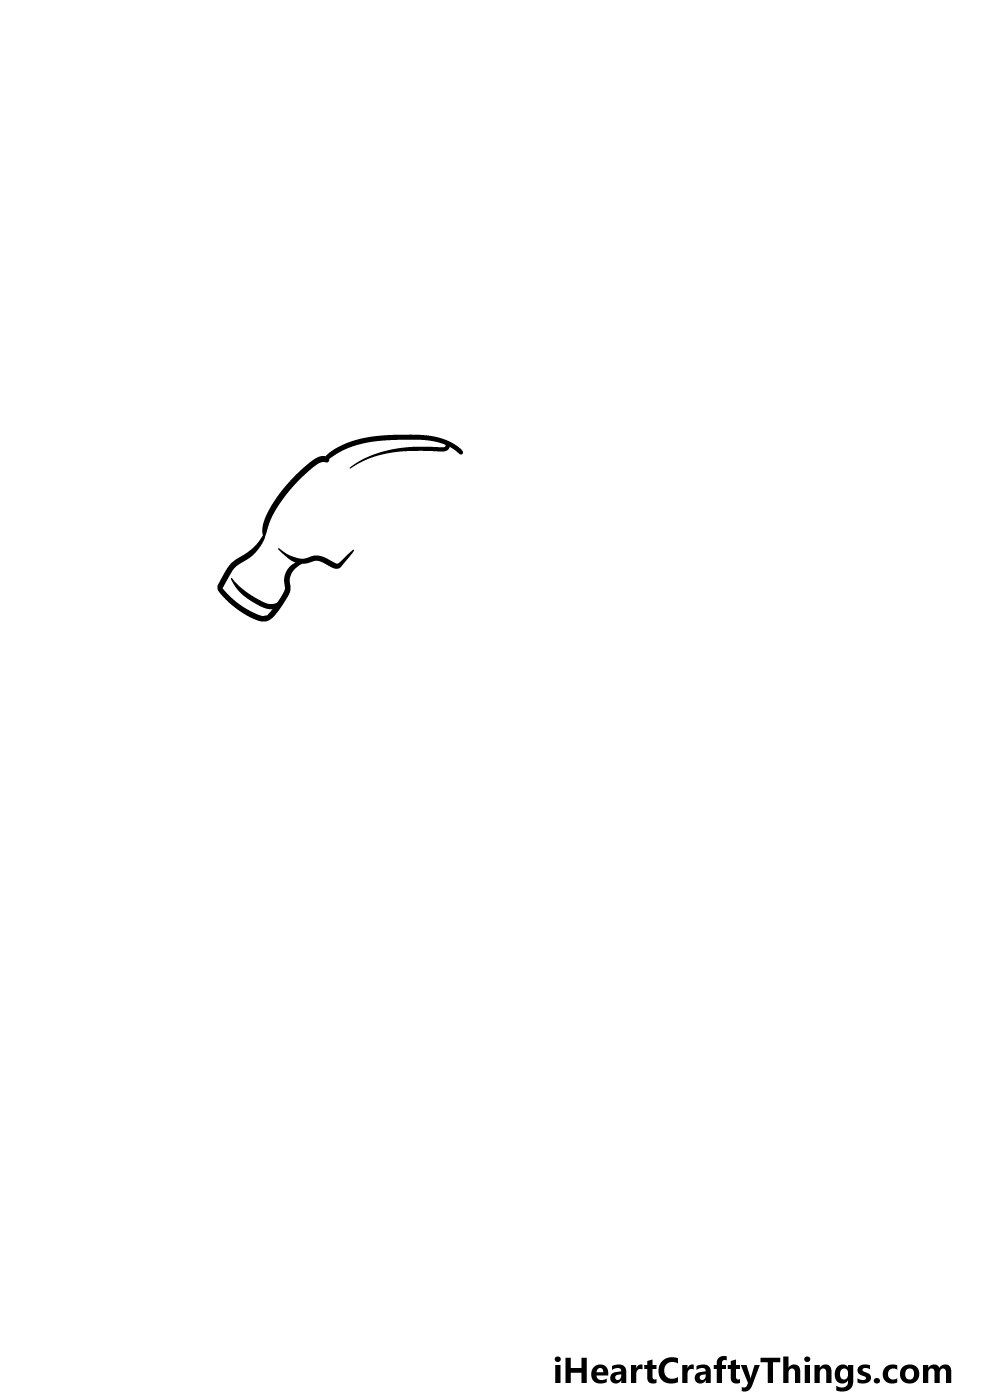
For this first step of our guide on how to draw a hammer, we will begin with the head of the hammer, arguably the most important part.
One side of the head has the flat ‘face’ of the hammer that takes care of the actual hammering. On the other end is the curved claw that can be used to pull out nails among other purposes.
We will be starting both of these aspects in this first step of the guide. The face of the hammer has a thin base that moves outward to the wider surface of the face.
This surface will also be very slightly curved, and it will have a rim close to the surface as well.
Then, you can draw the top of the body for the hammer, and then finish off by using some curved lines extending backward for the claw of the hammer.
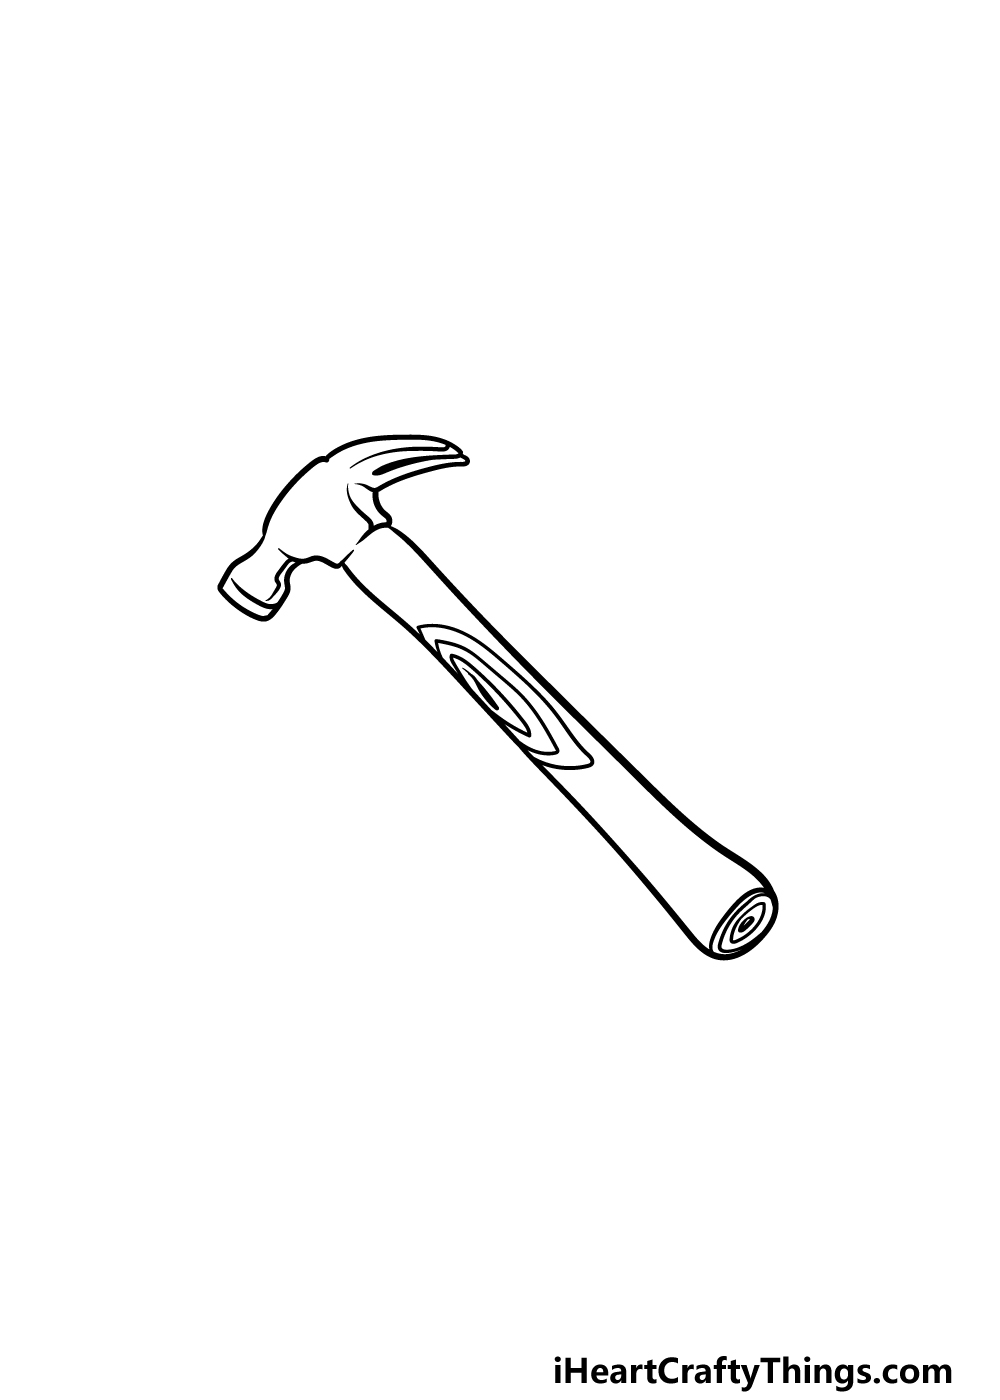
Step 2 – Draw some more of the head of the hammer
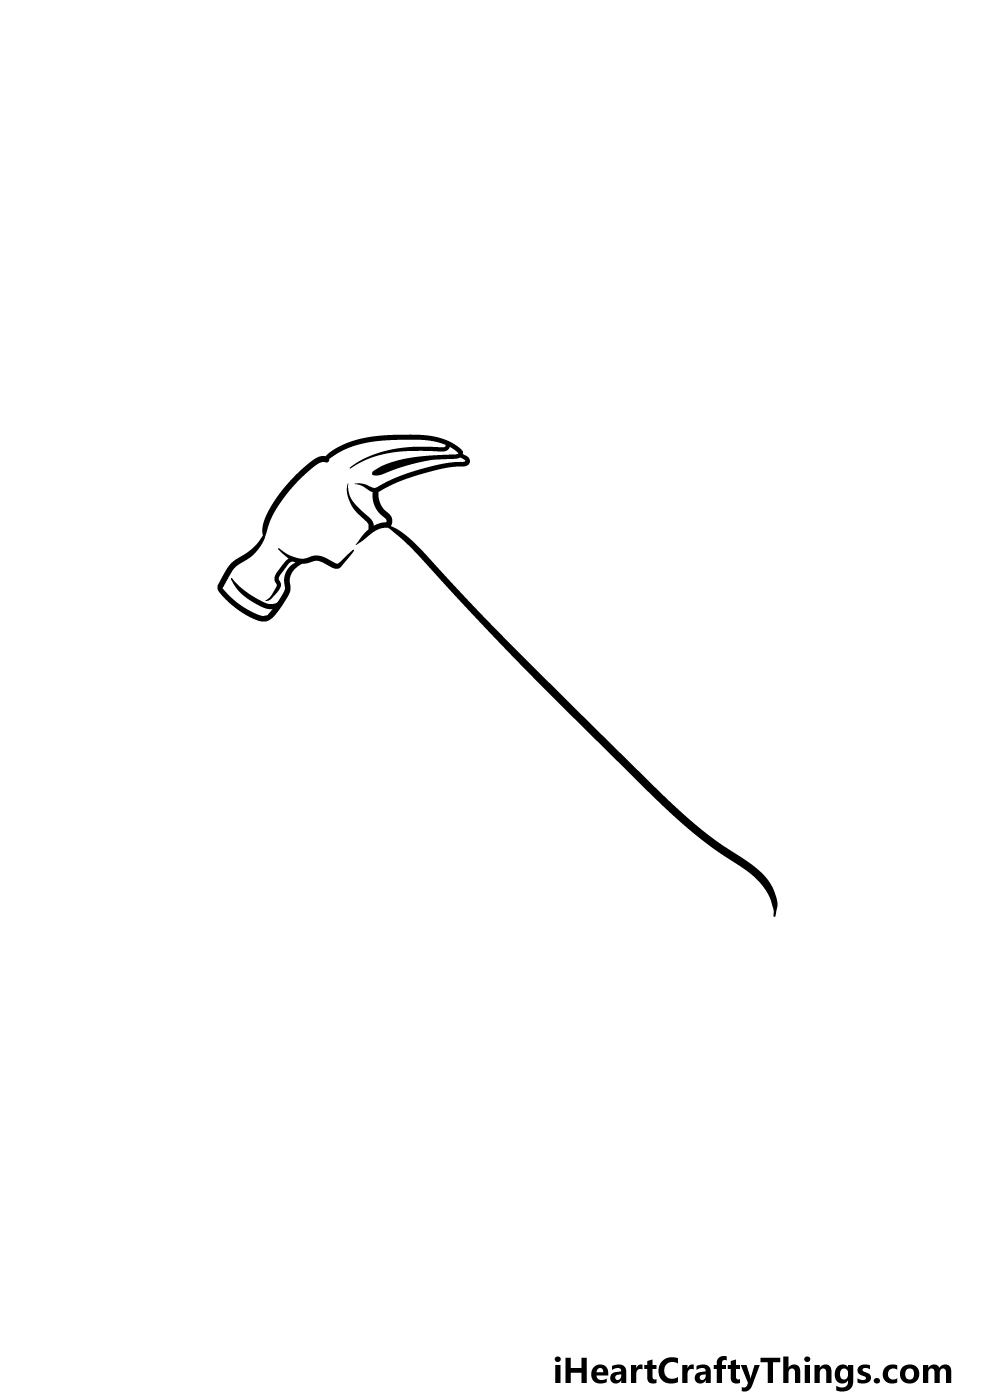
Continuing with this hammer drawing, we will add some more detail to the head of the hammer. First, use some more curved lines to draw the second half of the claw for the head.
The angle of the hammer will make it so that we can see the flatter underside of this claw, as shown in our reference image.
Then, use some more curved lines for the base of the hammer head, and then you can use a long line for the start of the handle’s right-hand side. Then it will be time to proceed to step 3 of the guide!
Step 3 – Now, draw the rest of the handle
This third step of our guide on how to draw a hammer will see you finishing off the handle outline for the hammer. First, draw a fairly flat oval shape for the base of the handle right at the bottom.
Then, we will be using another long, curved line moving up from that oval up towards the head of the hammer.
The handle of the hammer has a rather specific shape to it, so try your best to replicate it as it appears in our reference image.
With the handle done, we shall start adding some texture details as we continue.
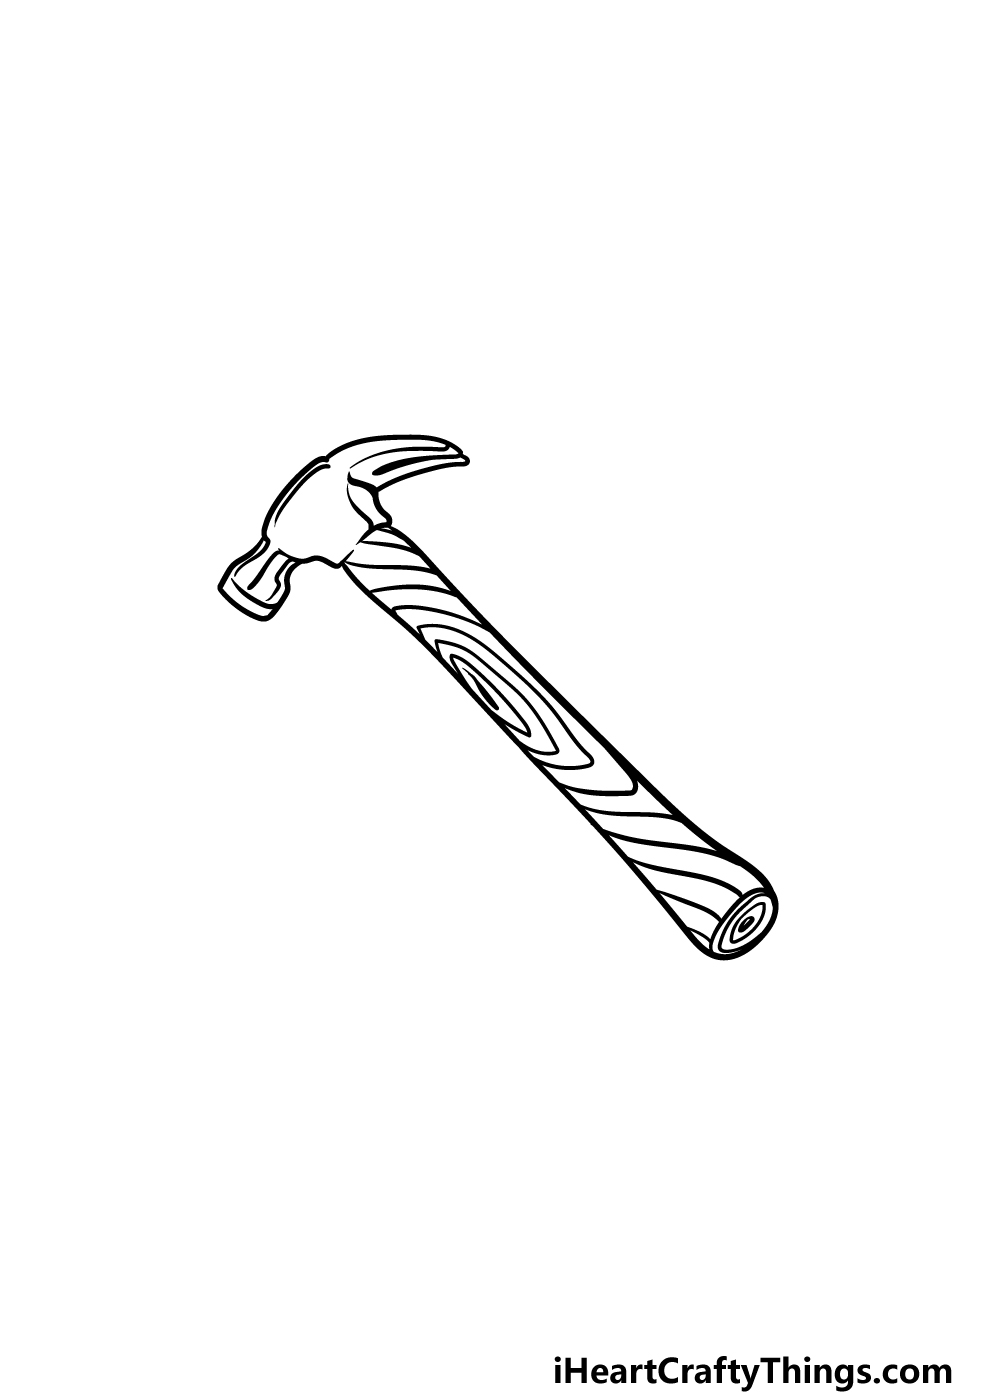
Step 4 – Next, draw the texture details for the handle of the hammer
Handles of hammers are often made out of wood, and we will be adding some texture to show this in this fourth step of your hammer drawing.
To give off the effect of wood grain, we shall be building up pattern layers on the wooden handle. Start by drawing a long, thin shape with pointy ends near the center of the handle.
Then, surround this shape with progressively larger versions of the shape around it. Draw three of these shapes for now with a thick line at the center of the first one.
Then, we can move on to step 5 where we will finish off the wood grain pattern along with any final details.
Step 5 – Add the final details to your hammer drawing
We will be finishing off the texture details and any final touches in this step of our guide on how to draw a hammer.
To finish off the wood grain effect of the handle, we will be drawing more curved lines onto the handle surrounding the shapes that you drew in the previous step.
Most of these will have a fairly smooth curve to them, but some near to the base will have a sharper shape to them.
Once you have added the wood grain details, you can then add even more details of your own!
One idea would be to leave out the wood grain effects and instead draw a rubberized sleeve effect on the handle.
You could also draw a background to show what kind of project this hammer is being used on. What can you think of to finish it off?
Step 6 – Finish off your hammer drawing with color
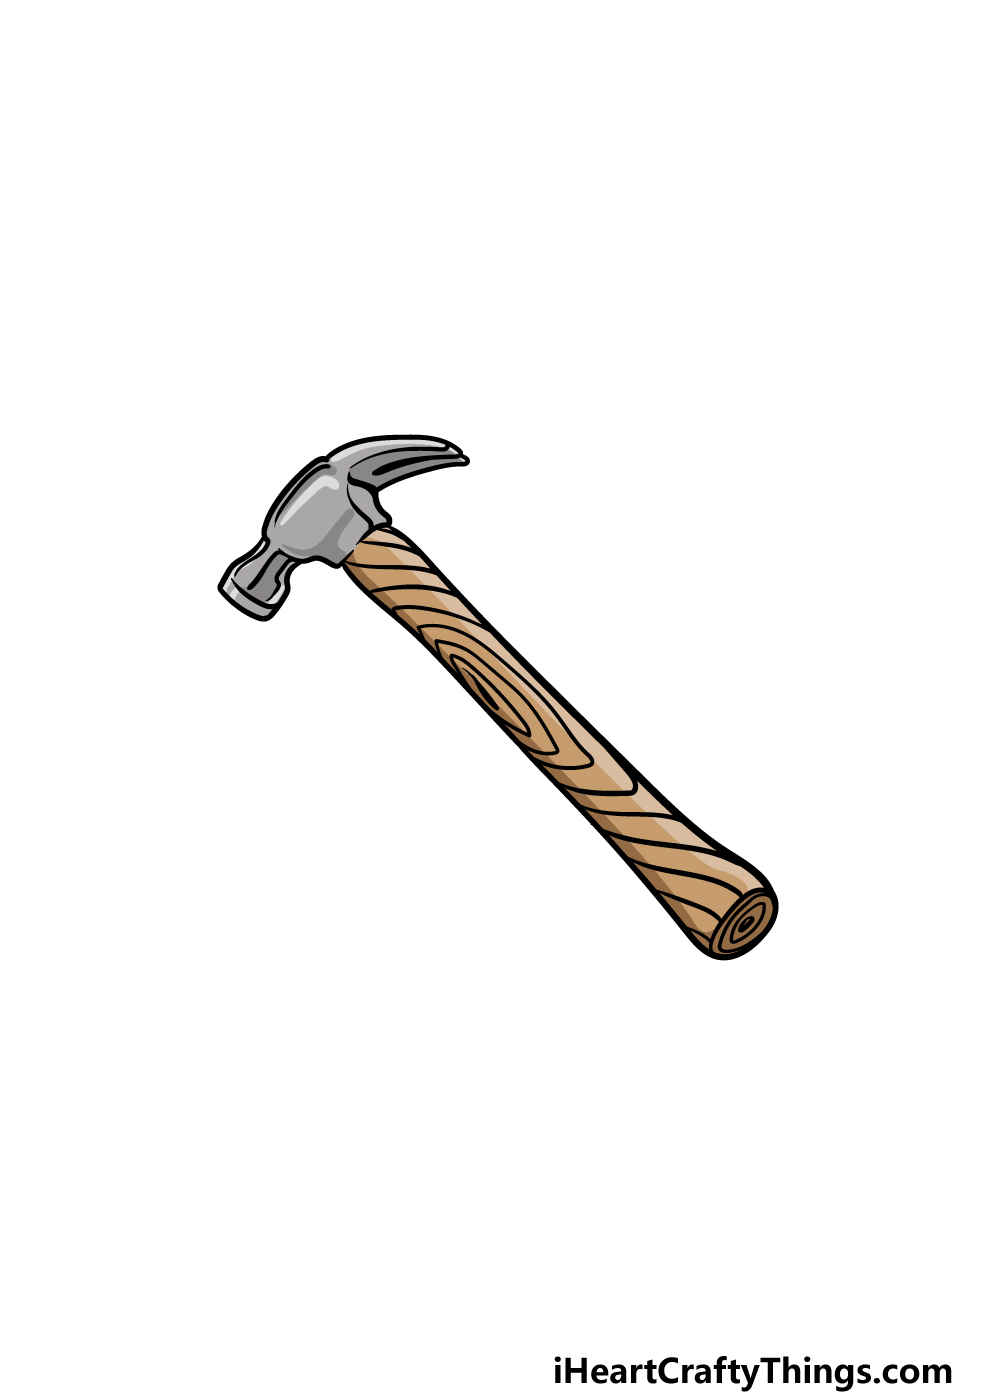
This is the final step of your hammer drawing, and in it we shall finish off with some colors. In our reference image, we kept the colors a bit more realistic.
We used shades of browns for the wooden handle, and then we used some greys for the metallic head of the hammer.
You could use similar colors to these, but don’t be shy about using some unique color choices of your own instead!
Once you have decided on the colors, you can then pick which art mediums and tools you will use to pull them off. We can’t wait to see what you choose!
Here’s how you can make your hammer drawing even better…
Get out your drawing toolbox as we build up this hammer sketch!
A hammer is a super useful tool, but it needs other tools and objects to reach its full potential. One of the main things you’ll probably need is some nails, and you could add some to this hammer drawing!
The nails could be lying beside the hammer, or you could show them after they have been recently hammered into a surface. You could even add something like a box of nails with some spilling out.
How else could you add some nails here?
Of course, hammers can also be used in conjunction with many other tools, as we mentioned. Adding some of these could be another great idea for this drawing of a hammer!
You would have many tools to choose from if you wanted to do this. They could include saws, drills, screwdrivers and more.
These are just a few examples, but you could build up this arsenal of tools in any way that you wish! What are some tools that any builder would be proud to have with this hammer?
Hammers have many uses, and you could make this hammer sketch even more complete by showing what it has been used for. Maybe it was used to build a doghouse out of wood.
Or, it could have been used to make a bird feeder or used to repair a table. These are just a few ways that this hammer could have been used, but they’re far from the only ways.
What else could this hammer have been used on?
Finally, you could finish off this hammer drawing with some background details and elements! You could make a whole scene once you have added any details and additions you want.
This can also be combined with some of the previous tips we have given you. You could even add a human character to the scene.
It could just be the arm of someone holding the hammer, or you could draw the entire character. It’s up to you to decide!
Your Hammer Drawing is Complete!
You have completed all 6 steps of this guide on how to draw a hammer, and you have landed up with a great portrayal of this useful tool!
We hope that by working through this guide that you found it to be a fun and easy experience to draw this hammer.
Don’t forget that you can add your own details, background ideas and other elements that you would like to finish it off.
Then, you can find many more amazing drawing guides on our website to enjoy. Be sure to keep checking in, as we have some more on the way soon that you won’t want to miss!
We would love to see your finished hammer drawing, and you can show us by sharing your creation on our Facebook and Pinterest pages.