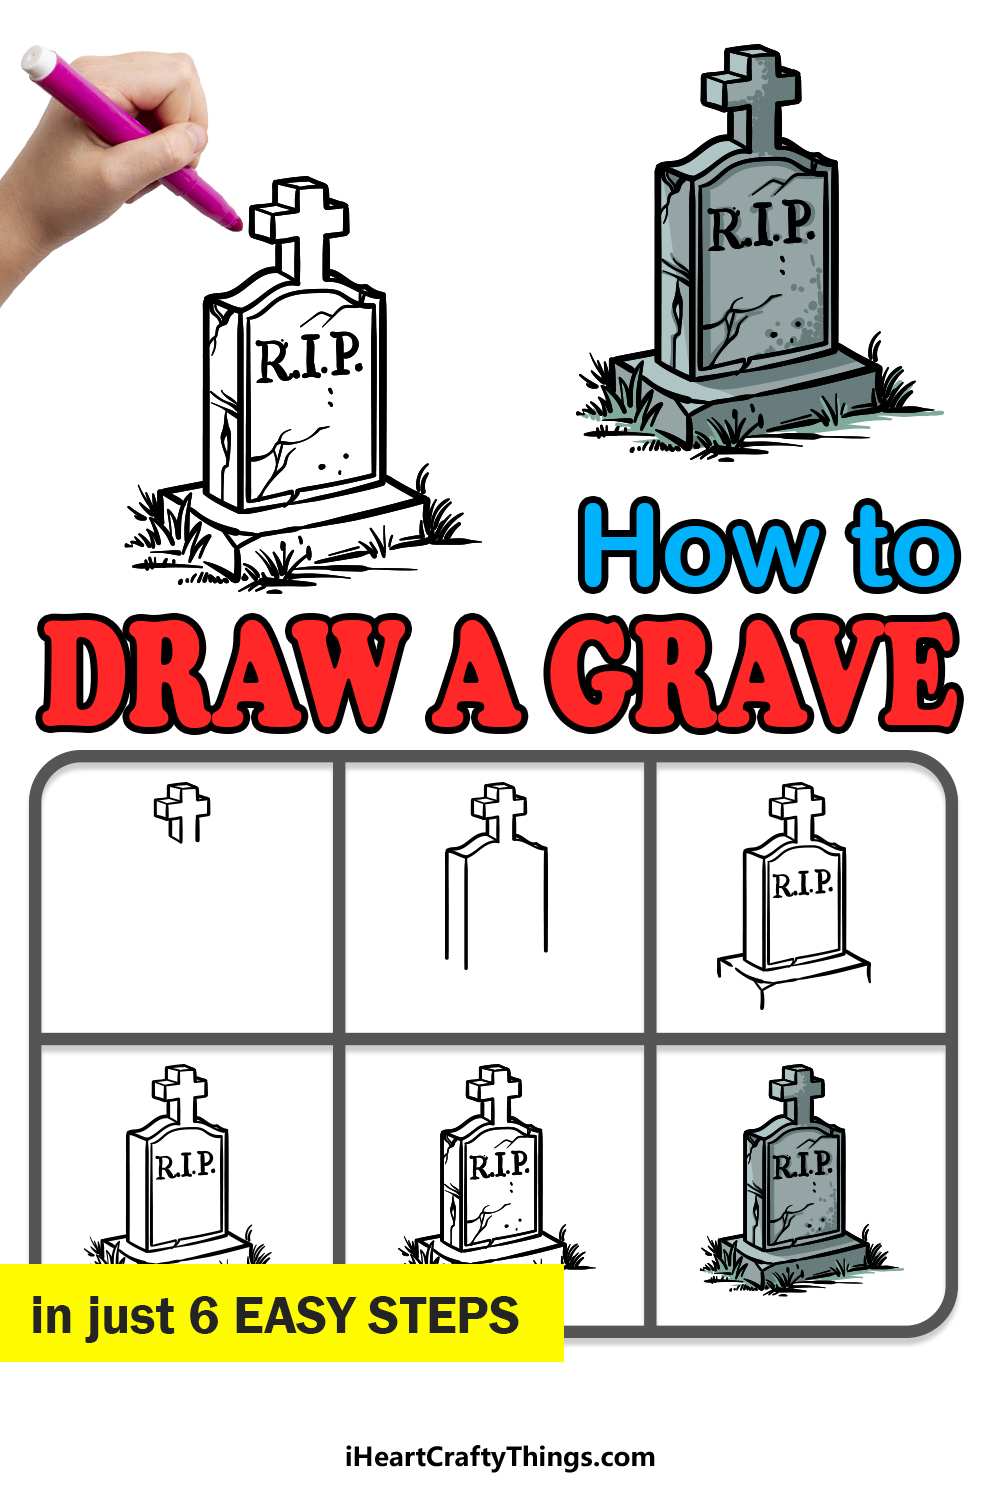
If you want to know the easiest way to learn how to draw a grave, then this guide for kids was made for you! It doesn’t have to be scary to master this design.
Graves are used as a permanent memorial for people who are no longer with us. They come in a lot of different shapes and designs, but each one will have information such as the person’s name, the dates they were born and passed away and perhaps a message of some kind.
Even though they serve a noble purpose, they have also come to be common in horror movies and Halloween decorations, as there is something inherently creepy about a graveyard.
This guide will show you how to draw a detailed grave design, and then you can add and change it in any ways that you like!
Watch These Steps On How To Make Your Grave Drawing
How to Draw A Grave – Let’s Get Started!
Step 1

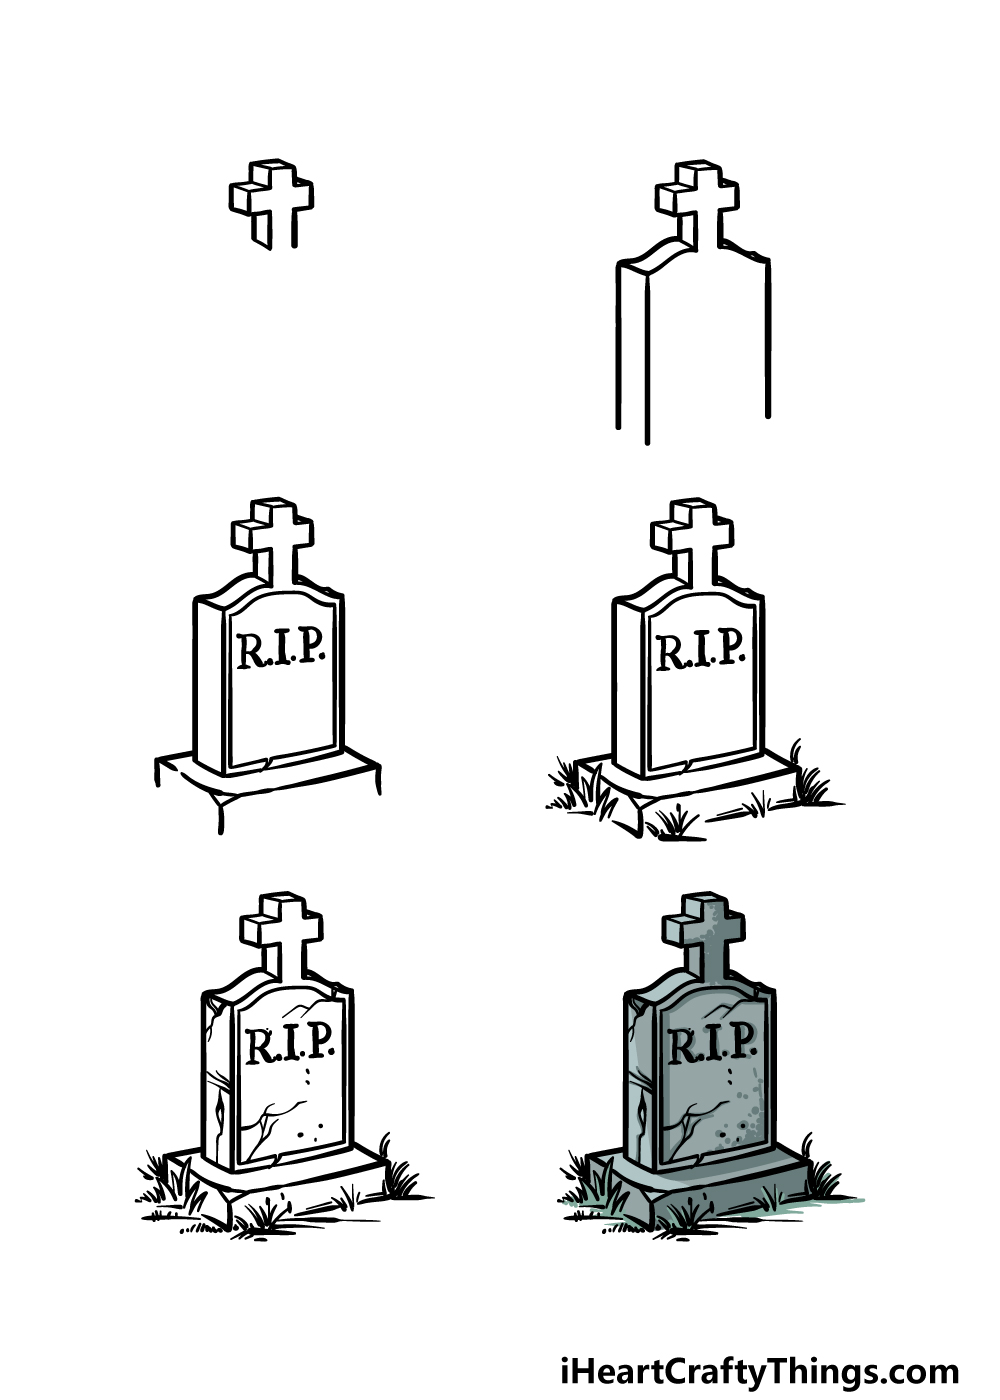
Graves will often have a cross structure or motif incorporated into the design, so that is what we will be drawing in this first step of our guide on how to draw a grave.
This cross will be on top of the grave, and we will be drawing it so that it has a somewhat 3D design to it.
To begin with, use some straight lines to create the flat front of the cross design. You could use a ruler to keep the lines perfectly straight, or you could draw it freehand to give it a more aged look.
Then, draw some lines going backward from the front of the cross to give it that 3D effect that we show off in the reference image.
Once the cross for this grave is drawn, we will draw the next section as we move to step 2.
Step 2 – Now, draw the body of the grave

With the cross drawn, we can now work on the main body of this grave drawing. The top of the body for the grave will be curved and a bit wavy, whereas the sides will extend straight down.
To draw this section, we will be following a similar approach to the cross.
The front, flat section of the grave will attach directly to the cross, and then we will extend some lines backward to draw the sides of the grave.
This will further help to give the grave a bit of a 3D effect. This effect can be a bit tricky to pull off, so be sure to copy the lines exactly as they appear in the reference image!
Step 3 – Draw some more details and elements of the grave
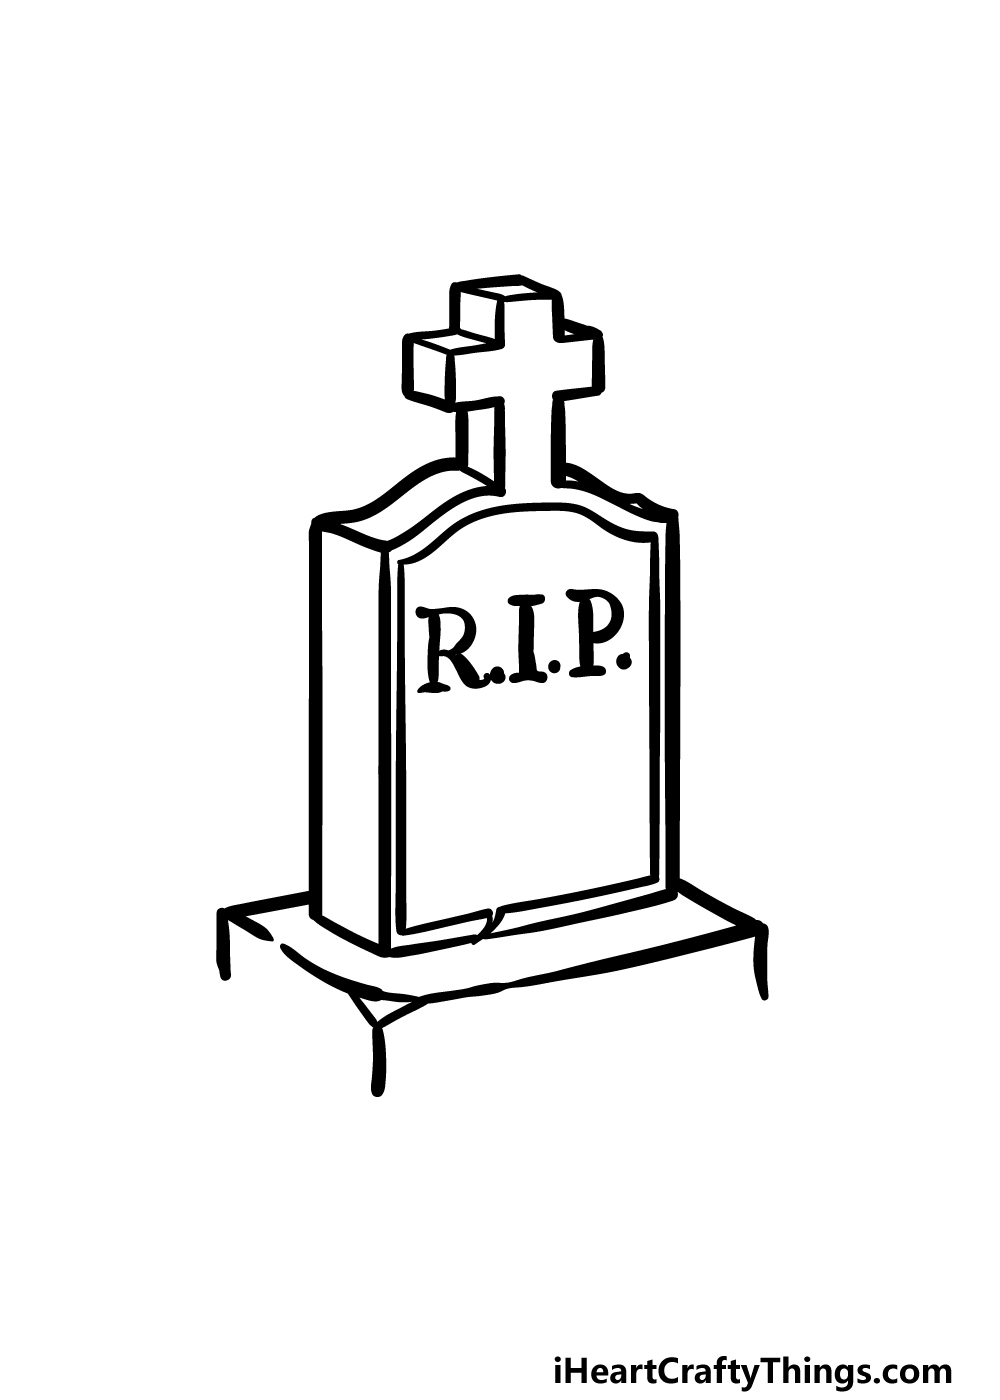
For this third step of our guide on how to draw a grave, we will not only be drawing some details for the grave but also adding some more sections to it.
First, we will be drawing a sort of frame onto the front of the body for the grave.
This will follow the inner perimeter of the grave face, so that means it will have a wavy top with flat sides and a flat base.
Then, we will draw the bottom of this section of the grave, and then we will draw the top of the rectangular stone base of the grave.
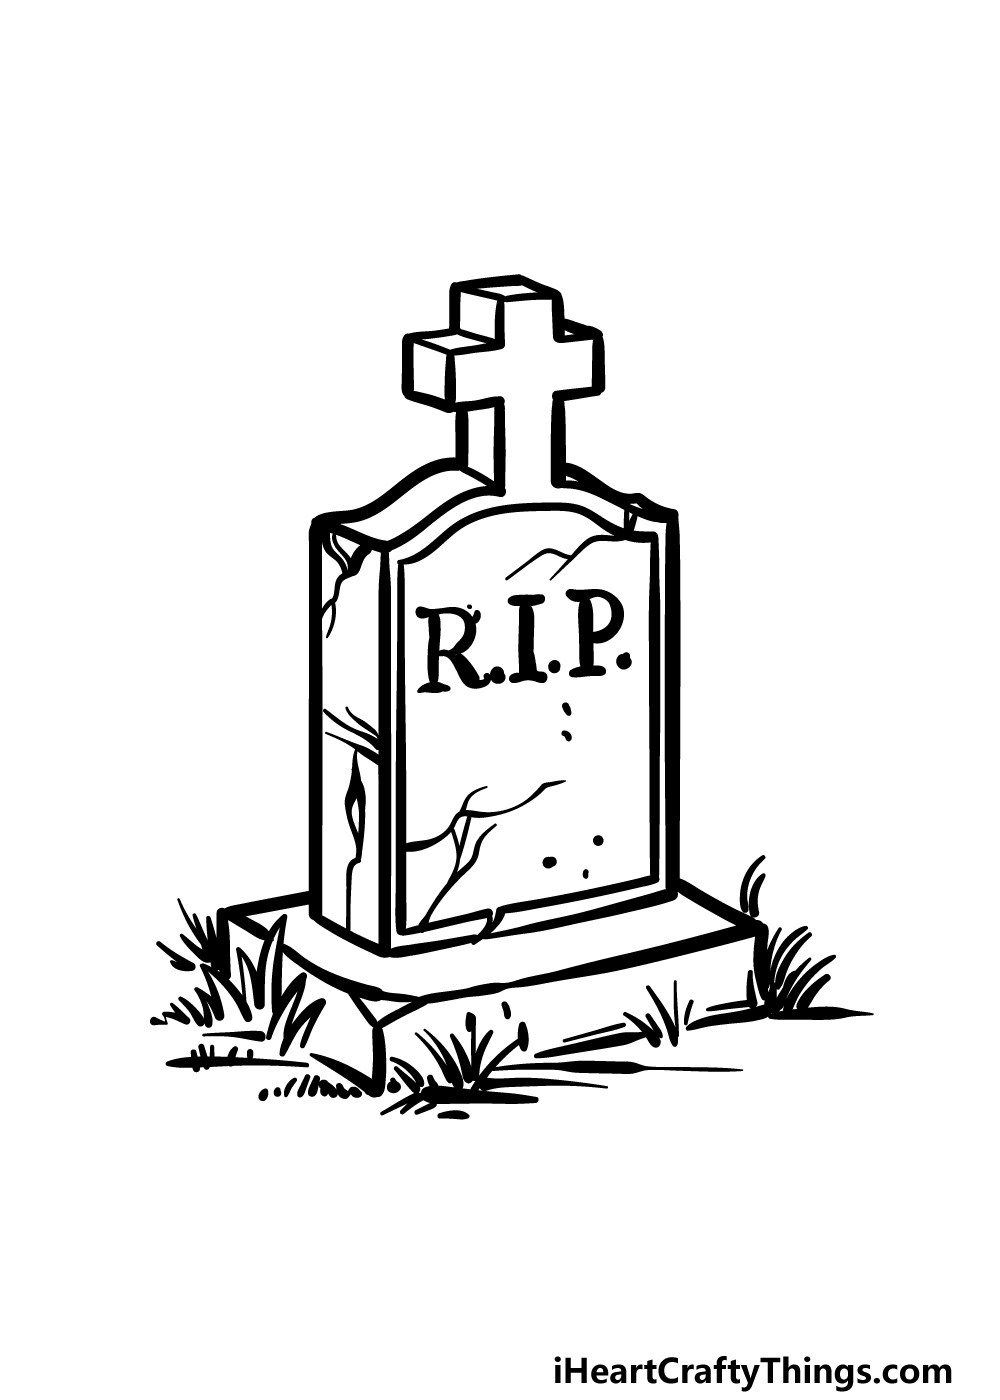
Finally, we will be drawing a RIP onto the face of the grave. You could also draw a name or phrase onto the grave for a personal touch!
Step 4 – Next, draw some details for the base of the grave
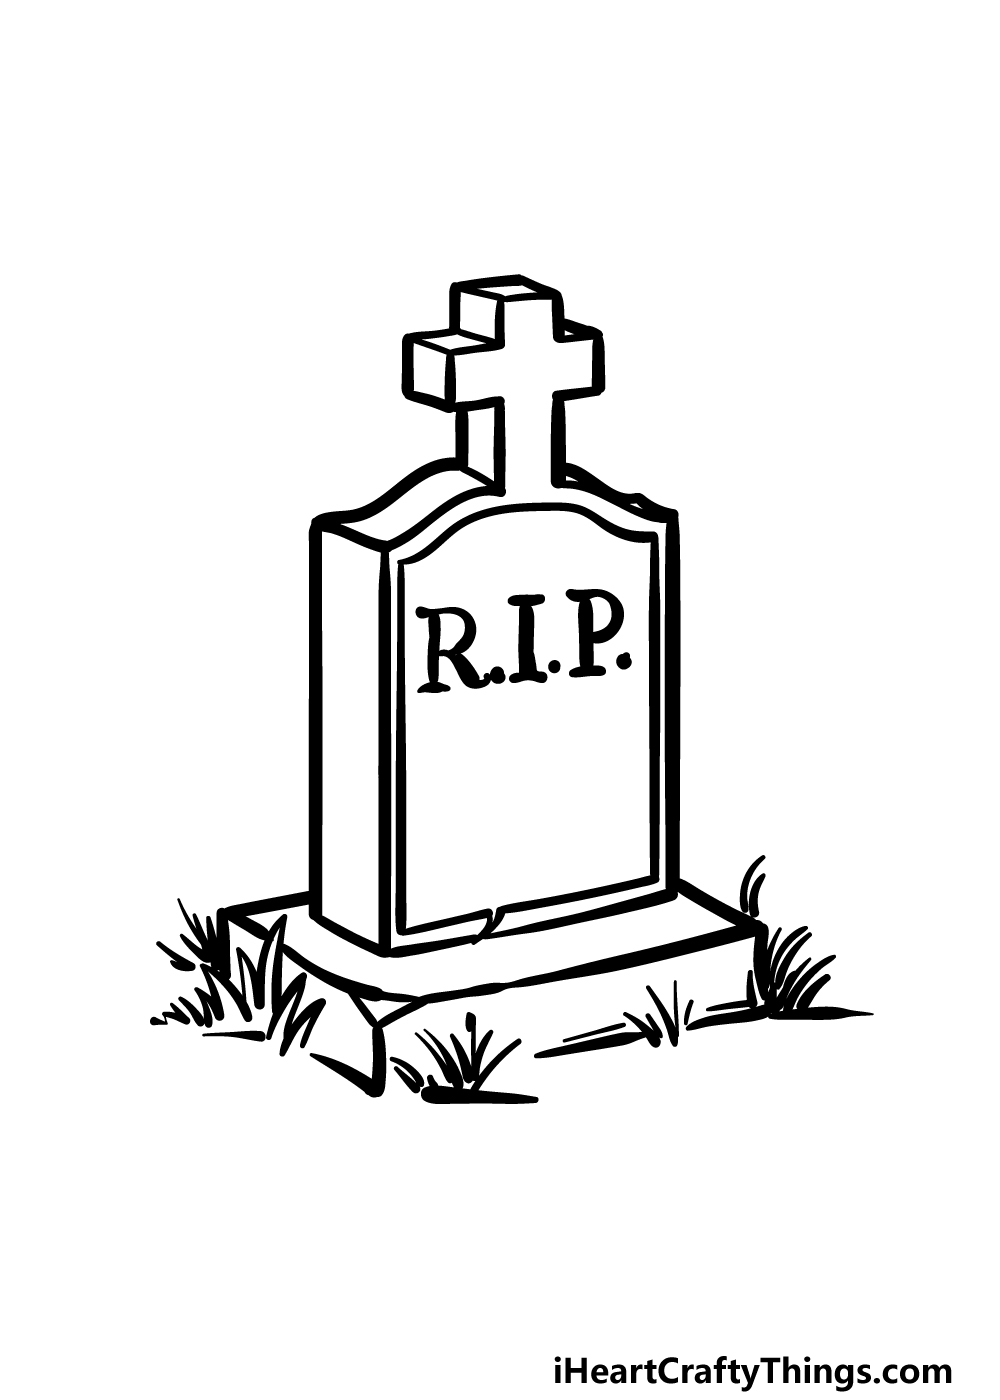
You have the main outline of this grave drawing complete, so now we shall finish it off with some cool details.
In this step, the main thing we will be adding will be some grass details around the base. These can be drawn with some curved, pointy lines.
Details like these will help to make the grave not only look a bit older but will also make the grounds around it seem a bit more unkempt.
Once these are done, we will move on to the final details in the next step!
Step 5 – Add the final details to your grave drawing
Now you’re ready to add the final details and touches before you move on to the final step of this guide on how to draw a grave.
In this part, we will be finishing off by adding some more details that will make this grave look older.
These details will mainly comprise of some cracks in the stone of the grave, and we will also add some more details to the base.
Before you move on to the final step, you could also add some details of your own! There are loads of cool ideas you could go with to personalize it.
You could add more graves to the background or maybe even draw some spooky ghosts around it! How will you finish off this image?
Step 6 – Finish off your grave drawing with color
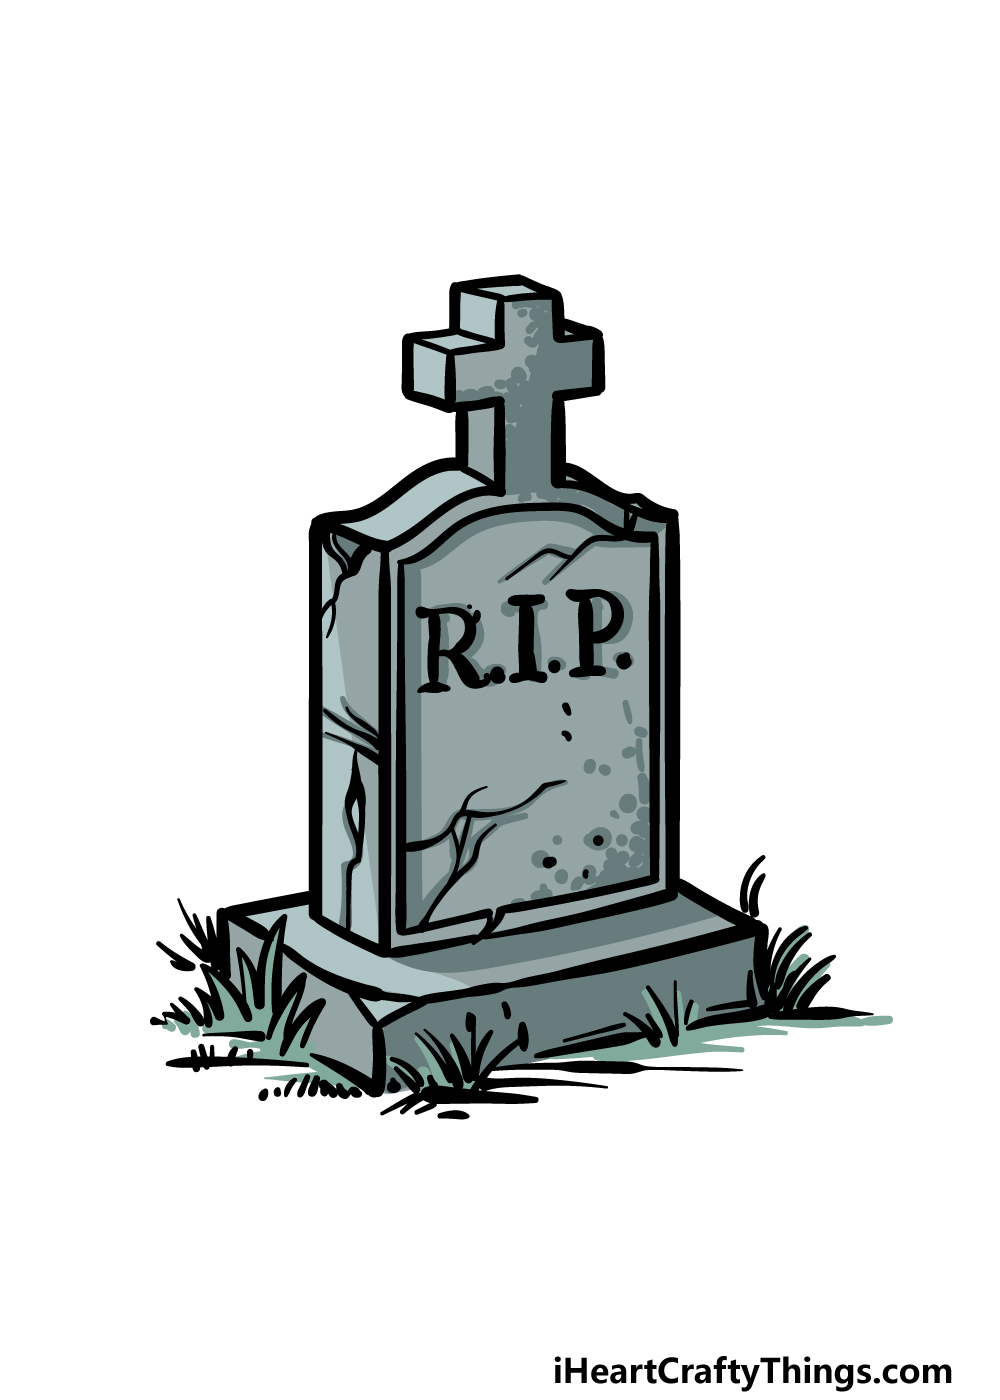
This is the final step of this grave drawing, and in it we shall finish off with some colors! In our reference image, we went with some different shades of greys for the image.
We kept the shades generally a bit darker, as this will further help to emphasize that this grave is quite old.
For a creepy touch, you could use a light wash of some white paint over the image to create a spooky foggy look for the image.
What colors, techniques and art mediums will you use for this picture?
5 Tips To Make Your Grave Drawing Even Better!
Bring your grave sketch to life with these 5 tips to try out!
For our version of this drawing of a grave, we added a simple R.I.P. to the grave. This looks great, but you could also make it more personalized.
It could be as simple as adding a name, or you could even have a message on the grave as well. What do you think you would like to write on this grave to make it more unique?
This grave design shows one kind of grave, but they can come in many shapes and styles. You could show off this variety by adding some more graves around it to make a graveyard.
These could be based on your own design or you could get some inspiration from some real graves that you’ve seen or found online.
This grave drawing looks like a real grave, but it could also be a Halloween decoration, as graves are commonly used for this purpose.
If that’s the approach you would like to take, then you could add others!
The most common one would be to add a jack-o-lantern, but you could also add some bats and cobwebs for a few other ideas. Which of your favorite Halloween decorations would you like to add?
Another way you could create your own graveyard scene would be by adding a background for your picture. This could include not only graves but other elements as well.
These could include fences, spooky gates or maybe even a mausoleum. You could make it look as spooky or realistic as you like or even have a mixture of both elements.
Finally, it could be fun to make this grave sketch even scarier by adding some spooky characters! For example, you could have a zombified arm plunging up from the dirt.
Or, there could be some skeletons dancing around the grave. This is another tip that would be great if you wish to give the image a Halloween feel.
What other scary characters could you add?
Your Grave Drawing is Complete!
That brings you to the end of this guide on how to draw a grave! As we mentioned before, a grave is usually a pretty solemn object to be around, but we hope that it was still lots of fun for you to work on.
Finishing this drawing is just the start of the fun, as you can also keep it going with your own cool ideas!
We mentioned just a few ways that you could do this, but now is your chance to show off how creative you can be with your own ideas.
If you enjoyed this guide, then you can find many more like it on our website to enjoy!
We have a huge selection and we bring out new ones often, so keep visiting us there for a steady supply of awesome drawing content!
You can also show us how your grave drawing turned out by sharing it on our Facebook and Pinterest pages when it’s ready!