The letter N is the fourteenth letter of the alphabet and the subject of this guide! Whether you’re writing the lowercase version or depicting the capital letter, it’s a fairly easy one to learn.
As with all letters, it can be depicted in many different styles and forms. One of these would be a more elaborate style, and that’s what we are focusing on now!
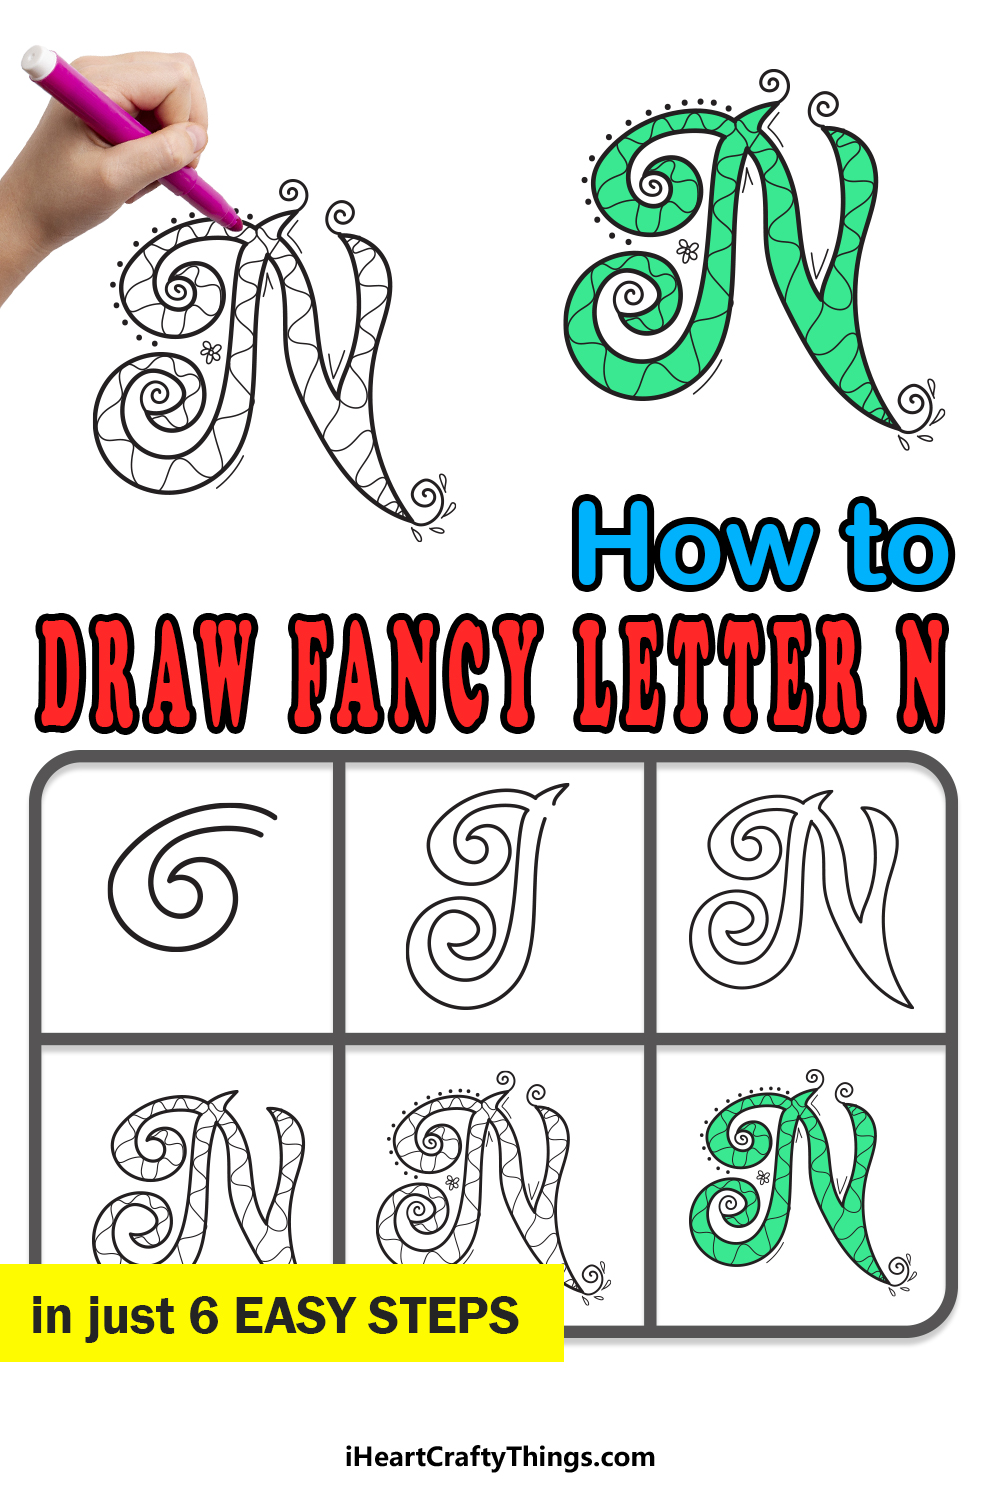
This guide is all about showing you how to draw a fancy letter N in just 6 steps. We will cover how to draw it first, and then we will look at ways to decorate it.
Finally, there will be some tips on coloring and adding to the design to finish it off in style! With all that being said, we can now begin with the first step of this guide, so let’s see how it’s done.
Let’s Get Started
STEP 1:
The letter N is not generally that complex a letter in terms of how it’s constructed. We can change that with the details that we add, however!
To make this letter fancier, we will be adding some flourish details, mainly in the form of some fancy spirals. Before we draw the first one, we would recommend drawing a rough version of the letter.
The best way to do this would be with a pencil, as we will be able to erase it later. You can draw a large letter N that’s vaguely in the shape of the final drawing.
Try not to press too hard with your pencil for now, as we want to be able to easily erase this later. You don’t need to do this planning, but it will help!
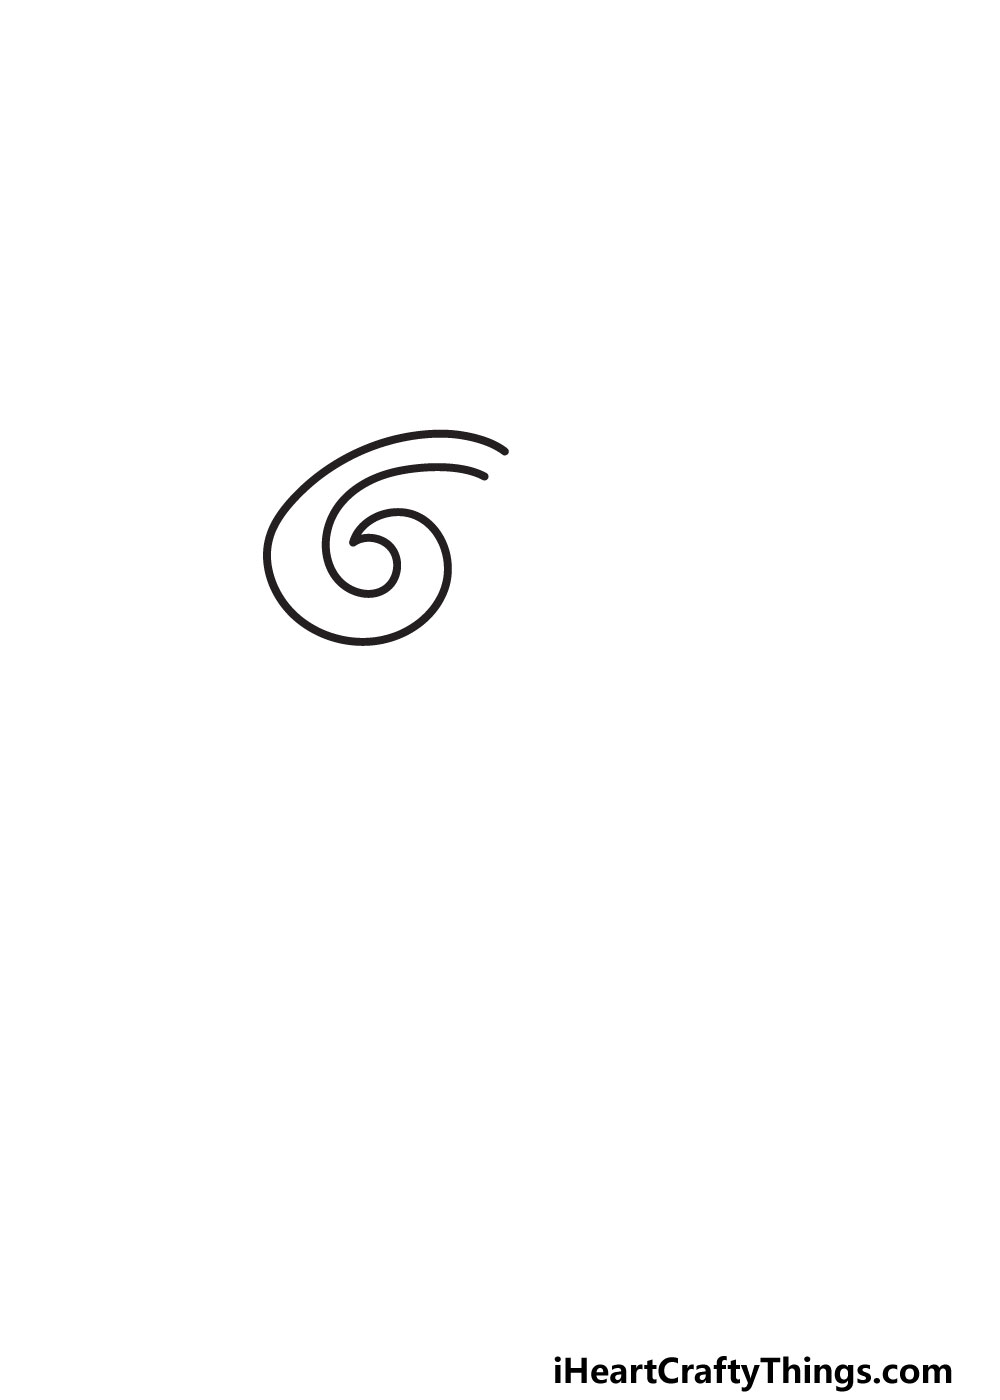
Regardless of whether you draw a plan or not, we can begin the first flourish. This spiral shape will go on the upper left side of the drawing.
You could either draw it as a single curved line, or you could draw it up as two lines connecting to one another. It will be shaped a bit like the number 6, or the letter G.
Once it’s done as it appears in the reference image, we can then move on to the second step of the guide.
STEP 2:
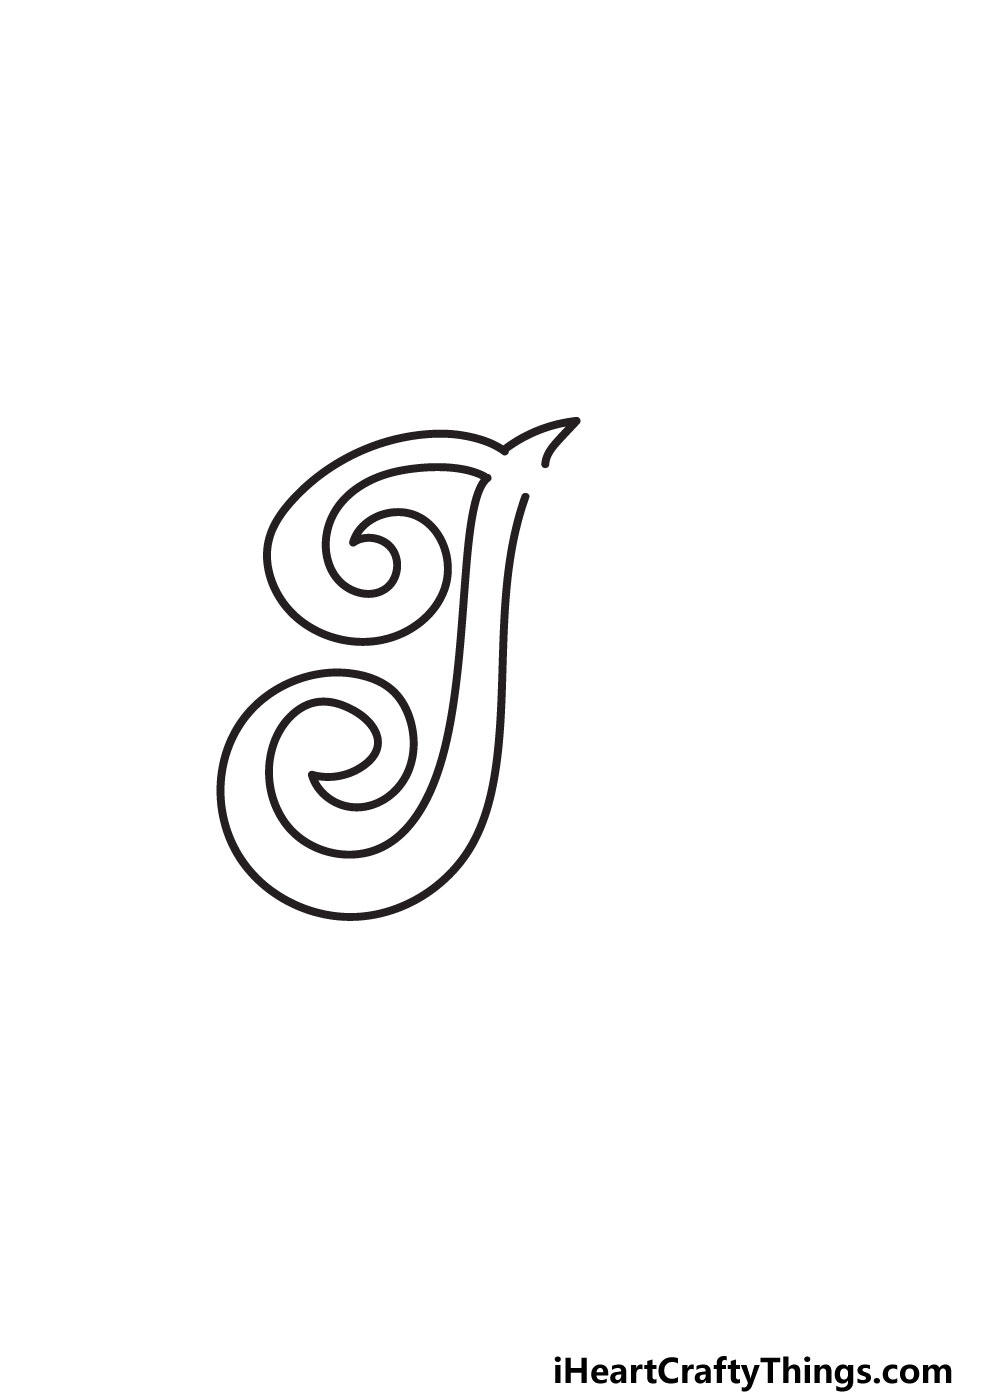
In this second step of the guide, we will be drawing the rest of the left side of the design. We shall start simply with this by drawing a pointy section at the top of the letter.
Next, you will be drawing a long, slightly curved vertical section coming down from where the spiral ended. It has a very slight waviness to it, as you’ll see in the reference.
It can be surprisingly tricky drawing a shape like this, so take it slowly and try to keep a steady hand. At the bottom, it will curl to the left to become another spiral shape.
This spiral will be very similar to the first one with a few key differences. It will be a bit larger, and it will be facing the opposite direction to the first one.
Now that you have the left-hand side of the letter, you are ready to move on. The third step will be all about finishing off the rest of the outline of the letter.
STEP 3:
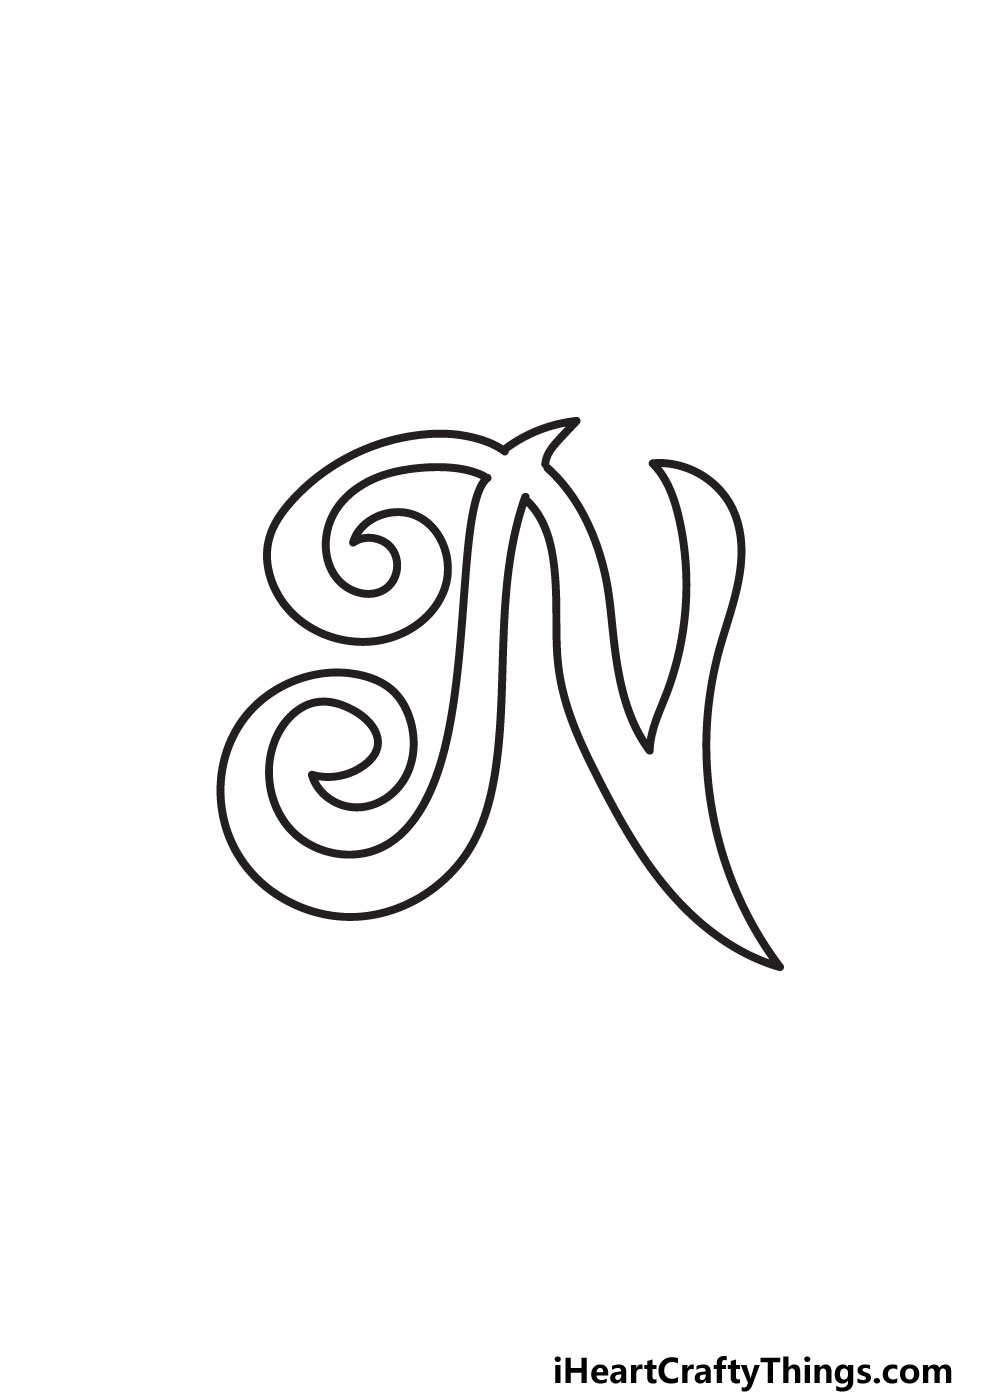
You’re ready to finish off the outline of your fancy letter N in this third step. This time, there will be no more spirals needed as we will be drawing much straighter shapes.
It will connect directly to the section we ended at earlier, and we will be drawing a large shape that looks a bit like the letter V
Start by drawing two curved lines diagonally down from the gap left in the previous step. This shape will end in a large pointy tip at the base and then extend up in a thin section.
It sounds more complicated than it actually is, and it will be even easier if you drew out the letter N with your pencil first!
When you have finished the outline, you won’t be needing those pencil lines anymore and can erase them. It’s better to be cautious as you erase these.
You might end up erasing lines you didn’t want to, or you could smudge pen ink if it’s still a bit wet.
Once you’re happy with it, you can move on to the next step where we will begin adding some interior details.
STEP 4:
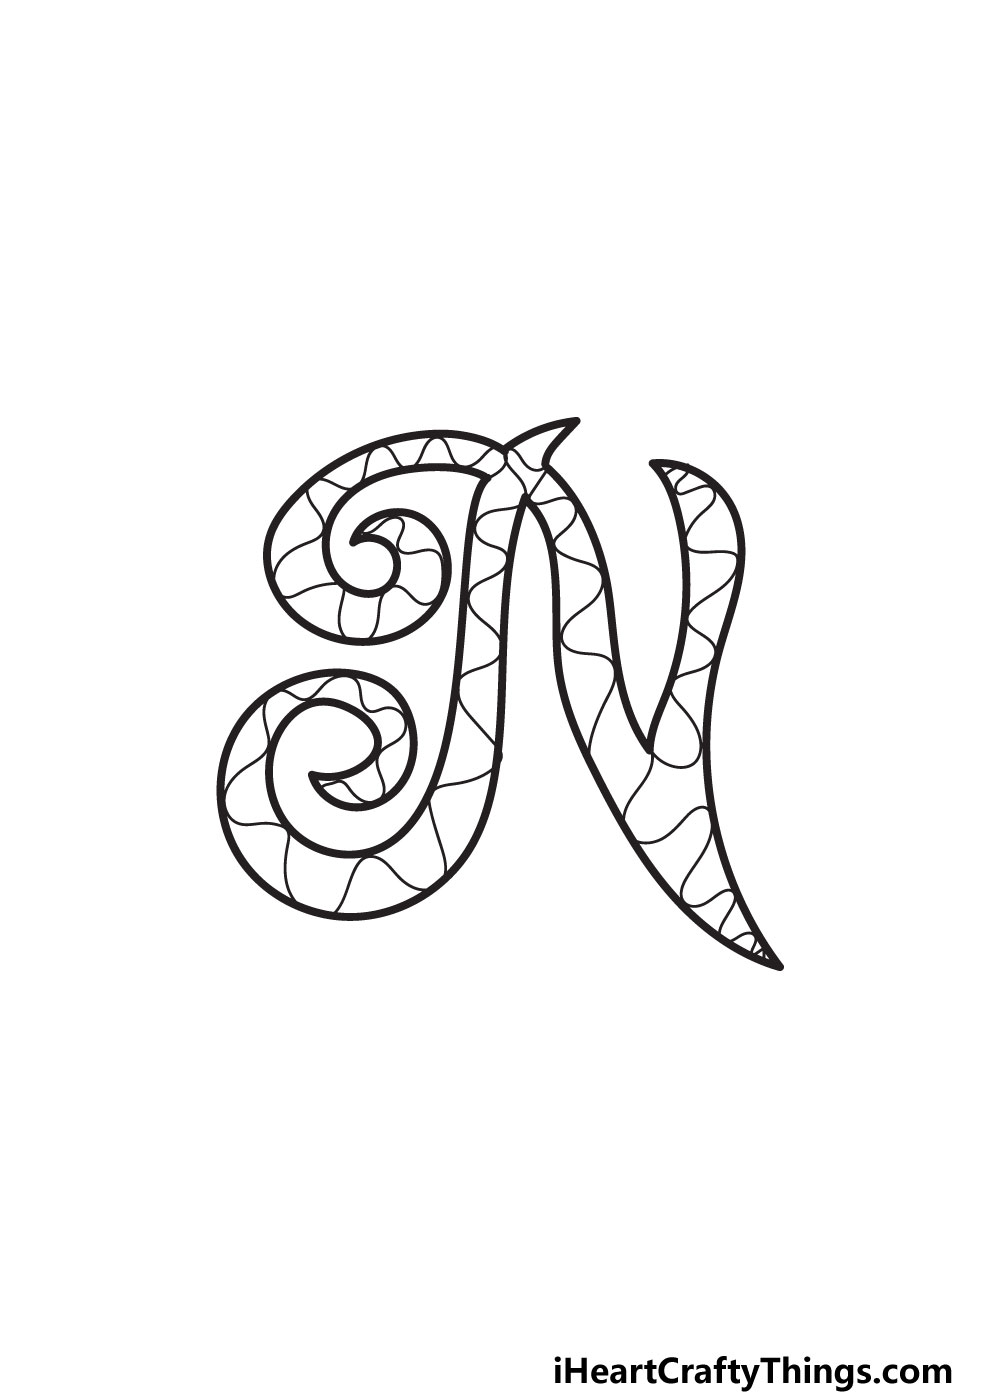
The outline of your letter N is all done now, and there is a world of possibilities! Now you can focus on the fun of adding some inner details, and there are so many ways you could do this.
In our example image, we showed you our interpretation of this design, and it is one of many different approaches you could take.
We used some curved, wavy lines all throughout the image, and it looks really cool! You could make this pattern with straighter lines or something even more extravagant.
For example, you could fill the letter with little shapes, letters, numbers or anything else you can think of. Of course, you don’t have to fill it with anything.
You may prefer to have the interior a solid color, for example. Or you may like to use some arts and crafts to fill it instead.
These are all just suggestions, but you can show off other ideas you may have! In the next step, we will look at some final details you can add around the exterior of the letter.
STEP 5:

Now, we will add some final small details around the exterior of the fancy letter N you have created. As you can see, these details are all rather simple, but they help to make it look even more vibrant.
First, we added some curled lines to some of the tips on the letter. Next, we drew a series of small dots along the outer edge of the swirl on the top left of the letter.
In this area, we also added a small flower to give it a nice natural feeling. We then moved our focus to the lower right side of the image.
Some small teardrop shapes surround the spiral line extending out, and we finished off with a few lines around the outline of the letter.
These are the details we chose for this design, but they’re just a small sample of what you could use! You can take or leave elements you like and add some of your own.
Perhaps you would like it to look even more extravagant and detail-filled, or you might like to pare it back a lot more. There is also a lot of free space in the background.
You could fill this with colors, shapes, more letters or pictures. Feel free to experiment with your own ideas, but we will also go over a few ideas you can try after the next step.
Speaking of that next step, we will look at some ways you can color in your creation in step 6.
STEP 6:
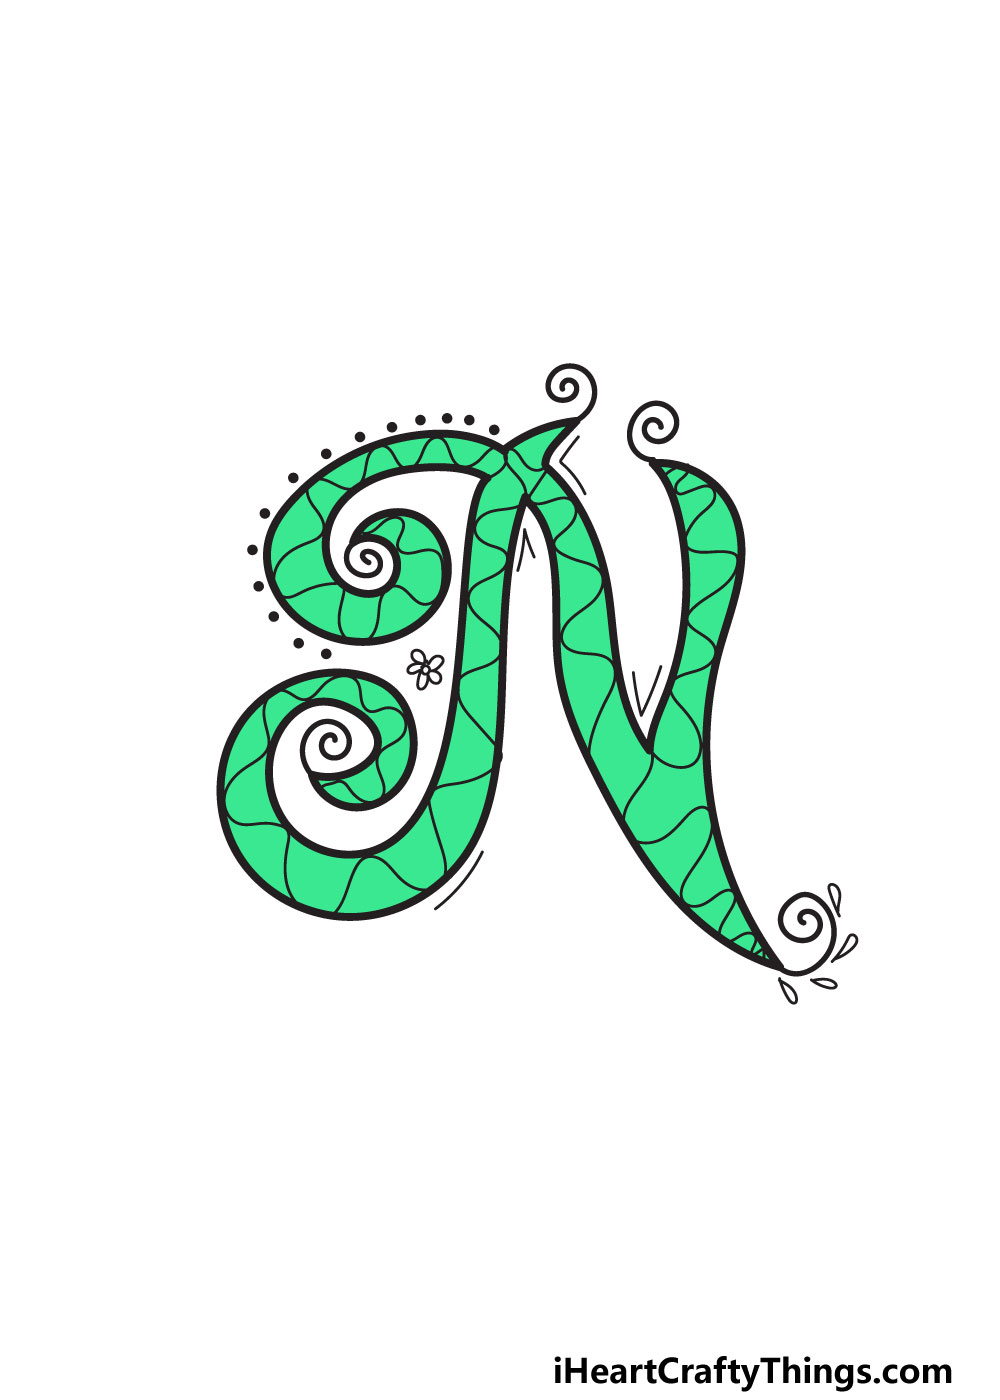
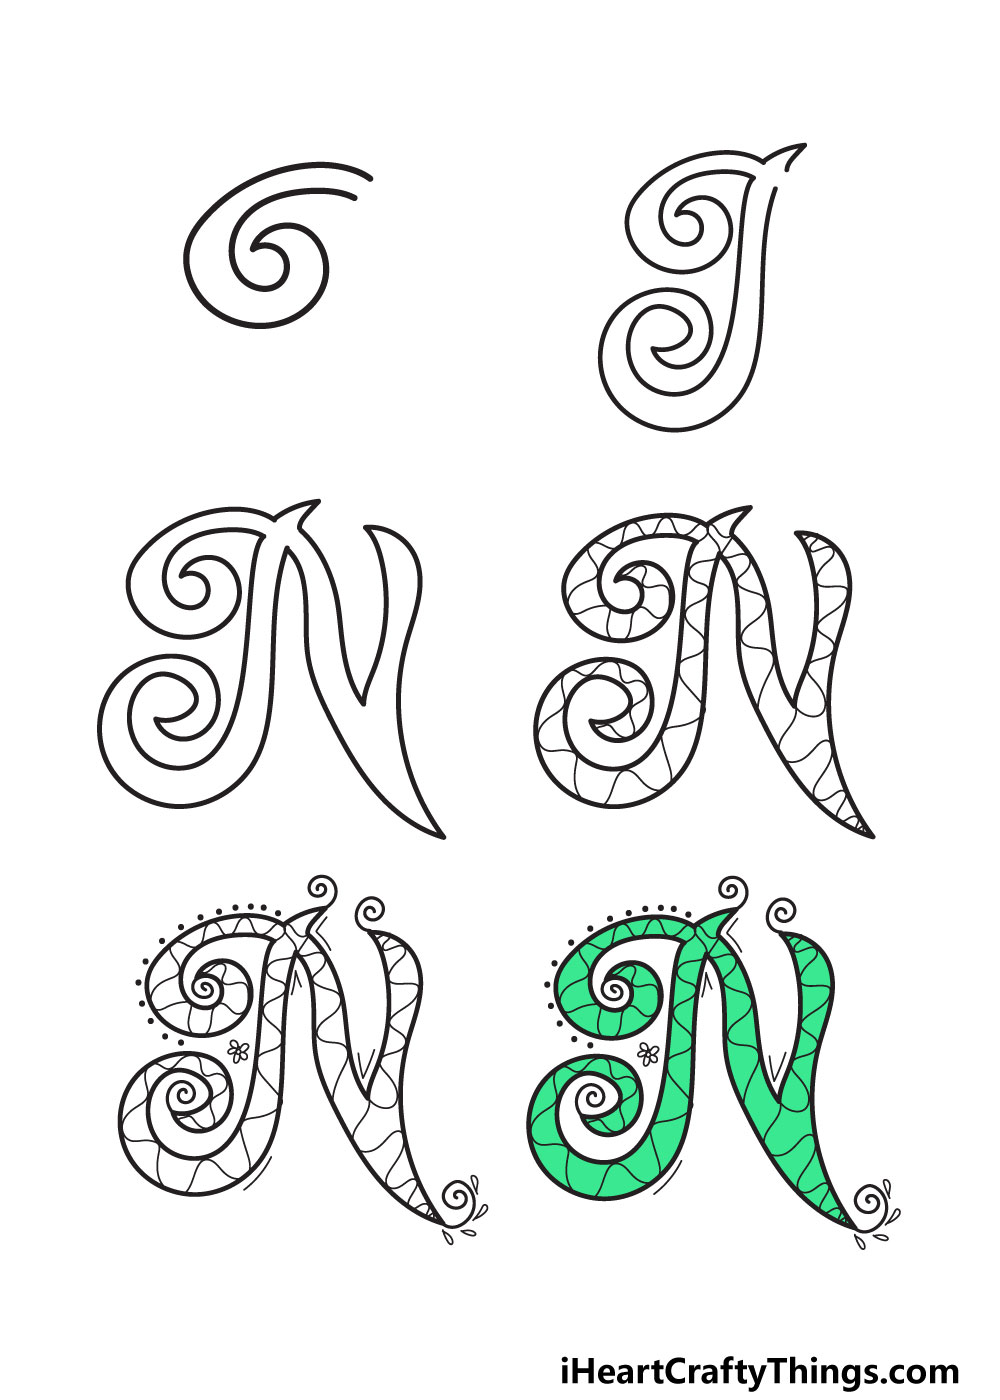
To color in our version of this letter, we went with a nice bright green color to make it stand out. The vibrancy of the colors could be achieved with some highlighters or colored pens if you like the look of the color.
Of course, you could go with any other colors you may prefer! They could be bright and neon like this one or you could go for something more subdued.
You don’t need to stick to just one color, either. It could be fun to fill it with lots of colors and fun arts and crafts. Color is always fun to experiment with, so you should let your creativity take over!
When you’re finished with the design, we will look at a few more ideas you can try to finish off the guide.
My Final Tips To Make Your Fancy Letter N Drawing Even Better!
We have a few more suggestions you can use to make your fancy letter N even more special! First, you can think of some words that start with this letter.
There are simple ones like nails or nickel that you could write out and decorate to a theme. Or, you could choose the name of a place like Nicaragua and add details that relate to the place.
Another great way to do it would be by choosing someone’s name. This could be based on someone you know, or you could pick a name that you like.
Maybe write out the name in this fancy style and then add some pictures and other details that remind you of that name.
Can you think of any names starting with N that would work? These are just a few suggestions, but now you can get creative with some of your own!