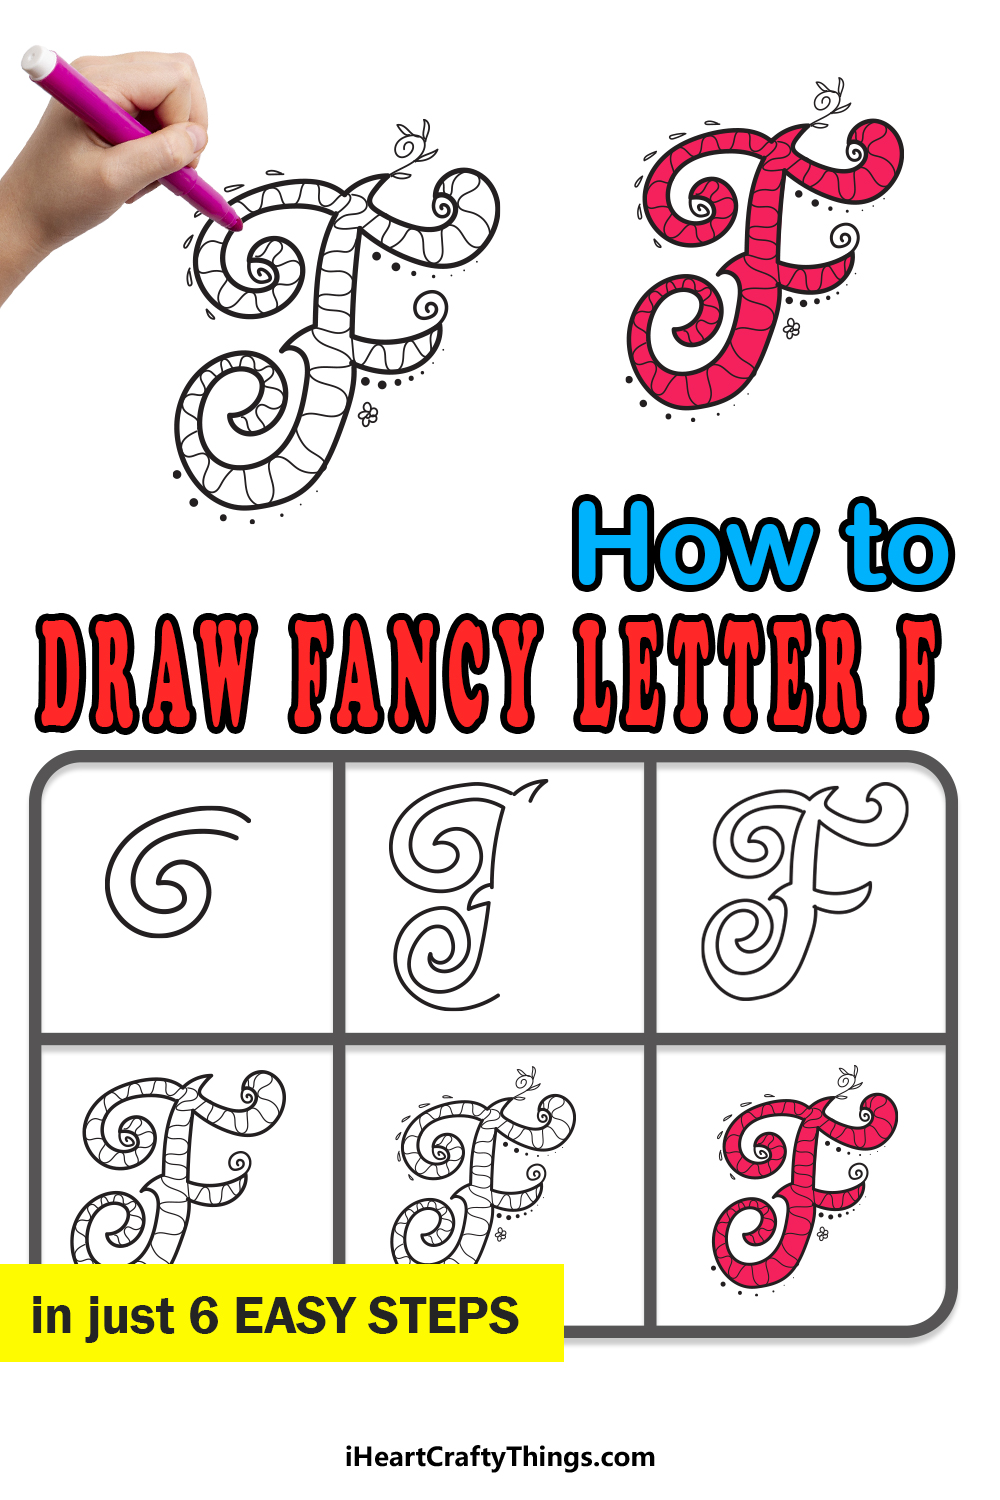
The word fancy starts with the letter F, so it’s appropriate that we will be learning how to draw a fancy letter F in this guide!
The letter F is the sixth letter of the alphabet, and it’s one we use quite a lot in English. It has a soft sound to it, and it has a fairly unique design to it.
This is true when writing it normally, but it’s even more the case when you draw it in a stylistic way. It can make it quite tricky when you want to make the letter fancier.
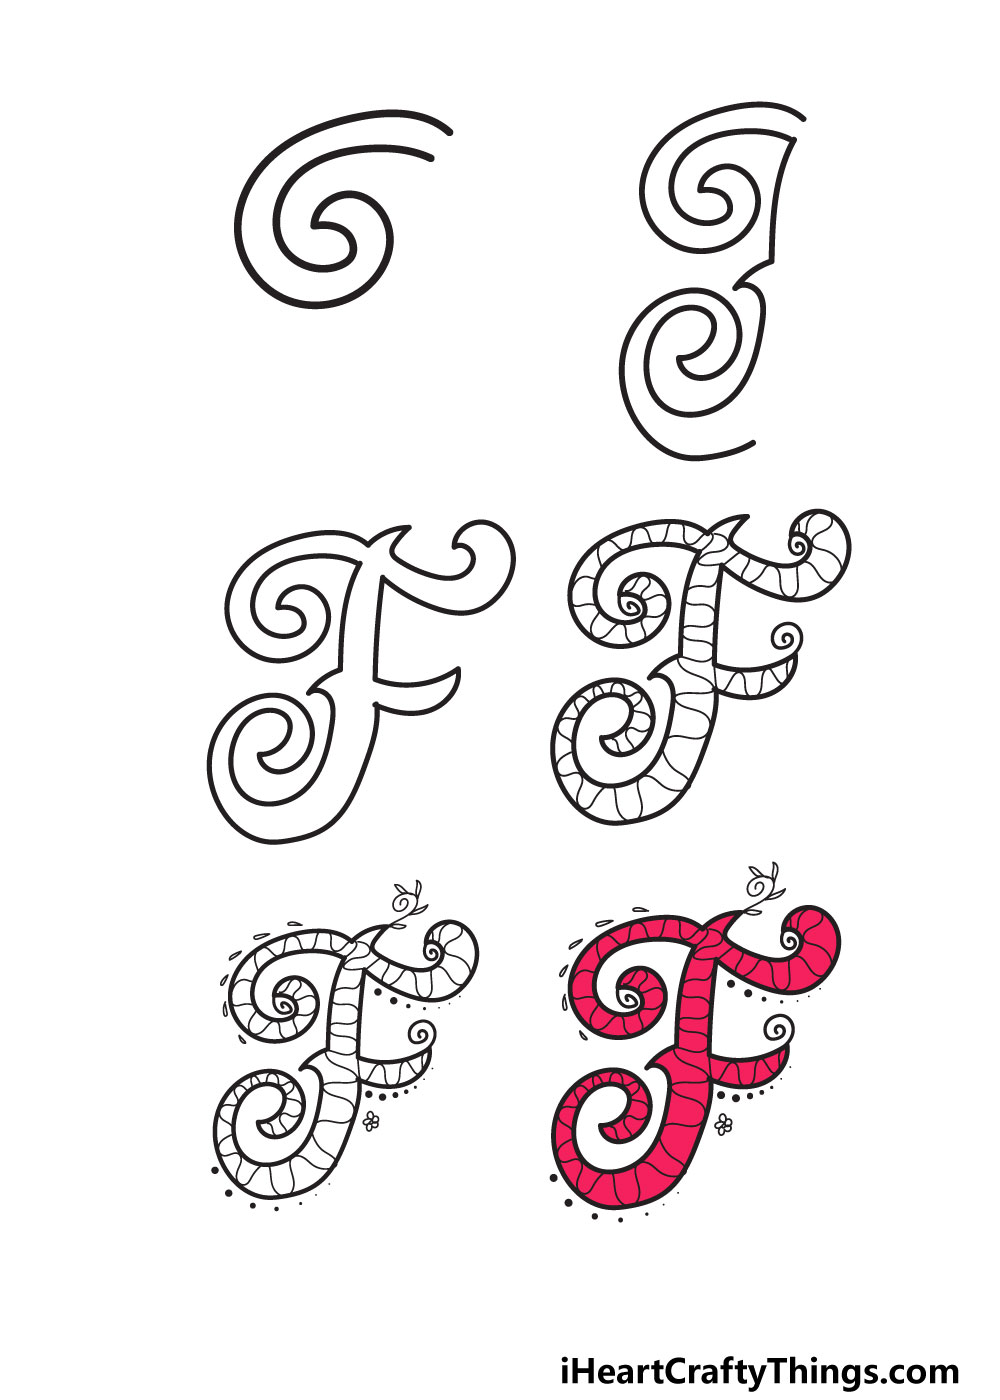
That’s why we created this guide, as we wanted to show you how easy it can be when you know what to do! We have 6 steps that will take you through the whole process.
After that, we will go over some ideas for how you can take it even further, so let’s start with step 1.
Let’s Get Started
STEP 1:
In the introduction, we mentioned that the letter F is a bit more complex to write than many other letters. While these steps will show you how to draw it, you can prepare for the design.
The best way to do this is by drawing it out with a pencil first. When doing this, the pencil version doesn’t need to be done in the same fancy style.
Instead, you can draw it out like a normal letter F. It will help you to visualize the shape of the letter as you draw the fancier version.
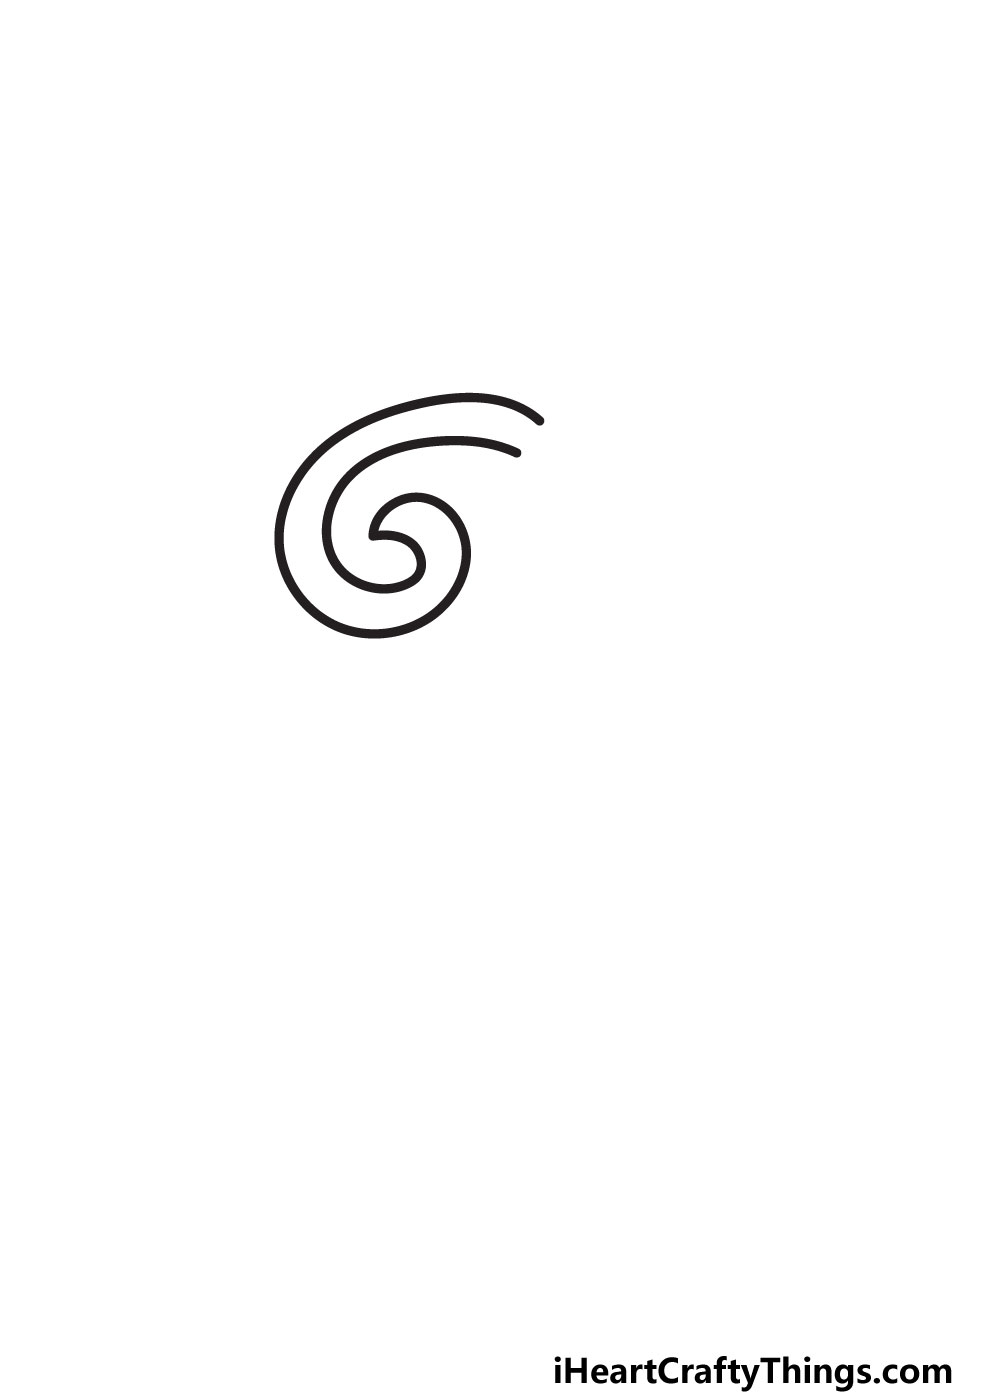
With that out of the way, we will focus on the first flourish of the letter. We will be adding some spiraling shapes to various points of the letter.
These spirals will help to make the letter look fancier, and you can draw the first one now. It will go on the upper left side of the letter.
You will see in the reference image that this spiral is shaped a bit like a rounded letter G, and you could make it even twistier if you like.
Once you have drawn this flourish, we can move on to step 2.
STEP 2:
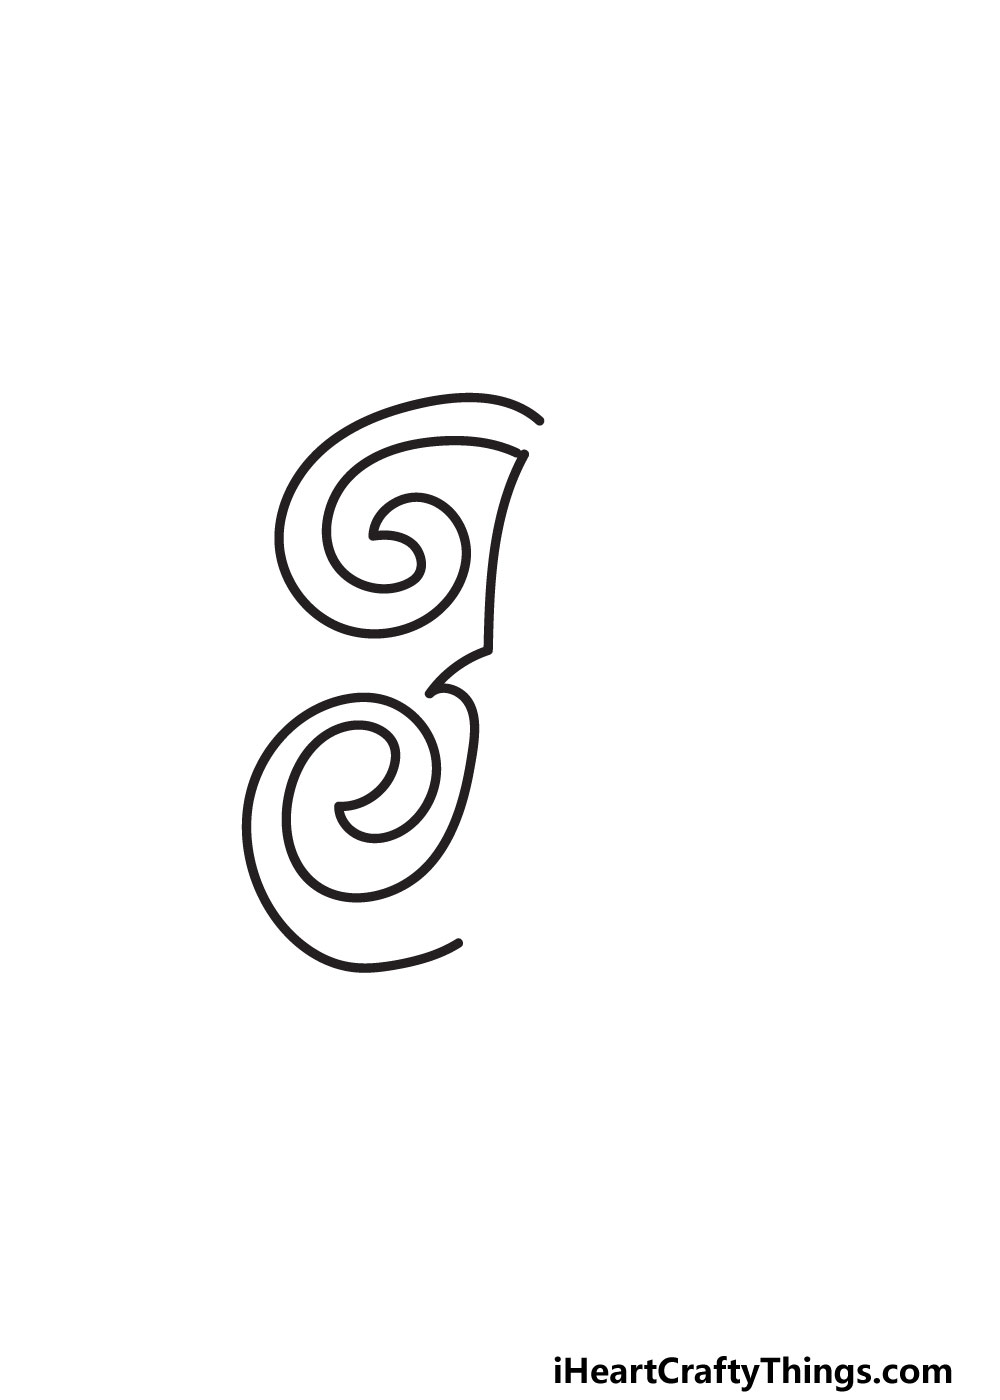
Next, we will be drawing the rest of the left-hand side of this letter. You can start with a very slightly curved line coming down from the flourish from the last step.
About halfway down the letter, we will be adding a small pointy shape that looks a bit like a thorn. The bottom of this shape will then extend into another slightly curved vertical line.
That line will gradually curve and twist a bit to the left until it turns into another spiraled shape. It will look similar to the first one you drew, but it will face the opposite direction.
This section can be surprisingly tricky, so be sure to take it slowly and closely follow our example image as you draw.
When you’re ready for the next step, we can draw the rest of the outline of the letter so you will be ready for some interior details.
STEP 3:

Now, we will be drawing the rest of the outline for your fancy letter F. This will be focused on the right-hand side of the drawing, and we won’t be adding any more spirals for now.
We will keep all of the lines fairly rounded to keep to the fancy look for this letter. You can start by drawing another sharp thorn shape at the top of the letter.
Then, we will draw the top branch of the letter. It will be longer than the one we will draw a bit later.
It will be drawn with the same curved lines, and it will curl upward, as shown in the reference image.
Then, there will be another vertical line coming down from that branch. About halfway down the letter, we will add the second branch, which will be smaller than the first.
It will curl up slightly, and it should be on the same level as the sharp thorn you drew on the other side.
Finish off with one more slightly curved vertical line coming down from the branch until it meets up with the twist you drew at the bottom of the left side.
With that, the outline is complete, and next up we will focus on some iner details.
STEP 4:

Now, we will start to make the letter look more intricate with some details inside the outline. This is something you can change up depending on your own tastes.
Four our design, we used a wavy line all throughout the outline to create a frilly effect for the letter. You could go for something similar or go for a different pattern if you prefer!
After that, we then drew some more lines from many of the tips of the various points of the letter. We drew some small spirals from these points, and it’s a simple yet effective touch.
These are just some of the touches you can add to the letter, but you could change them or add some of your own to personalize it a bit.
Once you’re happy with how it looks, we can then start adding some details around the letter in the next step.
STEP 5:
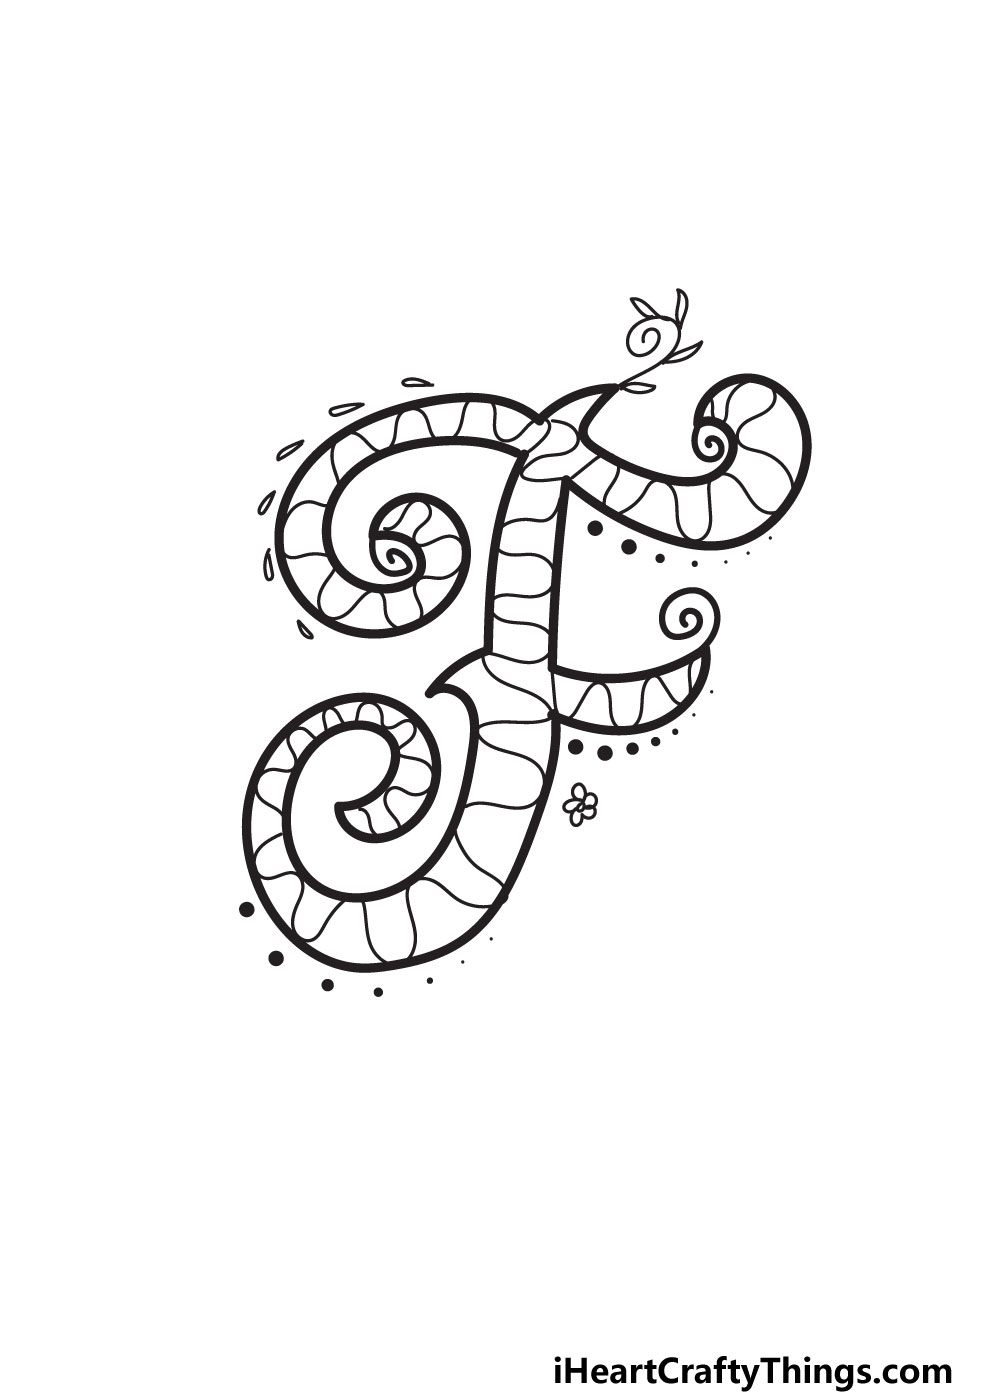
Seeing as the word flower begins with the letter F, we decided to go with a floral theme for the outer details of this letter. Before we add those, we also drew dots of varying sizes around the letter.
You could place these where we did, or you could vary the positioning and sizes. On the spiral on the upper left side, we drew some small petal shapes along the outer edge.
Next, we added a spiraled line coming from the top tip of the letter. Then, we added some small leaves to that line to make it look like a leaf-covered vine.
Finally, we added a small little flower on the lower right-hand side of the drawing. Just the one flower is a nice touch, but you could add many more if you like!
These are some of our suggestions for decorating the picture, but now you can add some more of your own.
There are so many ways that you can add details and flourishes, and you can even go with a theme.
After the next step, we will cover a few ways that you can personalize it even more, but first let’s add some color to the drawing.
STEP 6:
There is a practically infinite spectrum of colors, so you have so many options for how you could color your drawing.
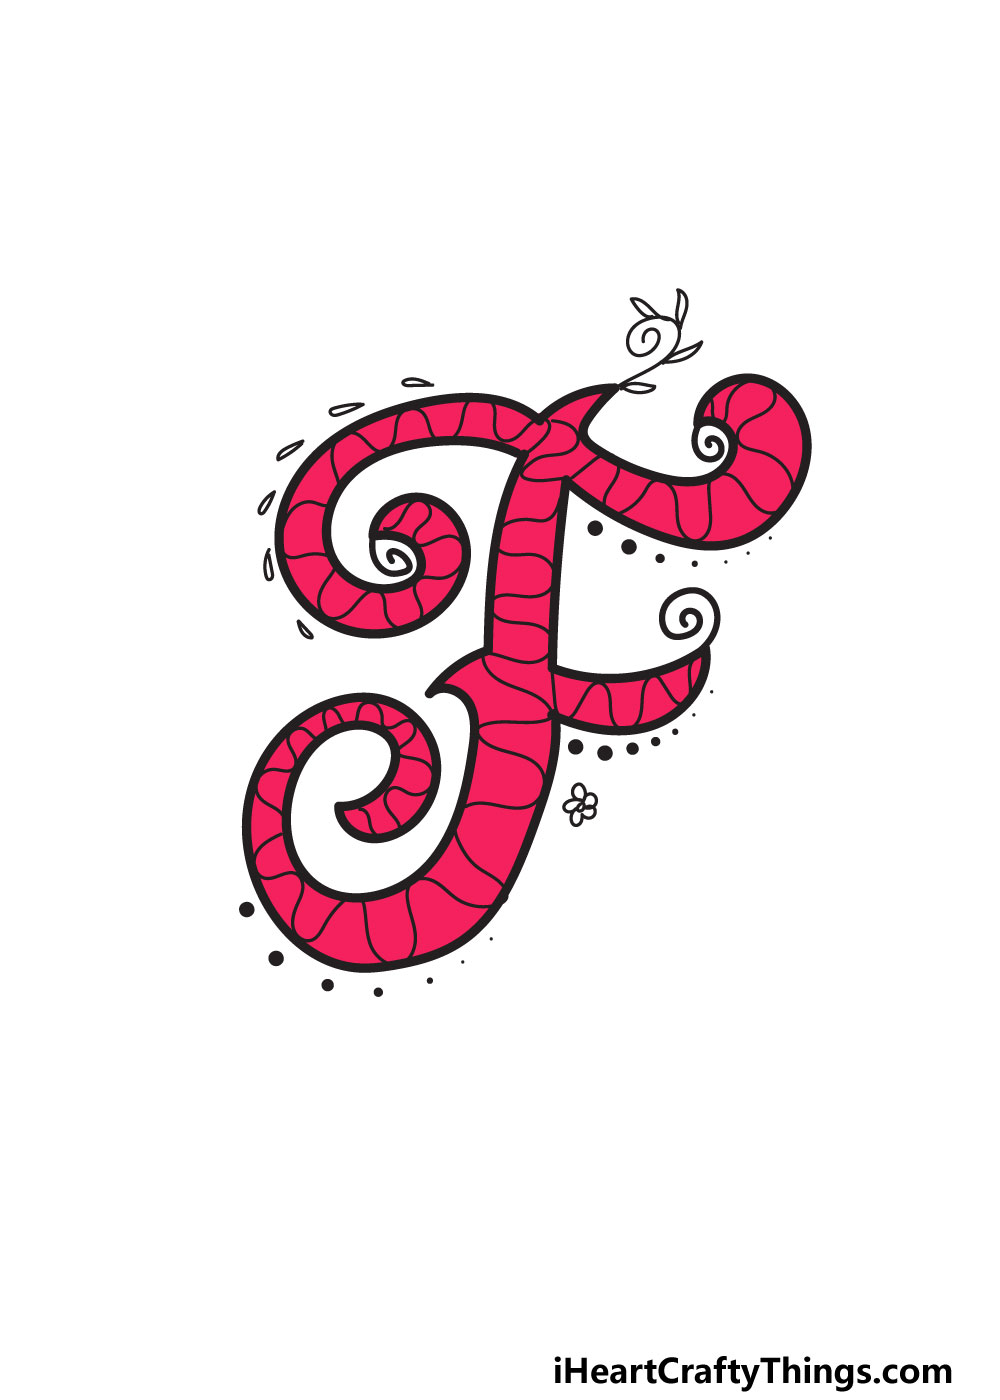
In our reference image, we showed you just one of the many ways you could color the letter. We chose to use a bright pink color for the letter.
This helps to make it look nice and bright, and you could use all sorts of art tools and mediums to achieve a similar look for your drawing.
While we love how the pink color looks, you could choose any other colors you like. You may want an even brighter color or you may prefer something darker.
For extra fanciness, you could even use some art tools like some glitter or beads to make it really stand out. Coloring patterns onto the design can also make it stand out.
Once you have colored the letter, you can also bring more colors in by coloring the areas around the letter. Now it’s up to you to decide what you would like for this drawing!
What will you choose for this drawing?
My Final Tips To Make Your Fancy Letter F Drawing Even Better!
You may think there’s not much left to do after finishing all the steps of this guide, but there is way more that can still be done.
We think it would be fun to come up with some kind of theme to customize the drawing. One great way to do this is by theming the drawing to the letter.
There are plenty of simple words that start with the letter F, such as fish, fan or fly. While you could write out these kinds of words in this style, you can also go for something fancy.
It could be fun to actually write out the word fancy in this style and add all sorts of fun extra details! Another way to do it is to write out a name that starts with F.
It would be a great gift for someone if you wrote their name in this style on a card or a picture, so try to think of someone you know with a name starting with F.
How else would you like to get creative with this drawing?