The Day of the Dead is one of the most unique cultural celebrations in the world.
Originating from Mexico, this intriguing celebration brings a sense of celebration and revelry to the usually pretty dark subject of death.
When it’s celebrated, there will be colorful parties, parades and other revelries, and colorfully decorated sugar skulls will generally be prominently featured.
Learning how to draw the Day of the Dead is a great way to create some wonderful artwork featuring this unique celebration.
This is the perfect tutorial for anyone wanting to commemorate this occasion!
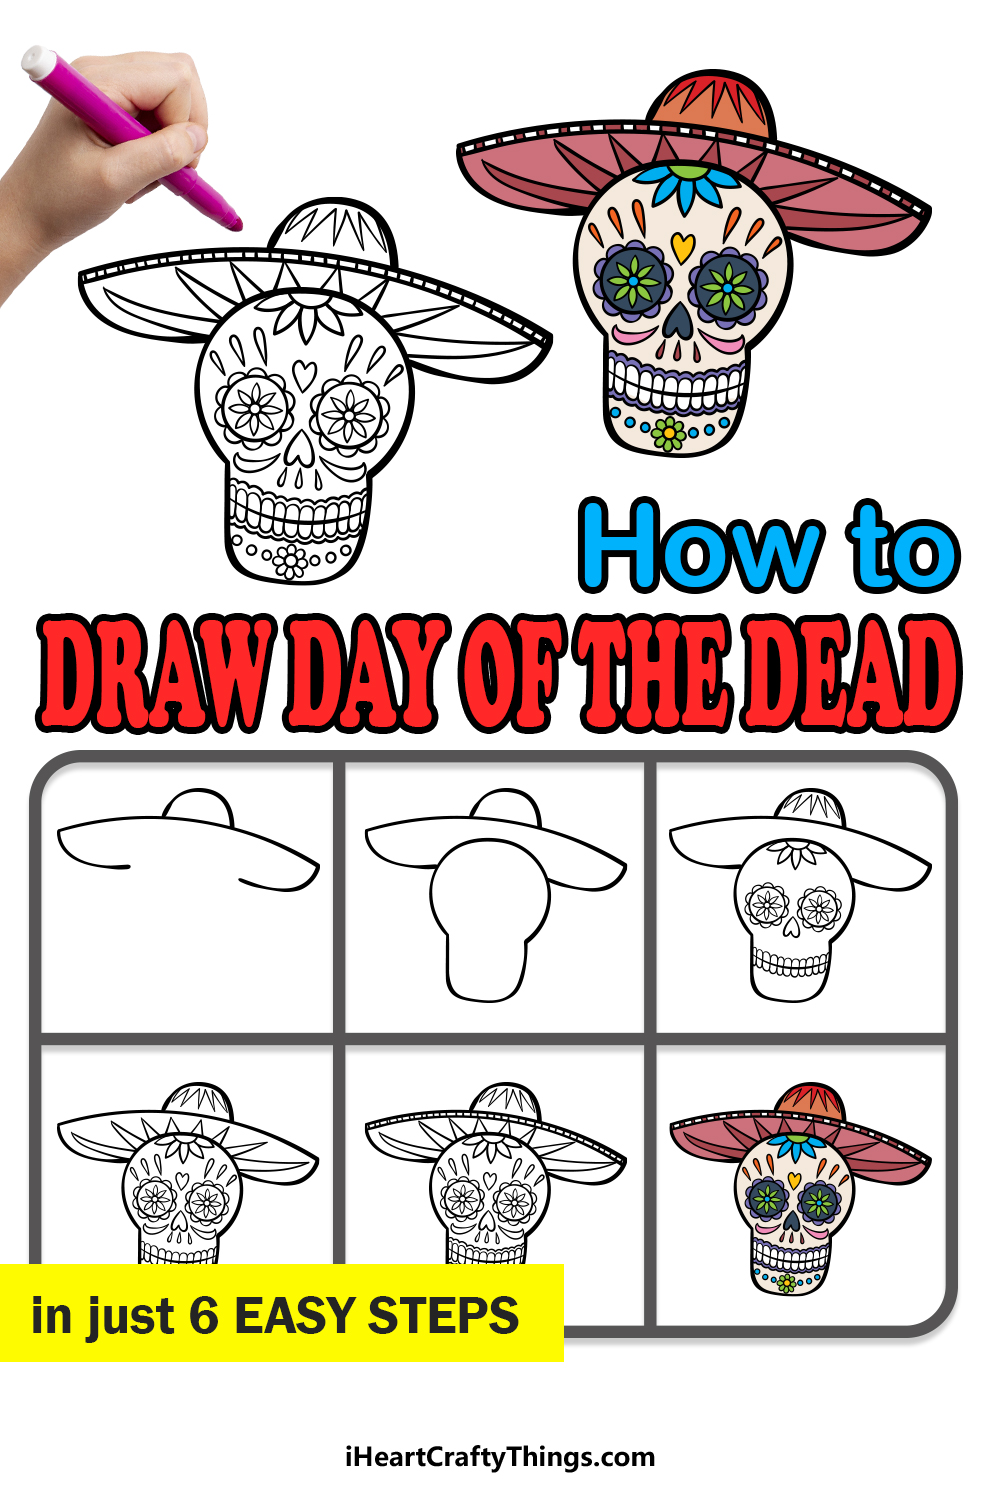
We hope that you have a great time as we work on this step-by-step guide on how to draw the Day of the Dead in just 6 easy steps.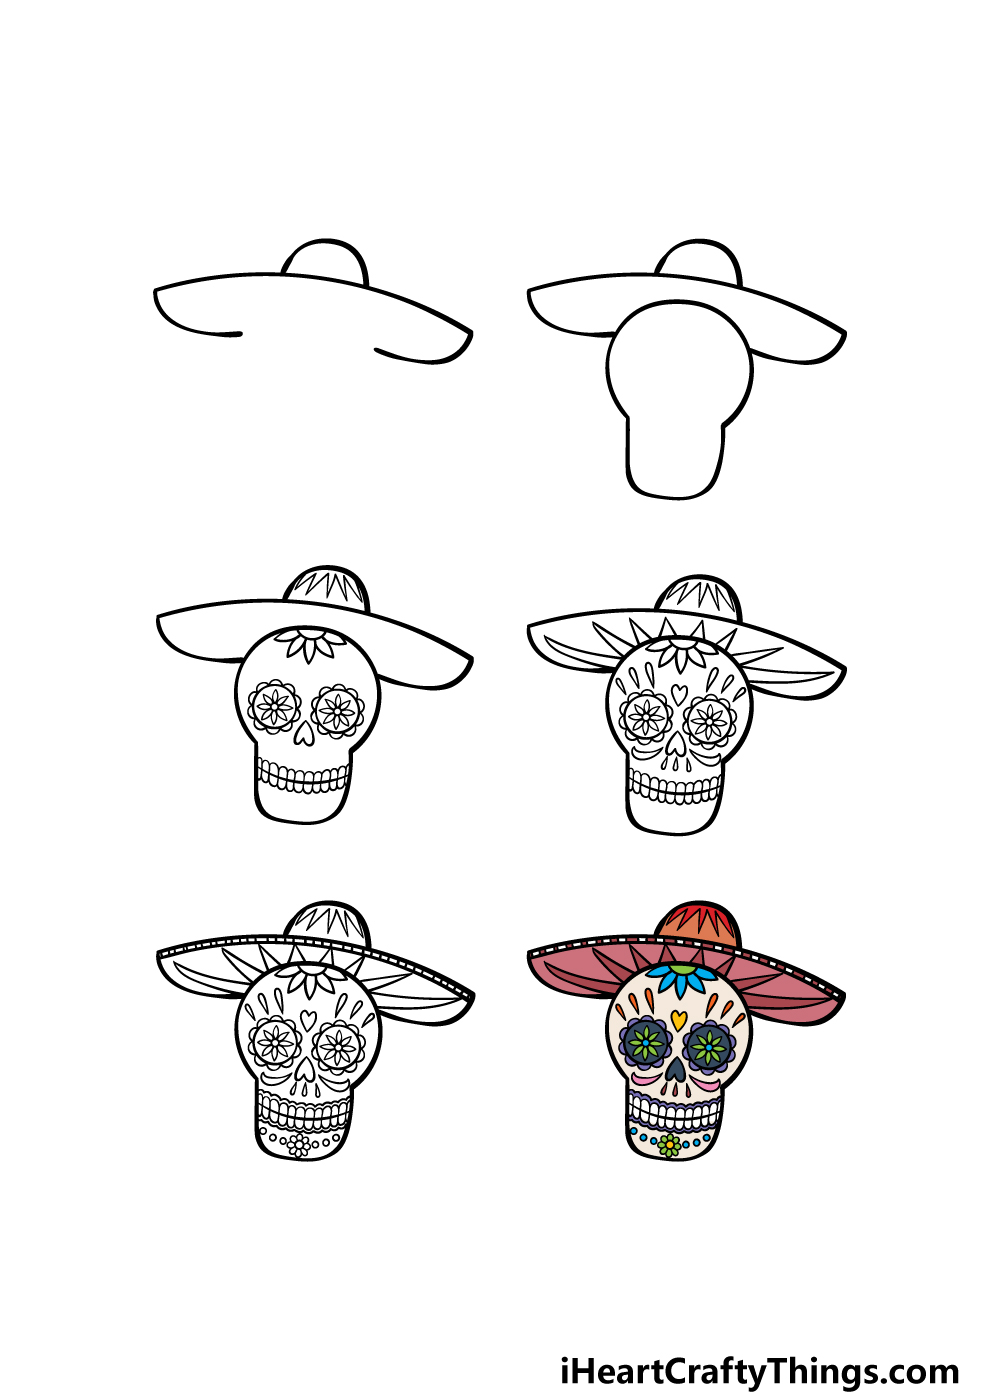
How to Draw The Day of the Dead – Let’s Get Started!
Step 1
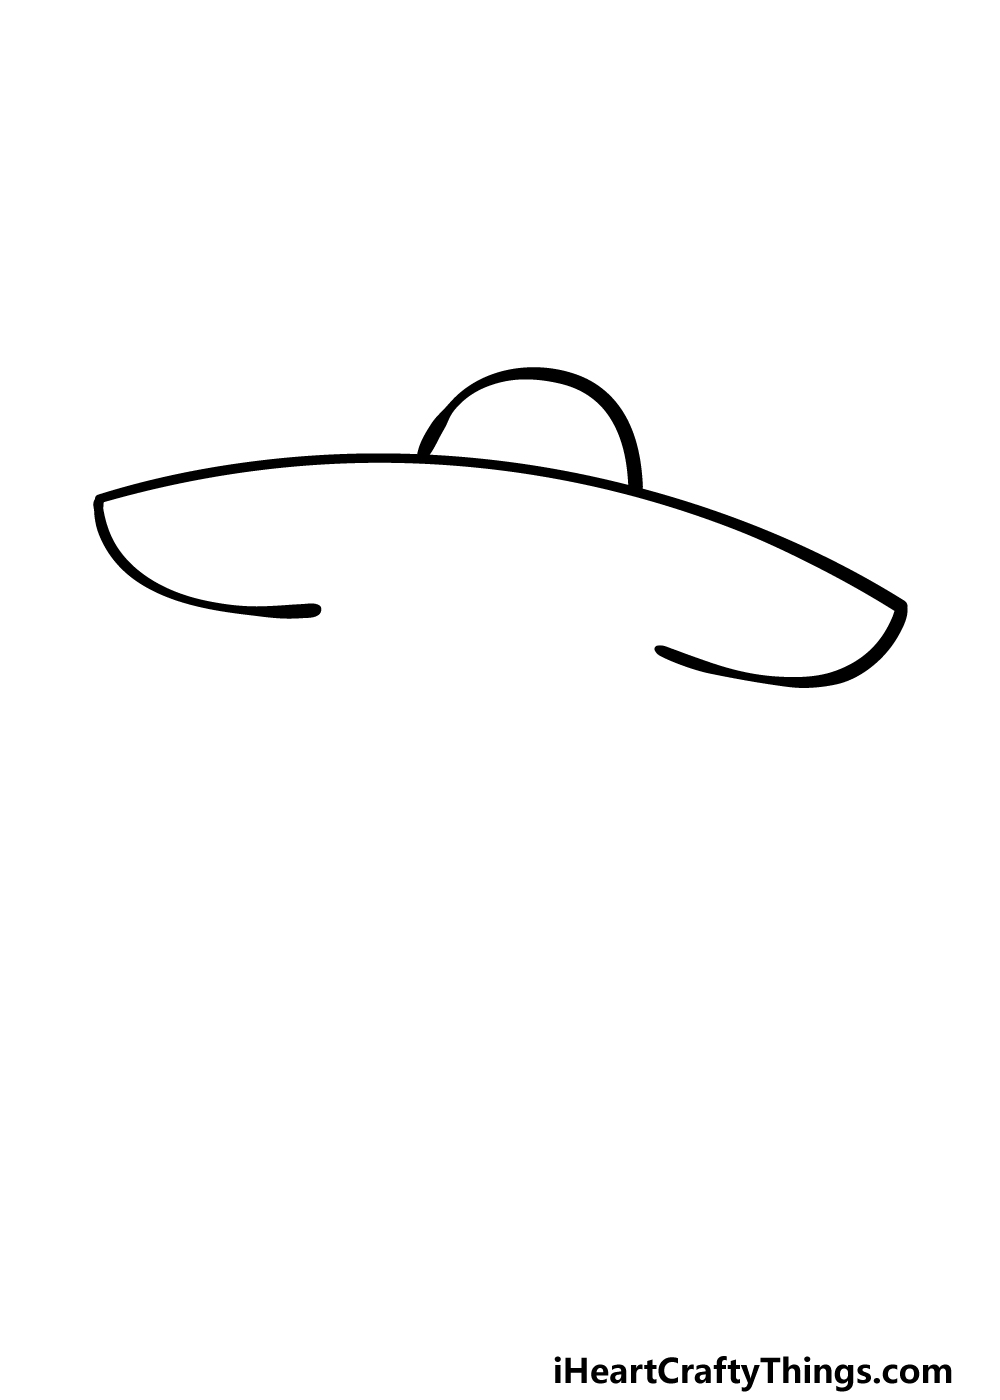
During this guide on how to draw Day of the Dead, we will be portraying a colorful sugar skull wearing a sombrero hat.
This hat is what we shall be starting with in this first step. First, draw a long, slightly curved line for the top of the rim. These will curve sharply inwards with some shorter curved lines.
Then, we will be adding the top of the hat. This will be drawn with a rounded line over the top of the rim that you just drew.
The bottom of the center for the rim will be blank for now, but we will fill that section in shortly.
Step 2 – Now, draw the outline for the skull
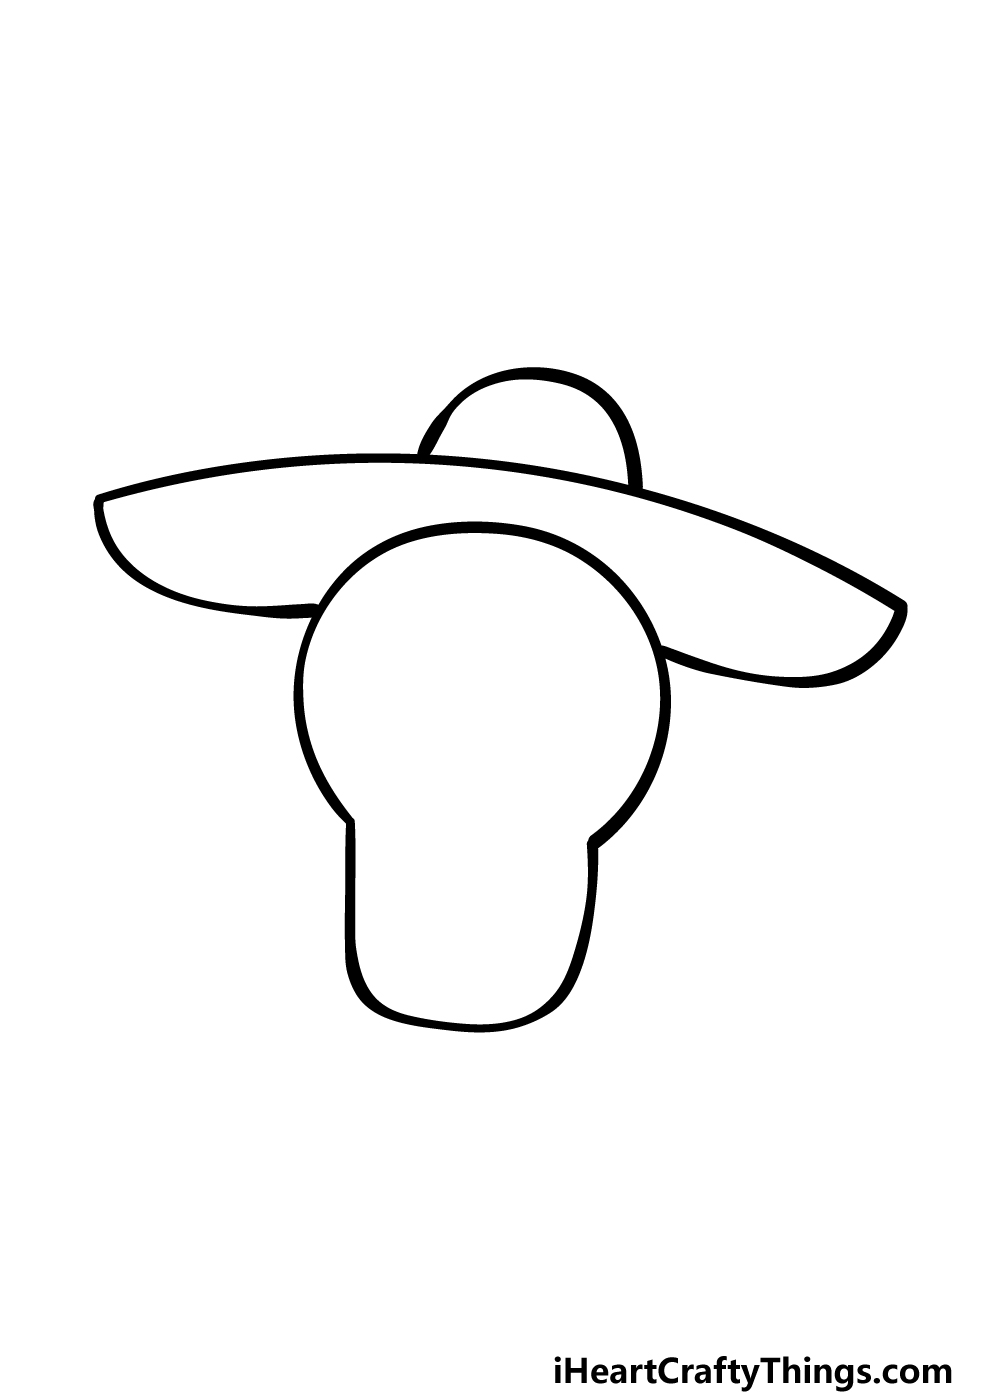
With the outline of the sombrero hat drawn, we will be drawing the outline for the skull in this second step. For the top half of the skull, we will be drawing a rounded line that looks quite circular in shape.
Then, for the bottom half of the skull we will be drawing a different kind of shape. This one will also be drawn with a rounded line, but it will be slightly more squared than the top half of the skull.
With all of the outlines taken care of, we can then start having fun with the decoration of the image in the next few steps!
Step 3 – Draw the first decorative elements for the skull

When it comes to Day of the Dead celebrations, you’re bound to see lots of bright colors and cool decorative elements.
For the sugar skulls, they will usually have some elaborate detailing that often has a floral element. This is what we shall start to add in this third step of our guide on how to draw Day of the Dead!
Once you have mastered this design, you could also use what you have learned to create your own designs. For the top half of the hat, we added some sharp, pointy lines.
Then, we added a flower design near the top of the skull. The eyes are drawn as round shapes with more petal elements around them.
Finally, we used an upside-down heart for the nose and a grid pattern for the grinning mouth. With these elements drawn, we can continue adding more details in the next few steps.
Step 4 – Next, draw some more details for the skull
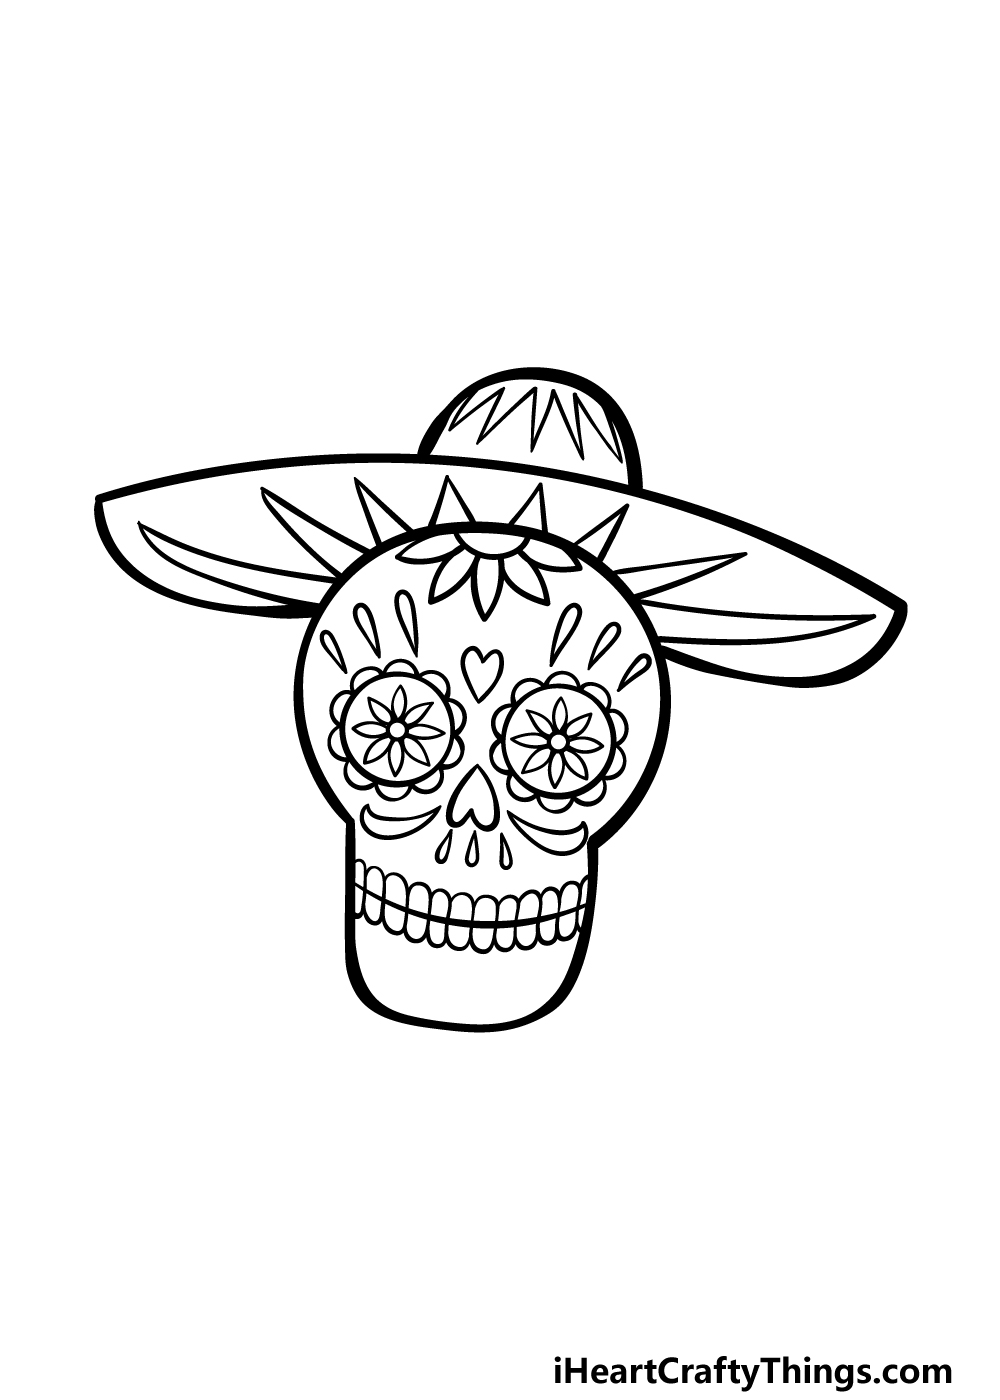
With these sugar skulls, the more details that can be added the better. For that reason, we will be adding a lot more detail to your Day of the Dead drawing in the next few steps.
First, we will be drawing some more sharp, pointy shapes inside the rim of the hat.
Then, we drew some more heart shapes and other small, rounded shapes into the top section of the skull.
We also added some smaller, curved shapes and lines beneath the nose to form a bit of a mustache shape.
Then you will be ready to move on to some final details in the next step of the guide!
Step 5 – Add the final details to your Day of the Dead drawing
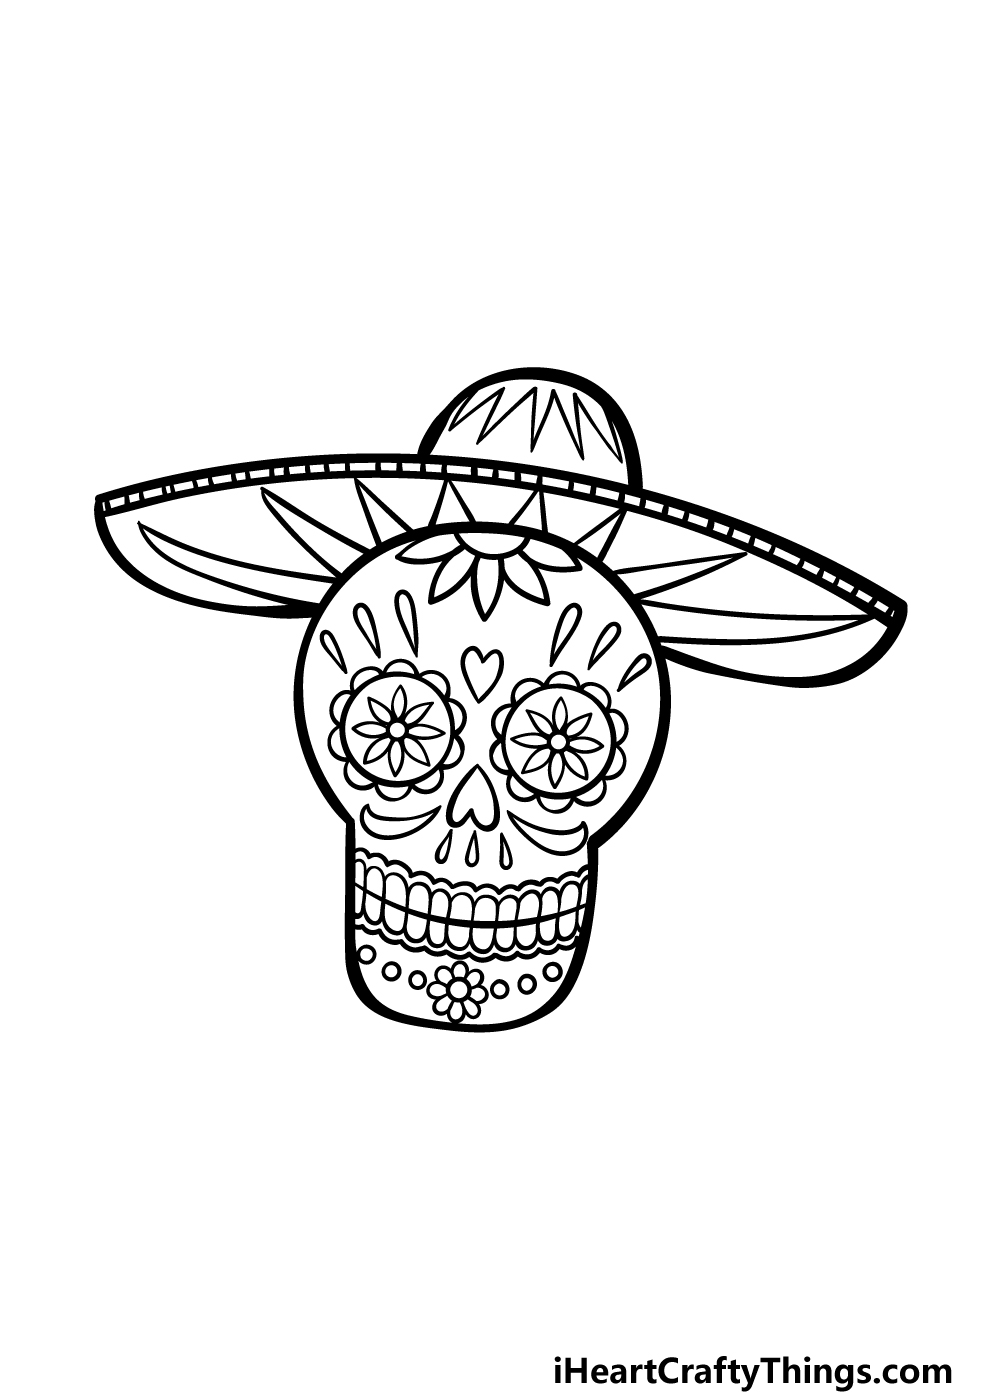
This fifth step of our guide on how to draw Day of the Dead will be all about finishing off with some final details and touches.
You can start by drawing a small flower shape near the chin of the skull and then surround it with smaller shapes. Then, we added some lines around the teeth and the rim of the hat to finish it off.
These are the details we chose, but you should also feel free to add any additional details that you may like for it!
Will you add some touches of your own? You could even draw a background to really finish off this image!
Step 6 – Finish off your Day of the Dead drawing with color

You’re ready to finish off this Day of the Dead drawing as you add some colors to your creation!
Color is a big part of the Day of the Dead celebration, so you should have lots of fun picking the colors that you think would best suit this image.
In our reference image, we showed you just one way that you could go about coloring this image in, but this is by no means the only way that you could color it!
When coloring, art mediums that allow for precision such as colored markers, pencils, pens and thin brushed would be ideal for the smaller details. How will you choose to color in this awesome image?
5 Tips To Make Your Day Of The Dead Drawing Even Better!
Celebrate this fascinating festival with these tips for your Day of the Dead sketch!
With this Day of the Dead drawing, we focused on the sugar skull design. This is an iconic decoration for the day, but you could make it even better by drawing a body for the skull!
This would naturally look like a skeleton, and you could put it in some kind of outfit. What sort of poses could you create for this skeleton character?
When it comes to decorations, sugar skulls can come in all sorts of different designs. The one we created for your drawing of Day of the Dead has a great design, but you could also come up with your own!
By changing the details on your own skull, you could decorate it any way you like. What sorts of patterns would you like?
Another way to show off some cool sugar skull designs would be by drawing more than one. Now that you know how to do it, you could add as many as you like to this Day of the Dead sketch!
It would be a challenge, but each one could have its own design. It would be worth the effort, as the end result would look awesome!
Sugar skulls are not the only Day of the Dead decorations, and you could create a wonderful scene using others. You could add simple objects like candles or create some elaborate banners.
If you want some inspiration, you could look up some real Day of the Dead celebrations to get ideas for decorations. What sorts of scenes would you like to create?
Finally, the best way to express yourself with this Day of the Dead drawing would be by using some awesome colors. We showed you a small selection of colors you could use, but you could use any others you like!
Not only that, but you may want to try mixing mediums and art tools to make the way the colors interact look even more dynamic.
Your Day of the Dead Drawing is Complete!
This celebration is certainly a unique and interesting one, and we hope that you enjoyed capturing a bit of the spirit of the occasion with this guide on how to draw Day of the Dead!
Throughout this guide, we aimed to show you not only that it can be fun and easy to make a design like this, but we also wanted to leave room for your own creativity.
When you have finished this design, you can show off your creativity by creating your own unique images with your own details and ideas!
If you had a great time with this guide, we hope you will visit our website to check out the many awesome drawing guides we have for you.
We upload new ones very often, so be sure to keep swinging by!
It would also be great to see how your Day of the Dead drawing turned out, so please remember to share your creation on our Facebook and Pinterest pages.