Blocked letters were a big part of many of our formative years! These bright and bold cubes with letters on them are a very helpful tool for young kids to use as they begin to learn their alphabet and letters.
While the physical blocks can be a great tool, it can also be fun and educational to learn how to draw blocked letters.
Sometimes it can be trickier than expected, making a guide on how to do it very helpful!
This step-by-step guide on how to draw blocked letters will show you how to learn and have fun mastering this drawing in no time!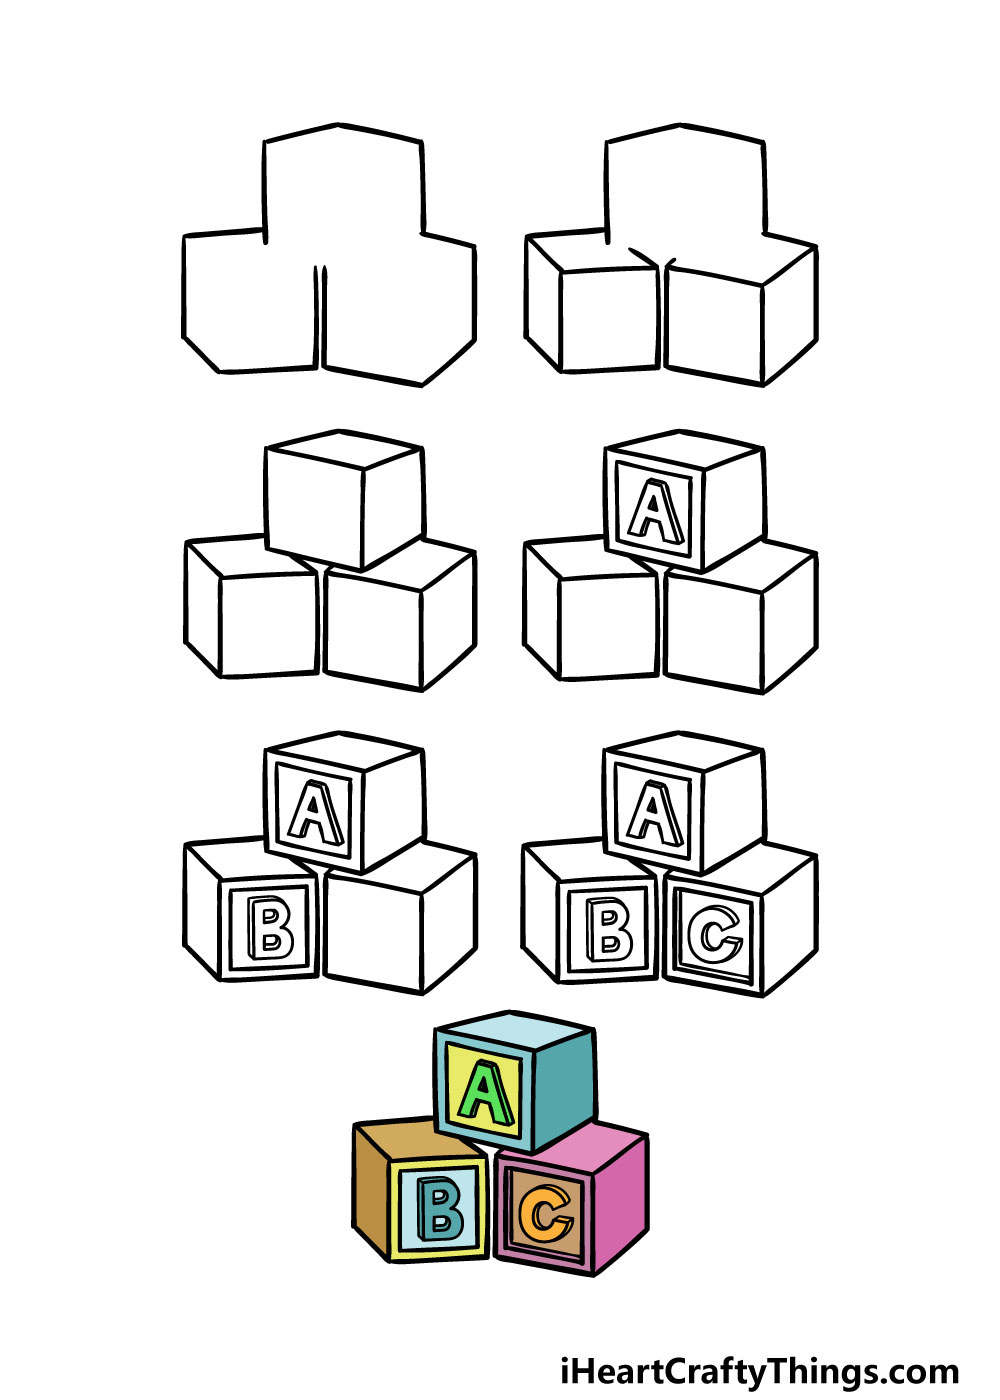
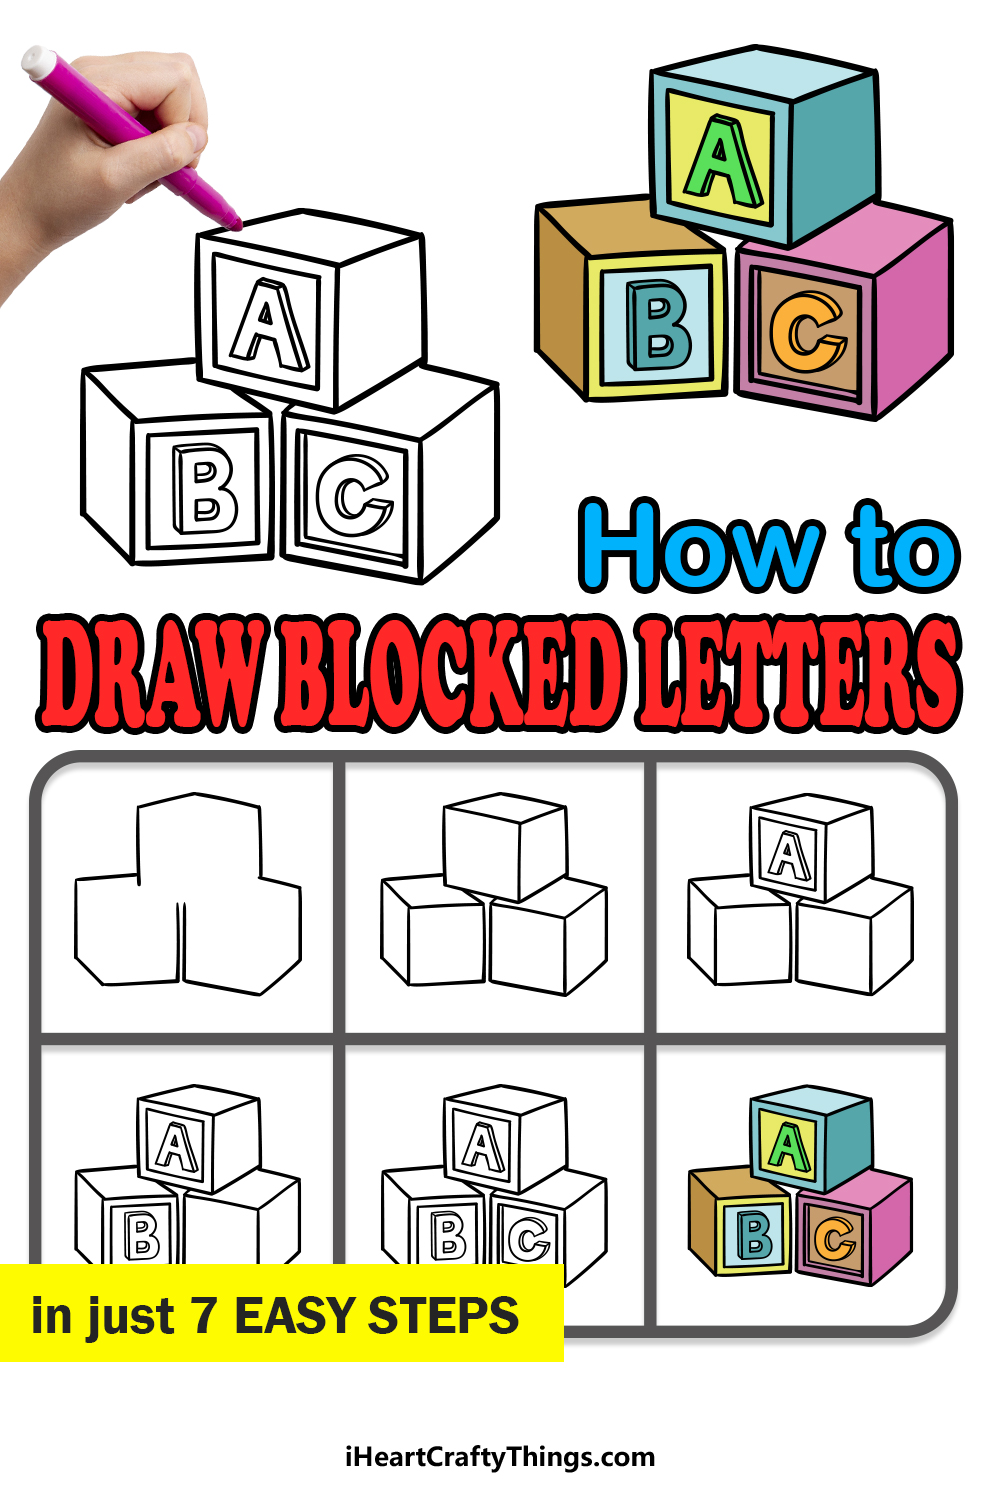
How to Draw Blocked Letters – Let’s Get Started!
Step 1
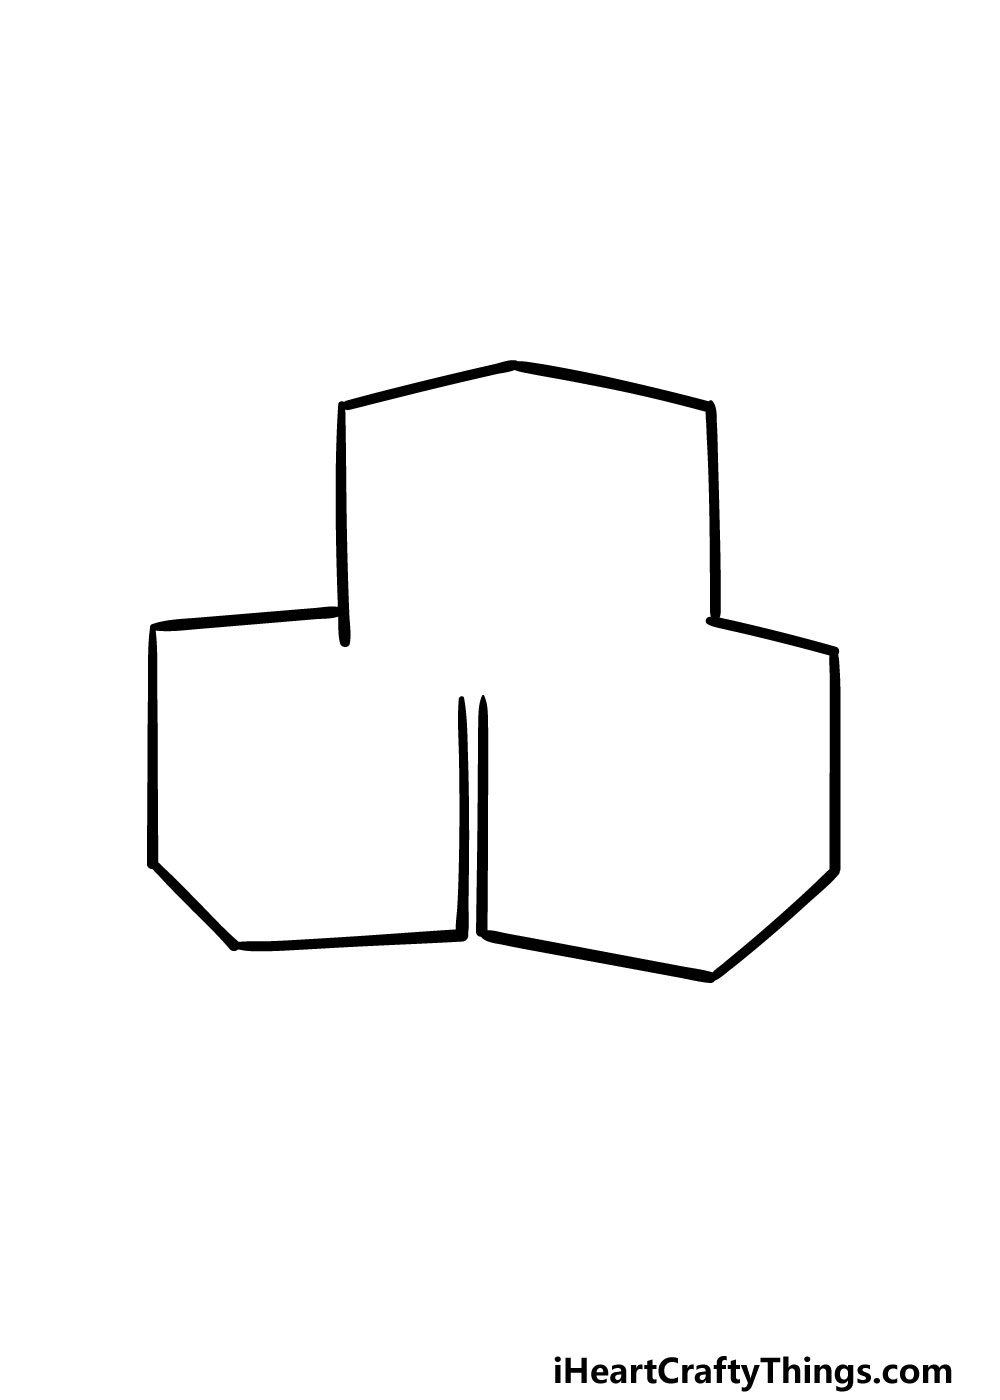
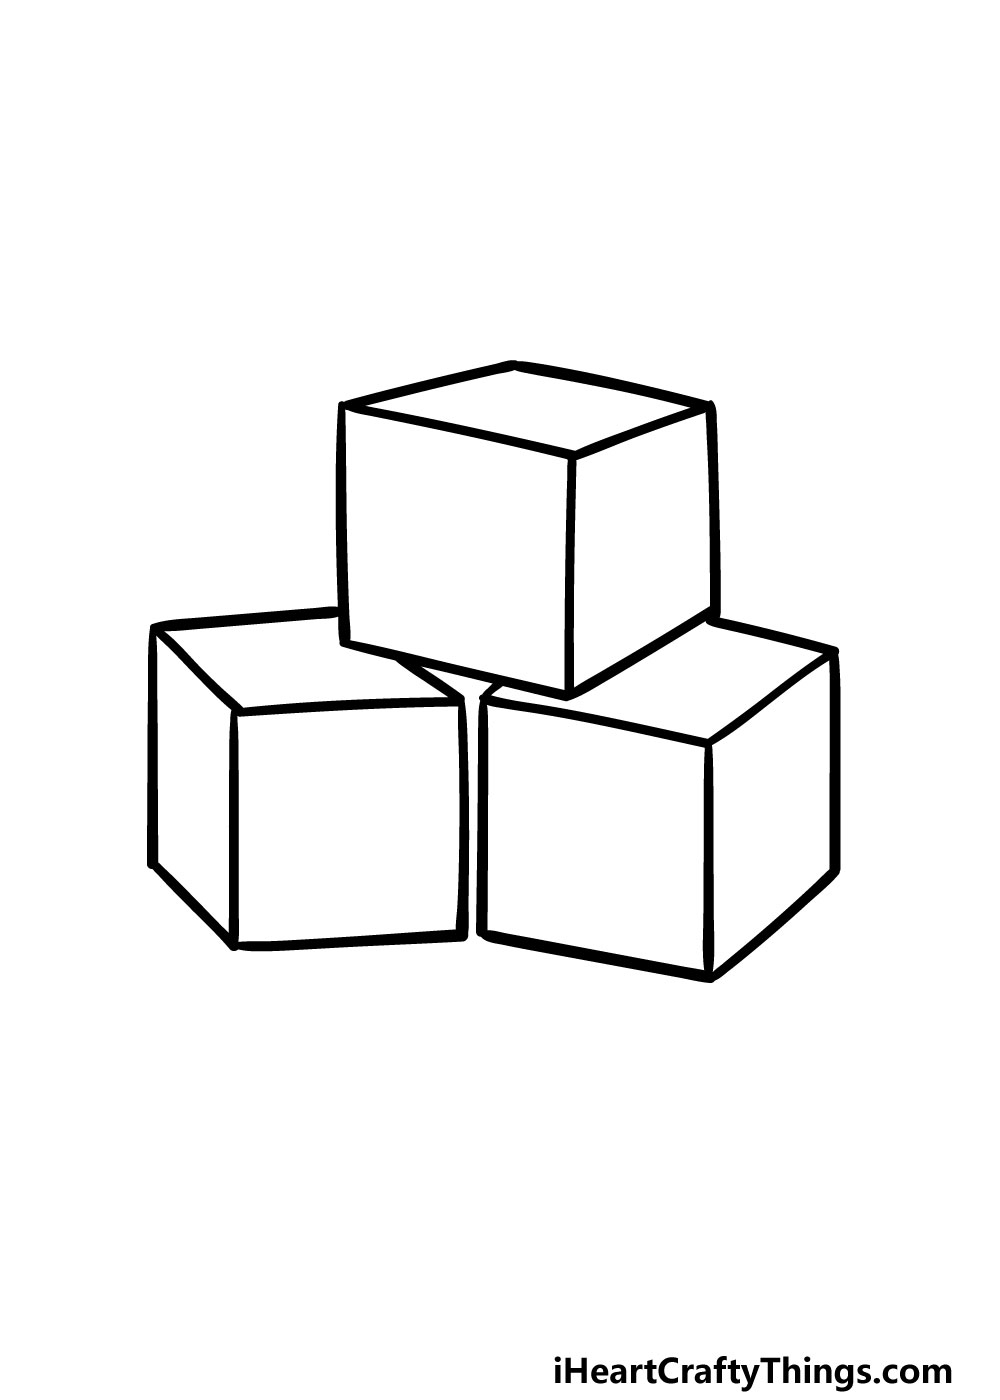
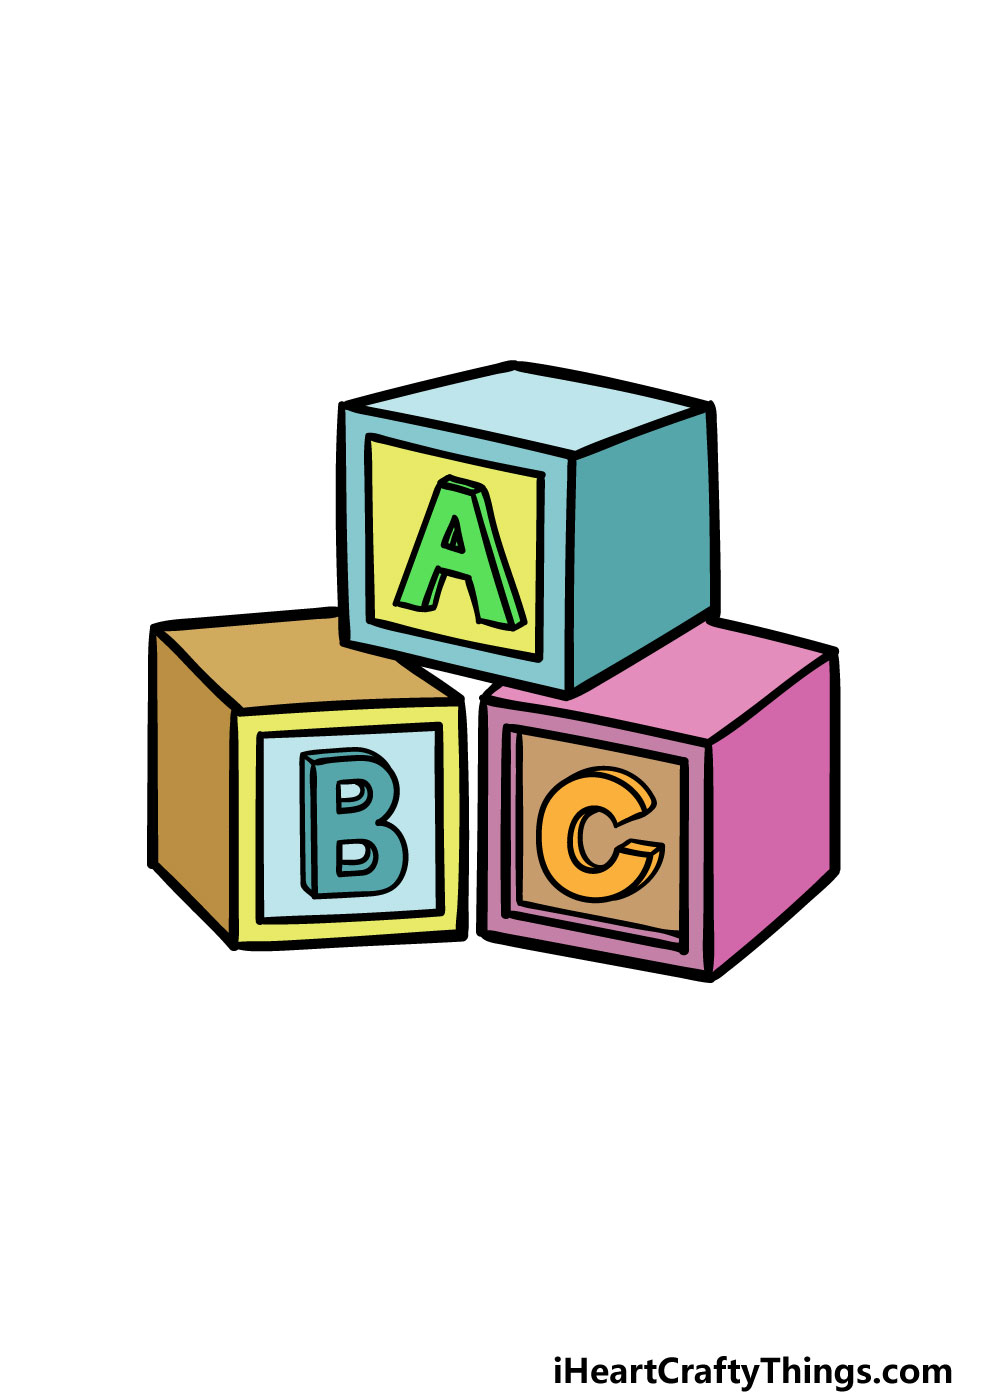
For this guide on how to draw blocked letters, you will find it much easier if you have a ruler on hand to help you out! We will be drawing three cubes on top of one another in this guide, and we will start with the outlines of these cubes in this first step.
Drawing cubes, especially cubes at an angle, can be a lot trickier than drawing simple squares, so you’ll want to follow the reference image as you draw, as the angles will need to be quite specific.
If you are using a ruler, then you may want to measure how long you make each line so that the cubes will be of equal size. There will be some gaps left in the center of the pile of cubes, and we will fill that in shortly.
Step 2 – Start drawing the inner angles of the cubes
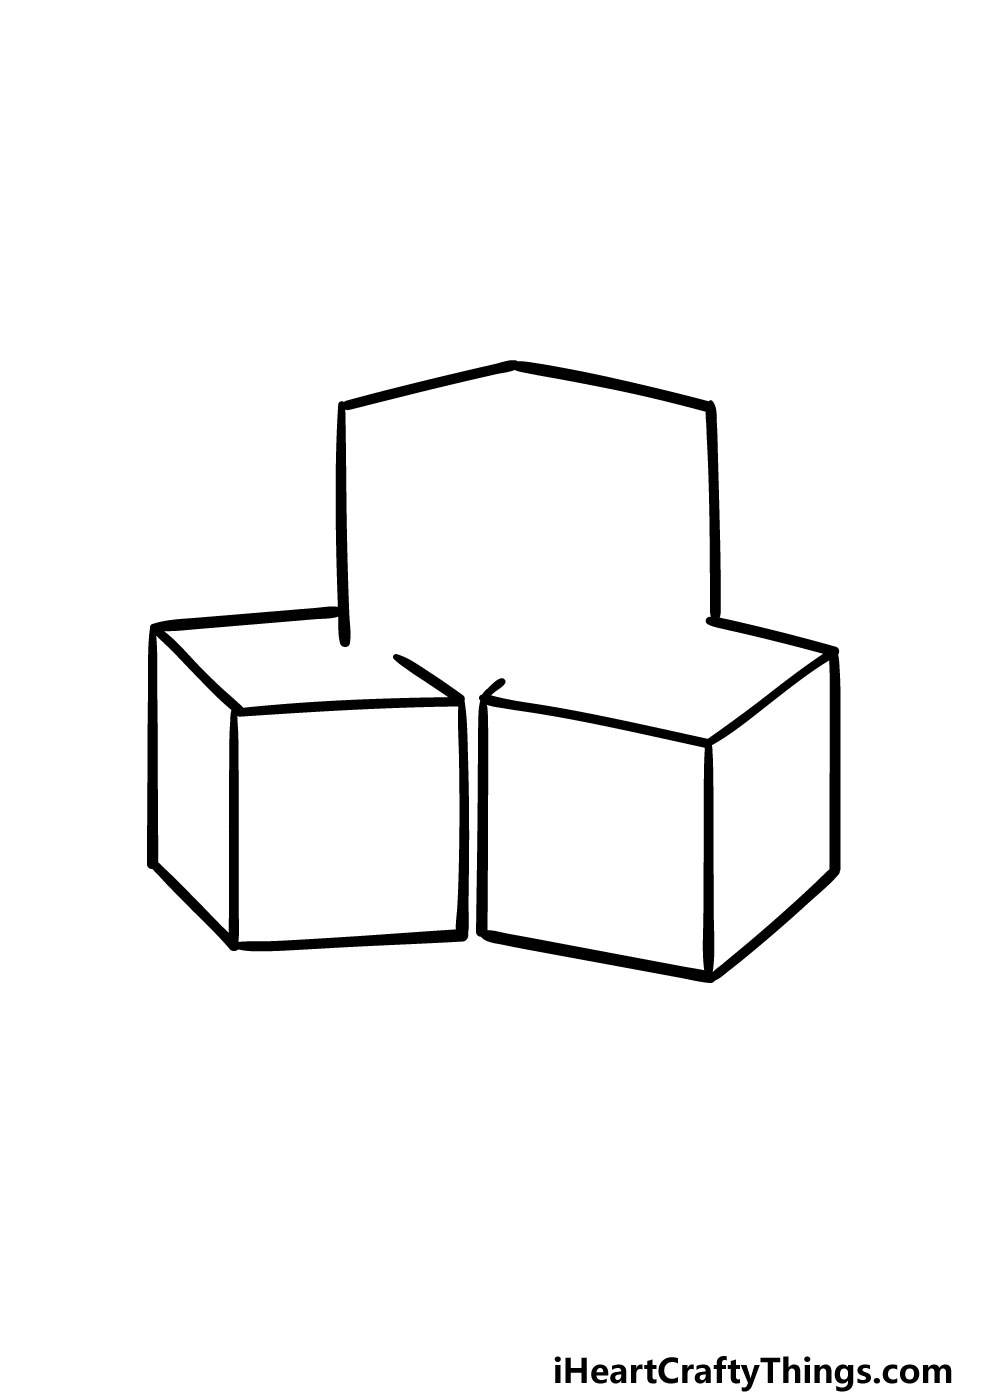
Now that you have the outlines of the cubes of your blocked letters drawing done, you can start to draw some inner details. In this step, we will be drawing some of the edges on the two cubes at the bottom of the pile.
Using that ruler, carefully draw the vertical and horizontal lines to make the sides and tops of the cubes. Once again, the reference image will show you how to position these lines for the 3D effect.
Step 3 – Next, you can draw the lines for the top cube as well
For this third step of our guide on how to draw blocked letters, we will be finishing off the edges of the top cube.
You’ll be doing this in a very similar fashion to how you just did the first two cubes. Simply use your ruler again to finish off the edges of the top cube.
Then, you’ll be ready to start adding the letters!
Step 4 – Draw the first letter details next
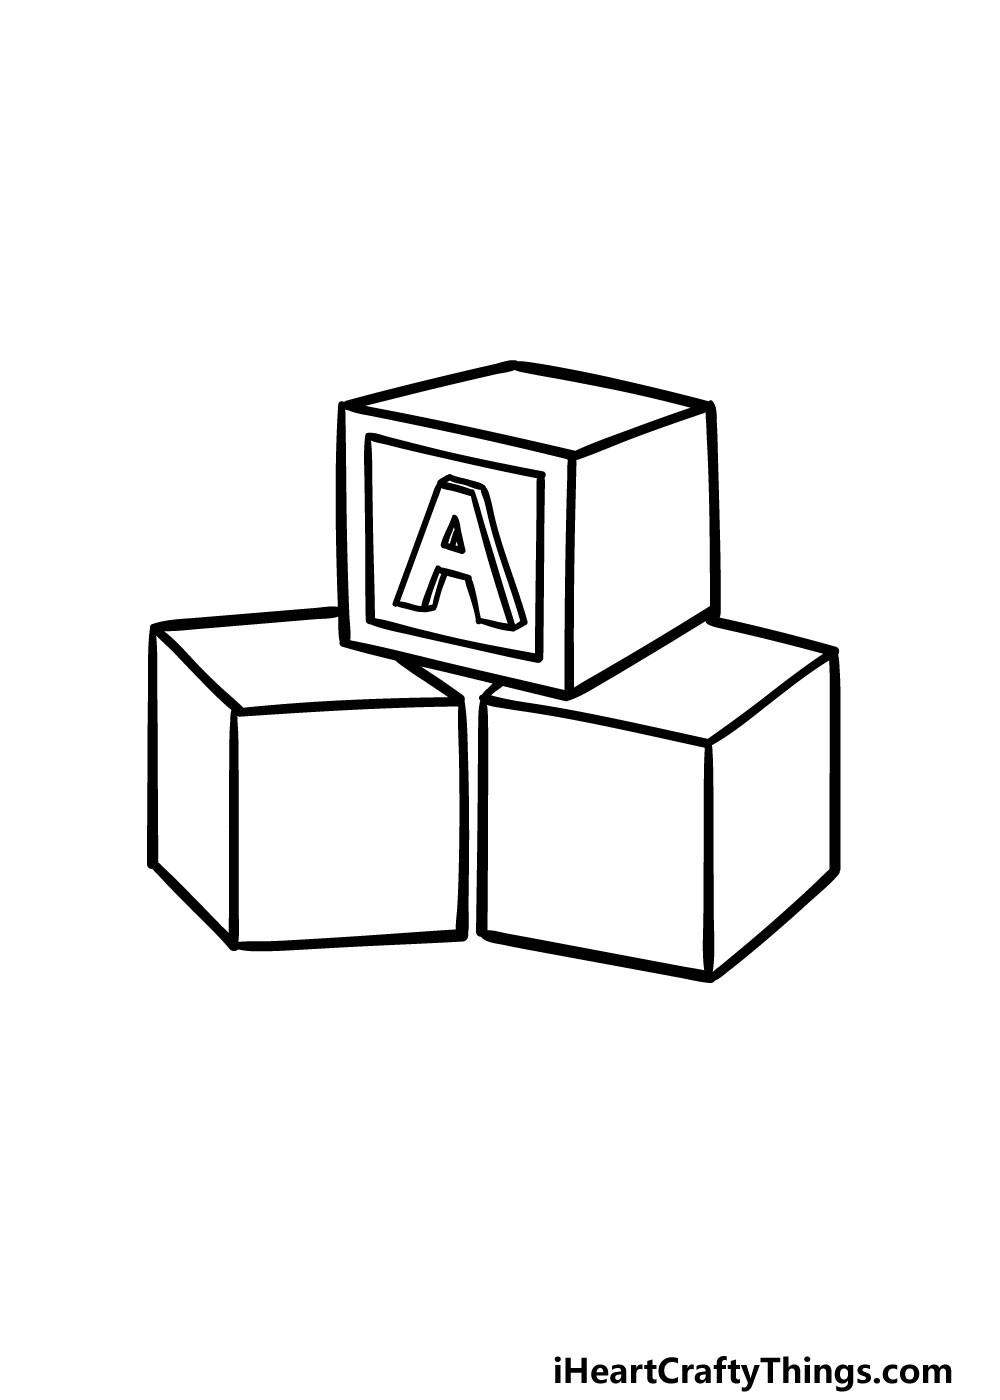
This blocked letters drawing wouldn’t be complete without some letters, so we shall add the first of these now!
First, use your ruler to draw a square shape within the side of the top cube that is facing us. Then, draw a bold letter A inside of this square, and then finish it off with some line details on the side to give it a 3D effect as well.
Step 5 – Now, you can add another letter to the cubes
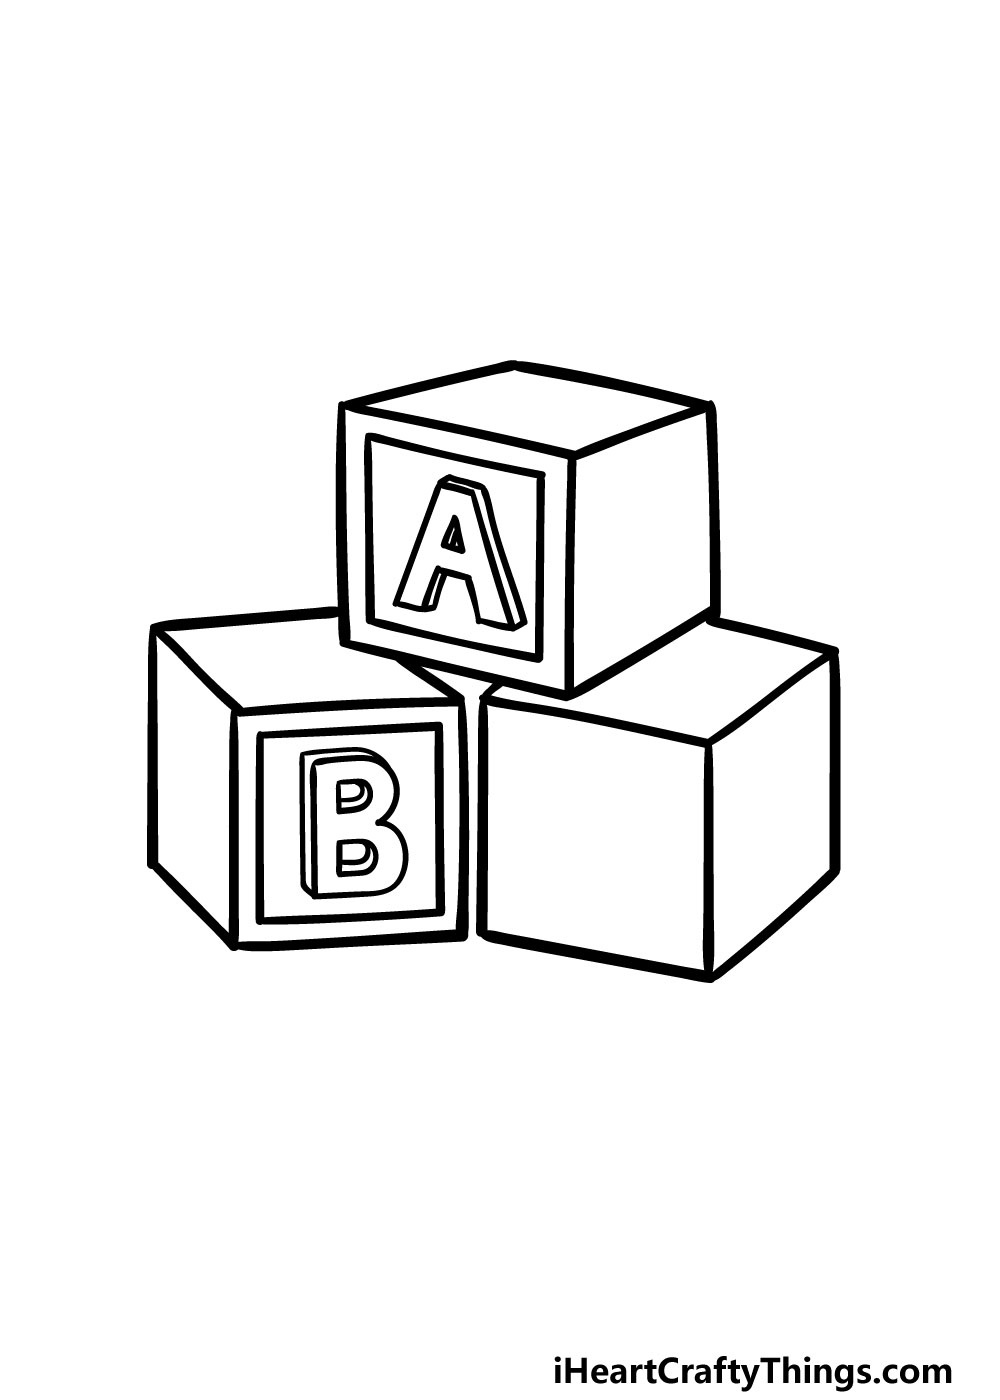
In this fifth step of our guide on how to draw blocked letters, we will be replicating what you did in the previous step, just with a different letter.
Just as before, you can use your ruler to draw a square on the bottom left cube. Then, draw a blocky letter B and add similar lines to it for that 3D effect again.
Once you have that letter drawn, we just have one more to do in the next step!
Step 6 – Next, you can add the final letter for the cubes
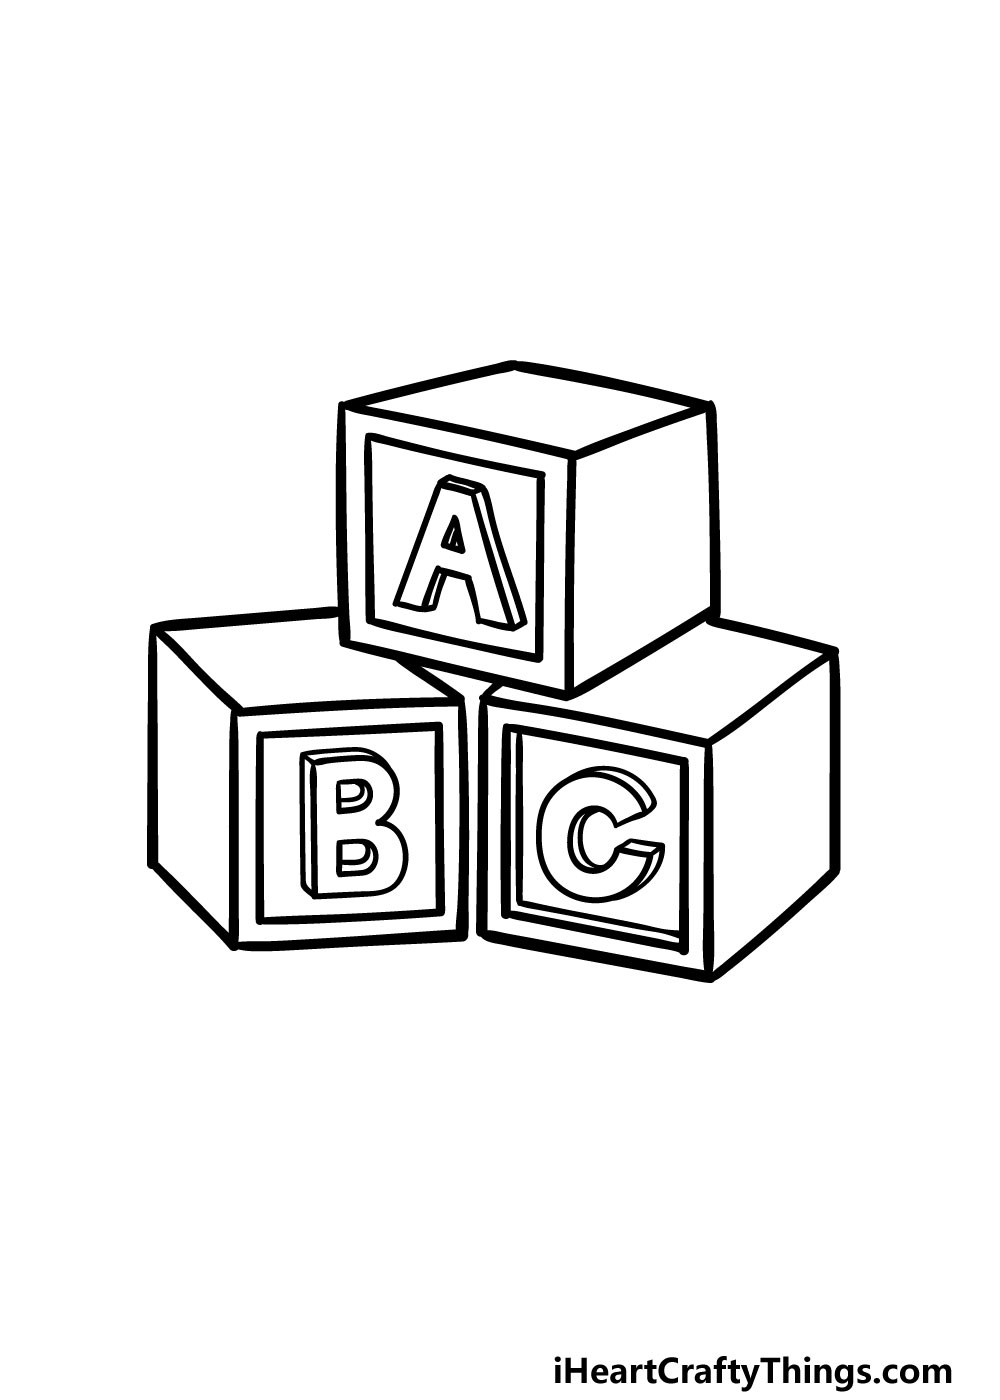
We will be adding some bright and awesome colors to your blocked letters drawing in the next step, but first we will finish off with the final letter.
You have the hang of this by now, and all you need to do is draw another square with a 3D letter C in it on the final cube.
That will do it for the details of this blocked letters drawing, but before you move on you could also add some details and additions of your own!
You could change up what letters are on the cubes or even add some more on the other sides of the cubes.
You could also take what you have learned here and draw more cubes to spell out your name! What else can you think of to finish off this drawing before the final step!?
Step 7 – Finish off your blocked letters drawing with some color
In this final step of our guide on how to draw blocked letters, we will be bringing the picture to life with some amazing colors! Blocked letters are usually bright and bold, so this is a great chance for you to use your favorite vibrant colors to bring this image to life.
In our example, we showed you just one way to color in this drawing, but this is a step where you can take over and show us what colors you think would suit this image best.
You can also have fun playing with your favorite art mediums! An image like this would look great with bright mediums like acrylic paints, colored pens or markers.
It would look equally good with more subtle mediums too, so it’s up to you! We can’t wait to see what colors and mediums you choose to finish this amazing drawing with.
Do this to take your blocked letters drawing to the next level
These tips for your blocked letters sketch will spell out some art fun for you to enjoy!
This drawing of blocked letters shows the first three letters of the alphabet. This is a great start, but you could write other letters instead of these ones.
For instance, you may prefer to use the letters of your initials for these blocks. You would not be limited to just letters, as you could also add numbers or punctuation instead.
What are some letters or other characters you could use for these blocked letters? We’re sure you can come up with all sorts of amazing combinations!
If you can’t limit your ideas for these blocked letters to just three, you could always add more blocks. You’re only limited by page space now that you know how to draw these blocked letters!
They could be scattered in different positions, and you could even spell out entire words with enough blocks. It could even be fun to write out a message for someone in letter blocks!
What are some words you could form with these blocked letters?
These blocked letters are some toys you could expect to find in a play room. There are many other toys that could be found with them, and they could be fun to add to this blocked letters drawing!
These could be anything from teddy bears to plastic dinosaurs. You could even keep to an educational theme and add some number games or musical instruments.
What are some other toys that could be enjoyed with these blocked letters?
A great way to finish off this blocked letters sketch would be by adding a background. This would be perfect for showing where you would like to enjoy these blocked letters.
We mentioned a play room in the previous tip, but there are many others you could go for instead. It could be a bedroom or maybe a classroom.
What are some other settings you could think of that you could use for this blocked letters sketch?
Your Blocked Letters Drawing is Complete!
That brings you to the end of this guide on how to draw blocked letters! We hope that this guide made it both easy and lots of fun for you to create this drawing.
If you follow the steps and take it slow then we know you’ll do an amazing job!
Once you have mastered this guide, then you can also put your own spin on the drawing. You could change up the letters, add more blocks or even draw more toys alongside it! What other ideas can you think of?
You can find more amazing guides like this that cover a huge variety of different subjects on our website! We hope to see you there often, as we upload new guides all the time.
When your blocked letters drawing is finished, you can let us take a look by sharing on our Facebook and Pinterest pages. We can’t wait to see it!