Fishing is one of the most popular pastimes around the world, and in North America bass are some of the most common and popular fish to catch.
They’re also popular in many other parts of the world as well! For fishing enthusiasts, the best thing to do is to go fishing, but when you can’t do that then it can also be fun to learn how to draw a bass.
With the help of this guide, you’ll be able to do just that in no time!
We hope that you enjoy our step-by-step guide on how to draw a bass.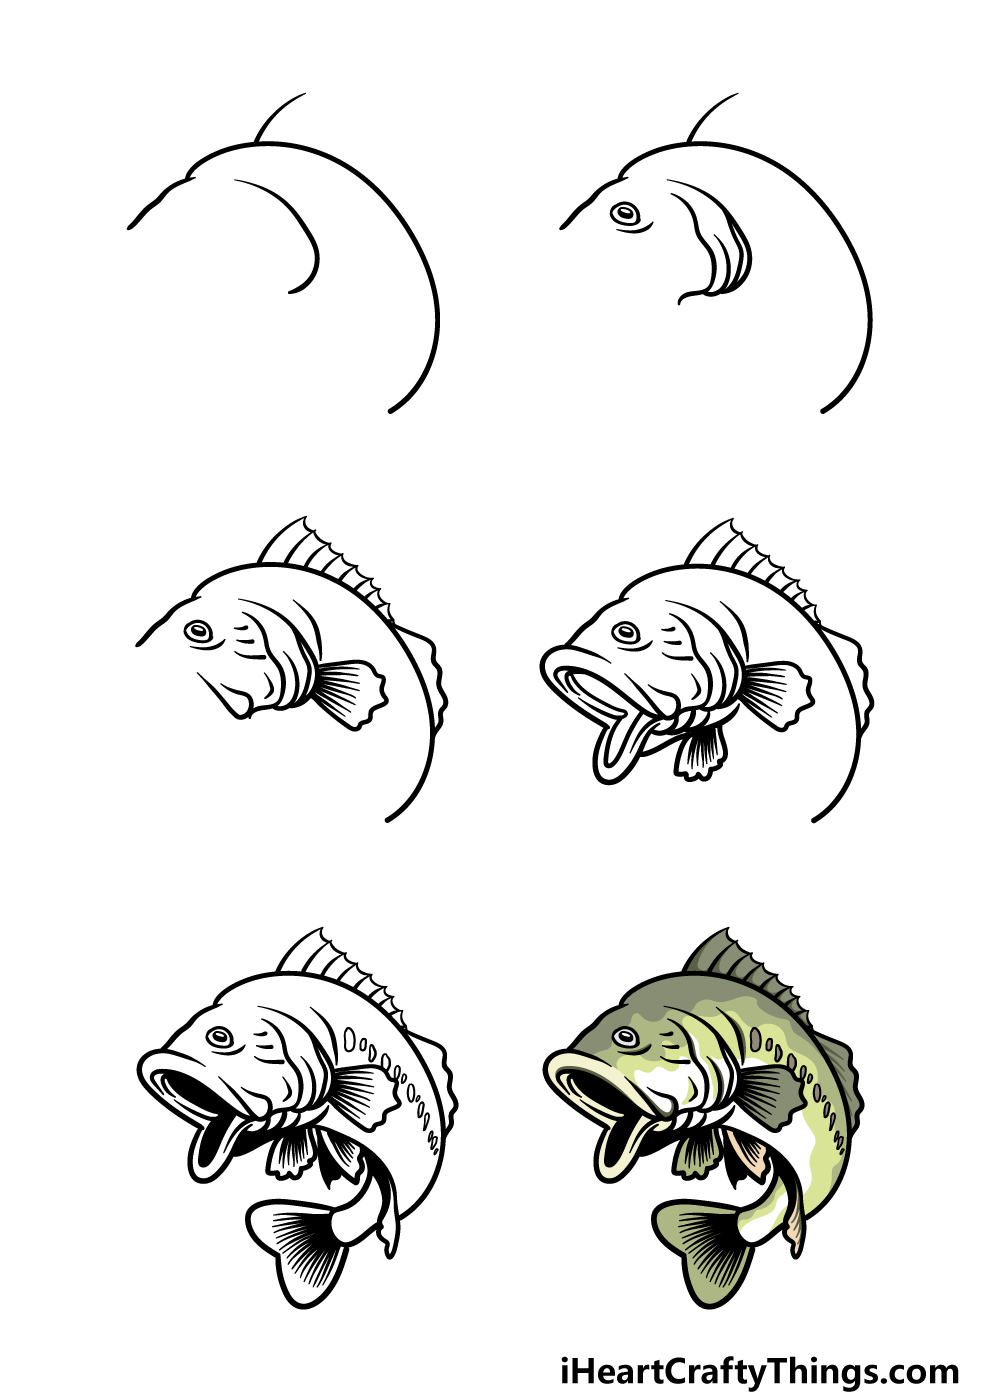
How to Draw A Bass – Let’s get Started!
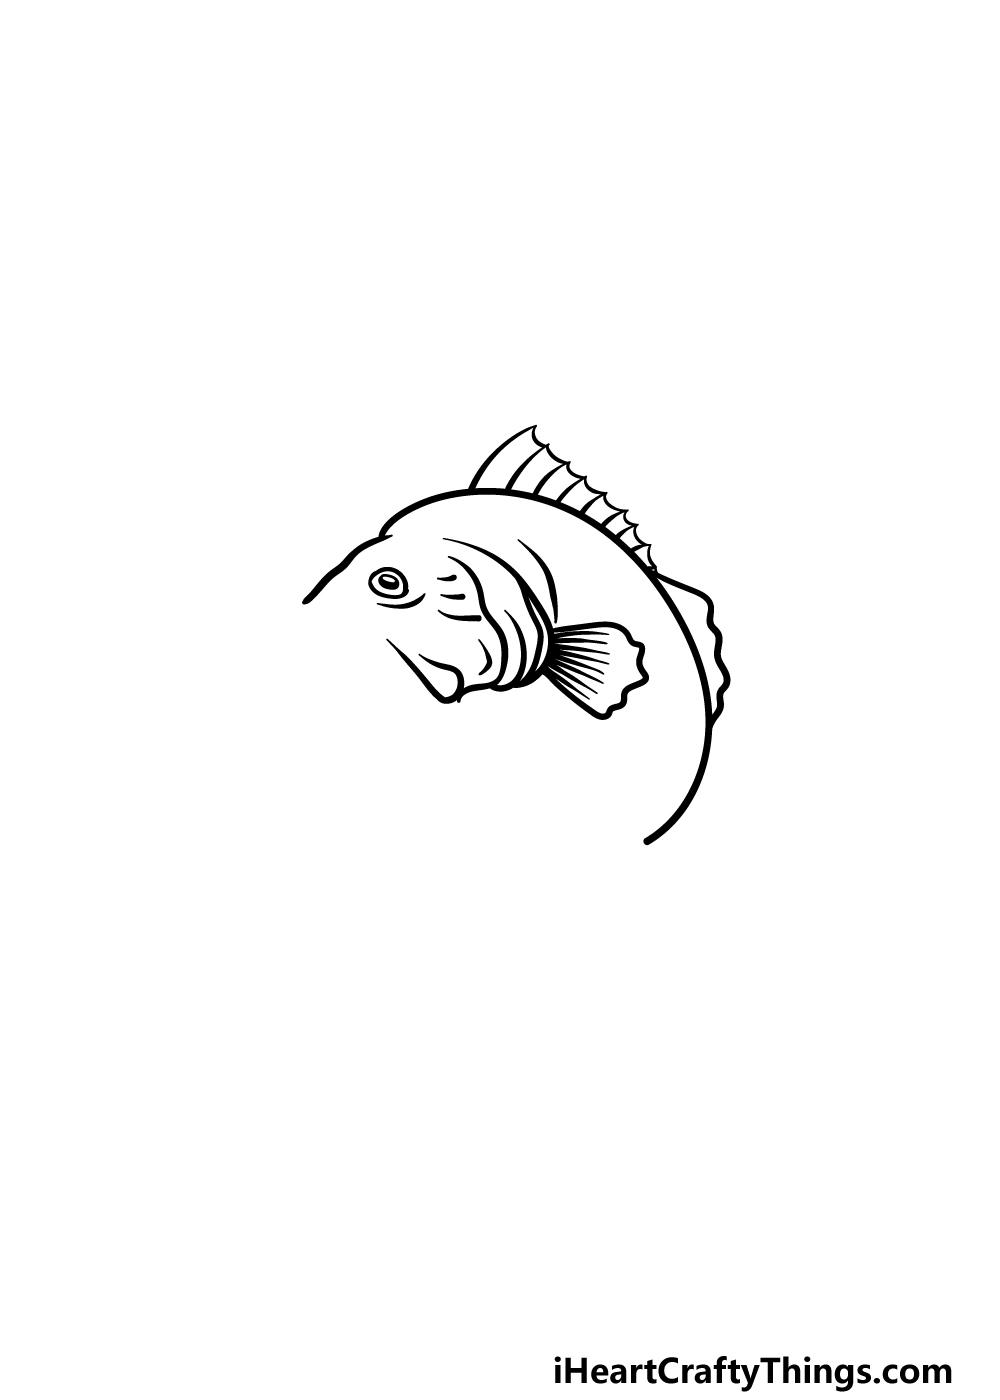
Step 1

In this first step of our guide on how to draw a bass, we will be starting on the outline of the fish. For the head, we will be using a bumpy curved line for the top of it.
Then, to the right of this line we will use a smooth curved one for the main gill of the bass.
Then, you can draw another long, curved line from the end of the head, and this line will form the body of the fish.
Then, you can extend one more line from the top of the body, and this will form the long fin on the fish’s back. That’s all there is to it for this line, so let’s move on to step 2!
Step 2 – Draw the eye and other gills for the fish

We will be adding the eye and gills for your bass drawing in this second step. First, use a small circle shape for the eye inside the face, and then add a solid black circle inside for the pupil.
You can also draw a line beneath the eye for some more detail.
Then, using the line that you drew for the gill in the last step, you can add some more curved lines near to it for the rest of the detailing of the gills
Step 3 – Now, draw some fins for the bass
This third step of our guide on how to draw a bass will see you adding a lot of details, so we will take it slowly!
First, you can add some smaller lines near the gills for more details surrounding them. Then, you can add a fin to the last line of the gills.
This will be a rounded shape with a jagged line at the edge. Then, there will be some lines added inside of the fin.
Then, you can extend another somewhat jagged line backward from the line that you drew on the back in the first step.
Then, some more lines will go inside of this fin for yet more detail. That will be all that we will be adding in this step, so once you’re happy with it then you’re ready for step 4.
Step 4 – Next, draw the mouth and another fin
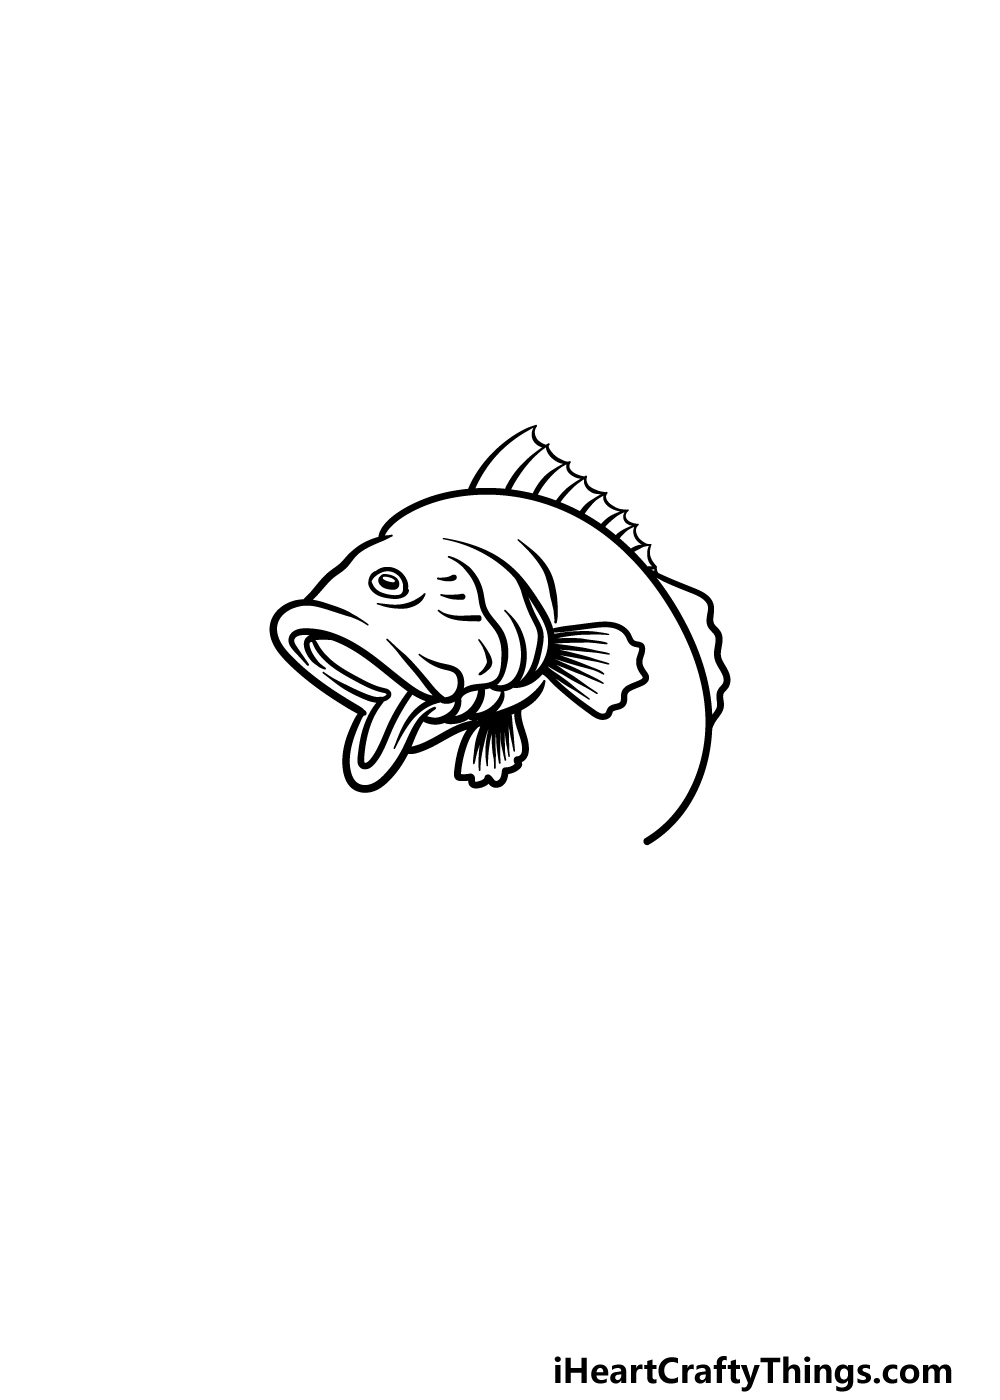
No bass would be complete without a mouth, so we will be drawing one for your bass drawing in this part. The mouth will have some curved lines for the outline, with more curved lines inside of it for the interior of the mouth.
Then, you can extend some shorter lines from the mouth for the chest of the fish, and then draw another fin onto that area. Because of the perspective, this fin will look a bit smaller than the other one did.
Step 5 – Now, you can draw the tail and final details
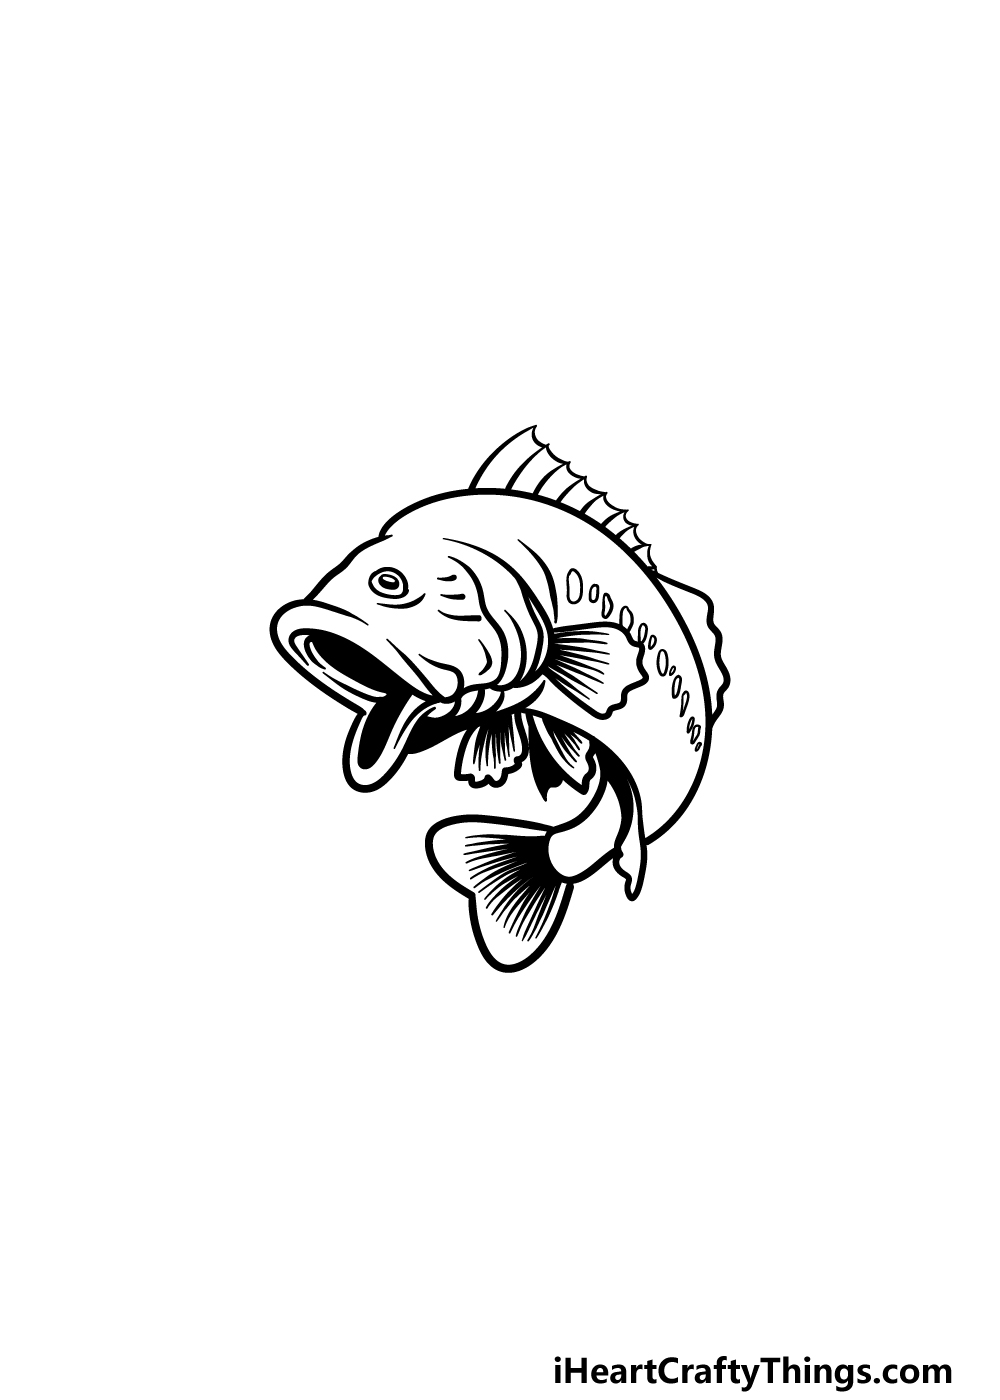
Before we color in your drawing, there are a few finishing touches to add in this step of our guide on how to draw a bass.
First, we will be adding another small fin to the belly of the fish. Then, some sharply curved lines will extend back for the start of the tail, and then that will end with the tailfin.
Then, we will finish off this step by coloring in the mouth and then adding some small round shapes along the body for the final details.
These will finish off the details for this guide, but you can also add some of your own! It could be fun to draw a background that shows some other fish swimming around behind this one.
Perhaps you could also draw your favorite fishing lure in front of the fish to show it’s about to bite onto it.
What fun details can you think of to finish off this picture before the final step?
Step 6 – Finish off your bass drawing with some color
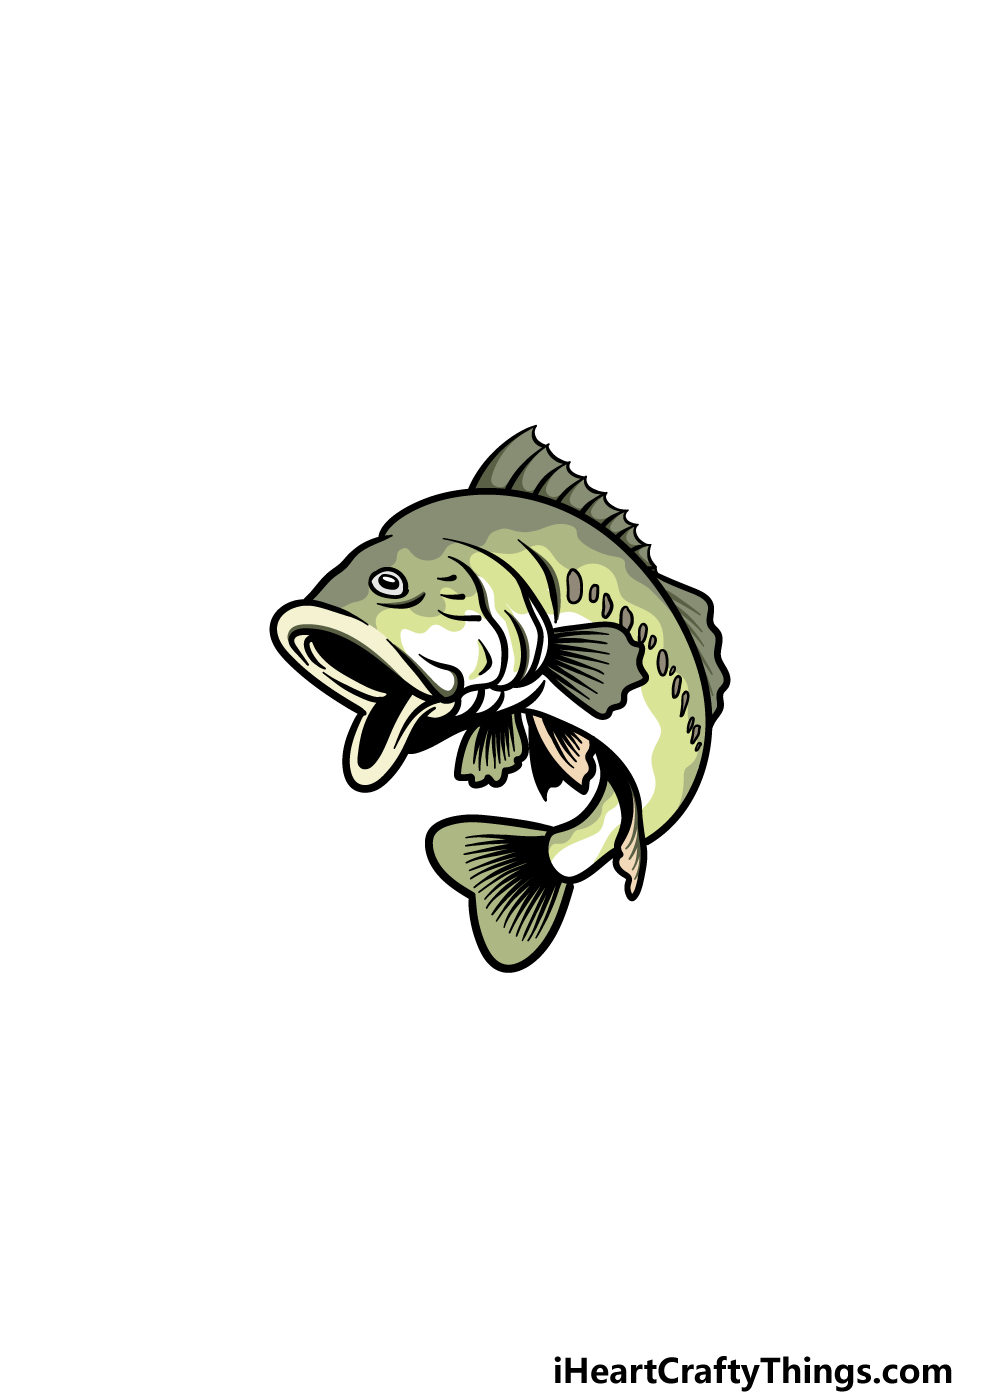
This sixth and final step of your bass drawing is the one where you get to have lots of fun adding some incredible colors to your drawing. In our reference image, we went with some more muted and realistic tones of greens and browns to color in the bass.
You could use this picture to help you if you would like a similar look for your own drawing. If you prefer, you could also use some other colors that you may love for a more stylistic look!
Then, once you know what colors you would like to use then you can decide what art mediums you will use to make the colors come to life.
For pictures involving aquatic scenes, watercolor paints and colored pencils can be great for a softer look that suits the subject matter.
It would also look great if you choose mediums that convey brighter colors as well, so we can’t wait to see what you choose!
3 More tips to make your bass drawing easy!
Make your easy to draw bass even easier with the help of these tips.
With this bass drawing we created together, we made quite a detailed version of this famous fish. The details look great, but you could also simplify and remove some to make it easier on yourself.
This all depends on what you find most comfortable to draw, and you could adapt this design to whichever style you feel most comfortable with.
This might even mean drawing it in a more detailed, realistic style. There are so many ways you can make it easier on yourself, so what kinds of styles would you like to adapt this drawing to?
No matter which style you end up using for this drawing of a bass, you can actually add extra elements to make things easier. Drawing some background elements can actually help you to get around challenges.
You may think that adding some elements will just give you more to draw, but you can use them in creative ways. For example, you might find the tail of the bass to be hard to draw.
If you showed this bass partially submerged in water, you could use the water to obscure the tail. Using tricks like that would be a great way to creatively avoid any problem areas.
Not only that, but you can also create some fun background scenes to make the image even more interesting!
Next, you can make this bass drawing easy to draw by doing some preparation. This can take a few forms, and used along with this guide you can make it so much easier on yourself.
First, you can consult some reference images. There are tons of photos online of basses online that you can use to help you with the details and posing.
Some people even have mounted basses that could be used to help! Then, you can use your pencils to help you prepare the drawing before you commit to the final pen lines.
These are just some ways you can make your easy to draw bass so much easier!
Your Bass Drawing is Complete!
You have reached the end of this guide on how to draw a bass, and you have an amazing picture to show for it!
We hope that this guide helped you as you drew and that you found it to be fun and easy to do, even though it was quite a detailed picture.
We know that as you have mastered this guide that you will be able to put your own spin on the drawing with your own details, and we can’t wait to see what you do!
You’ve finished this guide, but the fun doesn’t have to end here! We have many more guides on our website for you, and we upload new ones freqneutly.
We would love to see your awesome bass drawing, so once it’s done please share it on our Facebook and Pinterest pages for us to admire.