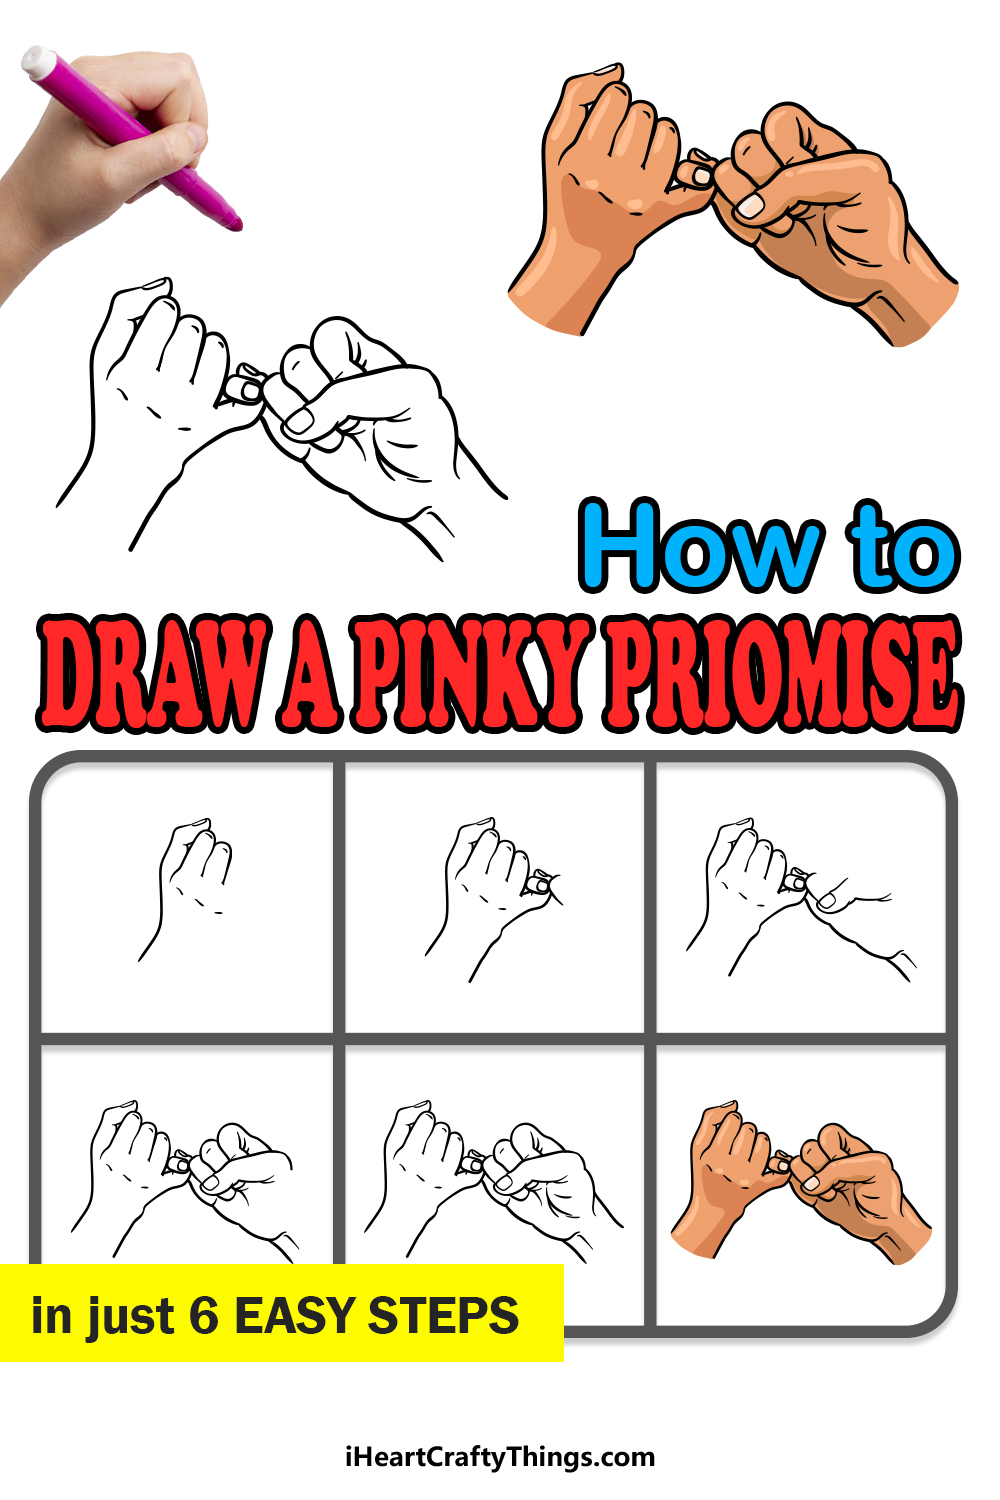
If you need someone to stick to their word, you can get a contract drawn up that obligates someone to stick to what they say or pay the consequences.
Contracts are binding and usually enforced by the law, yet there is a type of agreement even more sacred than a legal contract: the pinky promise!
This shared hand gesture serves as a promise that should not be broken, and learning how to draw a pinky promise can be a bit of a tricky endeavor.
Drawing hands just generally is considered one of the big challenges of drawing, but having the right guide can make things easier.
This step-by-step guide on how to draw a pinky promise will show you how to do it with no frustration!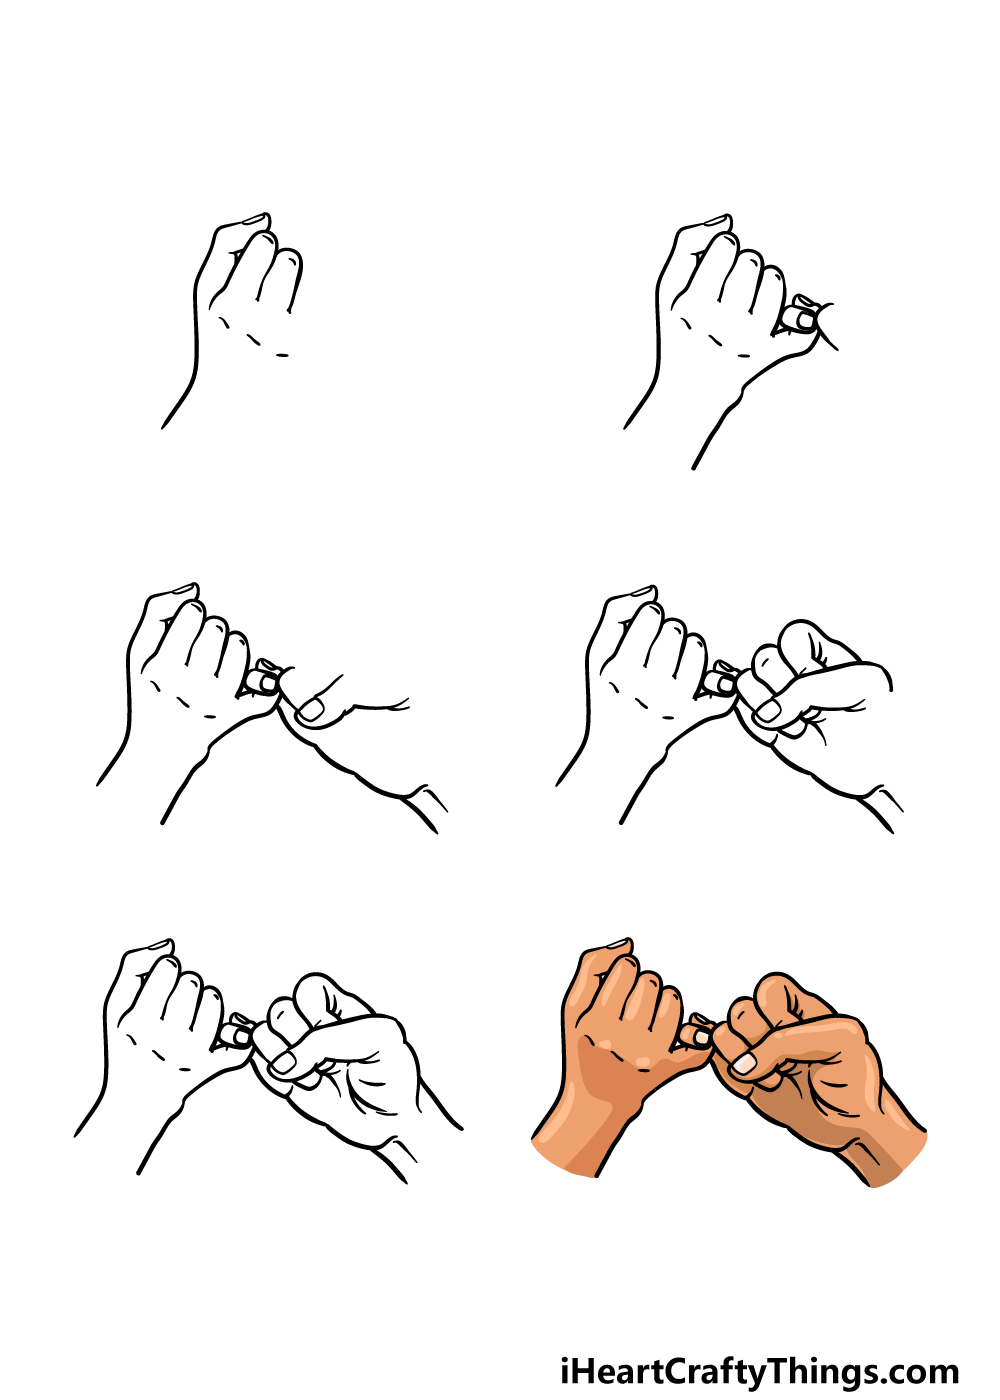
How to Draw A Pinky Promise – Let’s Get Started!
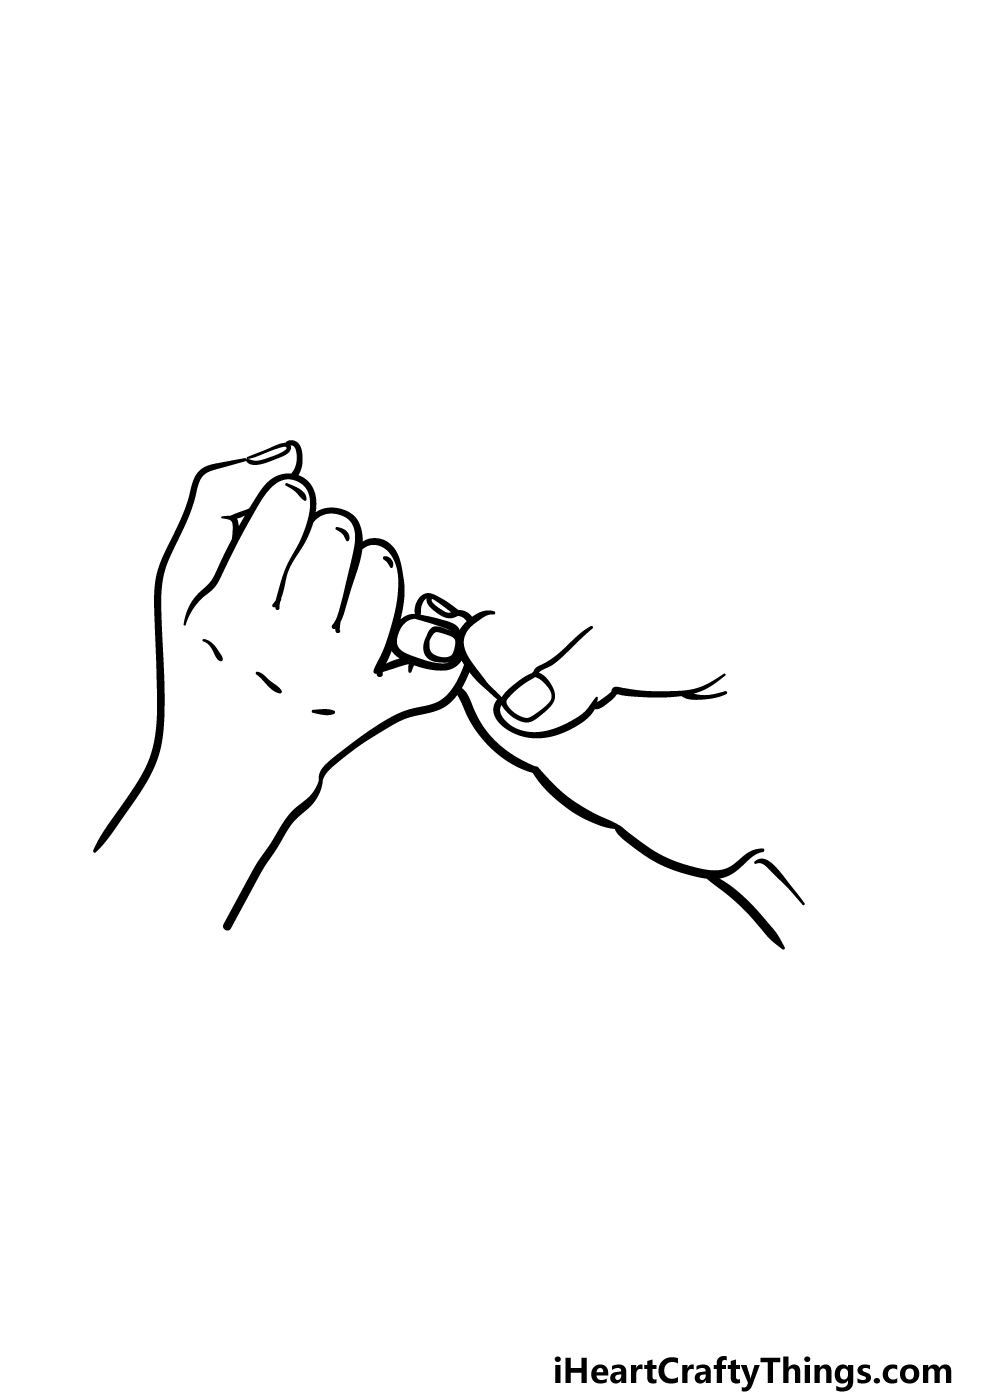
Step 1
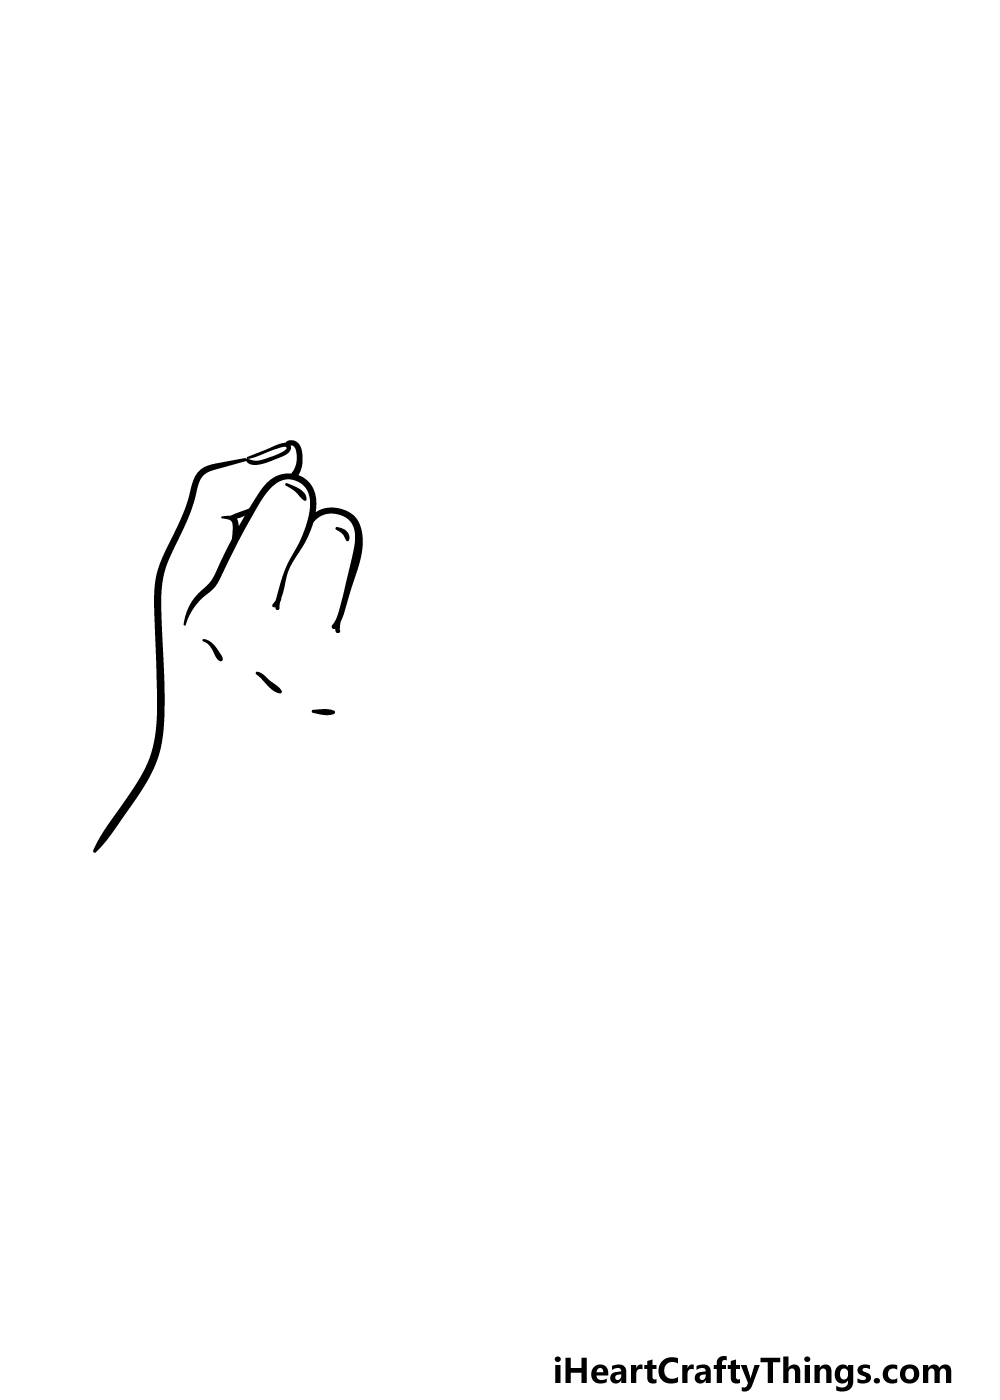
As we mentioned in the introduction to this guide on how to draw a pinky promise, drawing hands is a challenge in the best of times. That’s why we will be breaking it down into smaller, more manageable steps.
For this first part, we will be drawing the hand on the left. This is a step where you may want to try and replicate the lines exactly as they appear in the reference image.
Using a curved line, you can draw the wrist that leads up to the thumb of the hand. You can use a small, flat shape at the tip of the thumb for the nail there.
Then, we will be using some more rounded lines for the first two fingers that are bent over. You can also draw some small lines at the base of these fingers for the knuckles.
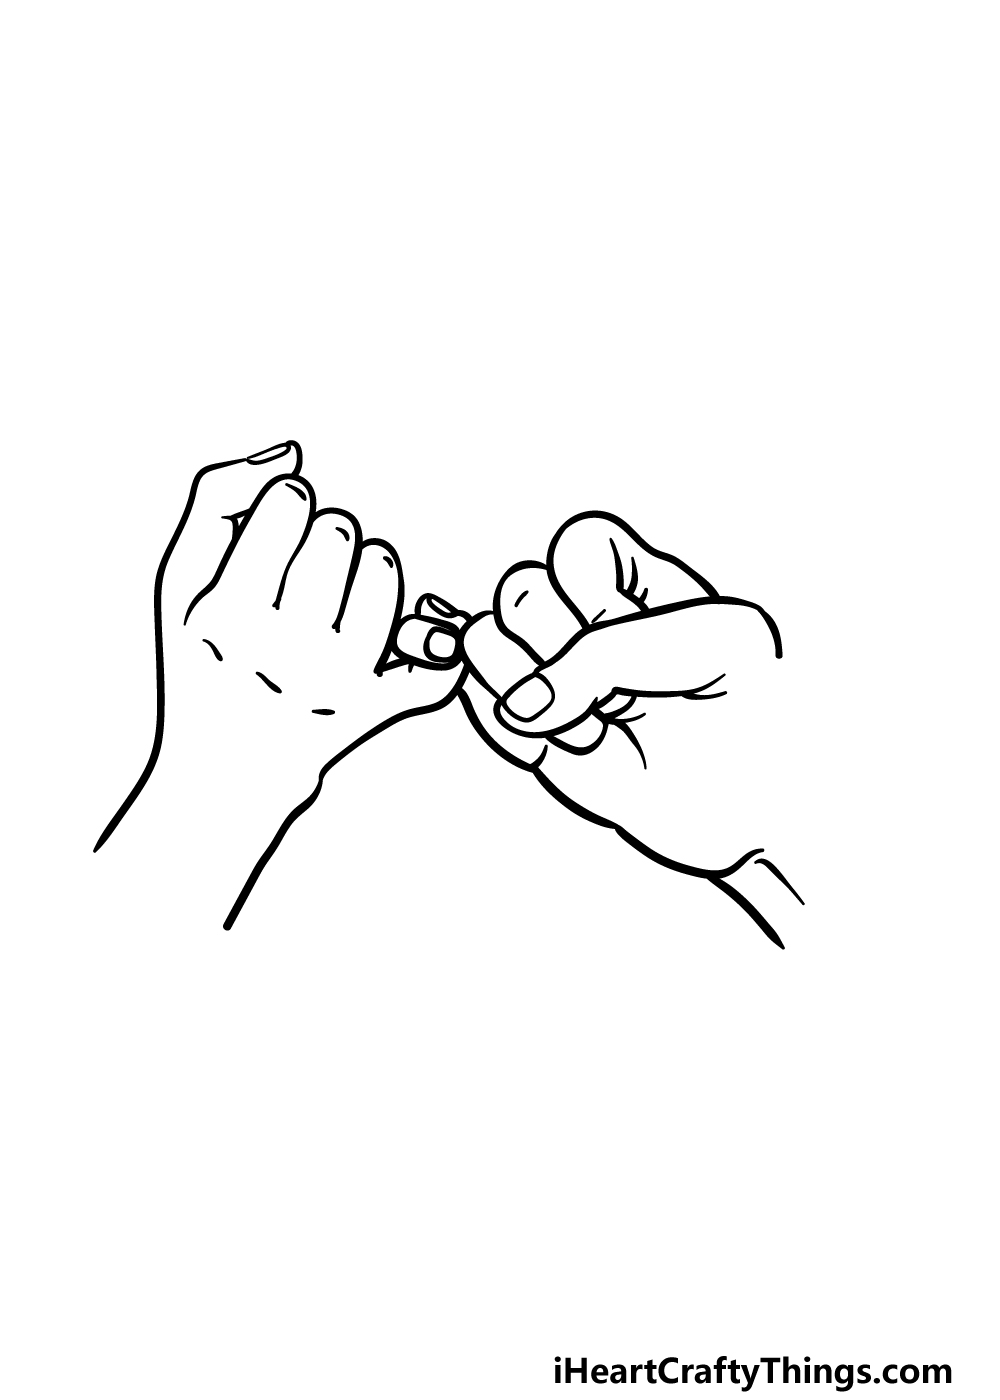
Step 2 – Draw some more of the hand and the first finger for the other hand
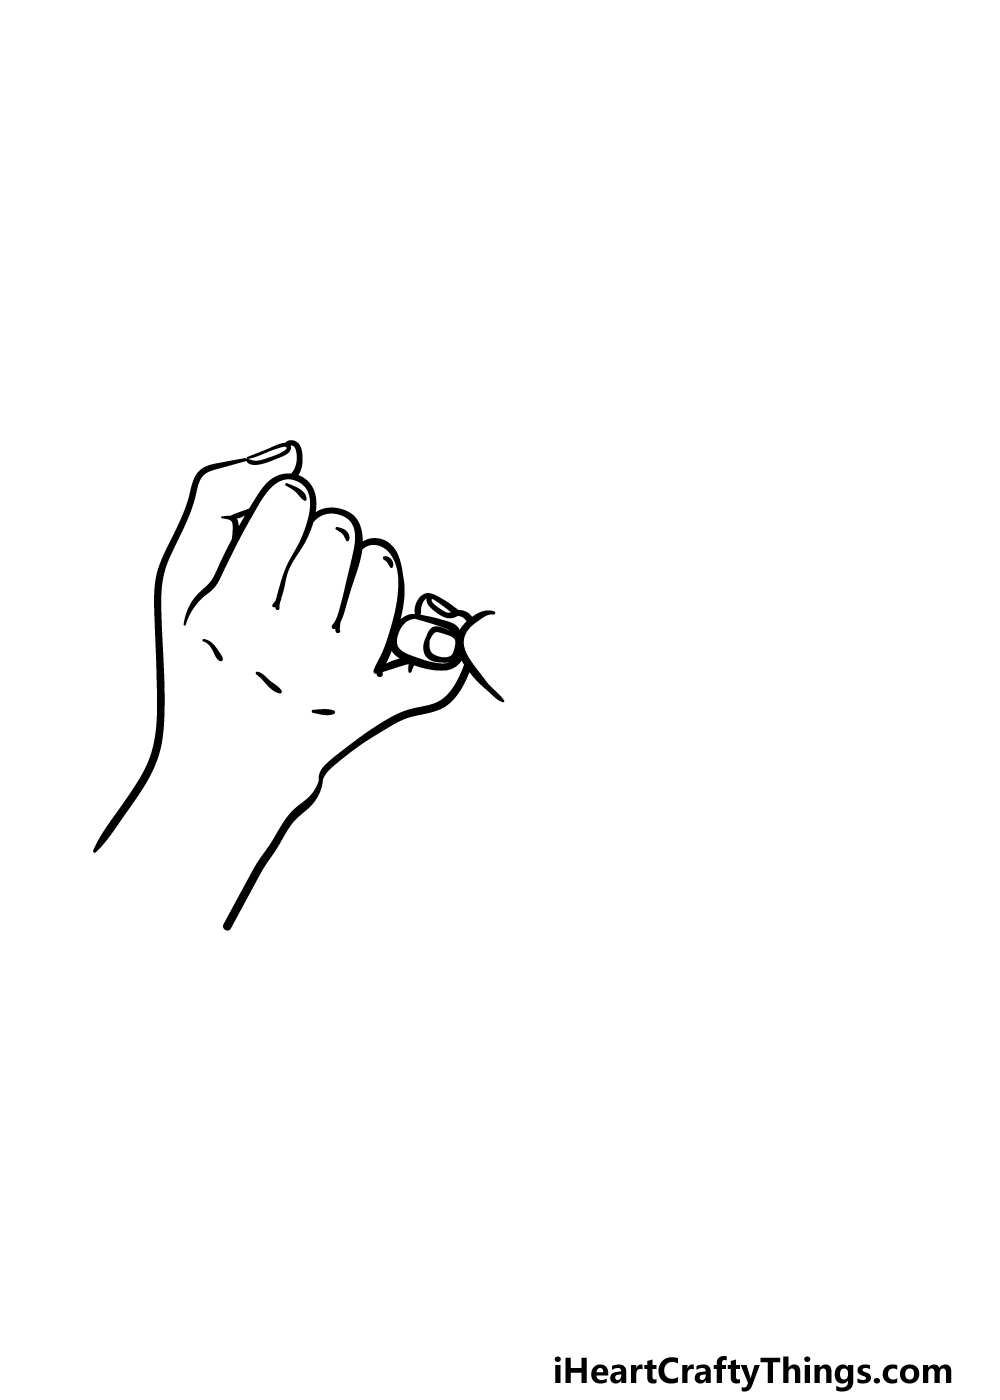
In this second part of your pinky promise drawing, we will be drawing the rest of the hand that you started in the previous part.
We will also be adding the first finger of the other hand, but first let’s focus on the first hand.
Use another long, curved line for the next bent finger on the hand you started in the last step. Then, use a long, fairly straight line for the wrist on the other side.
You will then draw the pinky of the other hand using a rounded shape with a fingernail on it.
This will connect to the bent pinky of the first hand, so try your best to copy the pinky as it looks in our reference image.
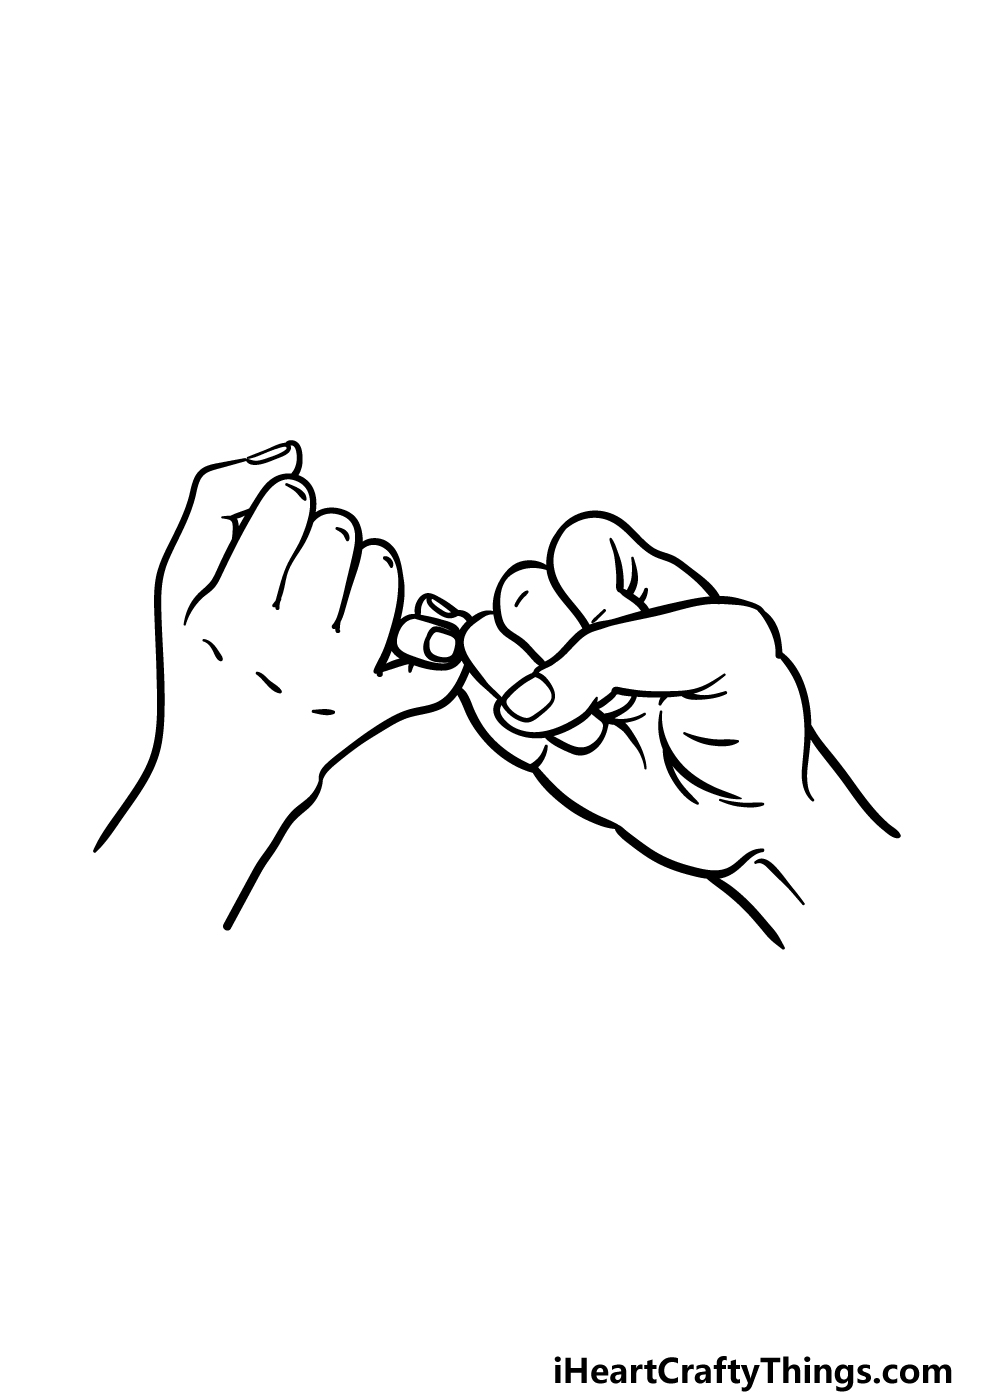
Step 3 – Next, draw more of the other hand
With the first hand that you drew in this guide on how to draw a pinky promise, the back of the hand was facing us as the viewer.
The opposite will be the case for the second hand, and we will see the fingers curled over. With this in mind, use a curving line for the left-hand side of the wrist for this hand.
It will extend down from the bottom of the pinky from the other hand.
Once that side of the wrist is drawn, you can then draw the thumb near the center of the hand. Once again, you should try to copy this thumb exactly as it appears in the reference image.
Step 4 – Now, draw the rest of the fingers for the second hand
Now you’re ready to finish off the fingers for the second hand in this part of your pinky promise drawing.
We will be using some curved, bent lines to show the fingers curled over as they appear in our image. Because of the positioning of this hand, the thumb of the second hand will go over the fingers.
There are a few line details we will add at the bends of the fingers for more realism, and then you will be ready for the final elements in the next part.
Step 5 – Add some final details to your pinky promise drawing
We will be finishing off the final details in this step of our guide on how to draw a pinky promise. To do this, we mainly need to finish off the wrist for the second hand.
First, use a curved line for the bottom of the hand that the thumb is attached to. Once that is drawn, you can then use one more straight line for the wrist of this hand.
Finally, we will be adding some simple line details to the area below where the thumb is pressed down.
Before you proceed to the final step, you should also feel free to add any extra details of your own that you may like! Perhaps you could draw a fun background to really finish it off.
Step 6 – Finish off your pinky promise drawing with some color
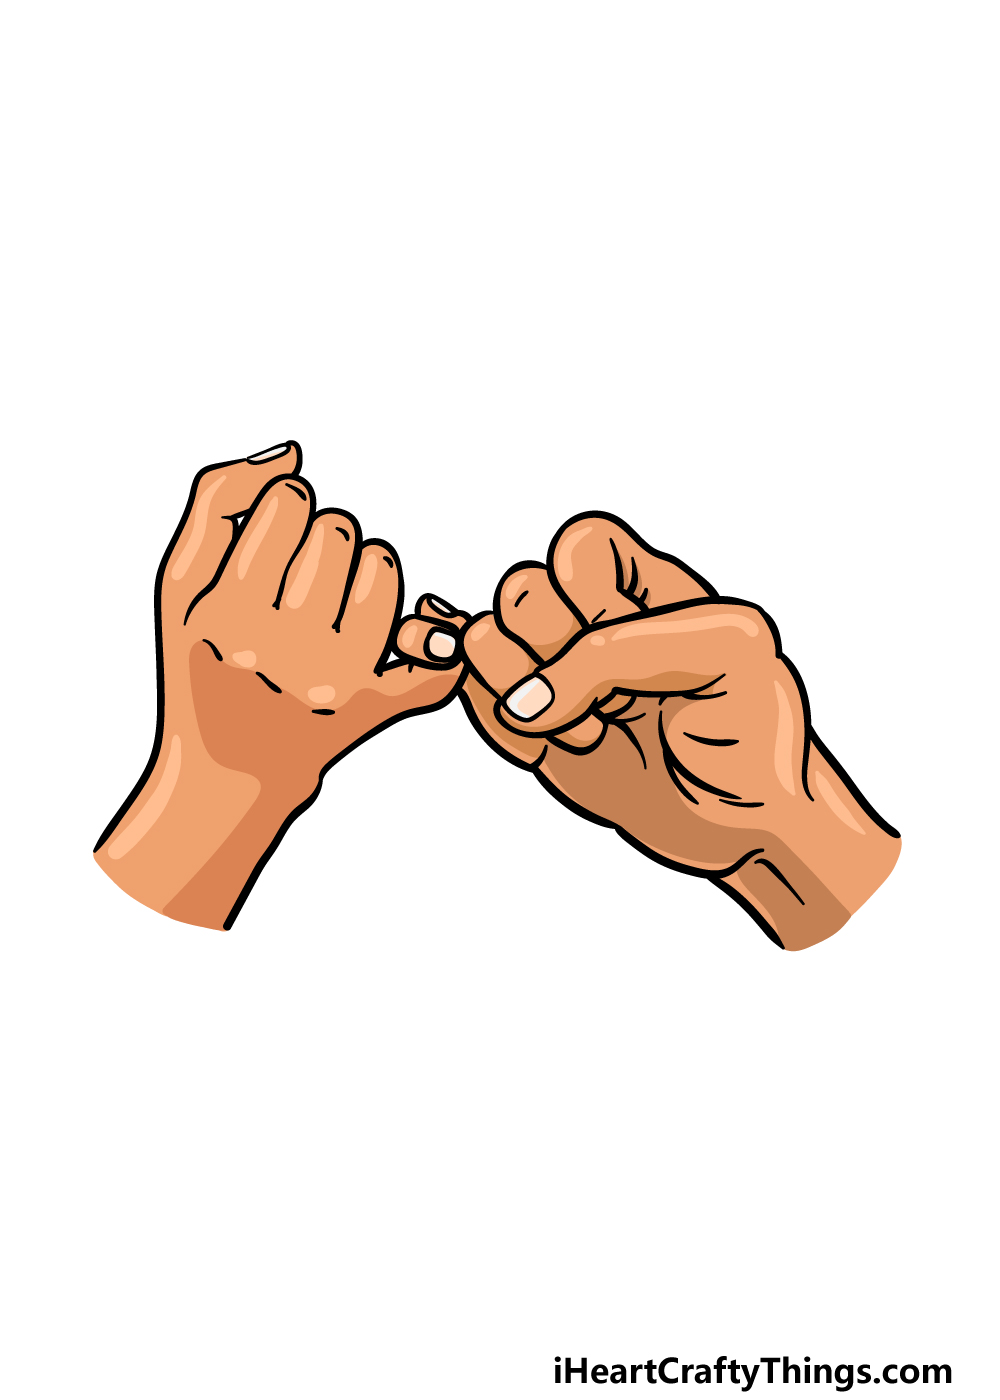
This is the final step of your pinky promise drawing, and in it you will be bringing this drawing to life by using some amazing colors.
There are many different skin tones and colors that you could use to color this drawing in, so you can have a lot of fun choosing the colors that you use!
There are also options for the art mediums that you use to finish it off.
Acrylic paints and watercolors are perfect for a more painterly look, whereas colored markers or pens can help achieve more vibrant shades. What will you choose for your drawing?
3 More tips to make your pinky promise drawing easy!
We promise these tips will make this easy to draw pinky promise even easier!
This pinky promise drawing we created together is done in a simple yet detailed style. Drawing hands is always tricky, but you could make it easier by going with a different style.
This would depend on the styles you feel most comfortable with, and whatever it is can be easily adapted.
Even if it’s a very simple cartoon style, you can follow the steps of the guide and change the details to match your chosen style.
You might even prefer to go with something more realistic and detailed if that’s what you find easier! Changing the style will also result in an even more unique artwork.
Even the most seasoned artists can struggle with drawing hands, and this is especially true when they’re posed. They will often get passed this by using real hands as a reference.
You can do the same thing for this pinky promise sketch, and this is true even if you changed the style. There are a few ways you could go about doing this.
First, you could get some friends or family members to recreate this pose. You can just take a photo of it if they don’t feel like holding the pose for a long time.
You can also find photos online that you can reference. Using these references along with our guide will have you recreating this drawing in no time at all!
If all else fails, you can make this drawing of a pinky promise easier by breaking it down into simple shapes. Using a pencil is the best way to do this, as you need not worry about making mistakes.
Using your pencil, try to break down the hand and finger shapes into basic forms that interact with each other. Then, you can add more and more details until you start to see the final design emerging.
Finish off with some final pen lines, and then you can erase all of the pencil lines to complete the drawing.
Your Pinky Promise Drawing is Complete!
We mentioned earlier that drawing hands can be quite a challenge, so you should be very proud of completing this guide on how to draw a pinky promise!
This guide was created to show you that even though it can be tricky, it can be made much easier when you have some steps to follow.
Now you can relax and have fun as you personalize this drawing with your own extra details, background elements, colors and mediums.
Be sure to enjoy yourself, let your creativity take over and see what happens!
If you enjoyed this drawing challenge, we have drawing guides fit for any skill level on our website. Be sure to keep visiting us there, as we have some awesome guides coming out soon!
Our Facebook and Pinterest pages are the best places to share your finished pinky promise drawing, as that will let us admire your artwork!