There are few activities as fulfilling as gardening. It’s a hobby where you have to put in a lot of work, but the effort is worth it as there is a very tangible result to your efforts as you get to enjoy the beautiful plants that it results in.
Gardening would not be possible without water for the plants, and you need a way to get that water from the source to those that need it. That’s where watering cans come in!
They also have a rather specific structure and look to them, and learning how to draw a watering can is a great way to have some gardening fun without getting your hands dirty.
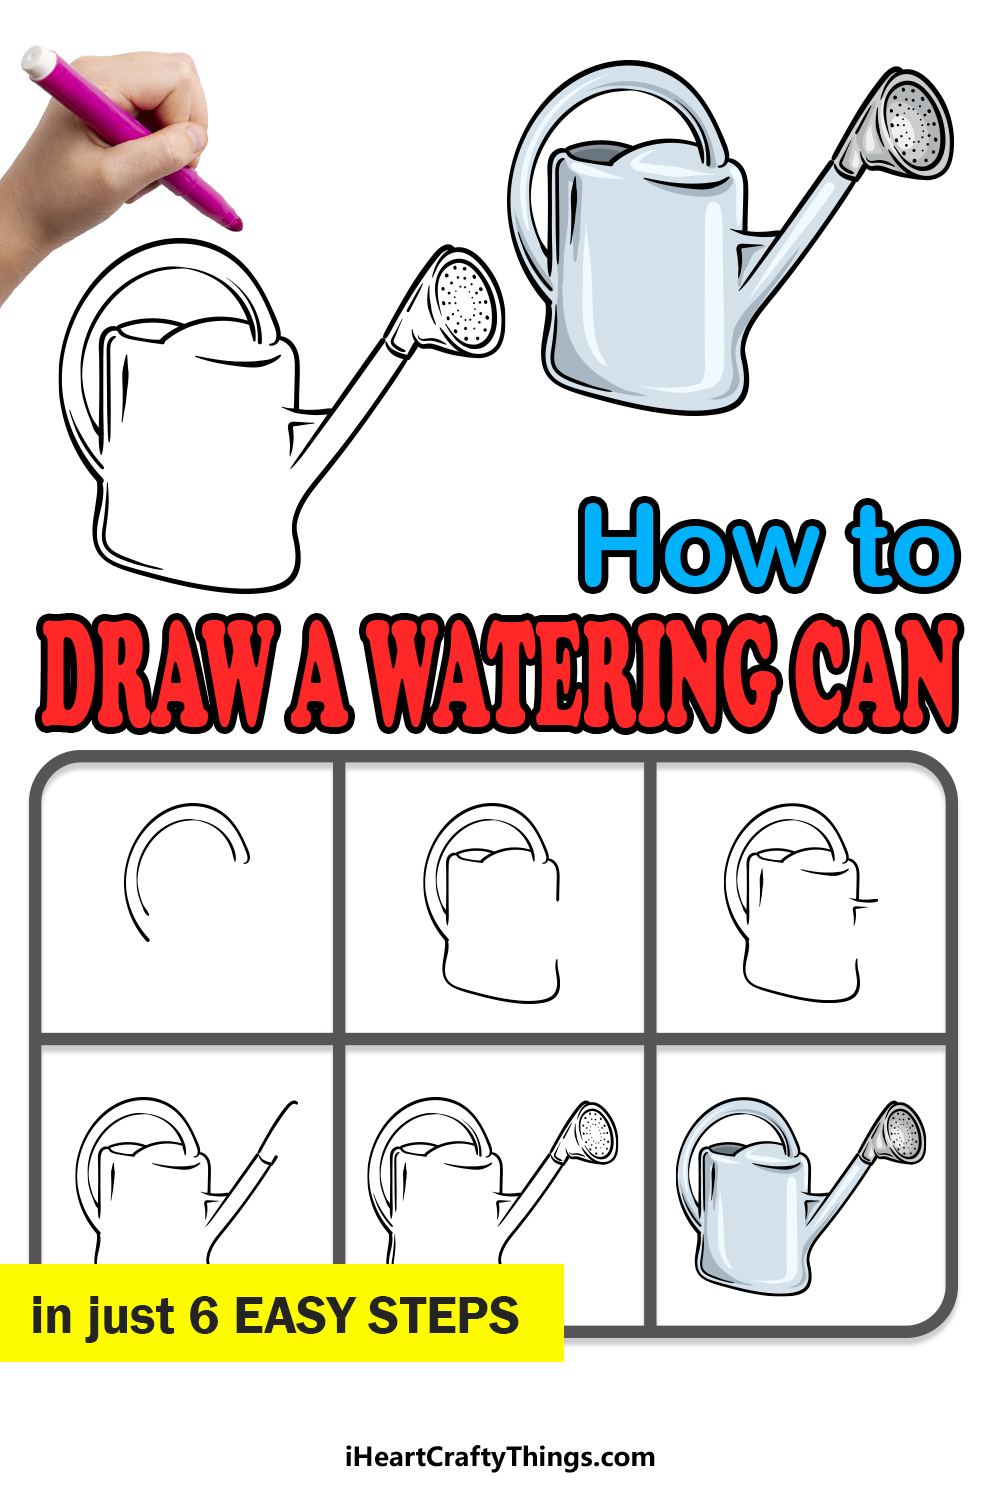
We hope that you have a great time as you work with us on our step-by-step guide on how to draw a watering can in just 6 easy steps!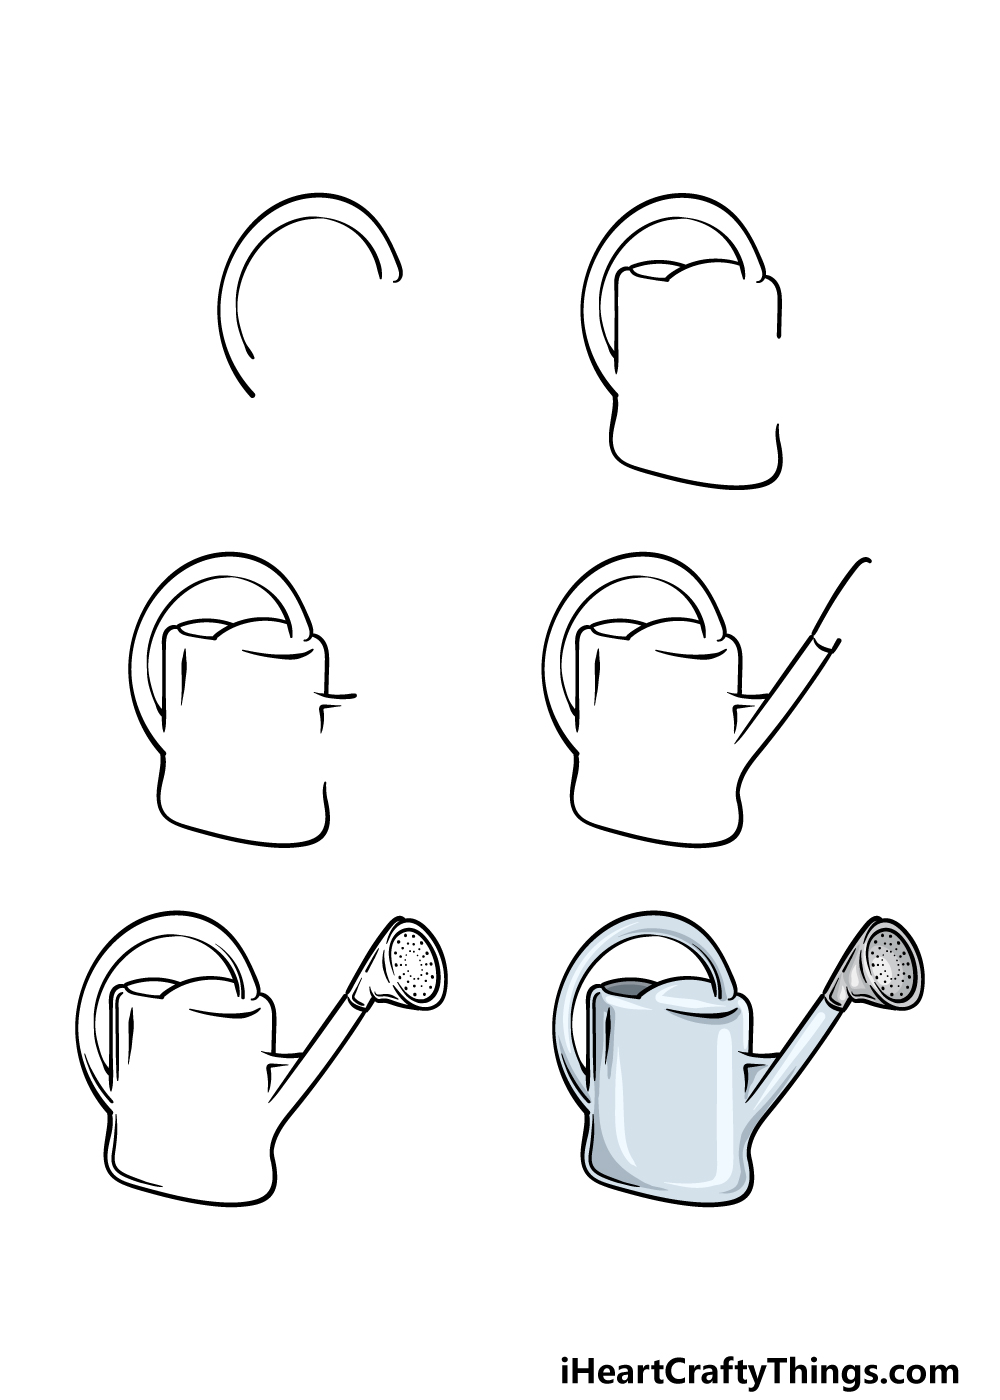
How to Draw A Watering Can – Let’s Get Started!
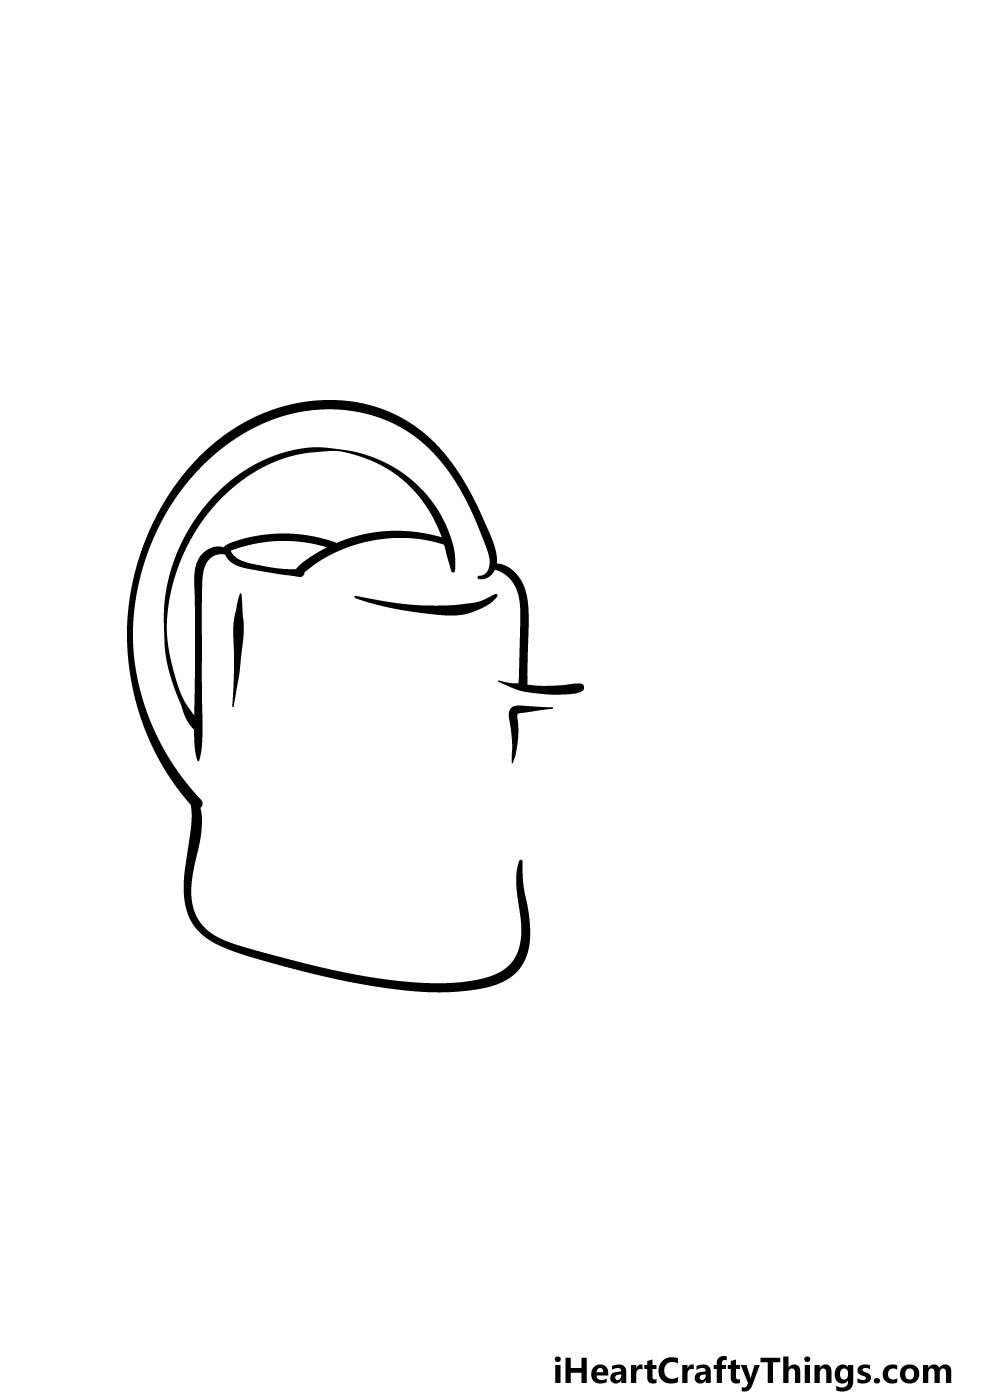
Step 1
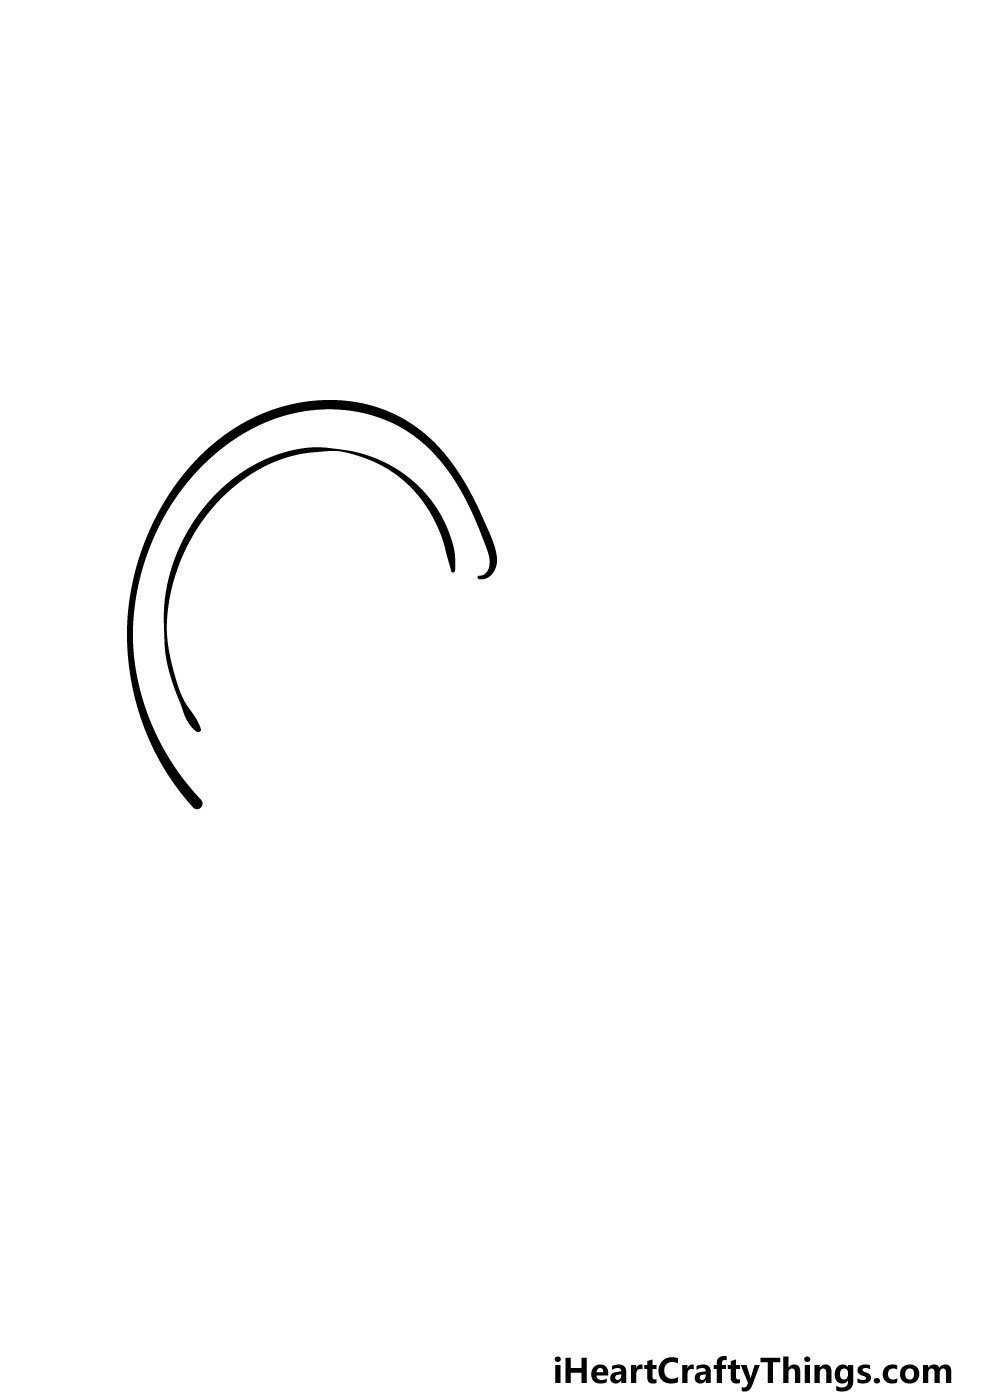
We shall start things off simply in this first step of our guide on how to draw a watering can. This tool will usually have a large rounded handle, as this helps to make it easier to water at any angle.
It is also what we will be drawing first in this step of our guide on how to draw a watering can.
To do this, we will simply be drawing two fairly large, curved lines running parallel to one another.
There will be a gap on either end of this handle, and this will be where the body of the watering can will be connecting later. Once it looks as it does in our reference image, it will be on to step 2!
Step 2 – Now, draw the body of the watering can
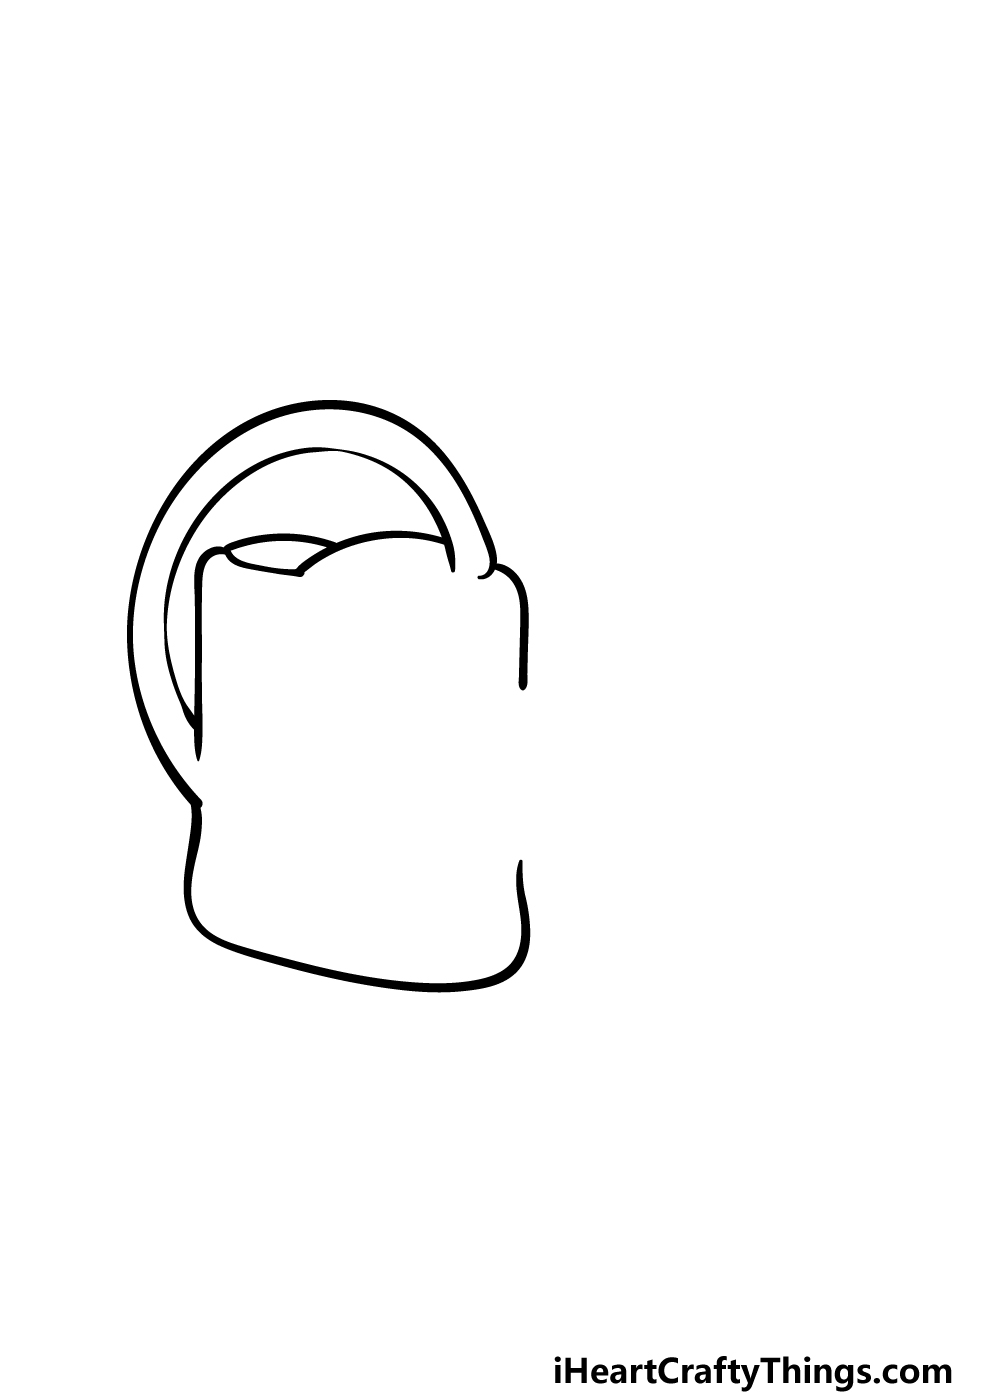
You have the handle of this watering can drawing done, and now we will be starting on the body.
This body for the watering can will have a slightly rectangular, wavy design that we show in our reference image.
Use some straighter lines for the sides of the can, and connect the bottom edge of the handle to the left side.
Then, draw some rounded lines for the top and the opening of the watering can, and then draw the base.
The edge on the right will have a gap in it, and this is where we shall be attaching the spout a little later on in the guide. Now, let’s proceed to step 3!
Step 3 – Add some more details and the start of the spout
We will be starting the spout of the can soon, but we will prepare for this important spect by adding a few smaller details in this step of our guide on how to draw a watering can.
First, we shall be adding some simple lines that will help to add some definition to the body of the can.
Add one vertical line near the left-hand edge of the can, and then add a slightly curved horizontal one near the top.
Next, to finish off this step we will be adding the small plastic section that helps to hold up the arm of the spout. You can draw this section using some simple lines on the right-hand side where the spout arm will begin.
Step 4 – Next, draw the long arm of the spout
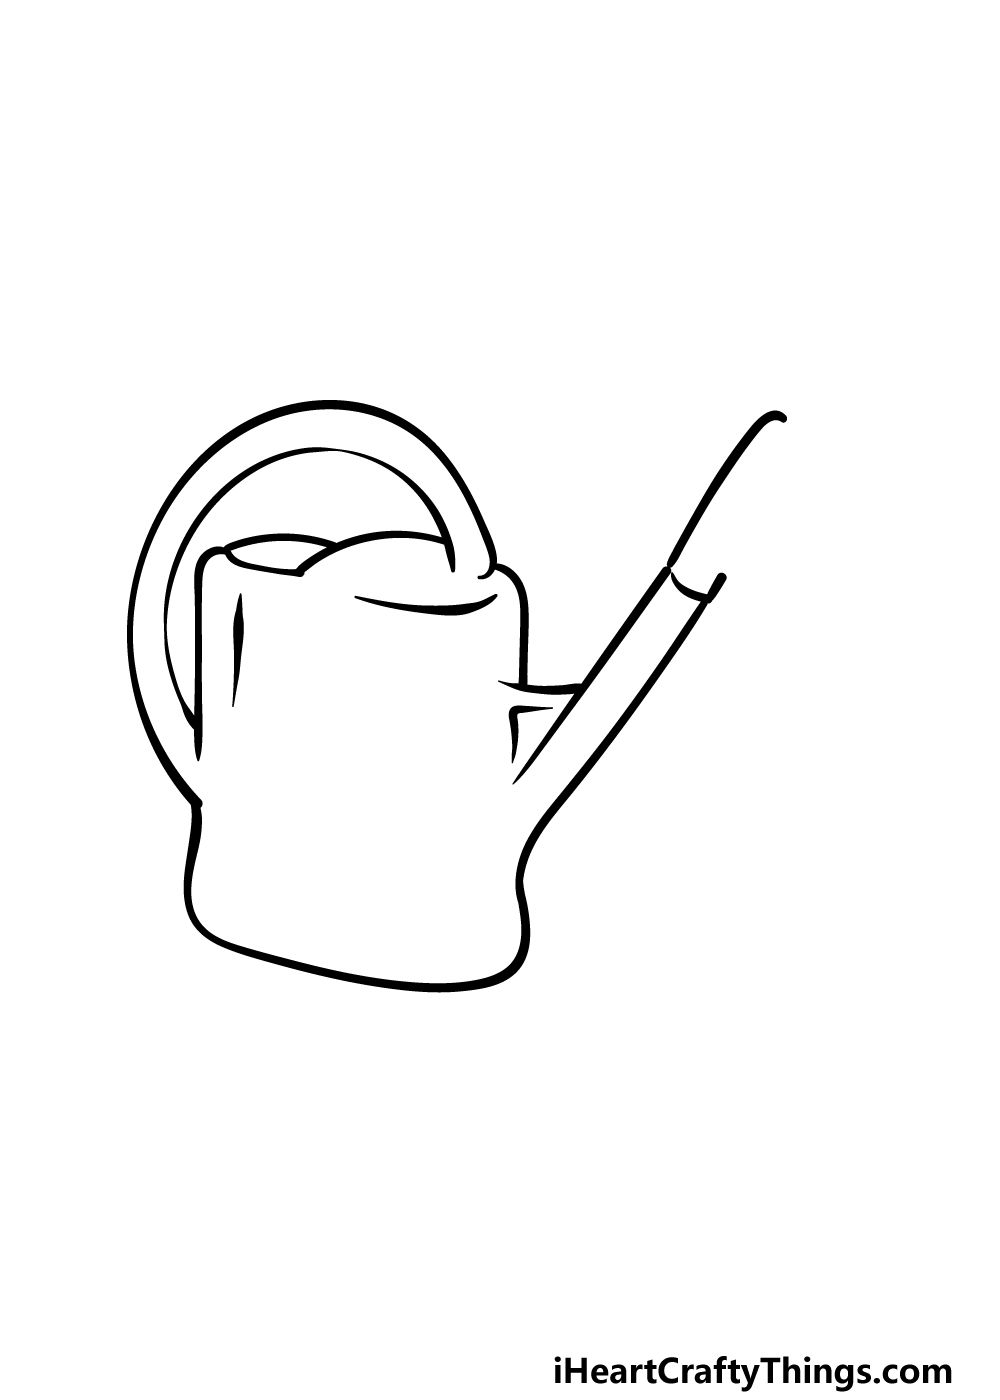
In this fourth part of your watering can drawing, we will begin drawing the arm of the spout.
These arms will sometimes be a bit curved, but the one we shall be drawing for this design will be quite straight and rigid.
You can extend some straight, smooth lines up at an angle from the gap left in the side of the watering can.
Finally, finish off this step by adding some more lines at the end to draw a rim area where the opening will be added along with any final details in the next step.
Step 5 – Add the final details to your watering can drawing
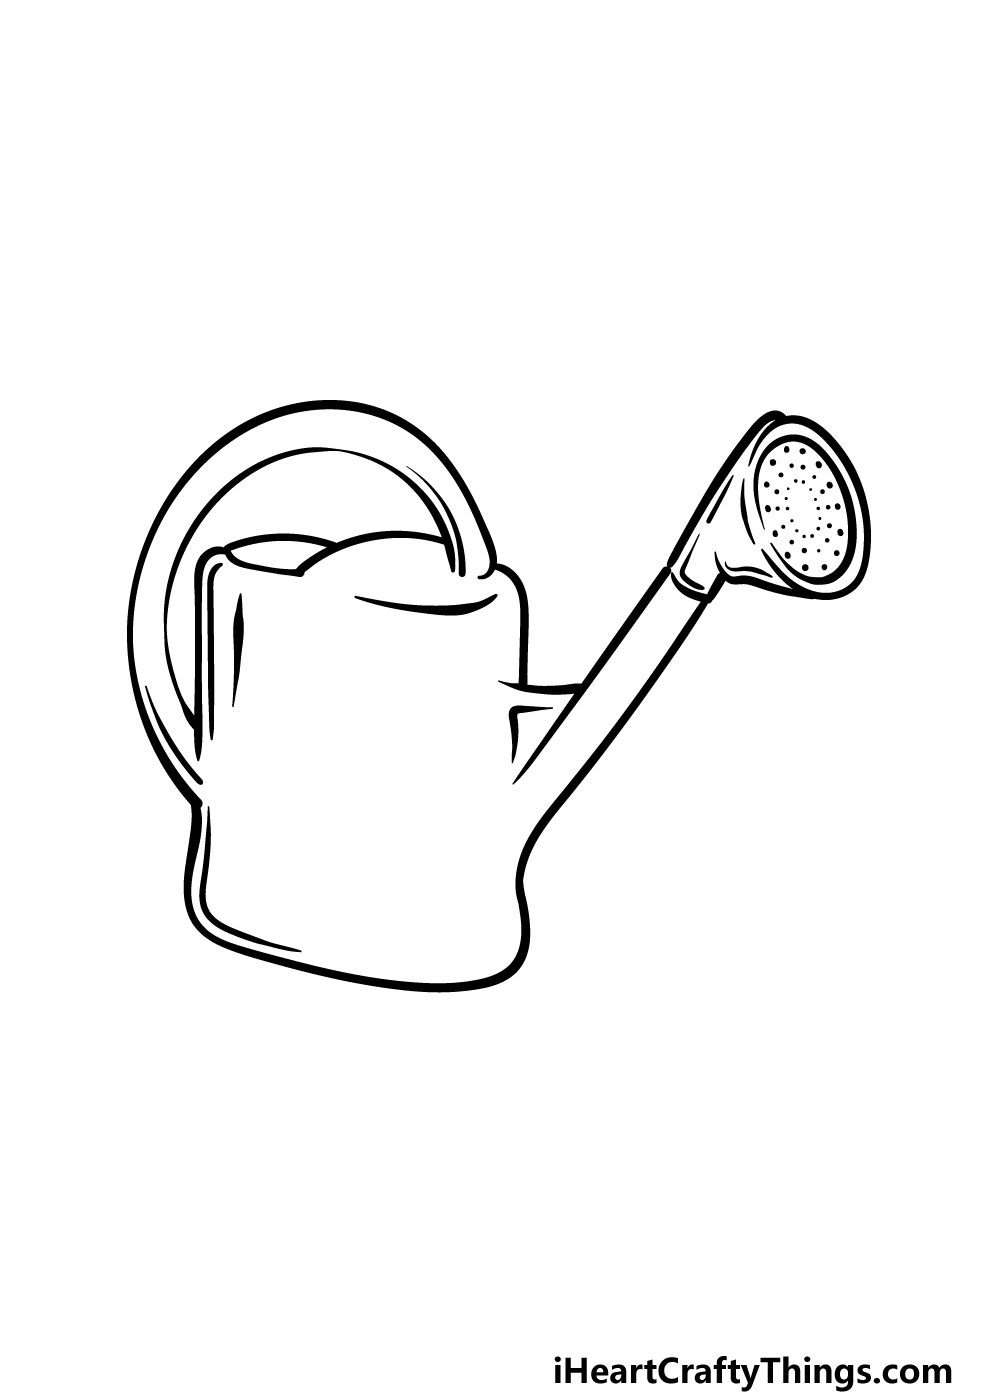
Now you’re ready to finish off the final elements of the drawing so that you’ll be ready for the final step of this guide on how to draw a watering can.
For the opening of the spout, draw a circle with a line going around the outer perimeter. You can then connect this with another line to the end of the spout arm.
Once this outline is drawn, you can add a series of dots within it for the holes that the water would come out of.
Then, add some simple lines throughout the watering can for more depth to the drawing, and then finish off with any extra final details of your own that you would like to add!
Step 6 – Finish off your watering can drawing with color
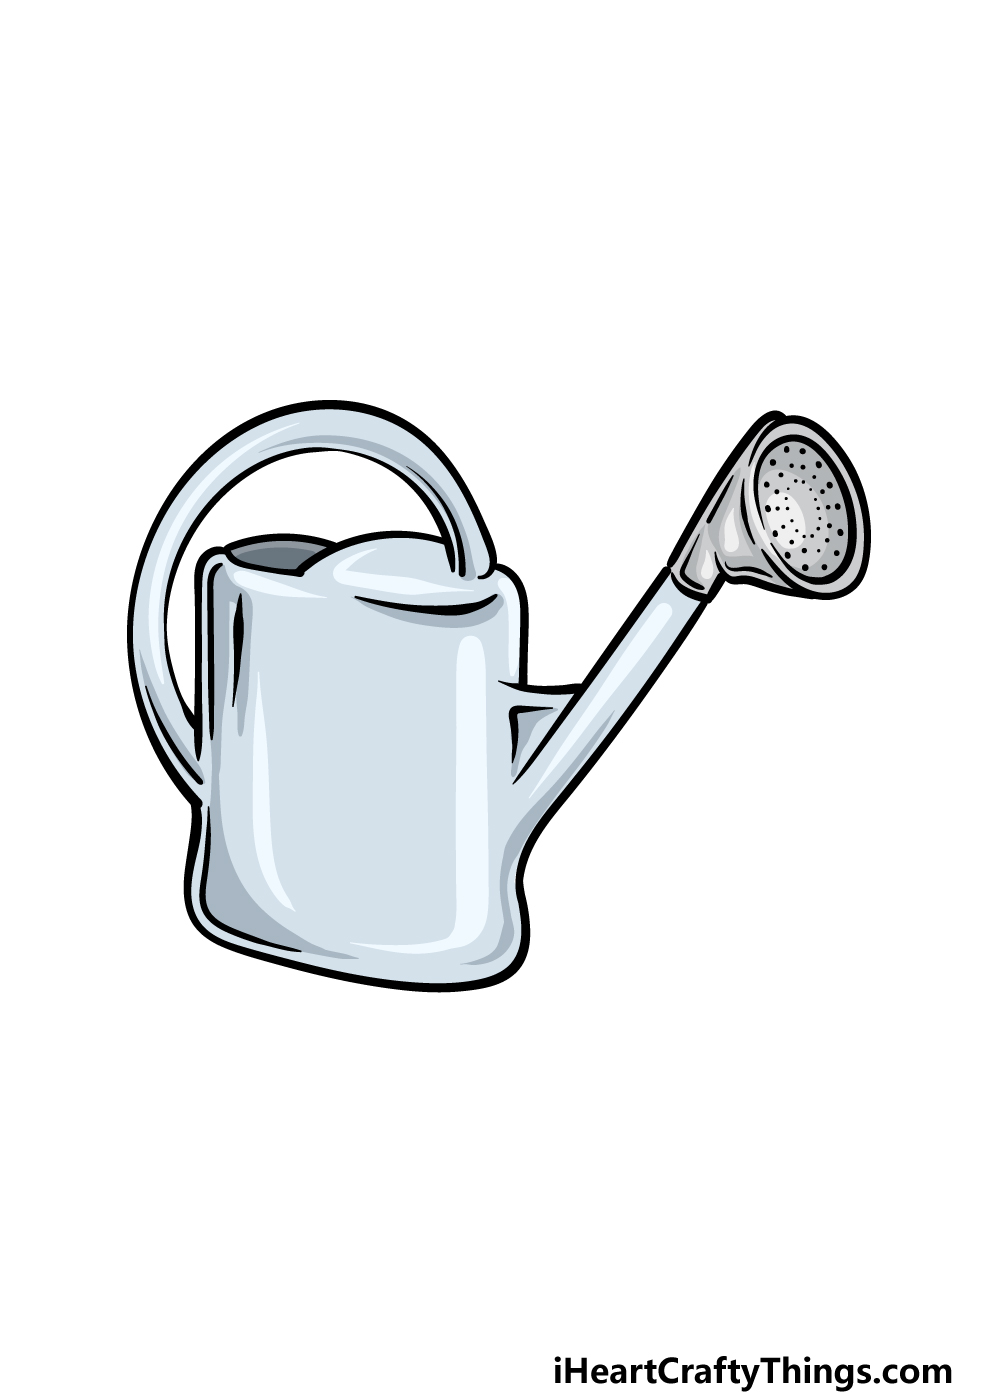
This final step of your watering can drawing will see you finishing it off with some color!
Watering cans are generally made of plastic, and that means that they can come in pretty much any color you can imagine.
In our example image, we kept things more subtle by using some really light blues and greys for a cooler look to the watering can.
You could go for some similar colors, but you could also make them bright and bold if you prefer! What kinds of colors and art mediums are you thinking of using to finish off this wonderful picture?
Here’s how you can make your watering can drawing even better…
Cultivate your watering can sketch as we make it even better with these tips!
This drawing of a watering can looks pretty dry, so we could fix that by adding some water. This could be as simple as adding lots of blue lines coming from the spout of the watering can.
To do this, you may want to draw the watering can at a bit of an angle. That is how you would need to hold it to pour water in real life, so it would be the perfect angle for the drawing!
If you want to show the watering can pouring water, then you could take it even further by drawing a human character in the image.
This character could be drawn in a charming, simple cartoon style, and you could base it on anyone you please. It could even be you or someone you know pouring this watering can!
That is one way of doing it, but who else could you base this character on?
Having some water and characters in this watering can drawing is one thing, but you also need something for the water to be poured on.
Flowers would be the perfect choice for this, and this would be a great chance for you to show off all your favorite flowers! This artistic garden could include a stunning variety of beautiful plants.
There are so many flowers, vegetables and fruits you could use here, and it will be interesting to see what you grow in this garden!
The watering can sketch we created here is a pretty simple one, displaying a simple grey color. There are so many ways that you could customize this watering can, though.
It could be as simple as changing the color of the watering can. Or, you could add some little pictures on the watering can or make it look like it is made of a different material.
These are a few ideas, but how else could you go about personalizing this watering can?
Your Watering Can Drawing is Complete!
This is the end of this guide on how to draw a watering can! You did a great job on these 6 steps, and you have an incredible drawing to show for it.
Simple objects like this don’t necessarily translate to a simple drawing, so we hope that these steps helped to make it easy and fun for you to work on!
Now you can show off what you think would turn this into the perfect image. You could do this by adding some details, drawing a background or by getting creative with your colors and art medium choices.
Then you can head to our website for access to many more amazing drawing guides to enjoy! We have a massive selection with more added all the time, so keep checking in to never miss out.
You can also share the results of your artwork by sharing your finished watering can drawing on our Facebook and Pinterest pages for us to see!