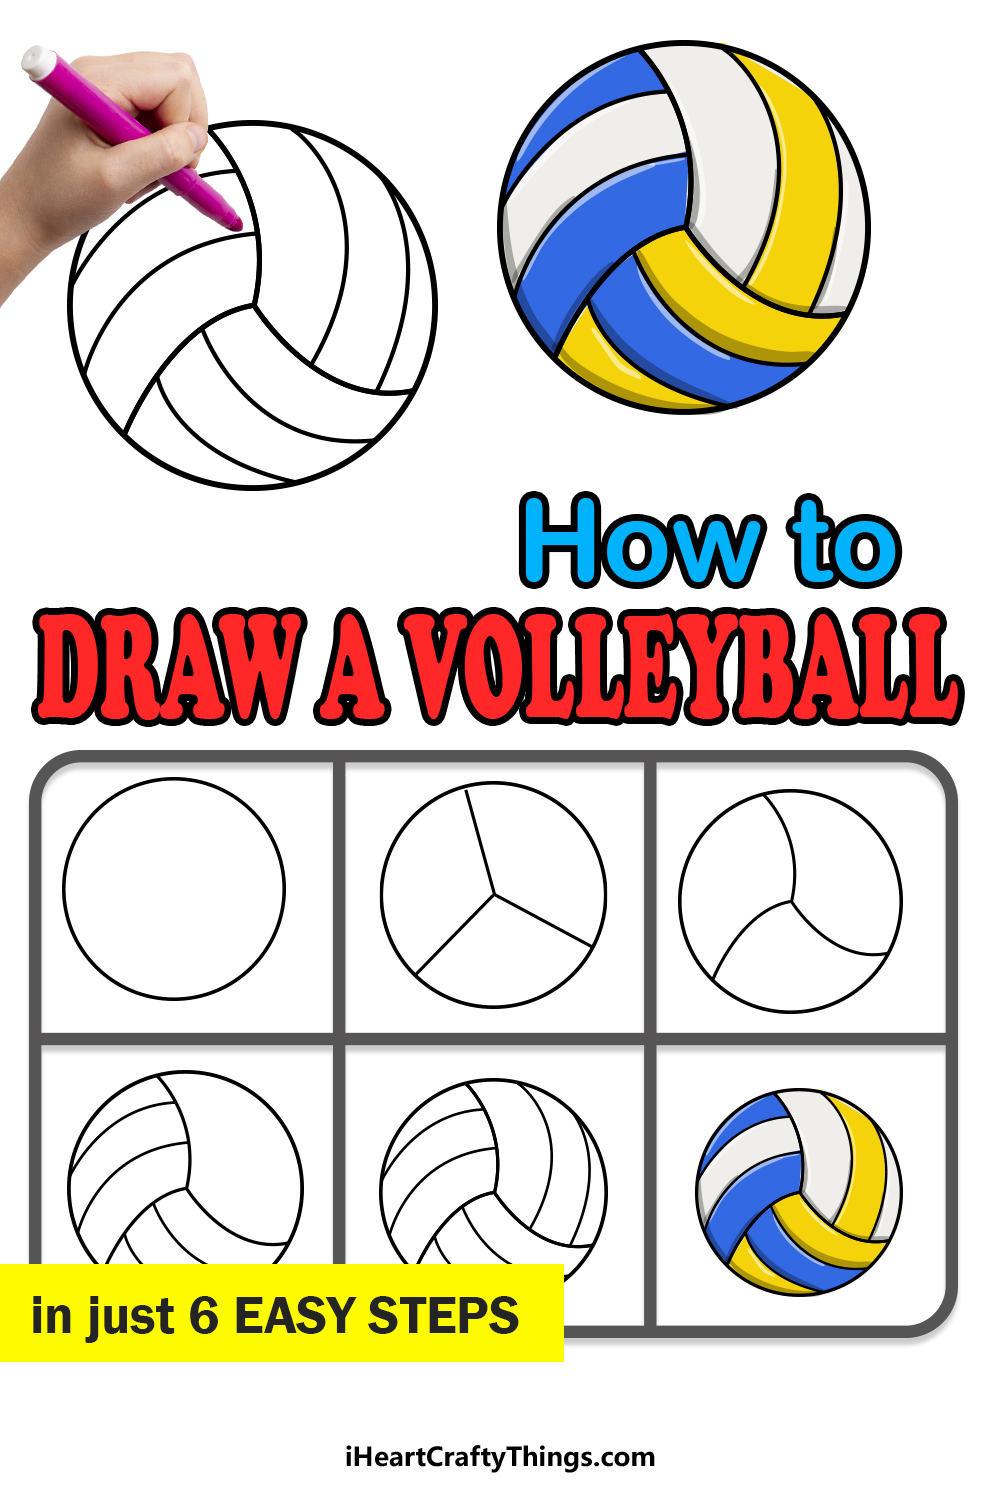
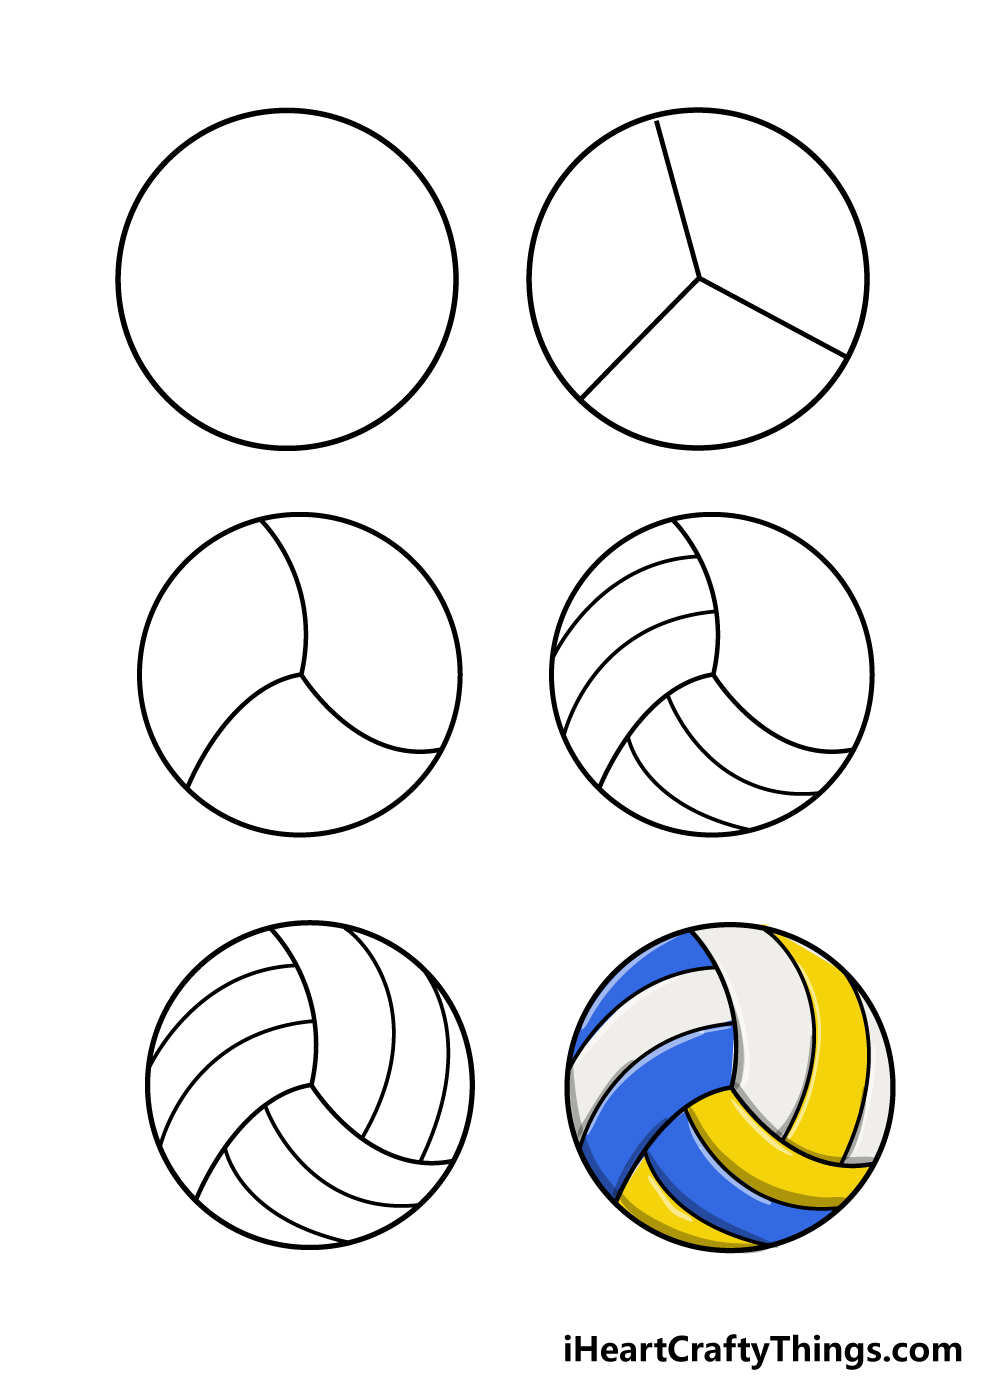
If you have ever struggled to learn how to draw a volleyball, then this guide for kids was made for you. It doesn’t have to be so hard when you know what to do.
Some may assume that drawing a seemingly basic ball would be a breeze, but a volleyball has more details than you may have thought. The stitching of a volleyball is quite distinct and needs to be drawn in the correct way for it to look right,
Adding the right colors can also help to make your volleyball look more authentic. This guide will show you how to start with a simple circle and then use some art tools to add specific lines to create the pattern of a volleyball.
Then, you will see that it’s easier than you thought! Once you have your finished volleyball, you could add some texture details or even design a background.
Learn How To Create A Volleyball Drawing By Watching This
How to Draw A Volleyball – Let’s get Started!
Step 1
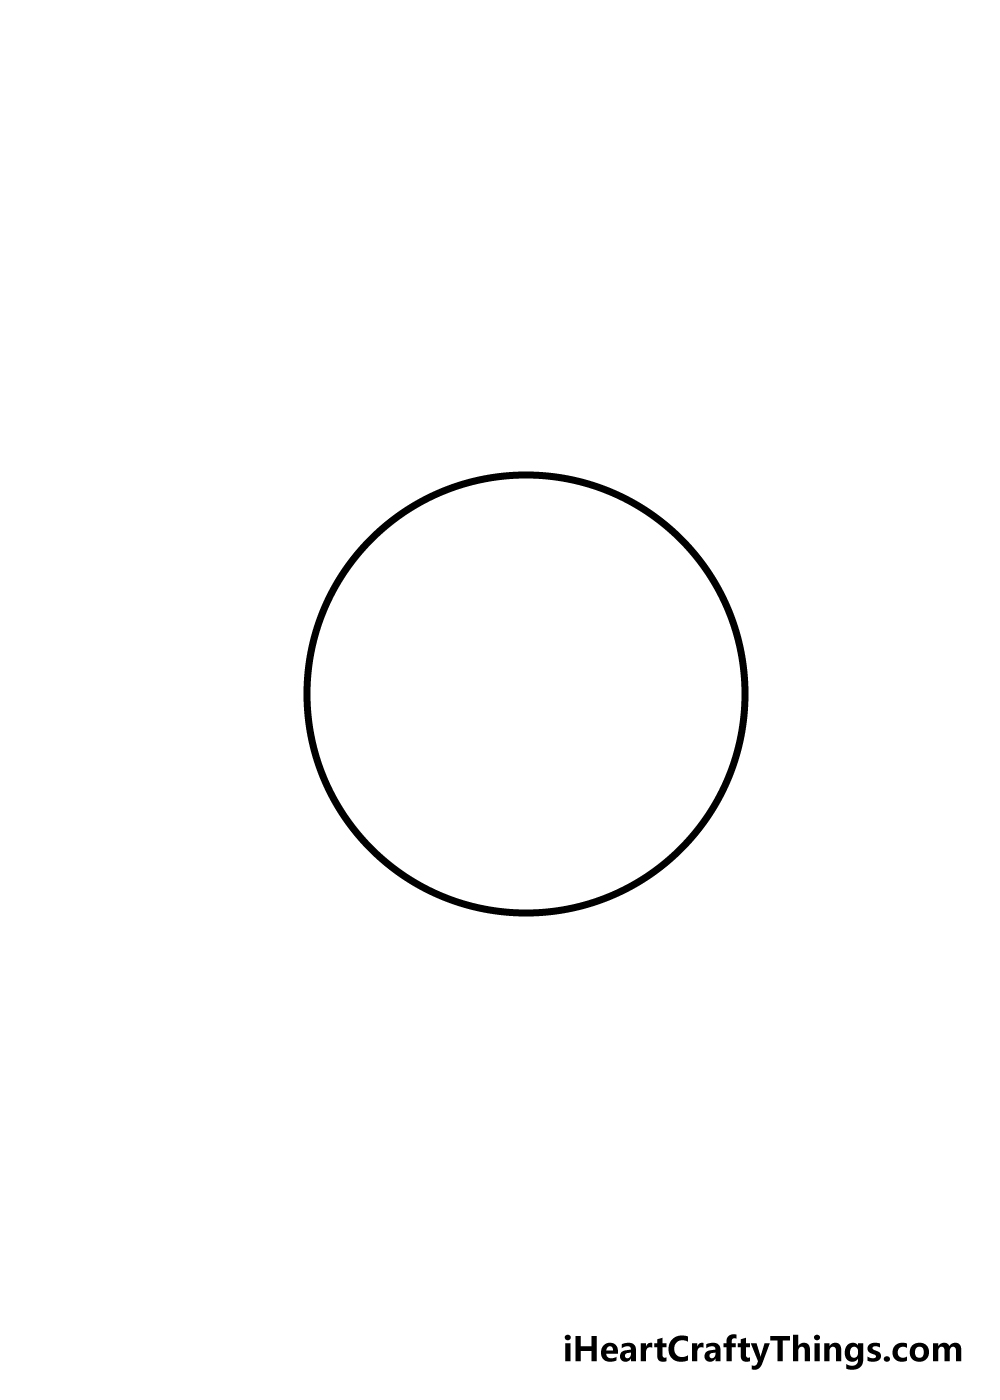
This first step of our guide on how to draw a volleyball will start simply. To begin, we will simply be drawing a circle.
Drawing a perfect circle can be practically impossible when done freehand, so there are a few tools that can make it easier.
The best tool to use is a drawing compass, as this can help you draw a perfect circle by clipping your pen or pencil into it and using the sharp point to finish the circle.
If you don’t have a compass available, though, there are some other options you could try. For example, you could use a flat, round object to use as a makeshift stencil.
This could be something as simple as the cap of a gluestick or the lid of a jar. Whatever you end up using, you have some options at your disposal to create a circle!
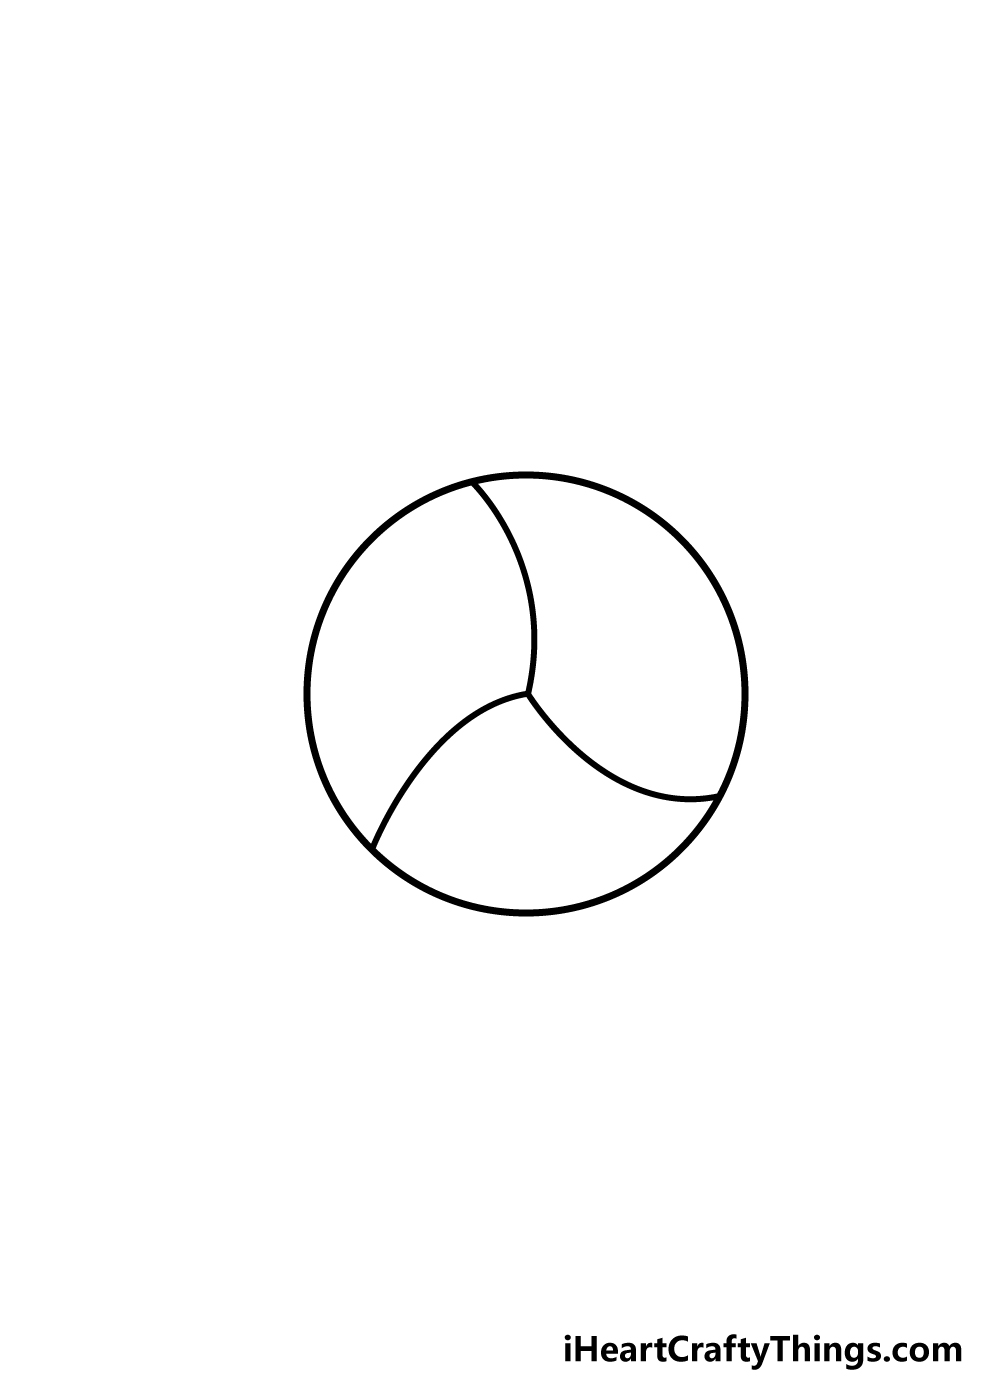
Step 2 – Draw in some lines to guide you
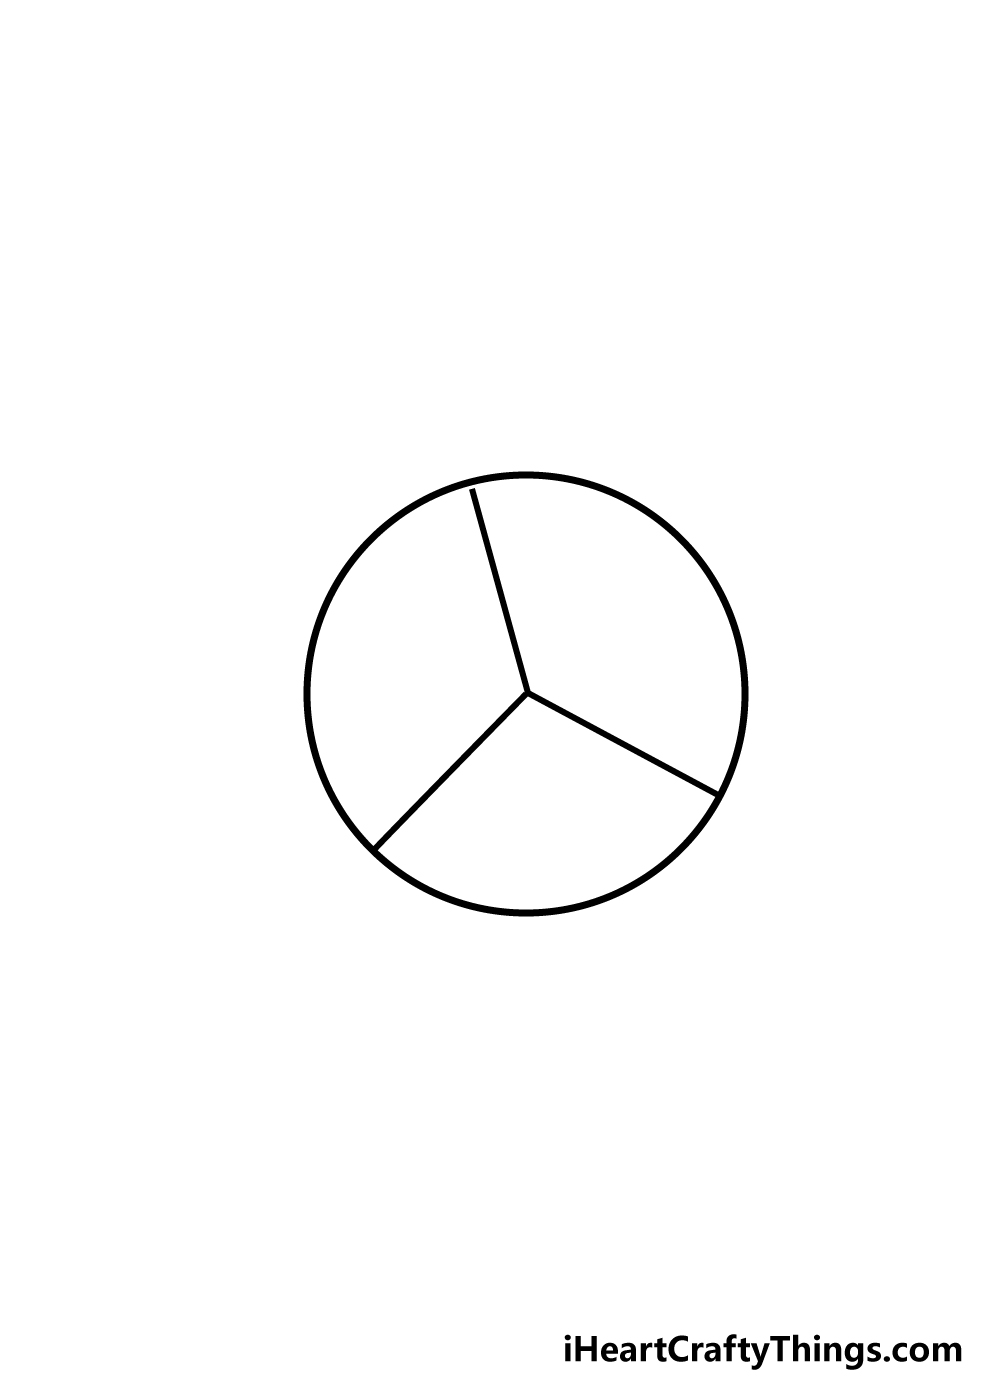
For this part of your volleyball drawing, you will need two things: a light pencil and a ruler. We won’t be using a pen or dark pencil, as the lines you will be drawing won’t be in the final image but will be guiding you in the next step.
Using your pencil and ruler, you can divide the circle into three slices as you can see in the reference image.
With these drawn, we will move on to the next step where they will help you with the next lines.
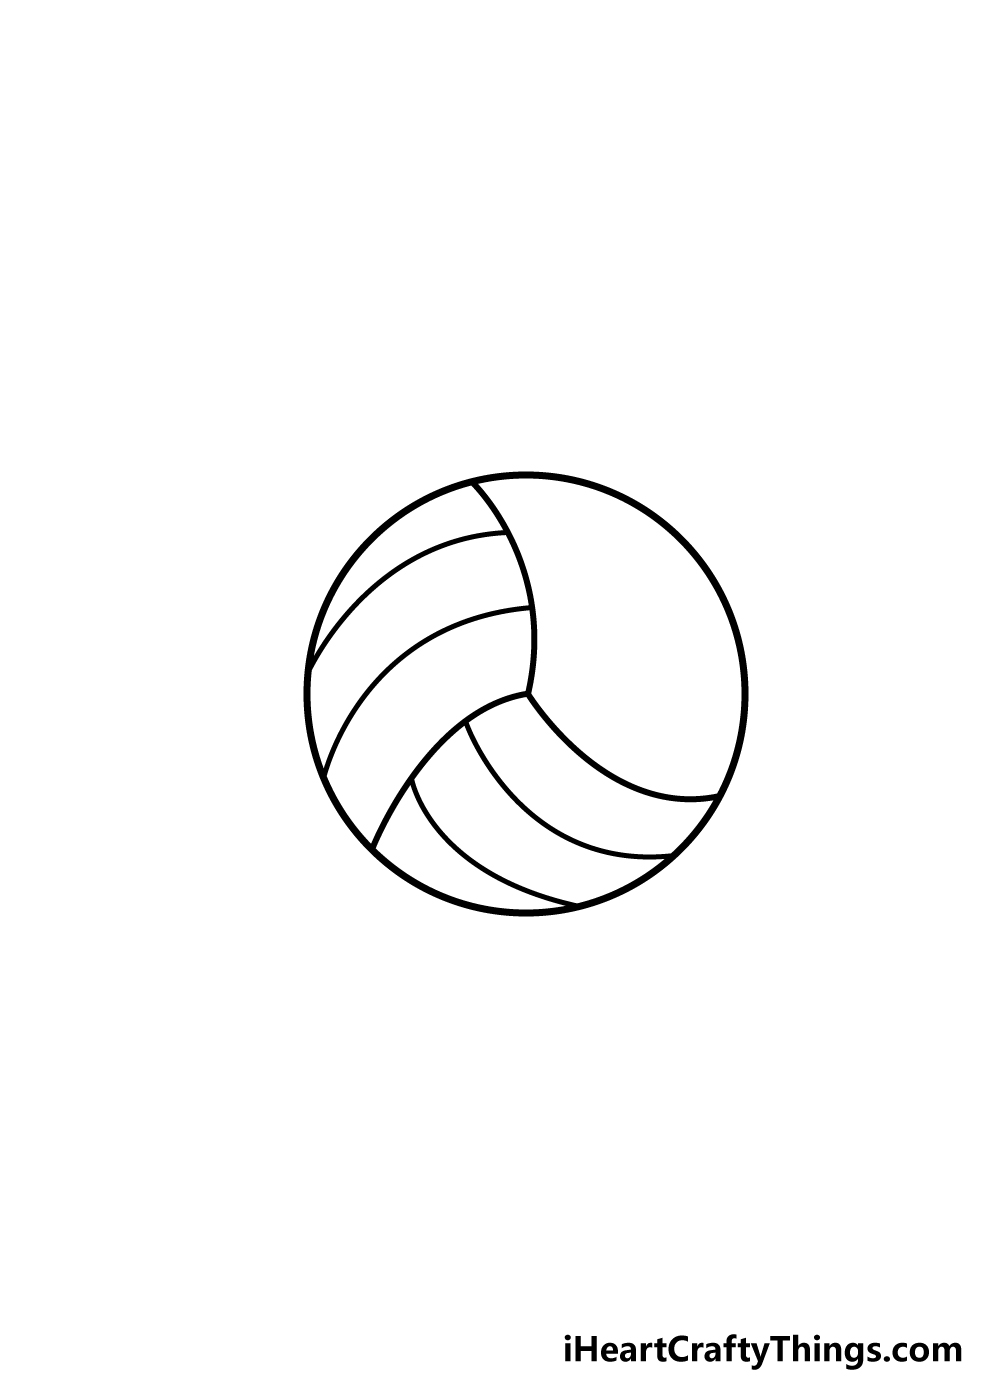
Step 3 – Next, start drawing the seams of the ball
Using the straight lines from the previous step, we shall draw some curved ones in this part of our tutorial on how to draw a volleyball.
Starting from the center point created by the three lines, carefully draw some slightly curved lines over them.
While they will curve in the middle, these lines will begin and end at the same points that the straight lines do.
Unlike the previous step where you used a light pencil, for this one you can go ahead and use a pen or a dark pencil, as these lines will be appearing in the final picture.
Step 4 – Keep drawing seams for the shoe
Your volleyball needs some more seams, so let’s add some in this step! To start off this process, you will be drawing some more curved lines.
These curved lines will be going in the left-hand ‘slices’ of your circle. Each one will have two curved lines from side to side as seen in the reference picture.
Step 5 – Now, draw the final seams
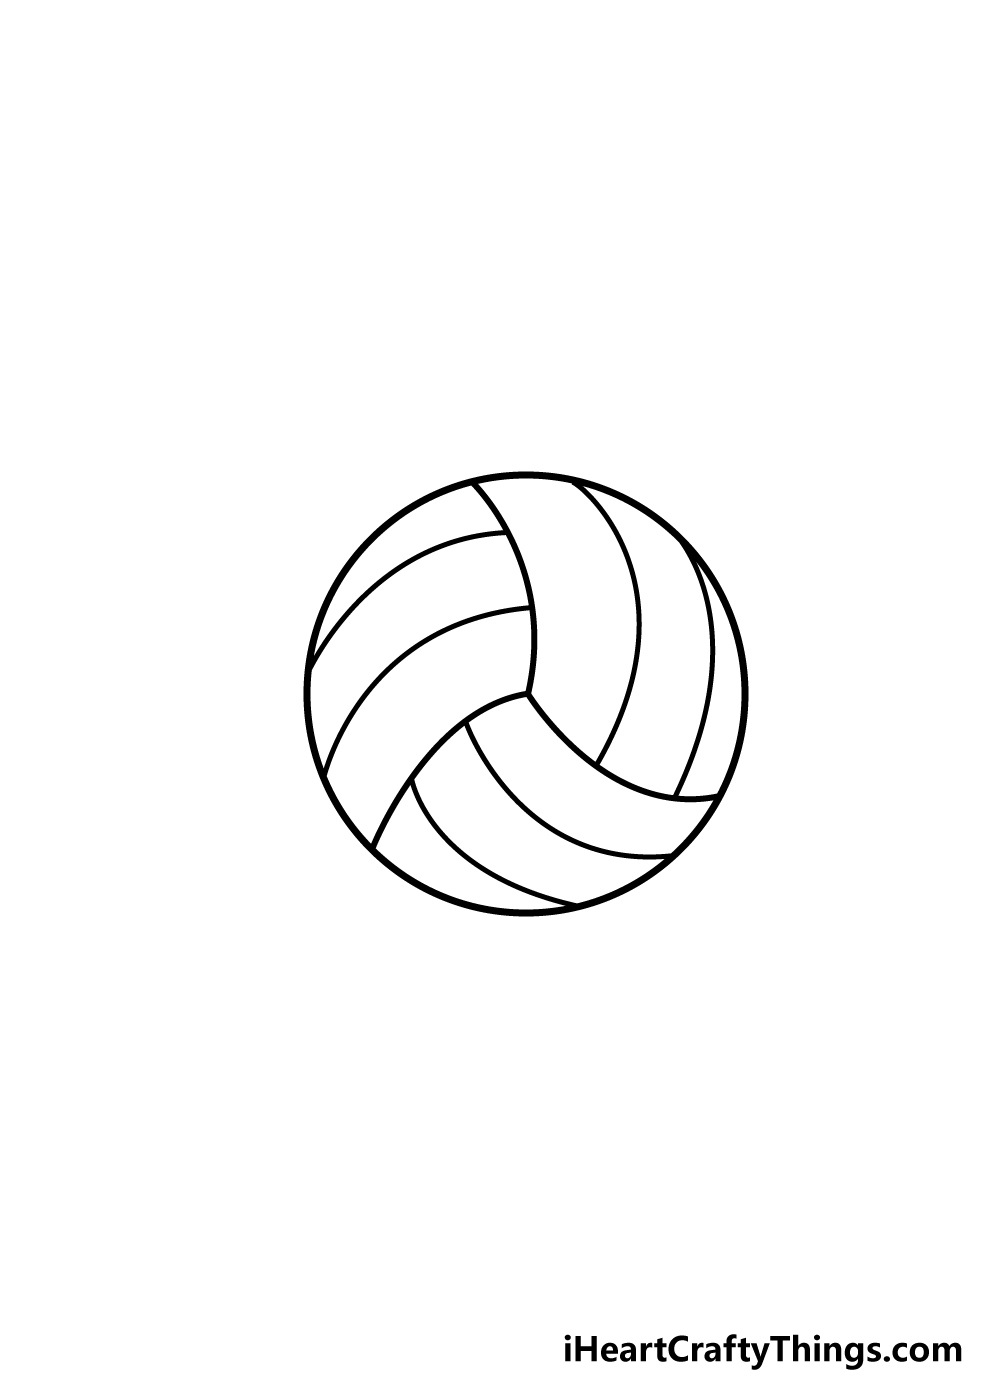
For this part of our guide on how to draw a volleyball, before you get to coloring in you can draw the final details. These will be similar to the lines that you drew in the previous step.
The drawing will be finished off with some more curved lines in a similar positioning to the previous ones from step 4. With those drawn, your drawing is pretty much done!
Before you move on to the final step, though, you could add some more details of your own. Some examples would be drawing on the logo of the brand of volleyball that you may use in real life.
You could even take it further and draw a background for the image or have a hand about to grab it.
What kind of scene can you think of to draw for this image?
Step 6 – Finish off your volleyball drawing with some color
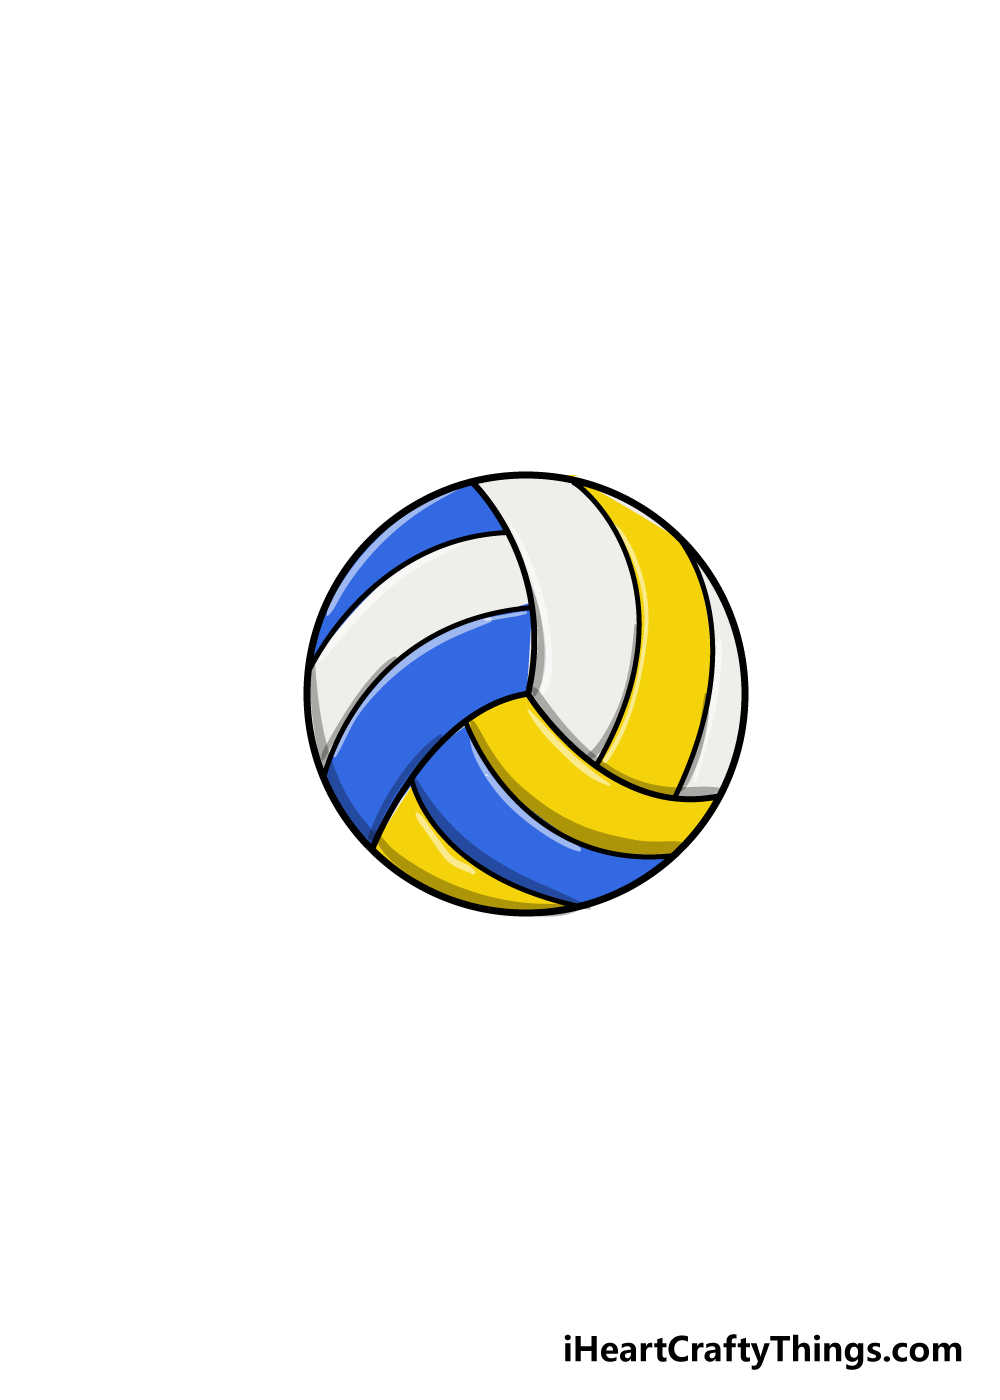
In the final step of your volleyball drawing, you’ll get to have some coloring fun! Even though we have shown you one way that you could color in this image, this is a step where you can show us how creative you are!
Volleyballs have all kinds of different color and pattern schemes, so you should really express yourself with your favorite colors in this step.
If you drew some background details or extra elements in the previous step, you can also have some fun finishing off these elements with your colors.
You could even get in there with some smaller details.
For instance, you could use some more precise art mediums such as colored pens or pencils to create some weathering on the seams by using some grey or brown on the lines.
We can’t wait to see which colors, art mediums and final details you choose for the finishing touches of your volleyball drawing!
Do this to take your volleyball drawing to the next level
Create a great drawing of this iconic sport as we make this volleyball sketch even better!
When playing volleyball, you will need a court that has a net in order to play the game properly. That also gives you a great background idea for this volleyball drawing!
By adding the markings of the court and the net, you can easily start building the background scene.
If you need a bit of help with drawing the court, you can easily find pictures online to help you out as you draw.
Adding a background always makes a picture even better!
Drawing the court and the net is one way to make this drawing of a volleyball even better, but there are other ways as well. For instance, you could draw some people playing volleyball with this ball.
This tip could go well with the previous one, too. The characters could be drawn in any style you like, and you could even just show a hand about to hit it.
If you were to add some characters to this drawing, who would you base them on? You could use yourself and your friends or maybe even a professional volleyball team!
When it comes to choosing the best volleyball equipment, there are different brands and makes that different players trust. You could add some details to this volleyball sketch in order to show what brand it is!
This could be as simple as drawing the logo of your favorite brand onto the stitching. It could also be fun to create your very own volleyball logo!
Lastly, you can also try out some different colors, art tools and mediums to color your artwork. We showed you one color scheme to try out, but you could use any colors you like!
If you’re really feeling creative, maybe each section of the ball’s surface could be a unique color.
Using colored pens, markers or brushes with thin tips would be ideal for this, as they would give you more precision.
Your Volleyball Drawing is Complete!
That brings us to the end of our guide on how to draw a volleyball!
We hope that this guide showed you that even with the complicated looking seam design of a volleyball that it can be made much easier if you know what to do!
Our goal was to make it both easy and fun for you to learn, so we hope you had a great time with it.
Learning to create a volleyball drawing is just part of the fun, though, and now you get to take over and show us what you can do!
Now, you’ll get to personalize your drawing with some of your own elements. There is a lot you can do, from drawing extra details to the volleyball to creating a fun background for the drawing.
You also have plenty of options with your color choices, and you can experiment with different mediums for different color styles as well.
The fun doesn’t end here, though, and we hope that you will keep checking our site frequently to enjoy the drawing guides that we will be uploading often!
We would also love to see your completed volleyball drawing, so please go ahead and share it on our Facebook and Pinterest pages for us to enjoy!