If you want to strike fear into the heart of even more seasoned artists, you can ask them to draw human hands.
It’s difficult enough when you have them in a relaxed state, but when they’re in any kind of dynamic pose it only makes it even more tricky!
That can make it a frustrating endeavor to learn how to draw a thumbs up and can make many artists give up in frustration.
Luckily, while there may not be a magic trick to make it instantly easier, it can be made much easier when you know what to do.
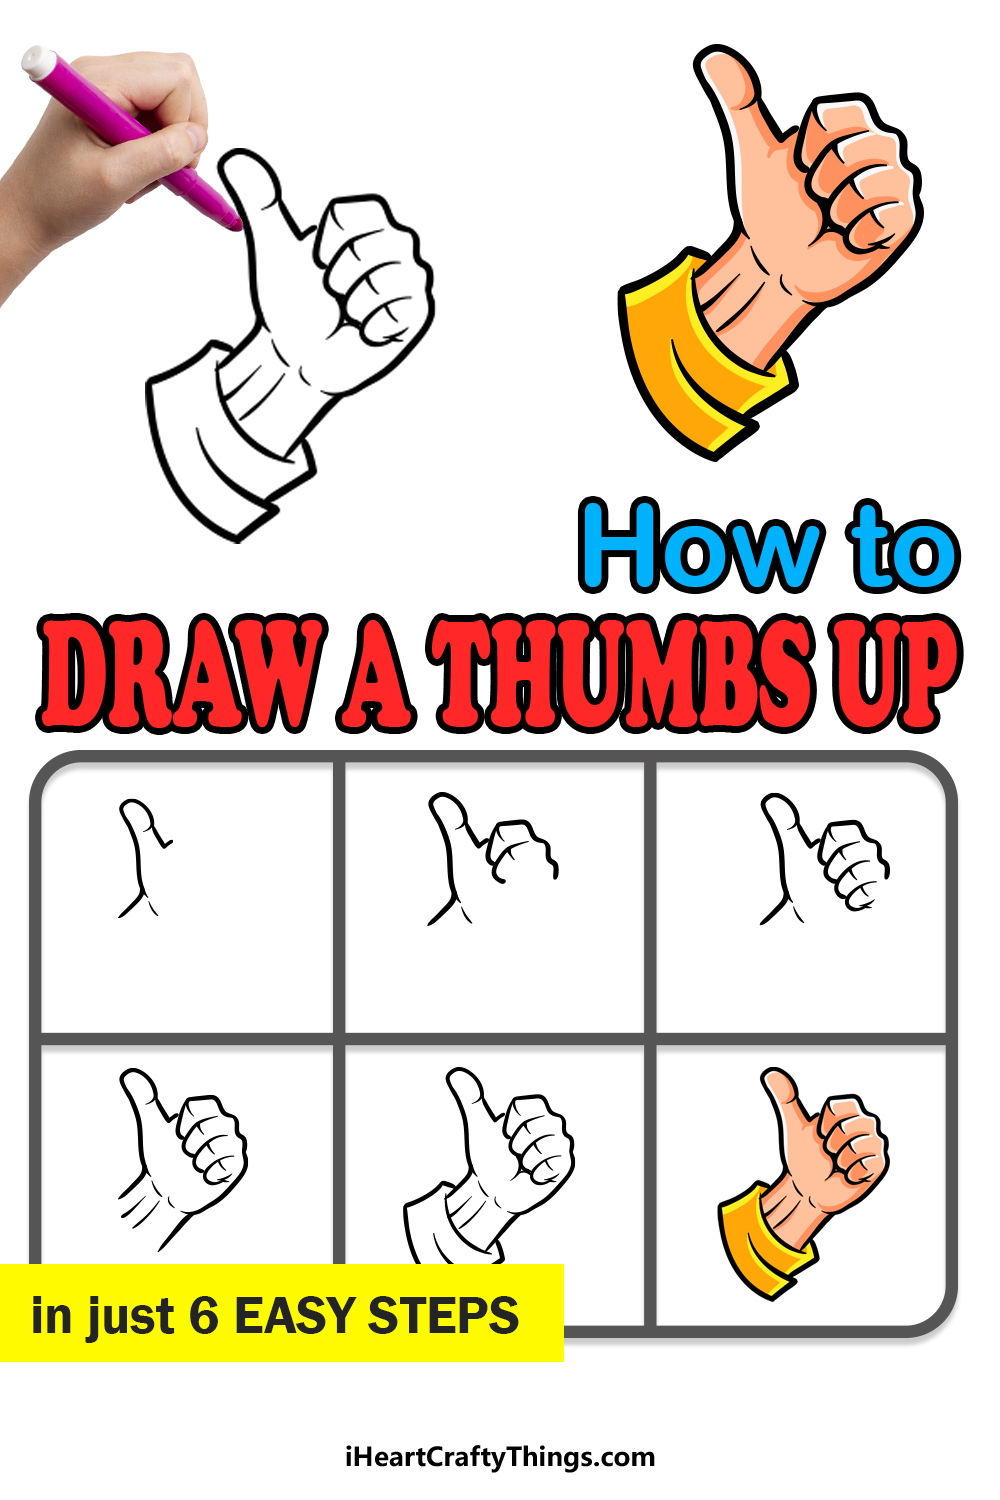
This step-by-step guide on how to draw a thumbs up will make it much easier and even more fun than you expected!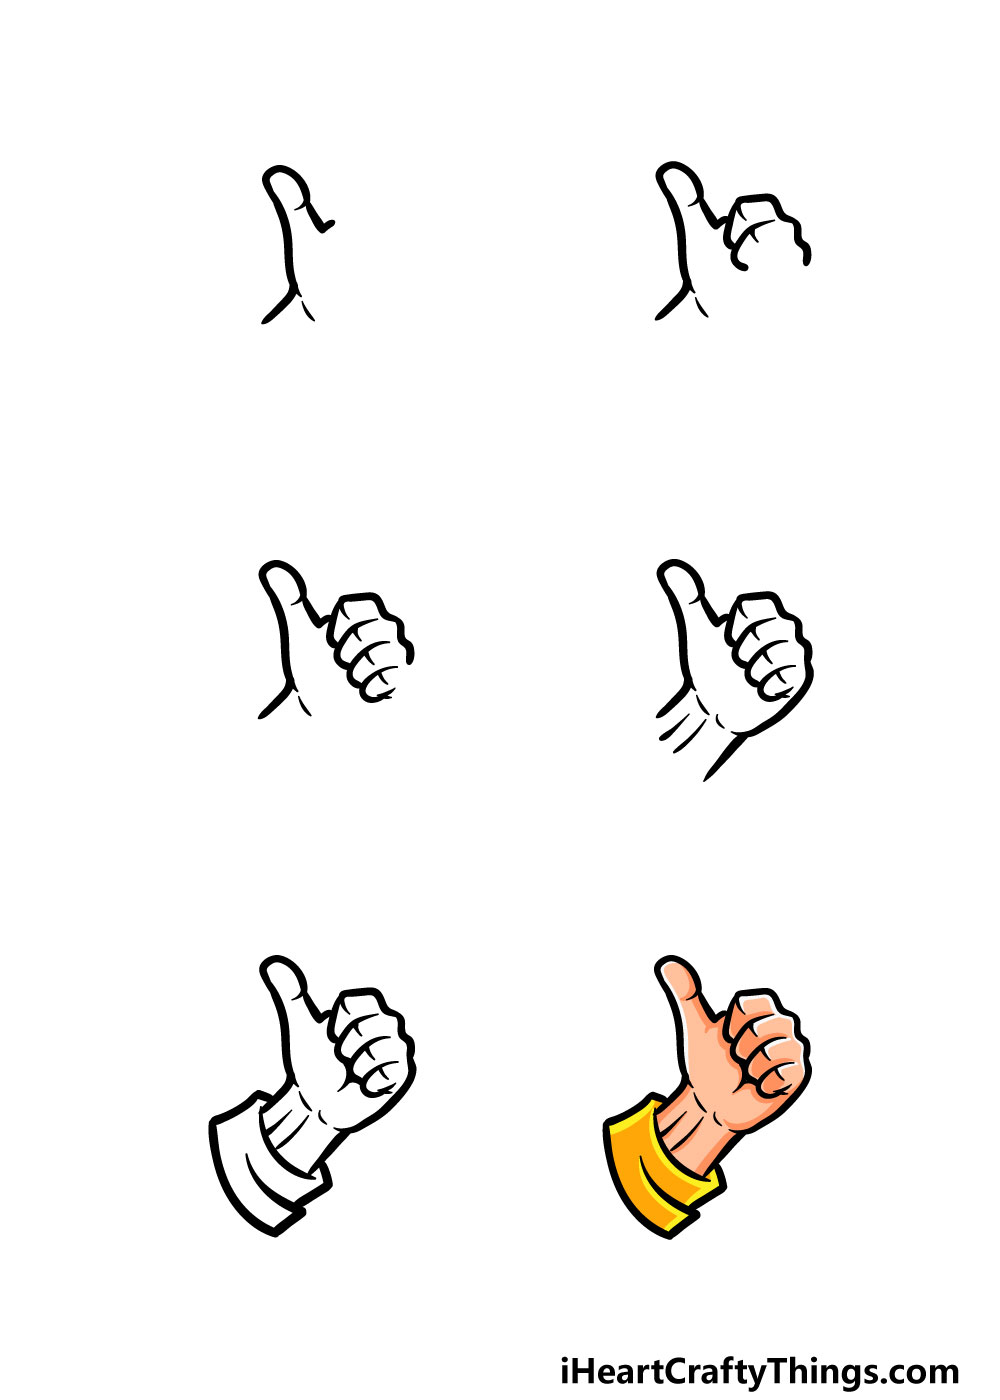
How to Draw A Thumbs Up – Let’s Get Started!
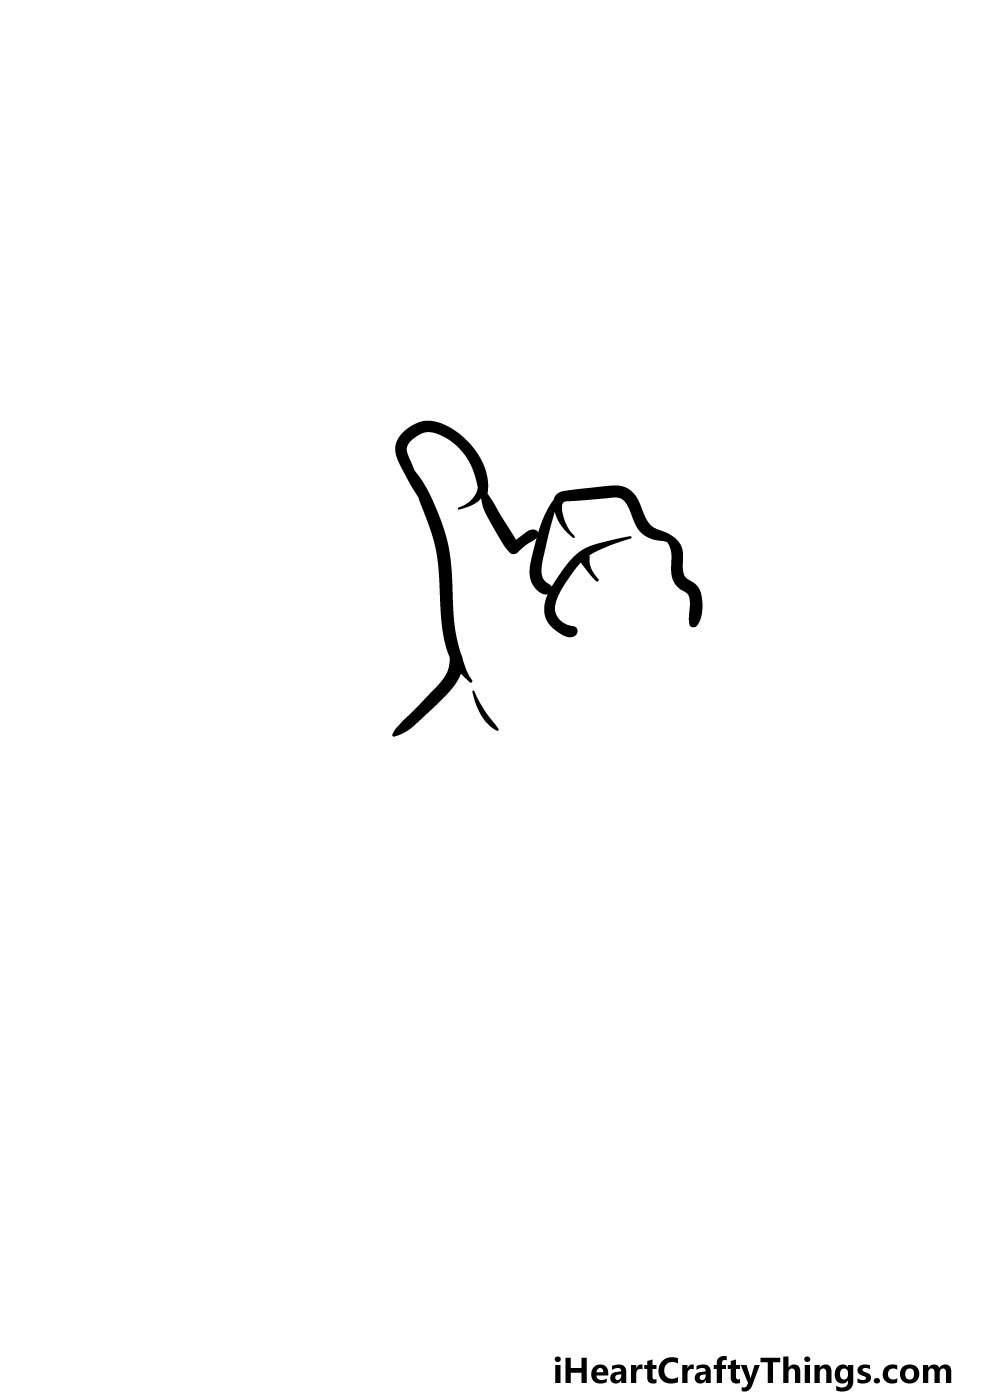
Step 1

For this guide on how to draw a thumbs up, we will be building up the drawing section by section. By taking it slowly this way, you will find that you can overcome the challenge of this drawing.
For this first bit, we will start with the thumb itself. You can start with a diagonal, slightly curved line for the wrist. Then, you can extend a curved line up from the wrist for the side of the thumb.
This will then loop over with a bulge at the top for the tip of the thumb. As you draw, you could also use a pencil at first and then go over with your pen when you’re happy with how it looks. This way, you wouldn’t have to worry about making any mistakes!
Step 2 – Draw the first knuckles and fingers
In this part of your thumbs up drawing you will be starting with the first fingers and knuckles of the hand.
You can do this by extending a wavy line from the short line at the base of the thumb. You will create three knuckles using this line, and then use some more bent lines for two fingers extending into the interior of the hand.
Each of these fingers will have a line going across about halfway for the second knuckle. The reference image will guide you as you draw, so don’t be afraid to refer closely to it as you go!
Step 3 – Now, draw two more fingers

You’ve already drawn two fingers in this guide on how to draw a thumbs up, so you should have no problems drawing the next two!
They’re also a little more structurally simple than the previous ones. These two fingers will be drawn with some simple curved lines with more knuckle lines drawn about halfway down the fingers.
Step 4 – Next, draw the rest of the hand

The hardest parts of this thumbs up drawing are behind you, so you should have no problem finishing off the final lines!
First, use a curved line for the side of the palm, as shown in the reference image. Then, use a straighter line for the rest of the wrist. Finally, add some straight lines inside of the wrist for even more detail.
That will do it for the hand itself, so we have just a few final details to add before the final step!
Step 5 – Now, you can draw the shirt for your drawing

This step of our guide on how to draw a thumbs up will be all about adding the final details and elements before you add some color in the final step.
The main element will be to draw the sleeve that the wrist is poking out of. You can draw this with a combination of straight and rounded lines, as shown in the reference image. Then, you can add some small lines to the palm to show how the fingers are pressing into it.
That will do it for all of the details in this guide, but before you bring some color to it, you can add some details of your own!
You could try to draw the rest of the arm or add a background for a few ideas. Maybe you could write some text beneath the thumbs up to make this a motivational image!
What ideas can you think of to put your own spin on this picture?
Step 6 – Finish off your thumbs up drawing with some color

You’ve worked hard on this amazing thumbs up drawing, so now you get to relax as you add some fun colors to your image.
In our reference image, we have shown you one way that you can color in the picture. This is just a suggestion, however, and you should be free to express your creativity with your colors!
You could follow our lead by using the colors that we have used in our image, but you can also use any colors that you love.
You could even use your colors to make it look like your own hand! If you drew any extra elements or background details then you could use those elements to incorporate any colors that you want for this image.
Once you know what colors you would like for this image, you can also have fun bringing them to life using the mediums and art tools that you use for these colors.
If you would like a brighter look, you could use some colored pens or acrylic paints for that kind of look. For more muted tones, you could use watercolor paints and colored pencils for a few suggestions.
What will you use to bring this drawing to life?
3 More tips to make your thumbs up drawing easy!
Creating this thumbs up sketch can be tricky, but these tips are here to help!
Drawing a hand in the simplest of poses is no easy task, and this is only even more so when in a pose like the one in this drawing of a thumbs up.
Luckily, you have hand models all around you! You could use your own hand in a thumbs up pose to help you as you draw.
If you have a patient friend or family member, you could get them to do the pose for you.
If all else fails, you can also look up pictures online to use alongside this guide to help you. If you have an art store near you, you can even buy poseable wooden hands that you could use to make it easier.
We created this thumbs up drawing in a fairly simple style, but it could be simplified even further if you want to make it easier. For example, you could draw it in a simple cartoon style.
You may find drawing in realistic styles to be easier, in which case you could adapt such a style to this particular design. It all depends on what your strengths and weaknesses are when it comes to drawing.
If you change the design, it will also result in a more unique image as well!
If you find that this thumbs up sketch is still a bit too challenging, you can use your pencil to prepare the drawing. Using a pencil is a great idea because it allows you to draw with no fear of making a mistake.
With a light pencil, try to break down the design into very basic shapes. Then, you can slowly add more and more layers of detail until it resembles the design we prepared.
Using this trick along with the other tips we suggested will only make it easier. When your thumbs up is looking perfect, you can then use a pen to finish up and then erase your planning pencil lines.
Your Thumbs Up Drawing is Complete!
With that, you have finished this guide on how to draw a thumbs up! This was a tough drawing to take on, so you should be very proud of reaching the end of this guide.
By taking it slow and trying your best you can overcome any drawing challenge that you take on!
Then, you can add your own details, elements and background creations while also bringing the colors to life with your favorite mediums. We can’t wait to see what you come up with!
Once you are ready for more drawing fun then you can visit our website! We have tons of amazing guides there for you and we upload new ones frequently, so be sure to visit often to never miss out!
We would also love to see your creative thumbs up drawing, so once it’s done please be sure to share it on our Facebook and Pinterest pages!