There are a few telltale signs of when someone has a royal status.
Some classic examples would be a fancy crown or a luxurious robe, but one of the best ways to show that you’re a full-on monarch is by having an opulent throne.
There have been many examples of these kinds of thrones throughout the years, and there are many different designs that they have featured.
Learning how to draw a throne is a great way to imagine what it would be like to be a part of royalty.
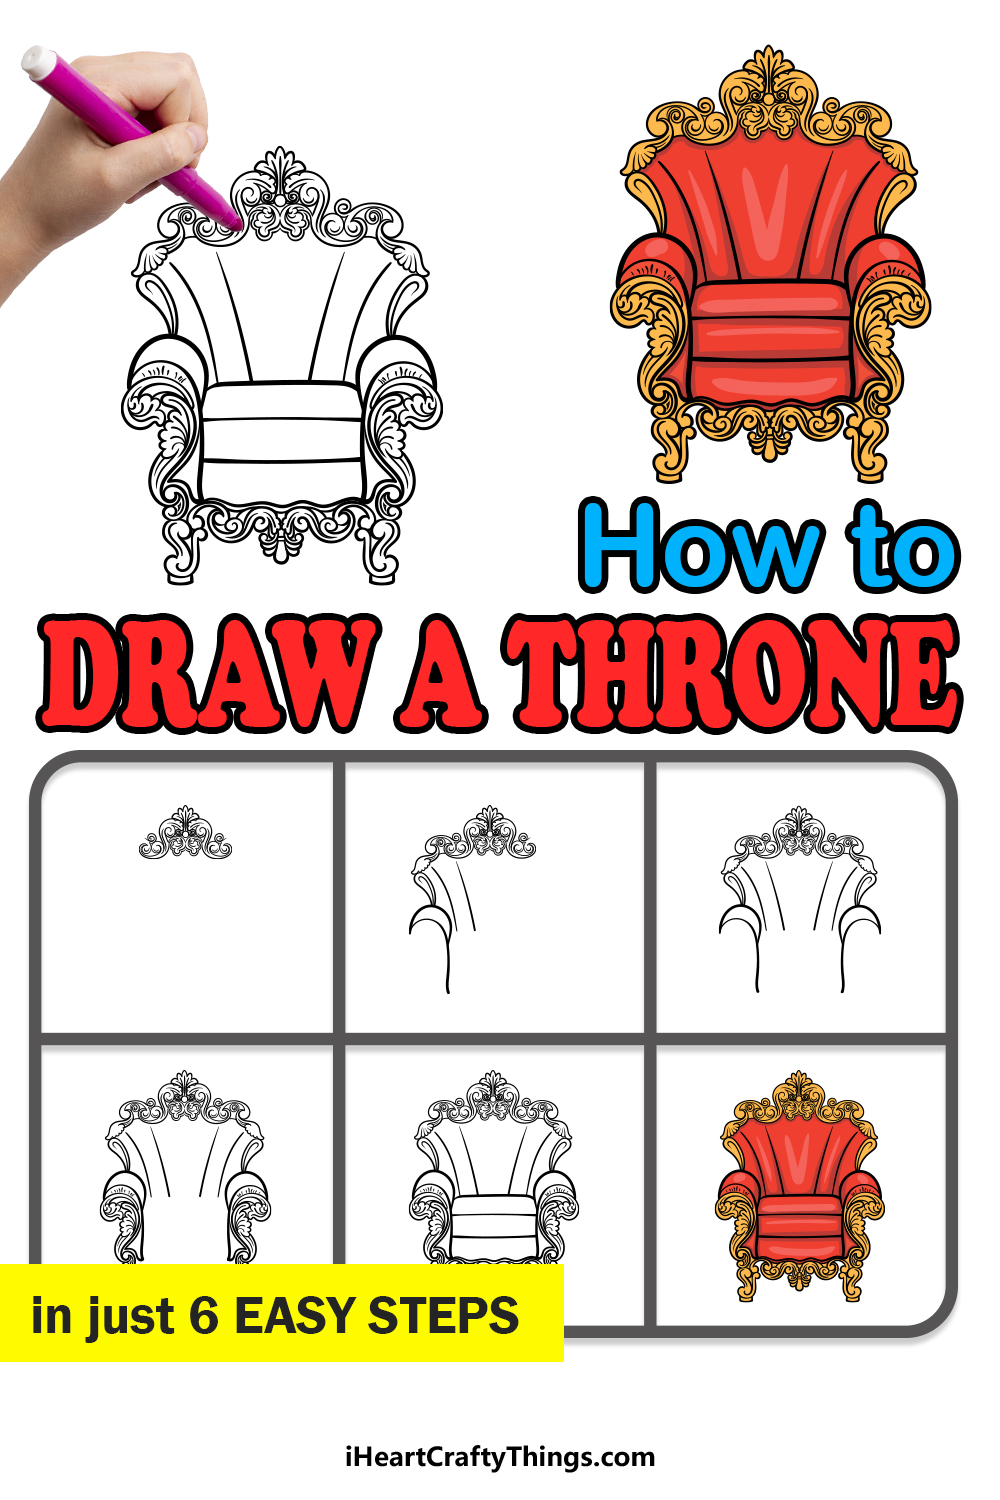
This tutorial will show you how you can recreate a beautiful example of one of these royal thrones.
So sit back on your own comfy throne (or a chair will do) and enjoy our step-by-step guide on how to draw a throne in 6 easy steps!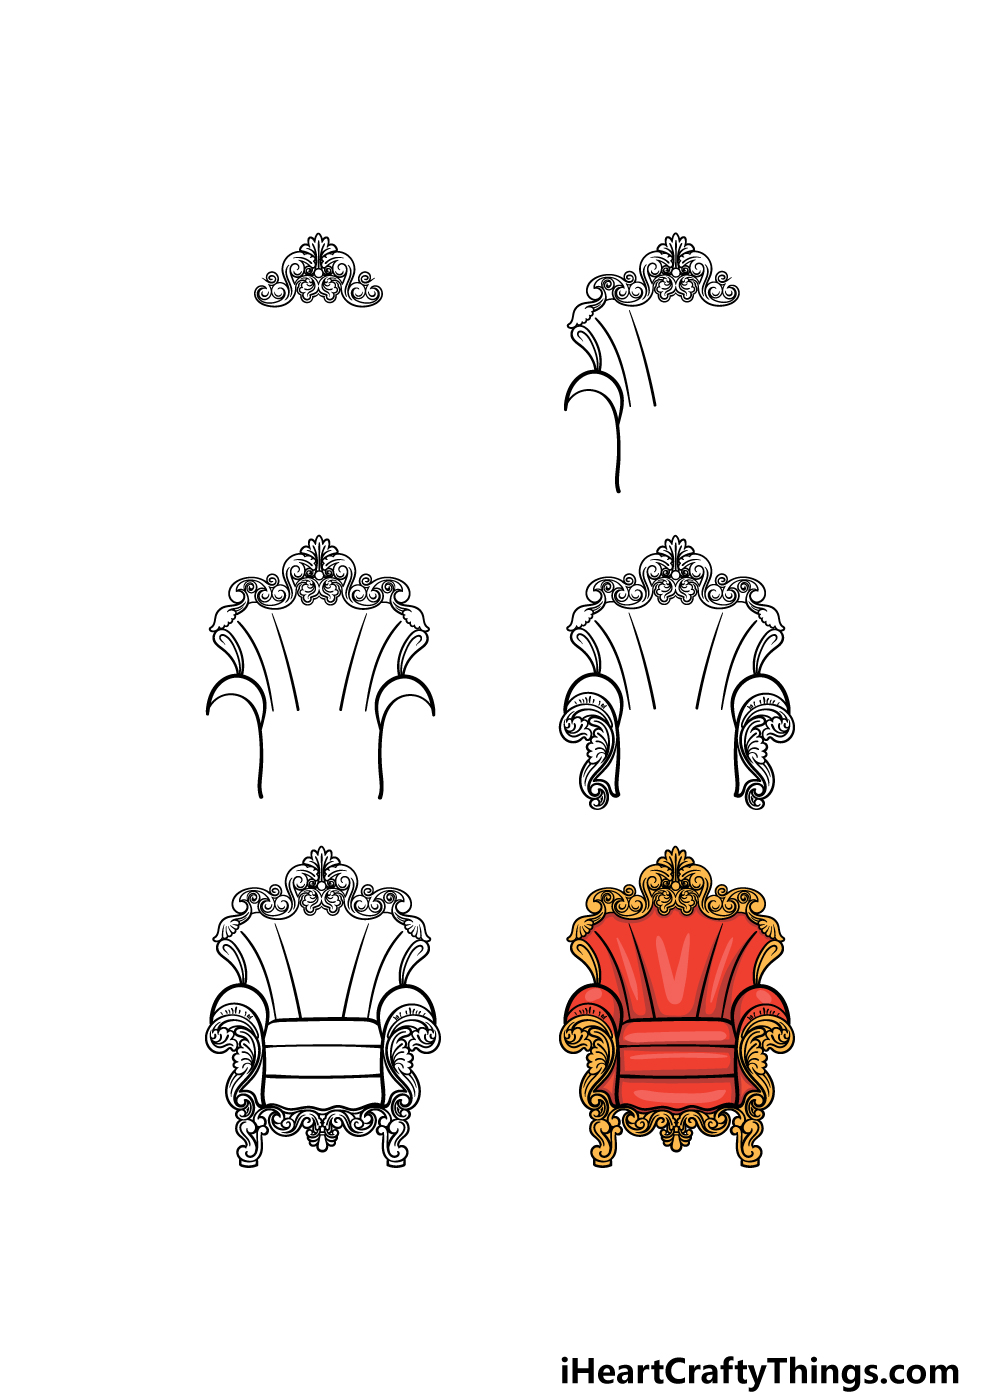
How to Draw A Throne – Let’s Get Started!
Step 1
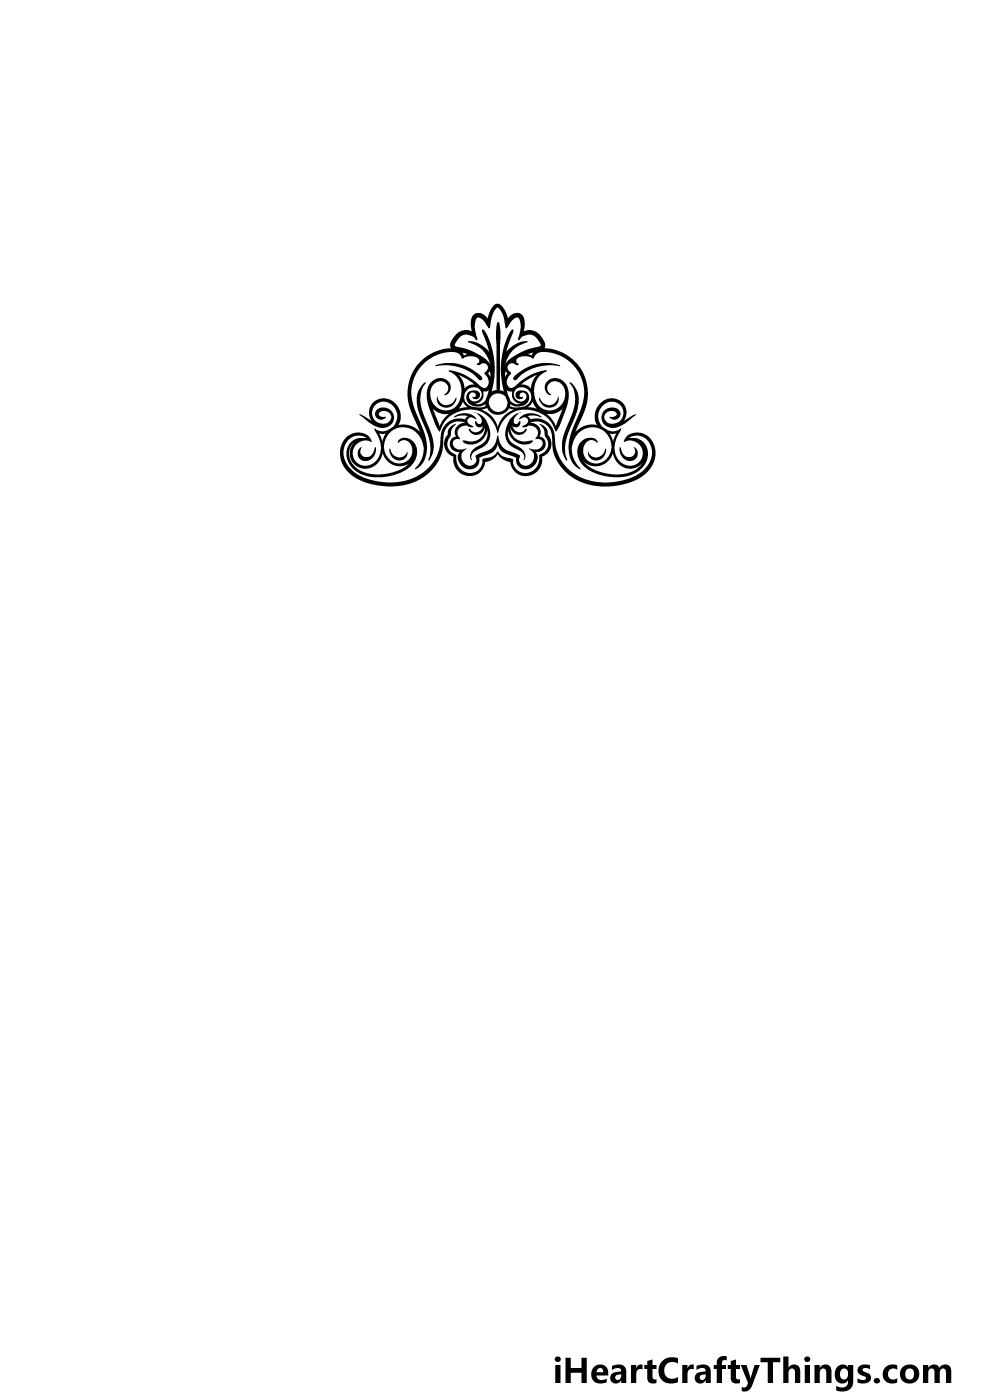
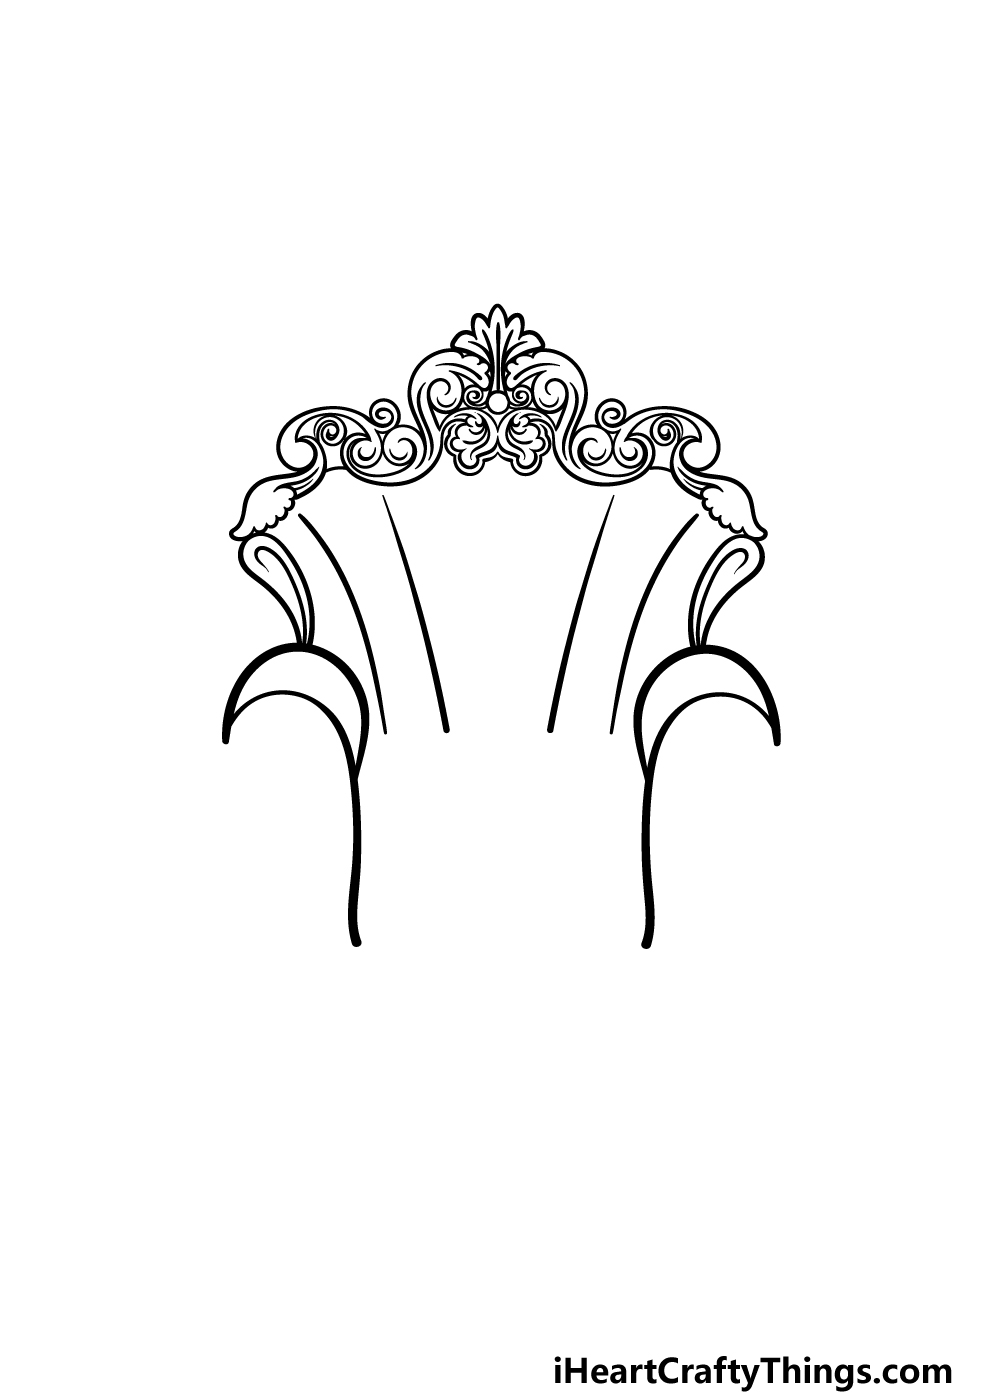
Every great throne will have some elegant and opulent details on it, and that is what we shall start with in this first step of our guide on how to draw a throne.
This detailing will go on top of the throne where your head would rest. The design has a really classic feel to it with plenty of swirling shapes and a symmetrical design to it.
If you would like to have this exact design for your own drawing, then carefully copy the lines as they appear in our example and try to get them to look symmetrical. You could also add your own decorative design if you wish!
However you decide to go for it, you will then be ready for the second step of the guide.
Step 2 – Now, draw the first side of the throne
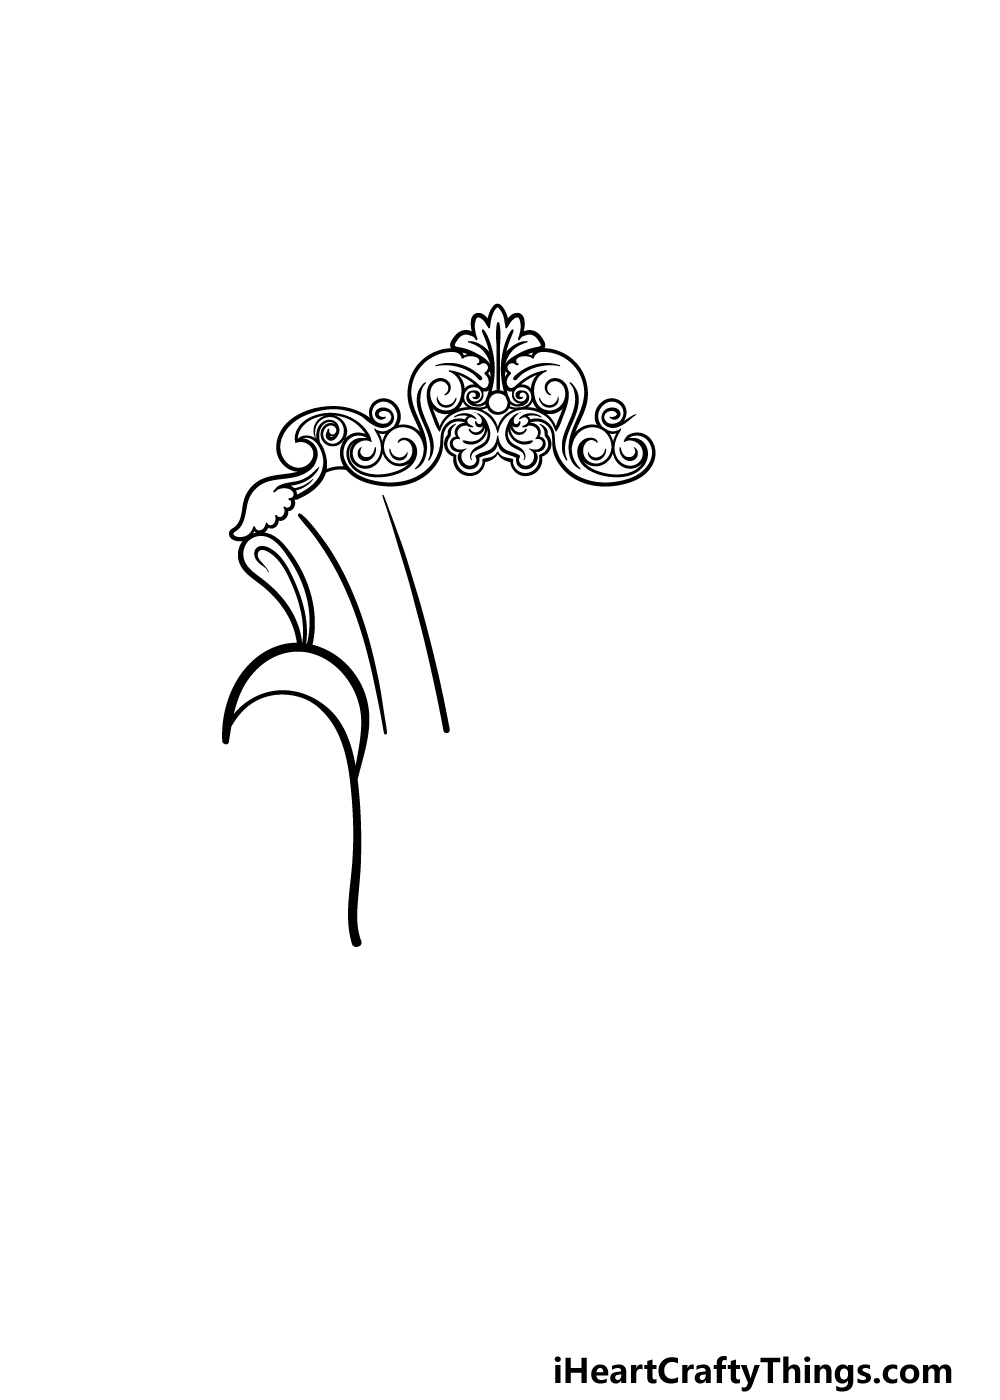
Now that you have the top decoration of your throne drawing completed, you can start drawing the sides of the throne now.
First, add some more swirling shapes onto the left-hand side of the decoration that you started in the previous part.
Then, we will use some more curved lines for the sides of the chair as well as the top of the armrest on the left.
We will add more to these elements very soon, so let’s head on to step 3 of the guide to continue!
Step 3 – Draw the right-hand side of the throne
In this third step of our guide on how to draw a throne, we will be drawing the right-hand side of the throne.
The good news is that you will essentially be recreating what you did in the previous step, so you’ve already nailed it once before!
This right-hand side of the chair will be a mirror image of the other side, so try your best to make it look as similar to what you just drew as you can.
Once this side of the throne is done, we shall then add more in the fourth step of the guide.
Step 4 – Next, draw some more decorative elements for the throne
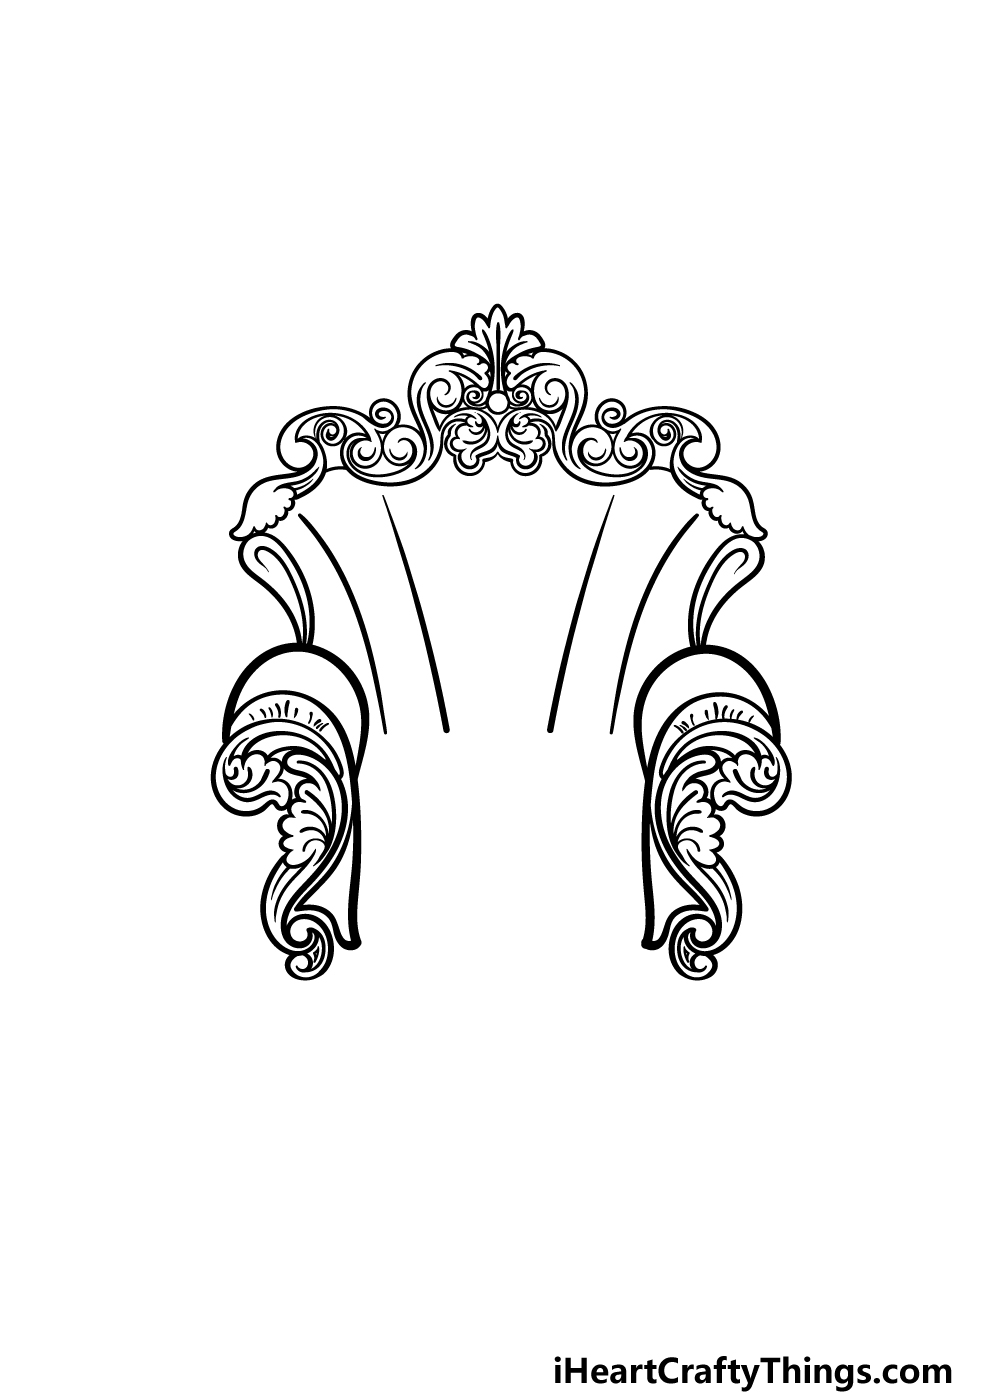
This next part of your throne drawing will see you adding some more decoration to the front of the throne.
These decorative elements will be very similar in style and structure to the decoration near the head of the chair.
These new sections will go on the front of the armrests, and they will have that same curly classic design that you drew before.
Once again, these are just how we decorated our example, so you could go for the same design or add a new variant of your own instead if you prefer!
When you’re finished with these sections, we shall then finish off the final details and touches in the next step of the guide.
Step 5 – Add the final details to your throne drawing
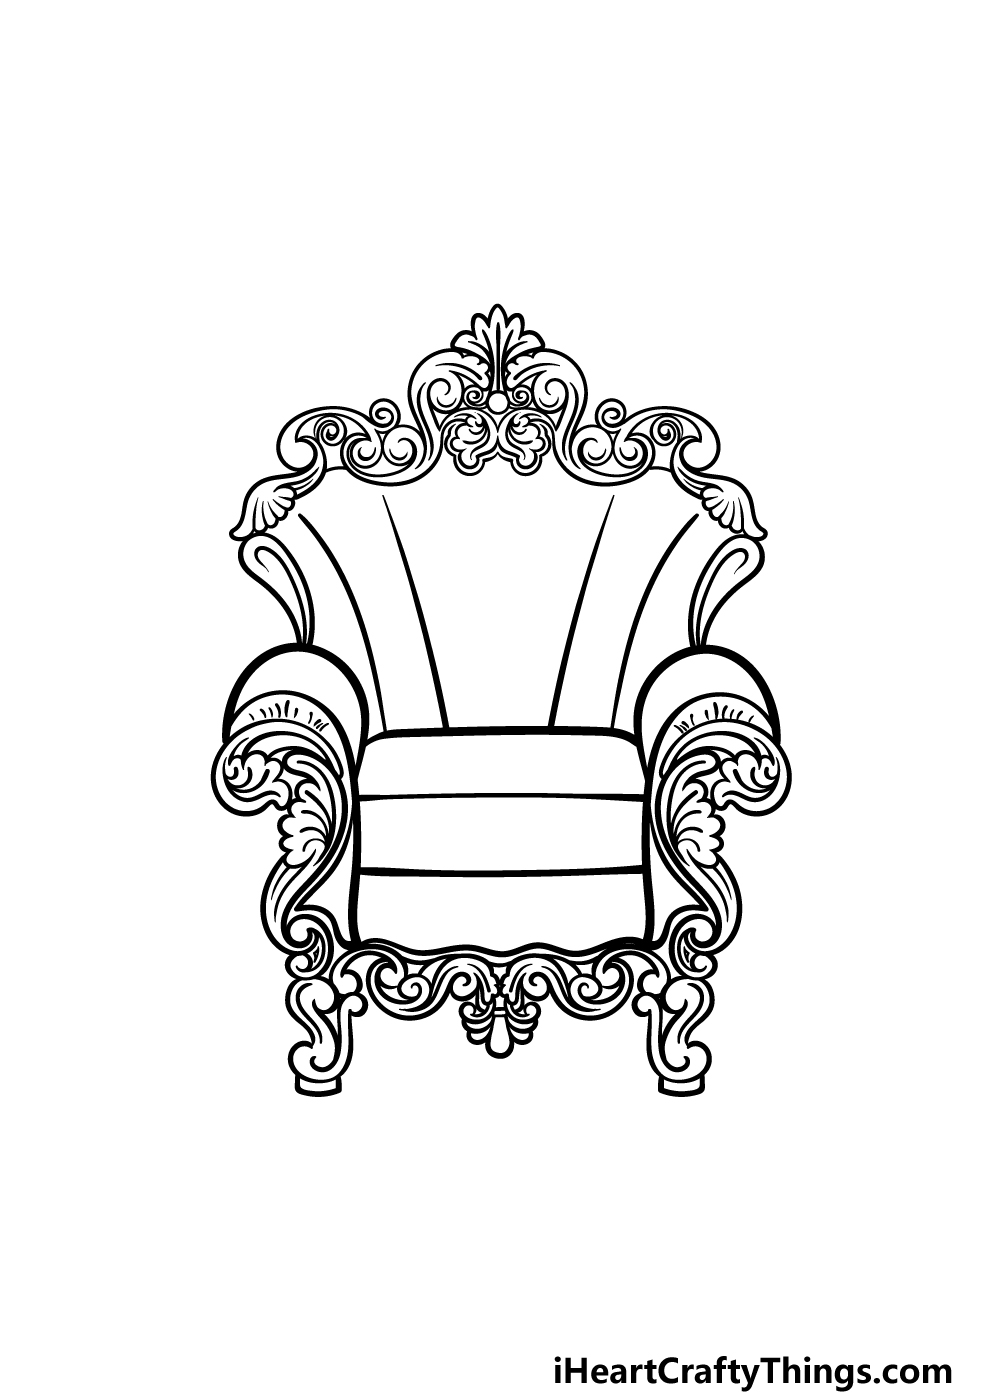
Now you’re ready to finish off the design in this step of our guide on how to draw a throne! This step will have you ready for some awesome coloring fun in the final step of the guide.
First, let’s draw the seat of the chair. This can be drawn as a square shape at the center, and then you can draw some horizontal lines across it.
Once that is done, we shall add some more orate detailing underneath the seat of the throne.
Finally, finish off with the legs of the chair that will also be in the same style as the rest of the detailing. Once these are done, you can also add your own ideas and extra details!
Perhaps you could draw a background or even add a royal family member standing next to it. What else can you think of to finish it off?
Step 6 – Finish off your throne drawing with color
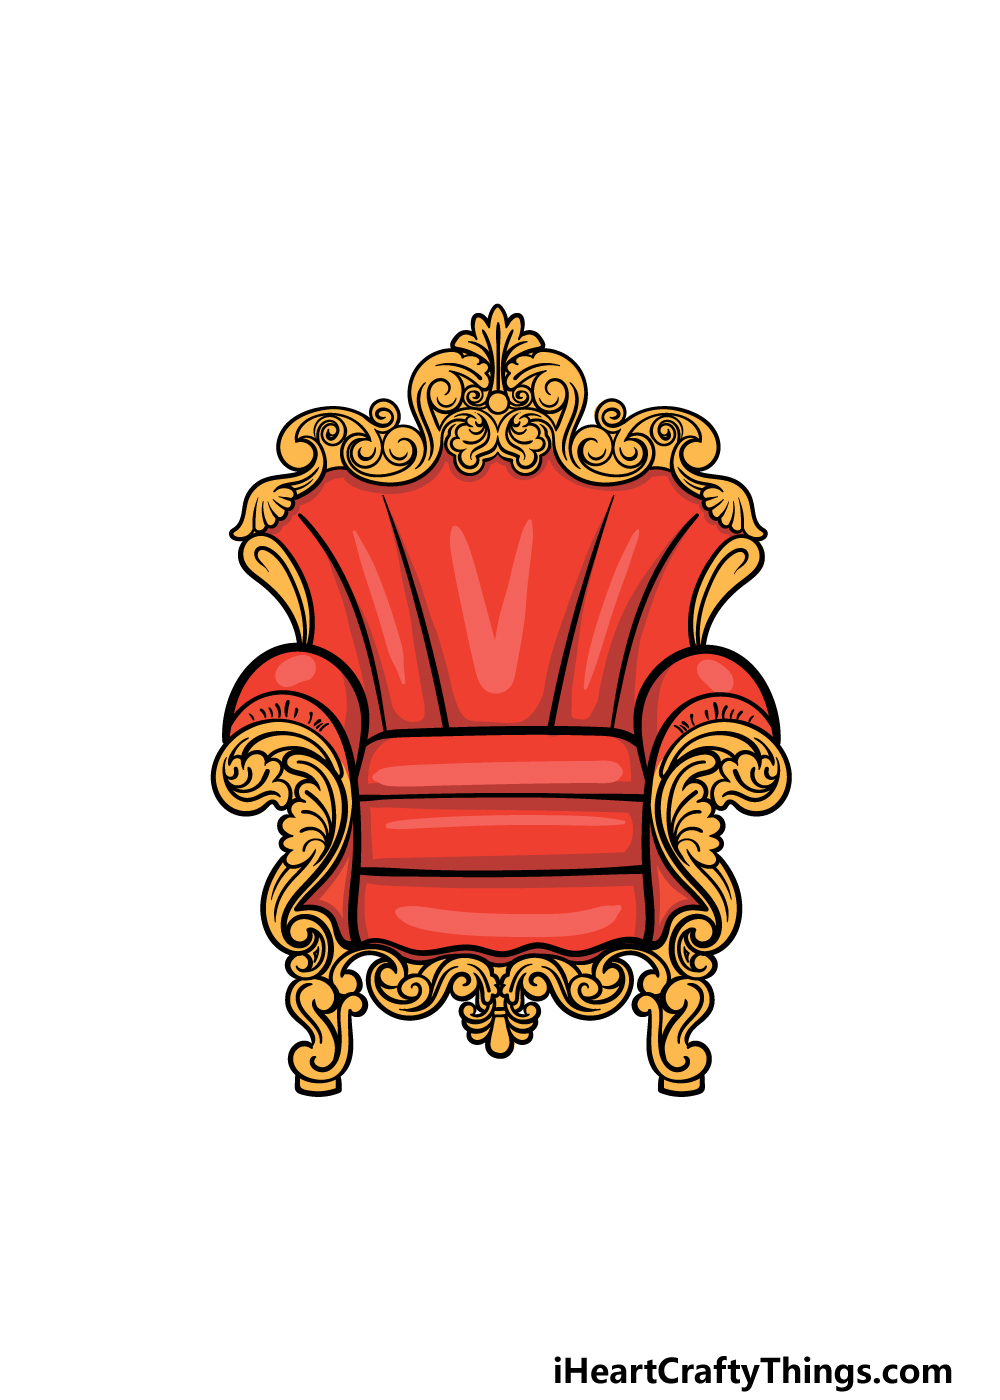
You have arrived at the final step of this throne drawing, and now you can finish off with some colors!
In our reference image, we went with a very royal color scheme of rich reds with gold for many of the details.
When you color in your own version of this picture, you could go for these same shades or use some of your own!
The color purple is also one associated with royalty, so maybe you could also incorporate some of that into your picture.
There are so many possibilities, so how will you finish off your image with your colors and art mediums?
3 More tips to make your throne drawing easy!
Sit down on your favorite seat and learn how you can make this throne sketch even easier!
Part of the charm of this drawing of a throne is that it is so ornate and detailed. These details can make it quite a bit harder, so you could change some of the details to make it easier.
This could entail changing the design entirely in order to make it more manageable. You could go for a simpler, more elegant design instead.
By doing this, you could not only make it easier, but you may just prefer a different style for the throne. What are some styles you could use in order to make it easier on yourself?
Some people find drawing furniture easier, while others find drawing humans to be simpler. If you are one of the people who prefer drawing humans, then you could have someone sitting in this throne drawing.
The person could be drawn in a simple style, but it would still be an effective addition. This way, the human would be the focus of the drawing, so less attention would be paid to the throne itself.
This would be a great approach to not only make it easier on you if you like drawing people, but would also make the drawing more unique! Who would you base the character on if you were to add a character?
Finally, you could get inspiration from real-life thrones to help you as you draw. There have been many incredible thrones in history, and any of them would help to make your throne sketch easier.
Even if they are a different style to the throne we created in this guide, you may find it helpful. The photo could help you to portray the shape and finer details of your portrayal.
Also, if you were to use real thrones, you could potentially create some variations and different examples of thrones throughout history.
Do you have some ideas for real thrones you could use to help you as you draw this one?
Your Throne Drawing is Complete!
That will take care of all 6 steps of this guide on how to draw a throne! We hope that you had a royally fun time as you worked on this drawing alongside us.
We packed a lot of details into the drawing, but as long as you follow all of the steps and do your best, you’ll have your very own beautiful throne in no time!
Now it’s up to you to take this even further. We presented a few ideas like designing your own new throne variant or drawing a king or queen next to it, but what else can you think of?
Remember that you can also have fun getting creative with your art mediums and color choices!
When you have completed this guide, you can find your next drawing guide on our website. We upload new ones often, so be sure to keep checking for new content!
Then, when you’re ready to show off your awesome throne drawing, you can share it on our Facebook and Pinterest pages for us to admire.