


Sushi started out as a classic example of Japanese cuisine, and in recent years it has transcended these origins to become a favorite food around the world!
Sushi can come in many different varieties and can be prepared from a multitude of different food types.
With the immense variety available with this delicious food, it can be lots of fun to learn how to draw sushi so that you can design your very own varieties!
By the end of the guide in front of you, you will be able to depict your own delicious sushi.
Get ready to enjoy this delectable step-by-step guide on how to draw sushi in just 6 easy steps!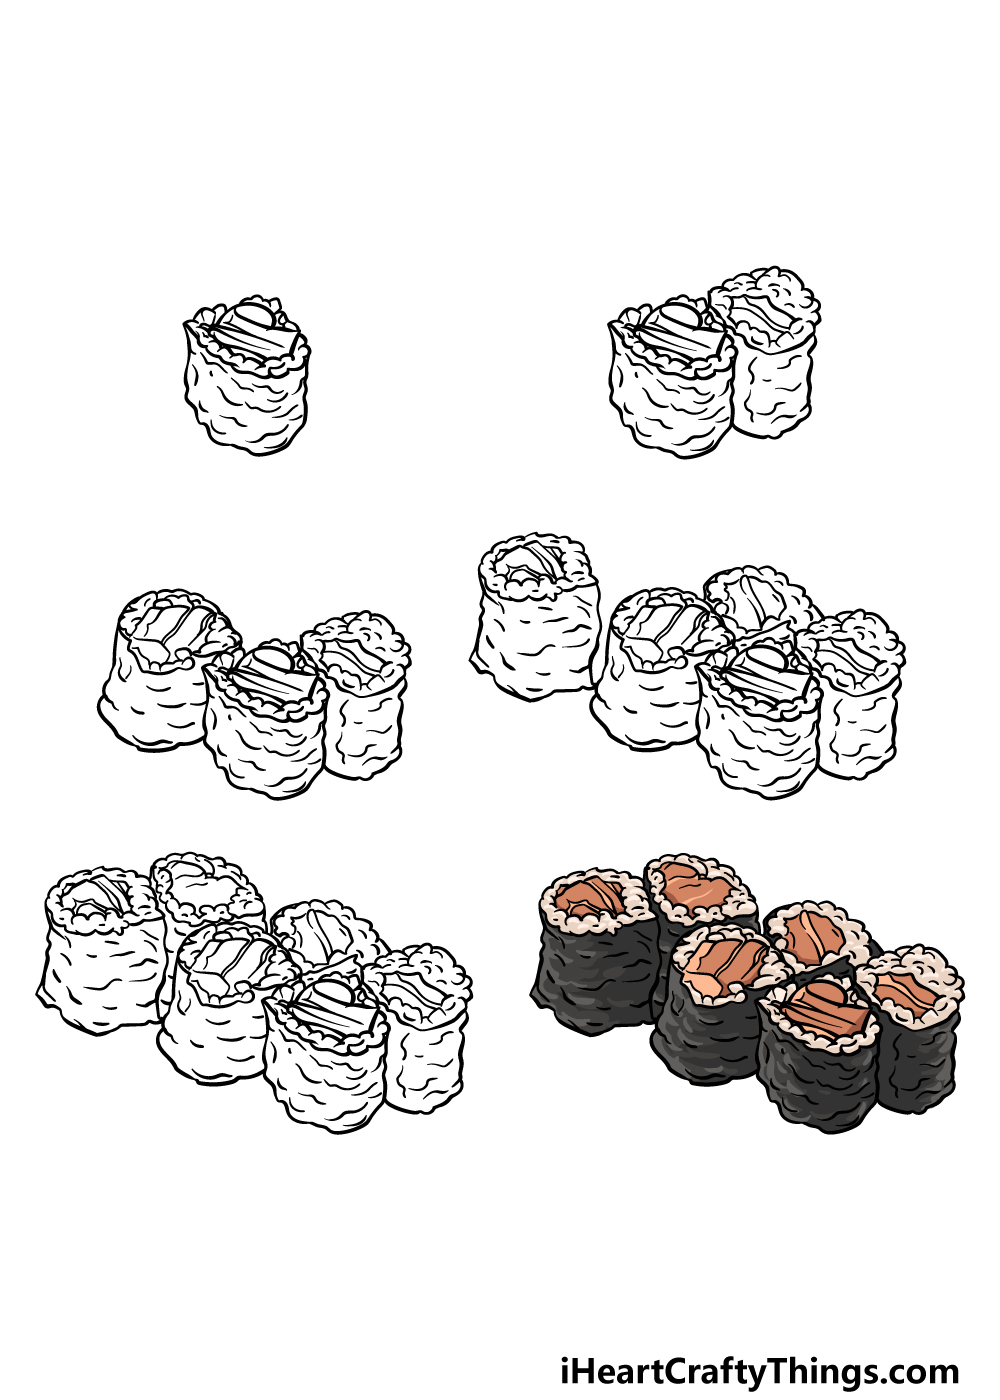
How to Draw Sushi – Let’s Get Started!
Step 1

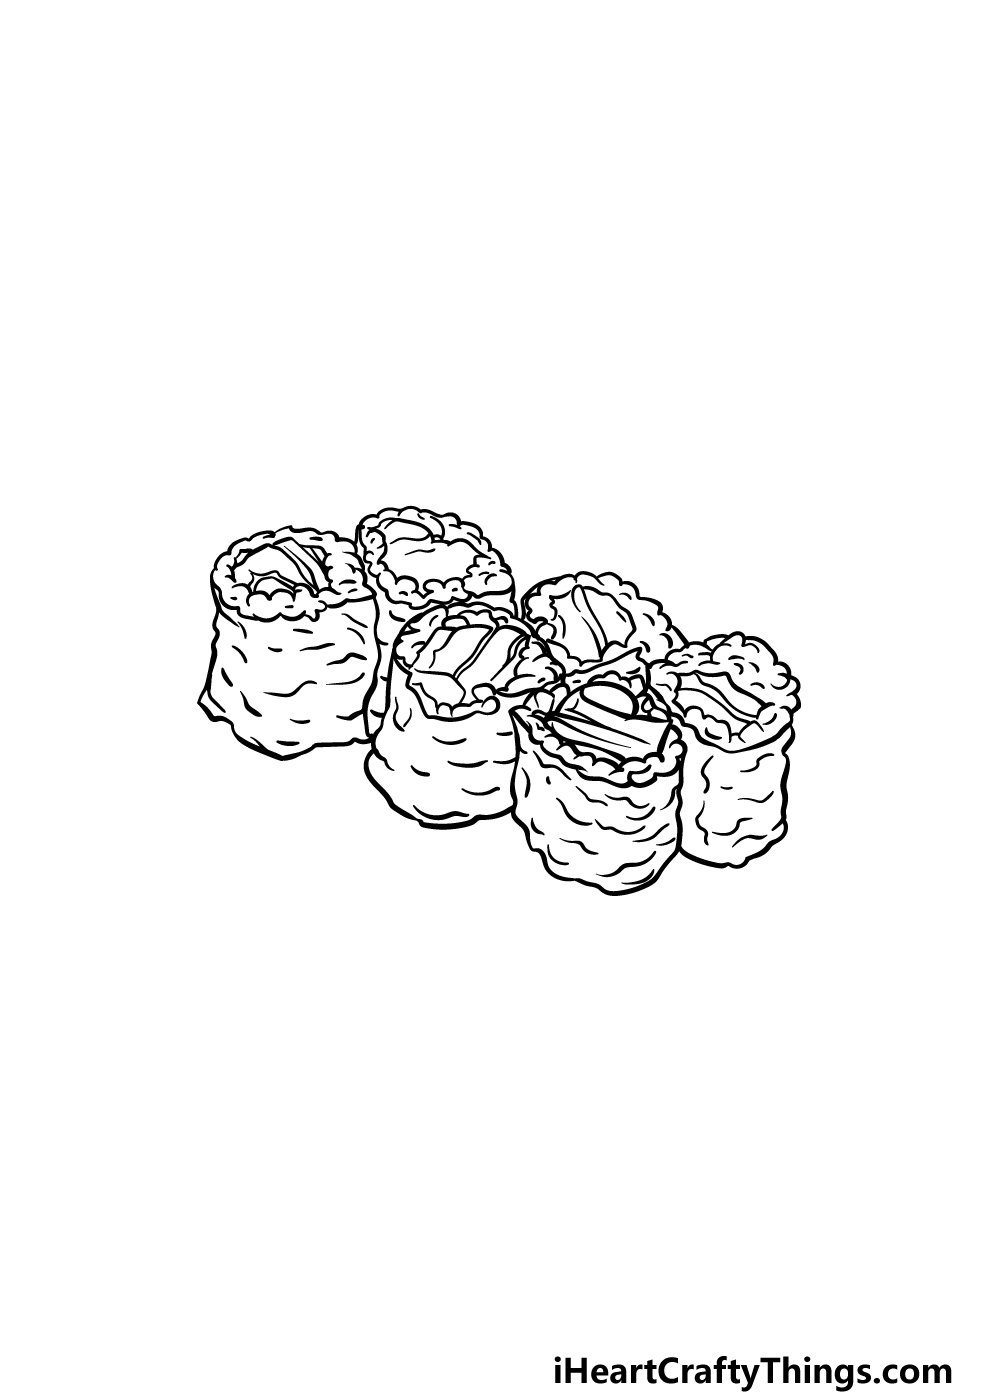
In this guide on how to draw sushi, we will be drawing a popular sushi variety that has seaweed sheets called nori encasing layers of rice and fish.
To start this, use a bumpy line to create the rounded rectangular outline of the sushi. There will also be some curved texture lines on the outer casing of the sushi.
Then, we will be drawing the filling inside. Use some more bumpy lines around the inner perimeter of the rim for the outline that you just drew, and this will serve as the rice layer for it.
Then, finish off by drawing some shapes within that rice layer for the fish pieces contained within. Then you are ready to proceed on to step 2!
Step 2 – Next, draw another piece of sushi
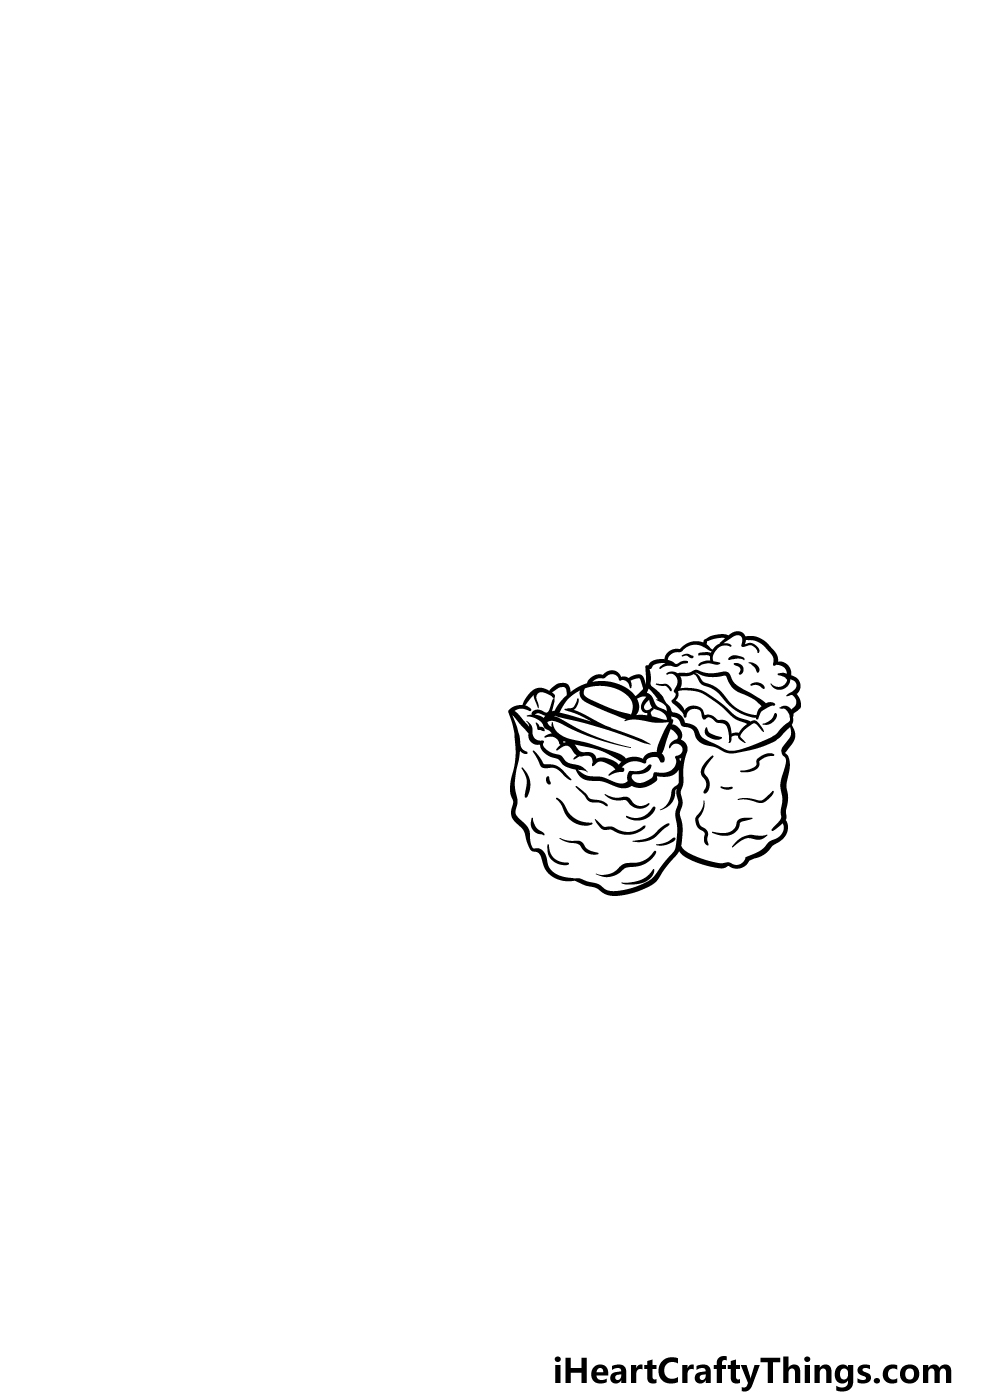
We will be adding another piece in this part of your sushi drawing!
To do this, you can repeat a lot of what you did in the previous parts, and that means drawing that nori seaweed casing and a rice layer inside of it.
The rice layer will be a bit thicker this time, and we will also be using some different lines to represent the fish filling of this one.
Step 3 – Draw some more sushi
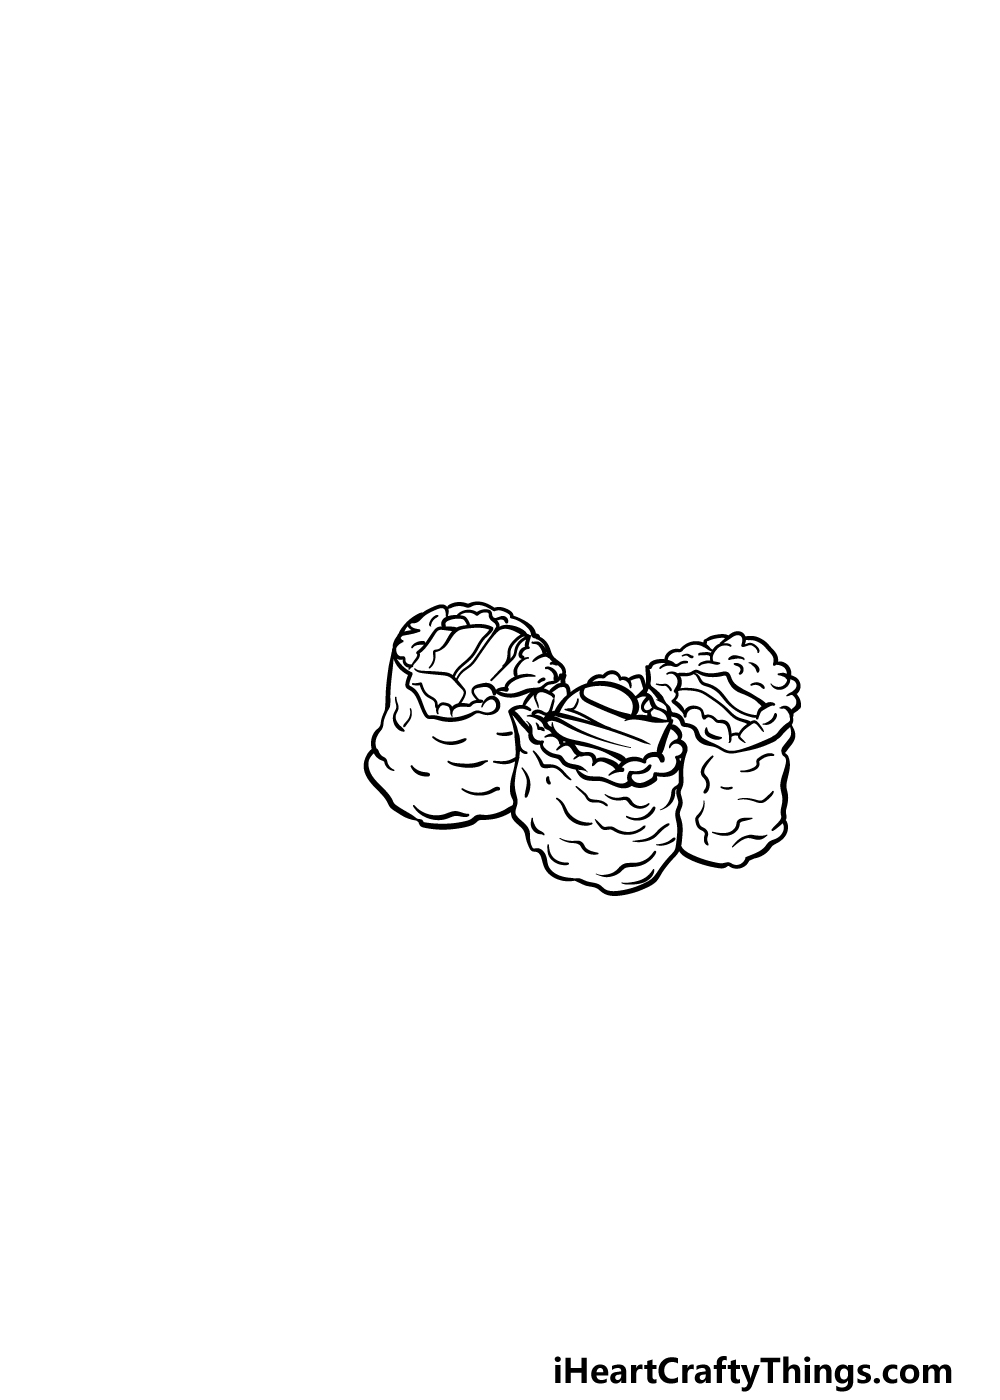
In this third step of our guide on how to draw sushi, we will be adding a third piece to the ensemble! Much like the previous piece, this one will have a similar structure.
That means the nori seaweed and rice again, but the filling will be different from the first two.
We will be aiming to have the filling be unique for each piece, and you can also change up these filling details if you so choose.
Step 4 – Draw more pieces of sushi
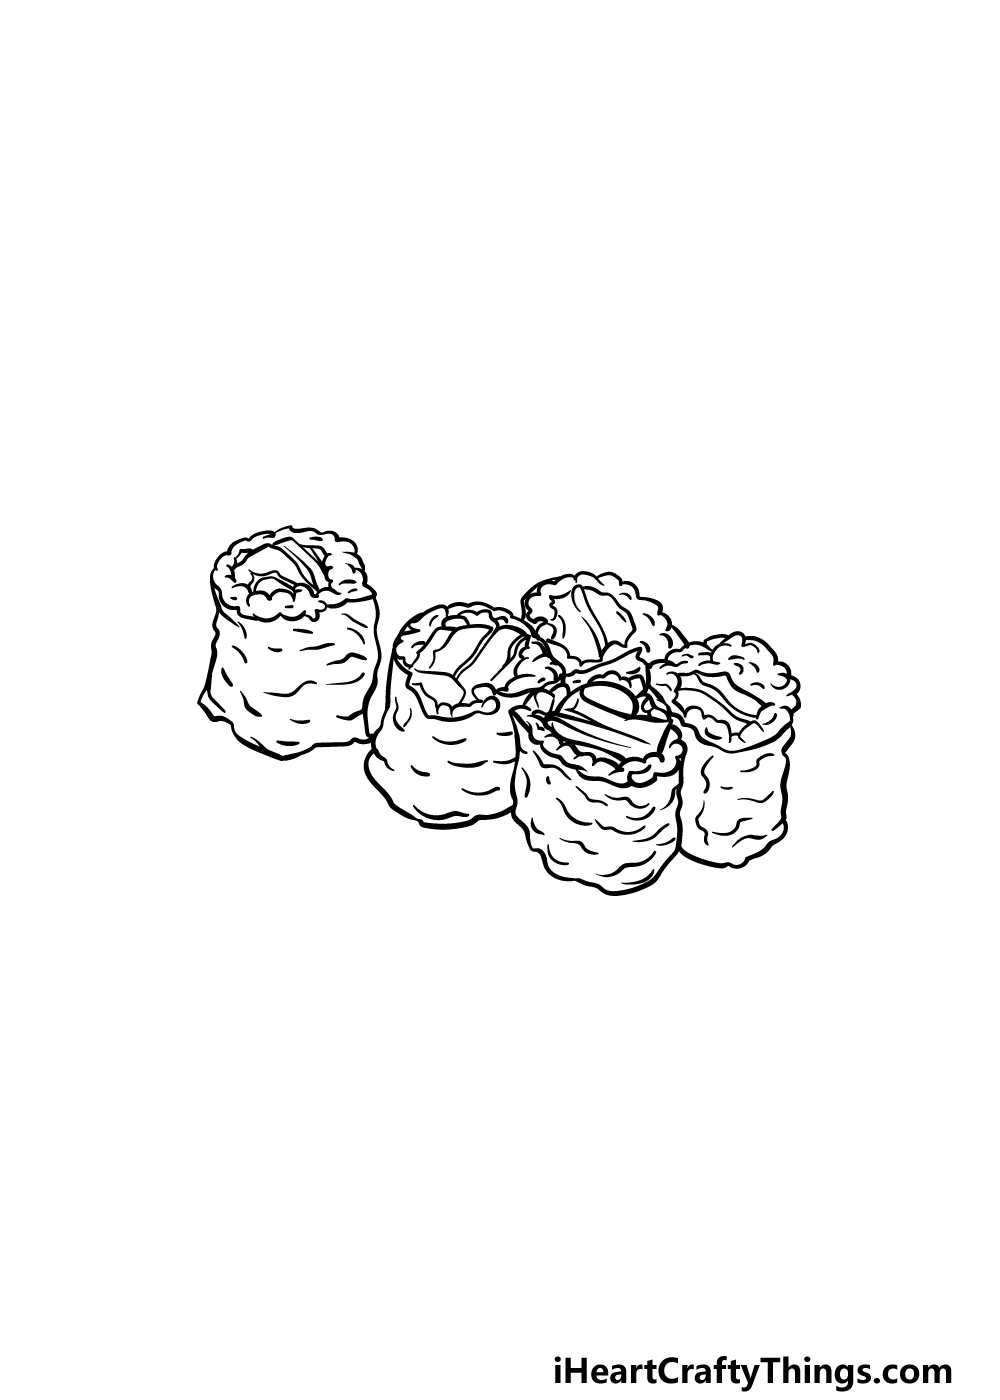
You’ve been doing a great job on this sushi drawing so far, so no you’re ready to double the intensity as you draw two pieces in one step!
Other than the fact that you’ll be drawing two pieces instead of one, they will essentially follow the same idea as the previous pieces.
Once again, you can also change up the detailing for the inner filling of the sushi pieces.
When these two pieces have been added, you will be ready to move on to some final details and touches in the next step, so let’s head on to step 5 to do just that!
Step 5 – Finish off your sushi drawing
This is the part of this guide on how to draw sushi where you get to finish off with some final details and some extra elements of your own.
First, we will finish off by adding one more piece of sushi. You know how to do this, as you’ve already drawn some fantastic pieces of sushi!
Once this final piece is complete, you will be ready to finish off with some of your own touches to really finish off this picture.
For starters, you could draw a background for this picture and show what kind of setting this sushi is being enjoyed in. You could draw in what food or beverages you would most like to enjoy with it!
As mentioned earlier, sushi can come in many different variations. You could pick some of your favorite real-life sushi variations and draw them along with these pieces that you have drawn so far!
These are just a few ideas of many that you could go for, and you should feel free to experiment as you see fit. We can’t wait to see how you will finish off this amazing drawing!
Step 6 – Finish off your sushi drawing with some color
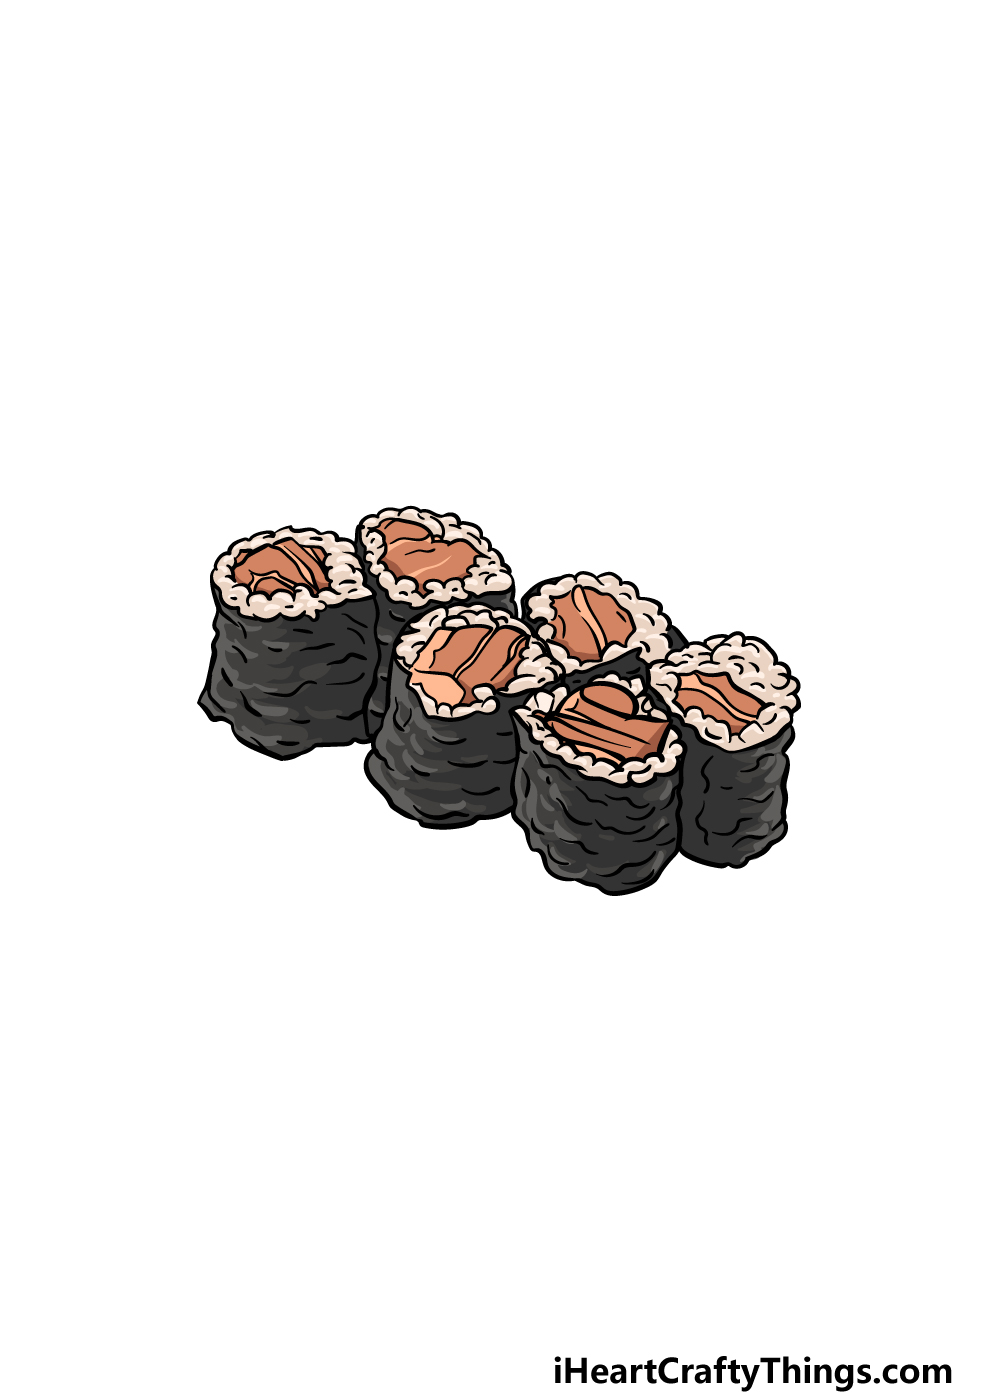
We will be finishing off this tasty sushi drawing of yours by adding some incredible colors to it.
In our reference image, we went with a more muted scheme of dark greys and black for the nori coating, while using some mild pink for the fish filling, perhaps to give it a look of salmon.
These colors are just a suggestion, however, and this is your opportunity to incorporate any colors you choose!
Sushi can come in many forms and variations, and it can also have many different kinds of fillings. These fillings could range from various vegetables to many different kinds of fish.
This give you a lot of options for how you could finish up this drawing of yours using your colors. You can also achieve different color styles depending on the art mediums and tools that you use to color.
Whether you use bright colored pens and paints or lighter watercolors and colored pencils, we know that this will be an incredible finished picture!
Do this to take your sushi drawing to the next level
Make your sushi sketch even tastier with these 4 fun and easy tips we have for you!
In this drawing of sushi, we have one type of this famous food on display. You could make it look more vibrant by adding a few more types that you could enjoy with it.
These could include pieces of fish, other small wraps and many others. If you love sushi, then you should be sure to include all of your favorite variants to finish off this sushi meal in style.
What other kinds of sushi would you add to this plate to finish it off?
Once you have decided what types of sushi you would like on the plate, you could then decide on some smaller extras to add. These could be small and subtle or they could be more blatant!
For example, you could add some sauces, small seeds and other extras that would be there to enhance the flavor.
Once again, you could use your own preferences as examples as you add these details.
Sushi will often be enjoyed with sides and beverages, and these could also be great to add to your sushi drawing. Some sides that you could include would be types of soup or small foods like eggrolls.
Then, you could also think about some beverages you might like to have with this sushi meal. This is your chance to create your very own perfect sushi extravaganza, and it would be great to see what you add to this dish!
Finally, it’s all well and good to have a delicious sushi spread, but you also need someone to enjoy it! You could fill this void by adding some characters to this sushi sketch to populate it.
These characters could be drawn in any style you’re comfortable with, and you could even use yourself or people you know as models for the scene.
It could be fun to use your friends and family to create a lovely meal setting where everyone is enjoying what you created!
Your Sushi Drawing is Complete!
We hope that working on this guide on how to draw sushi didn’t make you feel too hungry! We also hope that this guide made it easy and fun for you to create this wonderful image of this classic Japanese delicacy.
The best part is that mastering this guide is just part of it! Now you can show off all the ways that you could personalize and put your own spin on this picture. Be sure to get creative with it and have fun as you create a wonderful sushi portrayal!
When you would like to take on a new drawing subject, our website is full of many incredible guides for you. This list gets added to all the time, so be sure to pop in often!
Once your sushi drawing is finished and garnished, please share it on our Facebook and Pinterest pages so we can marvel at your wonderful creation!