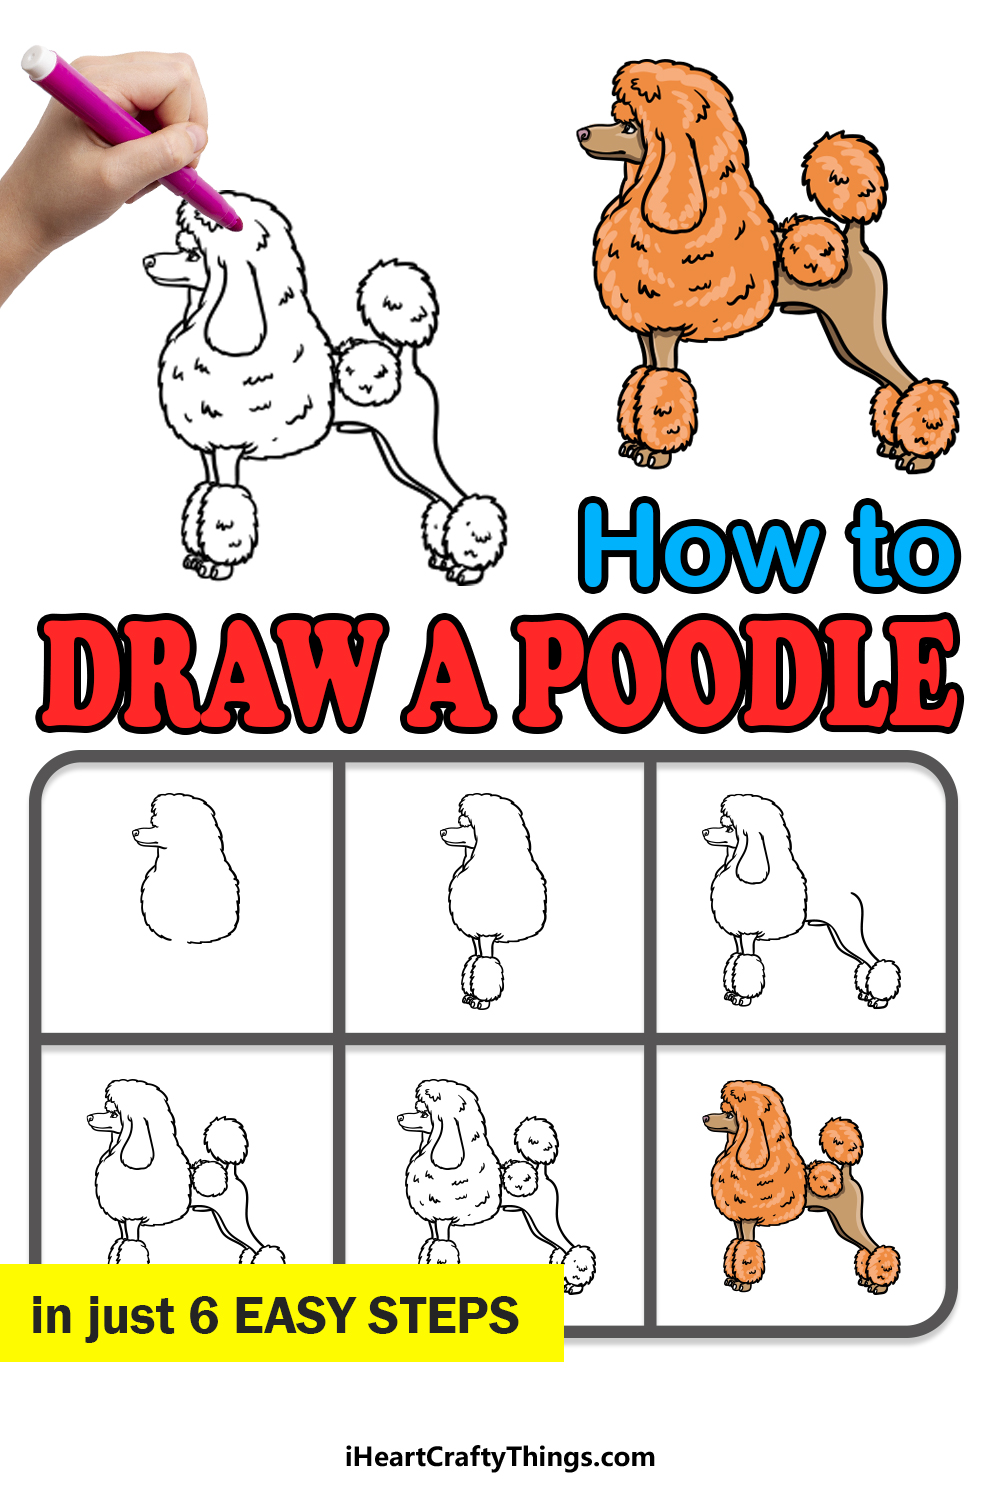
It’s hard to find someone who doesn’t love dogs! Whether you prefer small and cute dogs or big and intimidating ones, there is probably a dog breed for you.
Poodles are one of the most elegant and luxurious dog breeds out there, and many people love them for these aspects.
They can also be styled in many different ways, and learning how to draw a poodle is a great way to imagine how you would style one of these adorable poodles!
By the end of the tutorial that we have prepared for you, you will know how to do just that. You’ll definitely want to see this guide all the way to the end!
We hope that you have a great time working on this step-by-step guide on how to draw a poodle alongside us!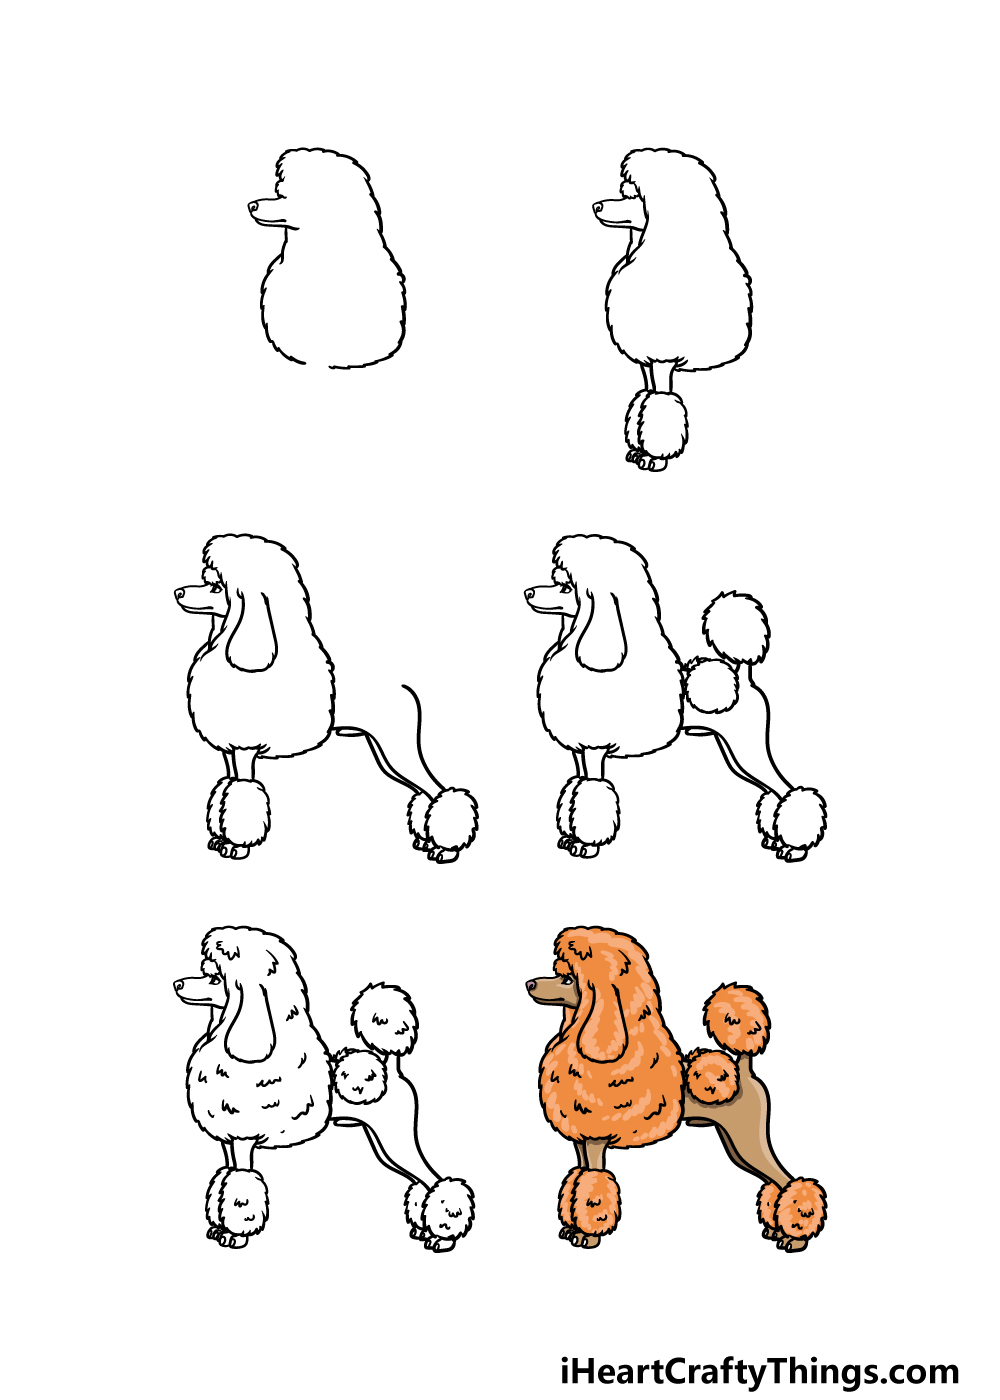
How to Draw A Poodle – Let’s Get Started!
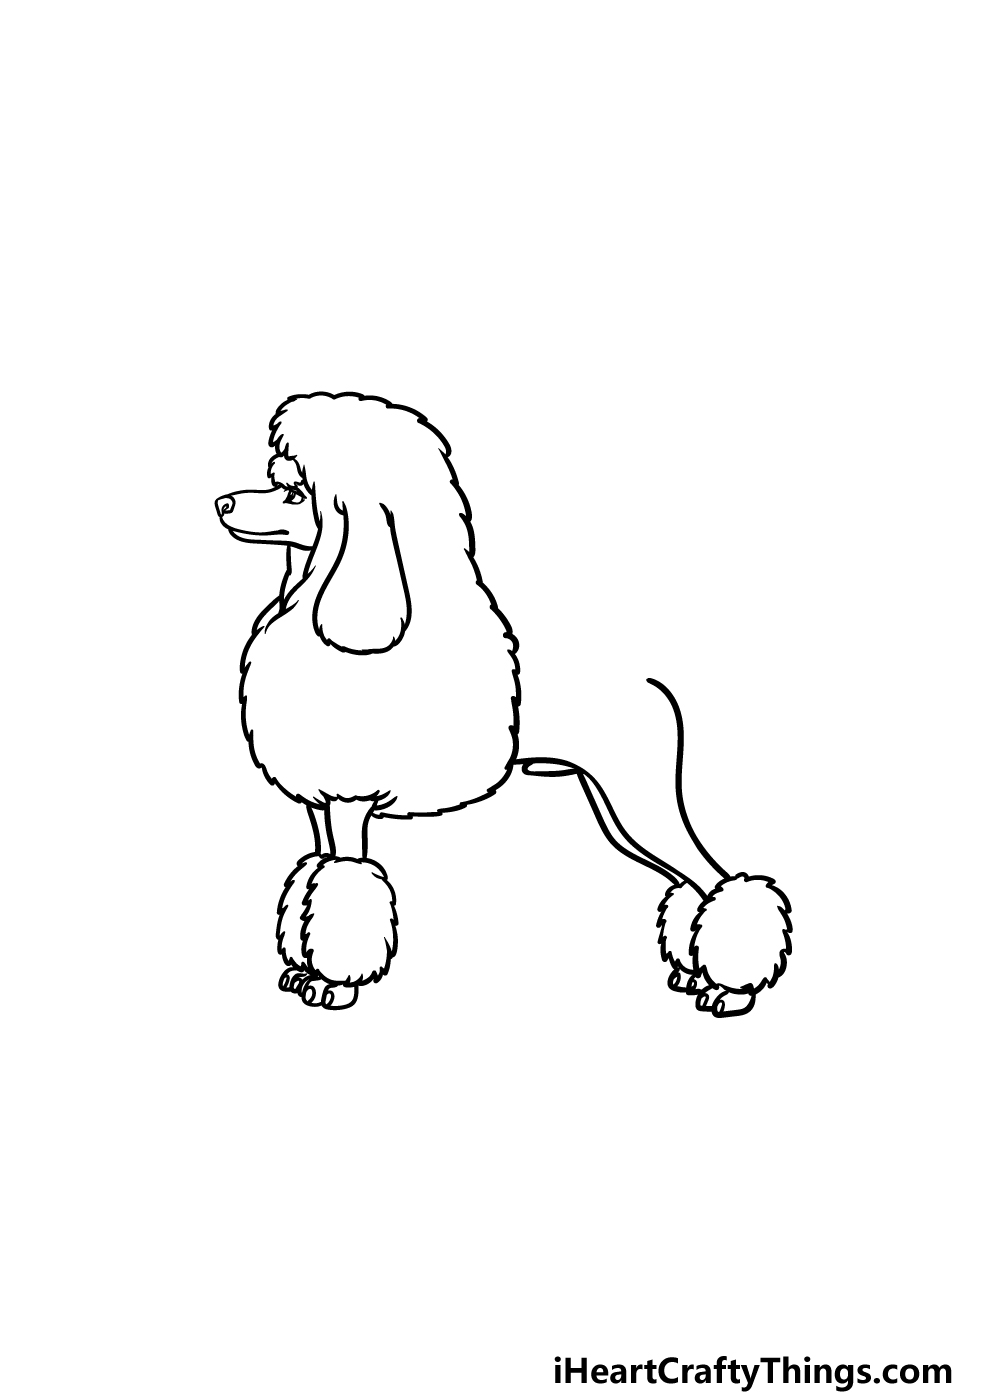
Step 1
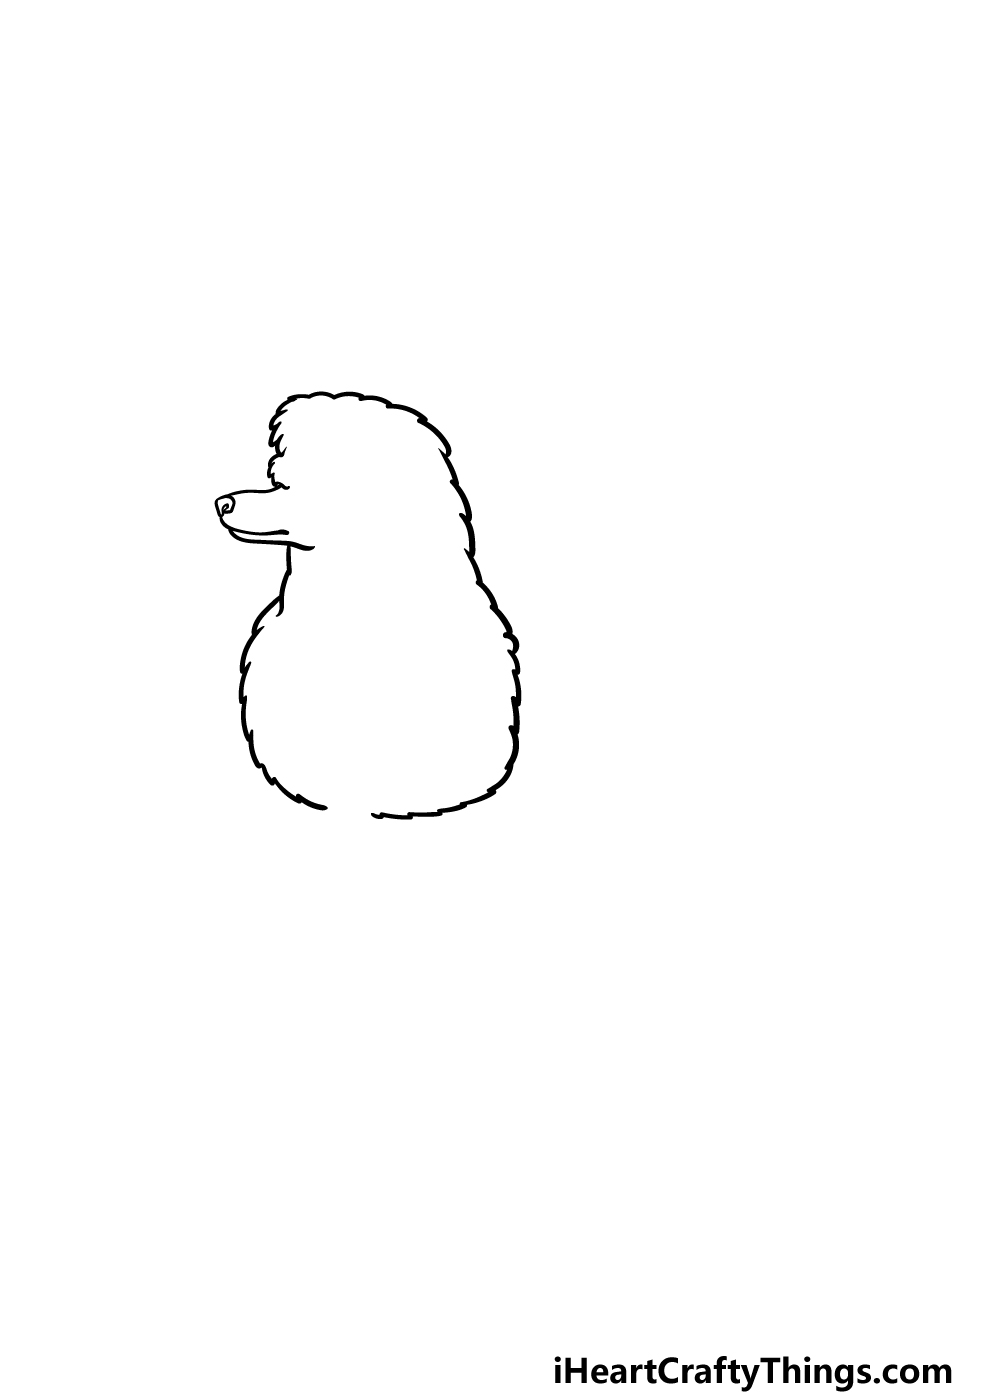
We shall start this guide on how to draw a poodle by drawing the fluffy head and chest outline of the dog.
The way that this poodle is styled will make it look like the head and chest section is one large portion of the dog. To draw this fluffy outline, we will be using a very bumpy line to give it that fluffy texture.
The head portion will be a bit smaller, while the chest section will be a bit larger and wider. Then, you can also draw the thin muzzle of the poodle poking out on the left.
Be sure to also leave a small space at the base, as this is where a leg will poke out in a later step.
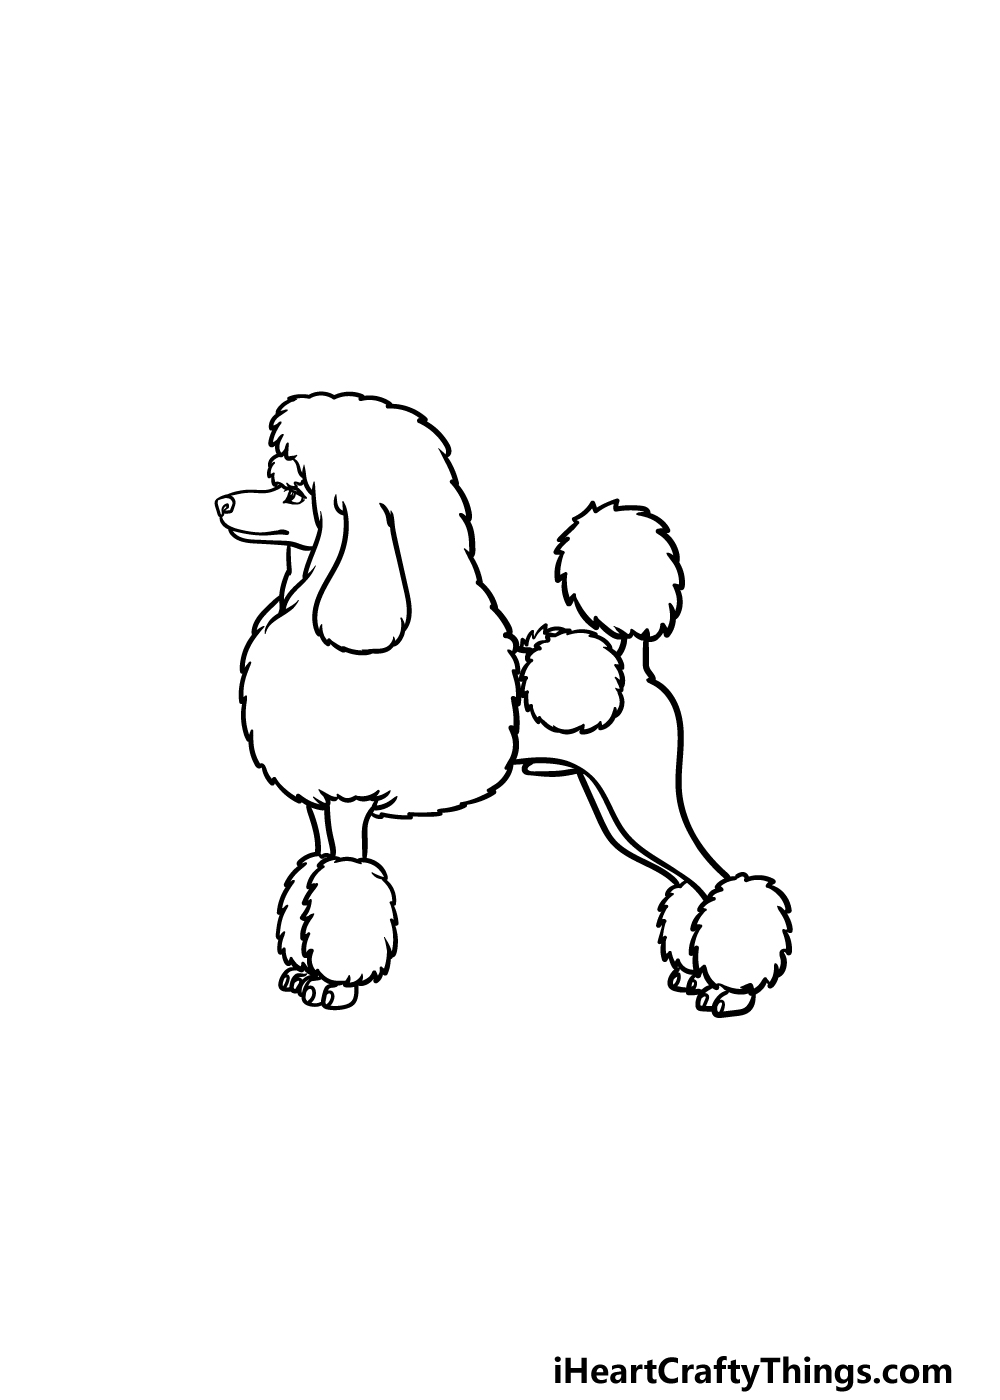
Step 2 – Now, add the first legs and some facial details
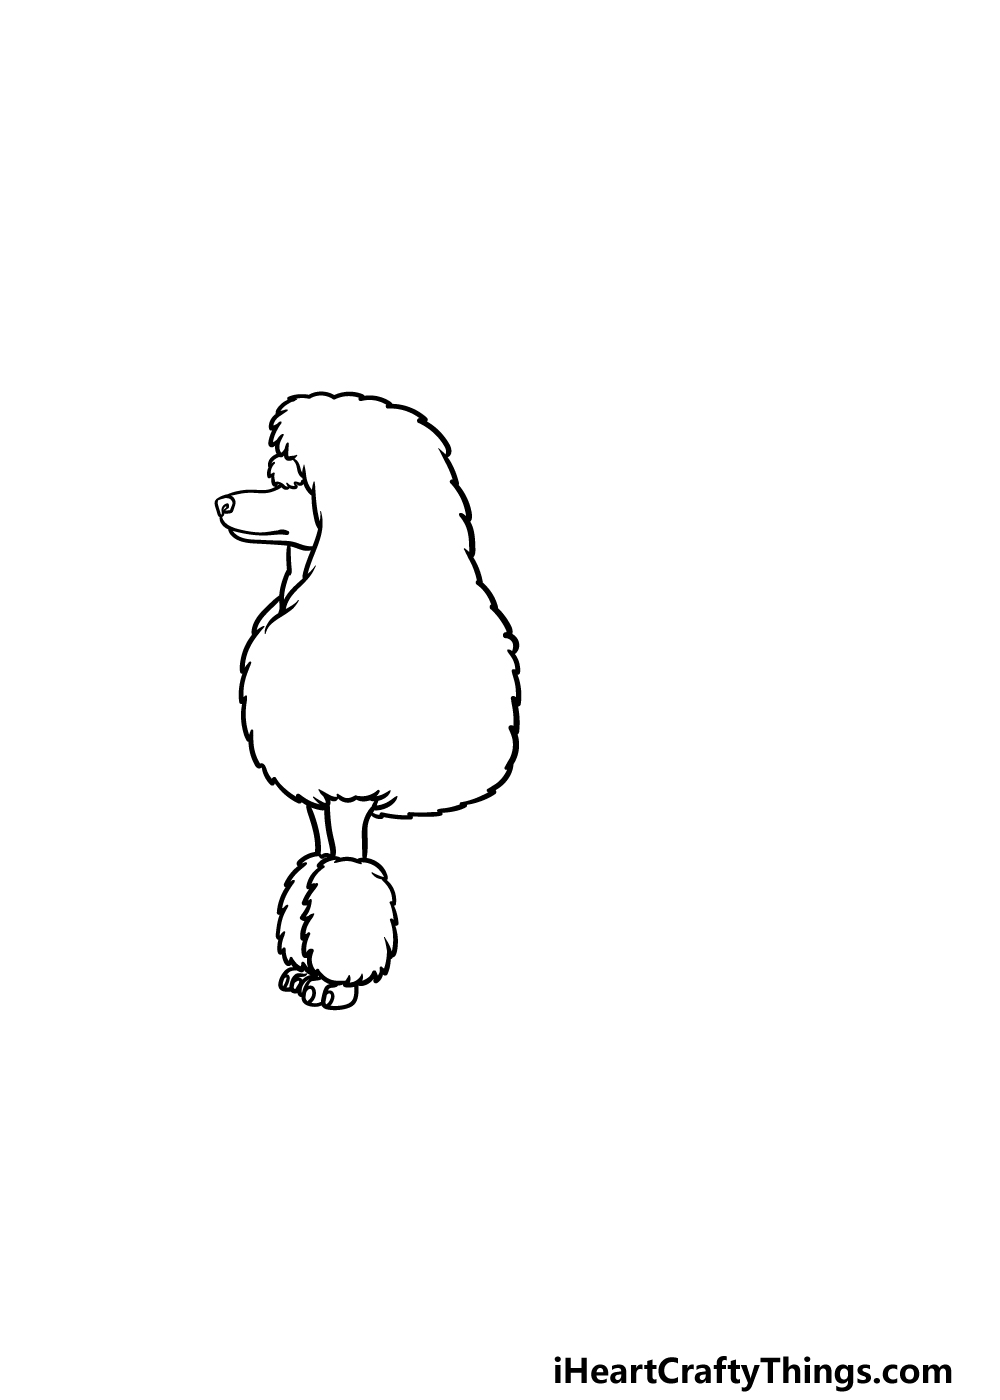
This part of your poodle drawing will see you filling in that space that we left at the base of the body in the last part. To do this, use some smooth lines for the tops of the front legs.
Then, we will be drawing the fluffy, round bases of the legs. To do this, use a similarly bumpy line to create the fluffy shapes as they appear in our reference image.
Then, draw some small paws below these shapes, and then finish off by drawing some lines around the face.
Step 3 – Next, draw the ears and the back legs
We will be adding quite a bit to this picture in this third step of our guide on how to draw a poodle. First, draw a small eye into the facial area of the dog.
Then, we will be using a curved line for the ear dropping down. This ear will have a small base, and then it will get wider as it goes down.
They will also be drawn with a slightly bumpy line to make them look furry as well.
Then, we will draw the back legs of the poodle. Much like the front legs, they will start with some smooth lines and then have furry tufts above the small paws.
Then we can move on to the next step where we will complete the outline.
Step 4 – Now, draw the tail and some more furry tufts
As mentioned in the previous step of this poodle drawing, we will be finishing off the outline of the dog before moving on to some final details in the next step.
The tail will have a small, smooth base and then will have a ball of fluffy hair at the end of it.
Once this tail is drawn as it appears in our reference image, we will then draw some round tufts of fur onto the back of the poodle.
That will finish off the outline for this poodle, and in the next step we can finish it off by drawing some smaller final touches and details.
Step 5 – Add the final details to your poodle drawing
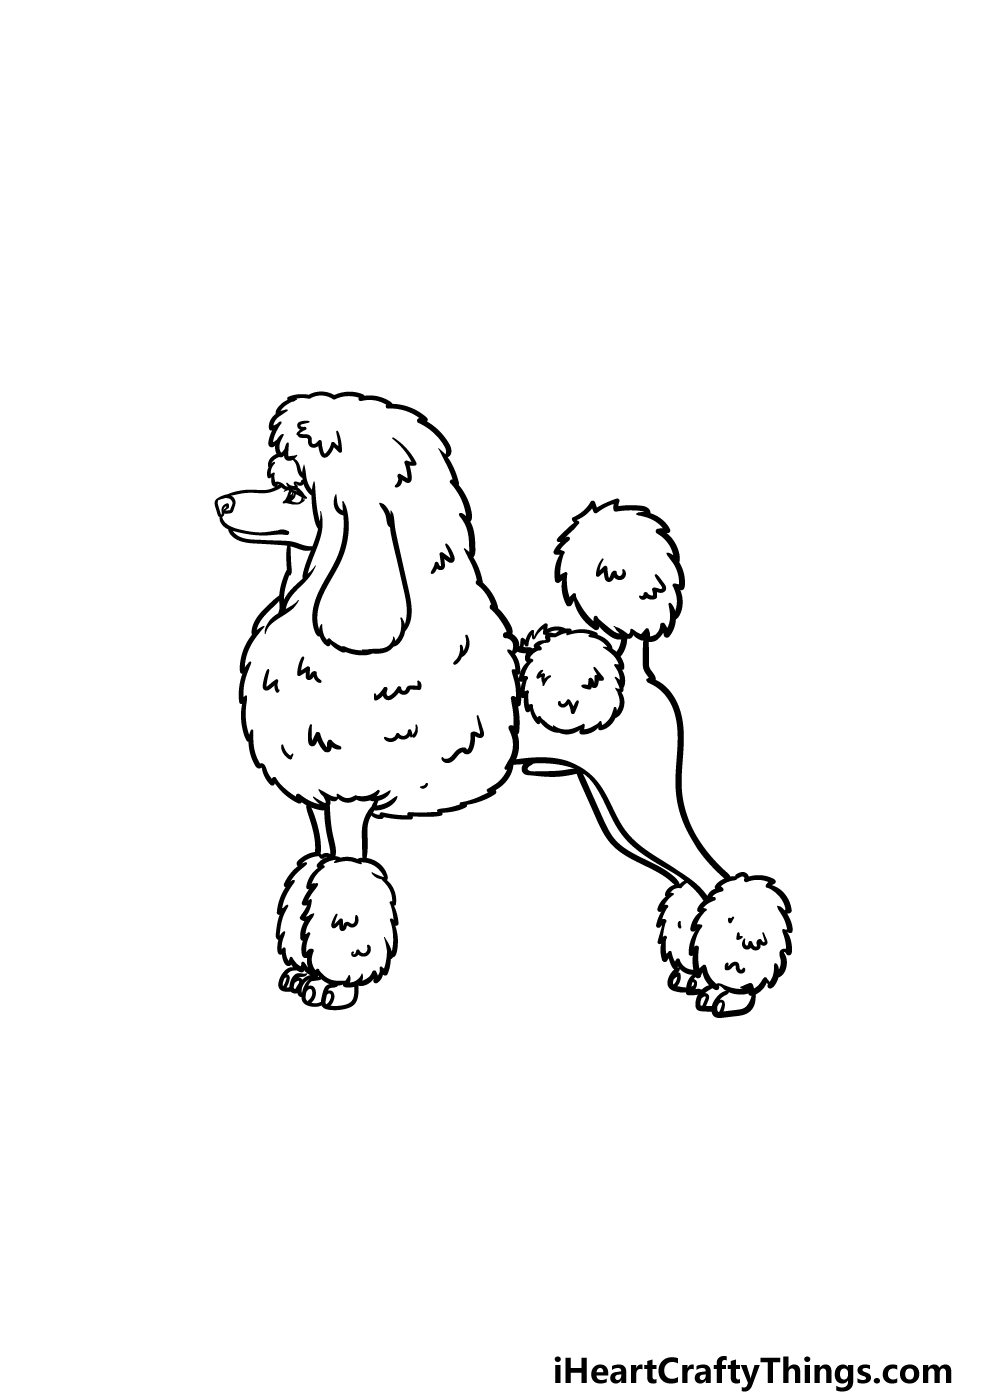
This fifth step of our guide on how to draw a poodle will see you finishing off by drawing some small final details.
These will be focused mainly on the areas of the poodle where there is fluffy hair present. These details will be small and curved to make these areas look even fluffier and more textured.
Once you have added these smaller details, you can also have fun adding more details and ideas of your own!
There are lots of great ideas that you could do to for this, and one would be to draw a background for the poodle. What kind of setting can you think of to put this poodle into?
You could even draw some more dogs or other pets that you may love to keep this fluffy friend company!
Step 6 – Finish off your poodle drawing with color
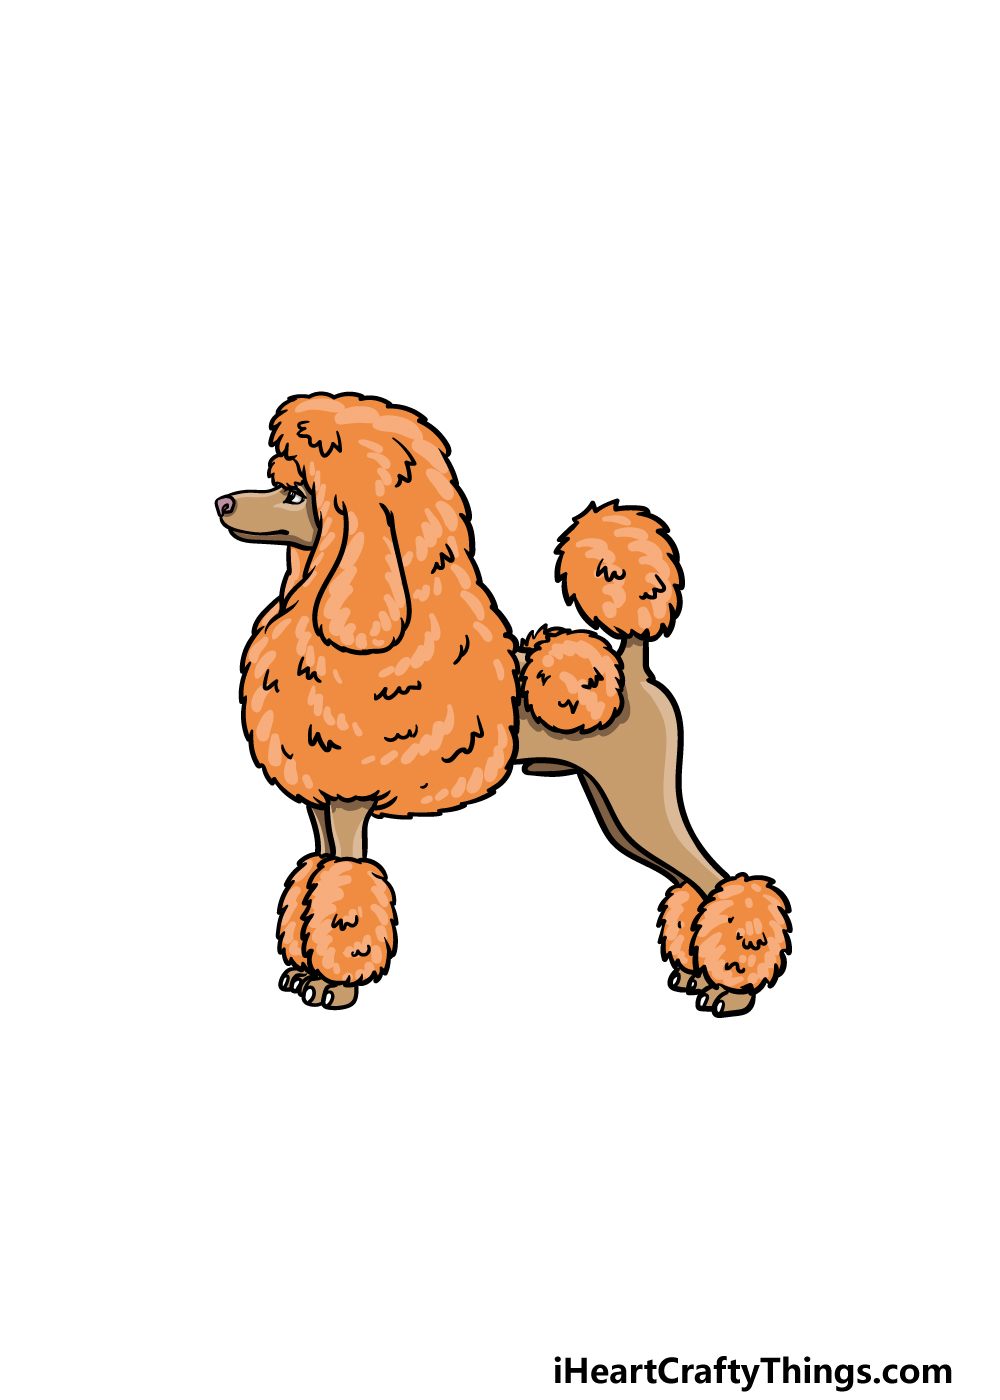
That brings you to the final step of this guide on how to draw a poodle! In this one, you can bring this drawing to life by adding some incredible colors to your artwork.
Poodles will often be styled with various colors, so you have a lot of options for how you could color this picture in.
For our reference image, we went with some oranges for the fur of the poodle, and then we went with some light tan brown for the skin of the poodle.
You could go for some similar colors to these, but this is also your chance to show off your color creativity! What colors or art mediums do you think would best suit this drawing?
Here’s how you can make your poodle drawing even better…
Make your poodle sketch look even better with these tips to try out!
The only thing better than owning a poodle would be owning more than one! That’s why we think it would be great to add at least one more to this drawing of a poodle.
Now that you have finished the guide, you know everything you need to add another one to the image.
It could be drawn very similar but have a few differences such as having it face the opposite direction.
How else could you differentiate other poodles from the first one that you drew?
When it came to coloring in this poodle, we chose some oranges and browns for the body and fur. While we like this color scheme, you could use any other colors you like for the poodle!
These could be natural colors you would expect to see on a poodle. Or, you could create a look that makes it seem like the poodle has its fur dyed.
The only question now is which colors would you like to use for this poodle?
Once the poodle drawing looks exactly as you want it, you could then add a background setting for it to be a part of. There are so many amazing settings you could use for the background!
It could be a simple setting such as having the poodle in a living room or yard. Or, it could be enjoying a day out at a location like a beach or a museum.
When it comes to coloring in your poodle sketch, you may feel limited to traditional mediums like paint or colored pencils. There are so many cool arts and crafts you could incorporate, however!
For example, real poodles are known for their fluffy hair. You could make this particular one look realistically fluffy by sticking some cotton wool over the dog’s fur.
You could also use beads, stickers and even glitter to give the image some extra personality. What are some other mediums you could use to make this poodle look even better?
Your Poodle Drawing is Complete!
You have finished all 6 steps of this guide on how to draw a poodle, and we hope that working on it was a lot of fun!
In this guide, our main aim was to make sure that you would be able to easily overcome any challenging aspects of the drawing, so we hope that we succeeded in this goal.
Now that you can draw this adorable poodle, you can keep the fun going by adding some details, additions and ideas of your own.
There is a lot that you can do to further personalize this drawing, so don’t be shy to have fun getting creative!
If you loved this guide, be sure to check out our website for more! We upload new ones often, so stay tuned for those.
Please be sure to share your finished poodle drawing onto our Facebook and Pinterest pages for us to enjoy as well!