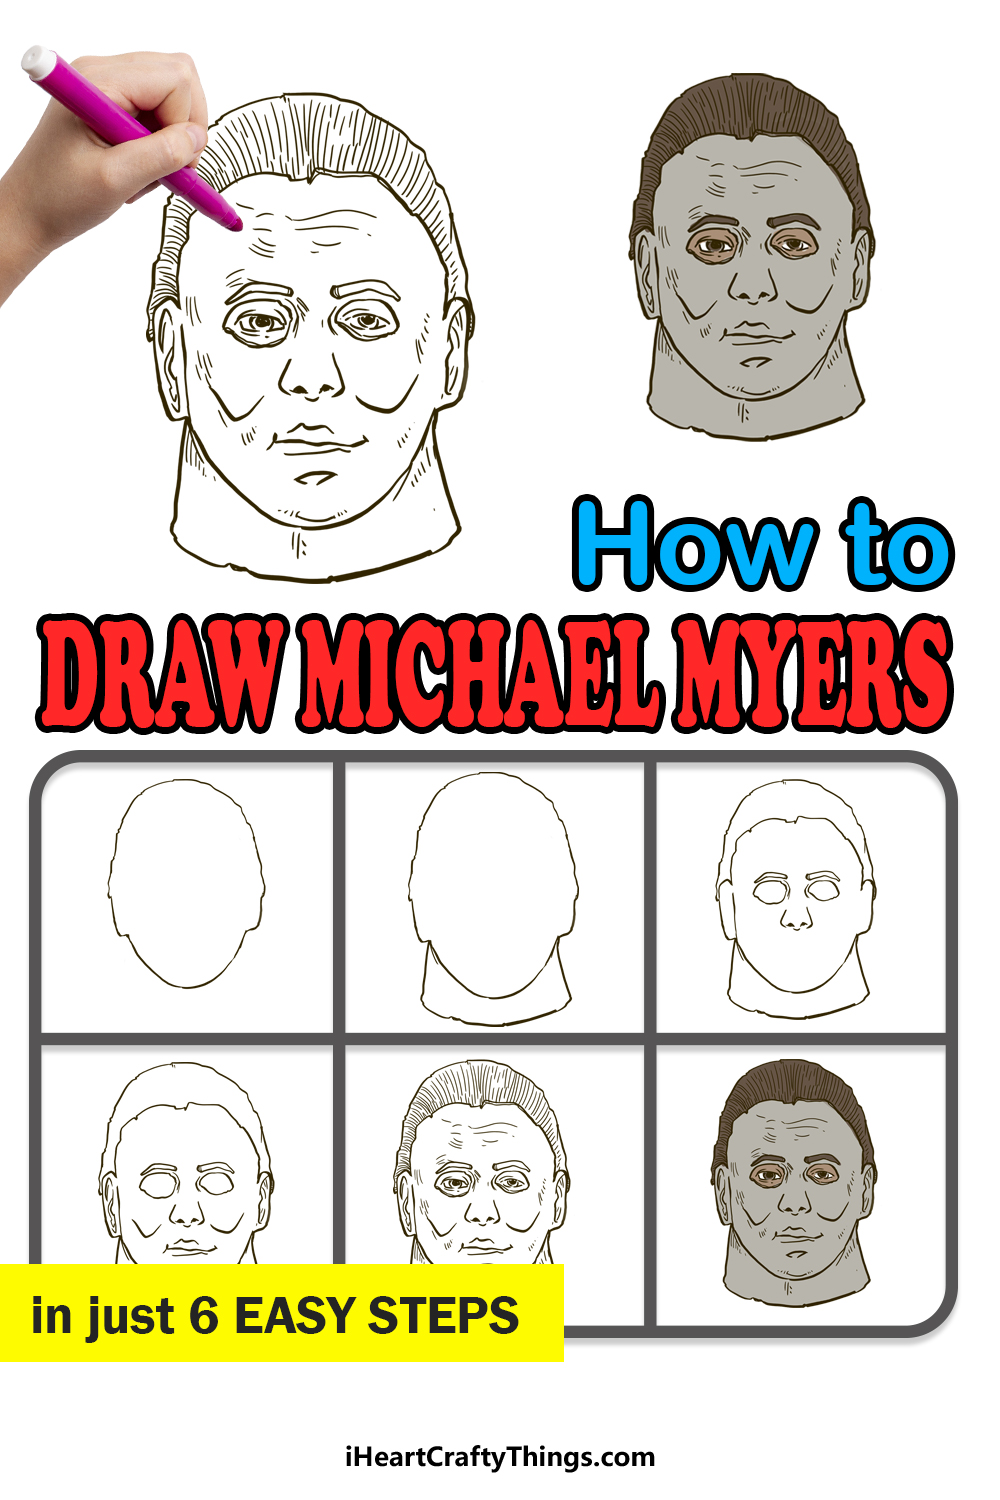
Horror fans will love this guide on how to draw Michael Myers for kids! Anyone can recreate this iconic slasher icon in just a few steps.
Michael Myers made his first appearance in the 1978 film Halloween, directed by John Carpenter. His famous mask was actually a painted William Shatner mask, but despite the last-minute addition of this mask, it proved to be an iconic choice.
Many sequels later, Michael is still one of the most recognizable horror villains of all time. Many people love to draw The Shape, but getting his mask right is easier said than done!
I will take you through all the steps to show you how you can make this famous scary face. Once you have the hang of it, you could change details to match your favorite incarnation of the mask or even draw the rest of Michael’s body.
Watch This Guide To Make Your Michael Myers Drawing
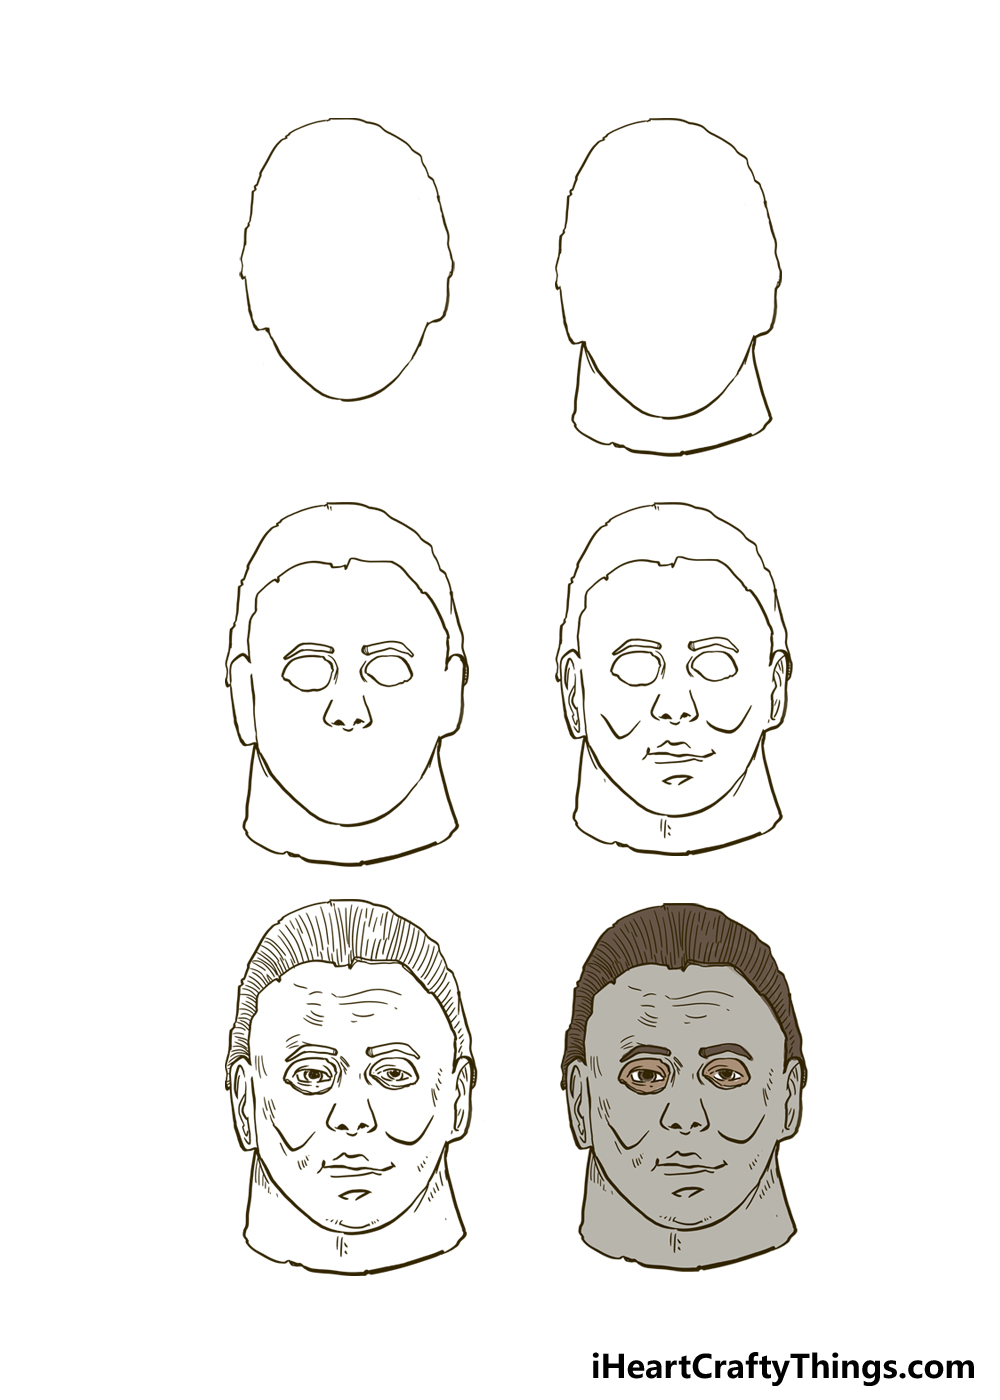
How to Draw Michael Myers – Let’s Get Started!
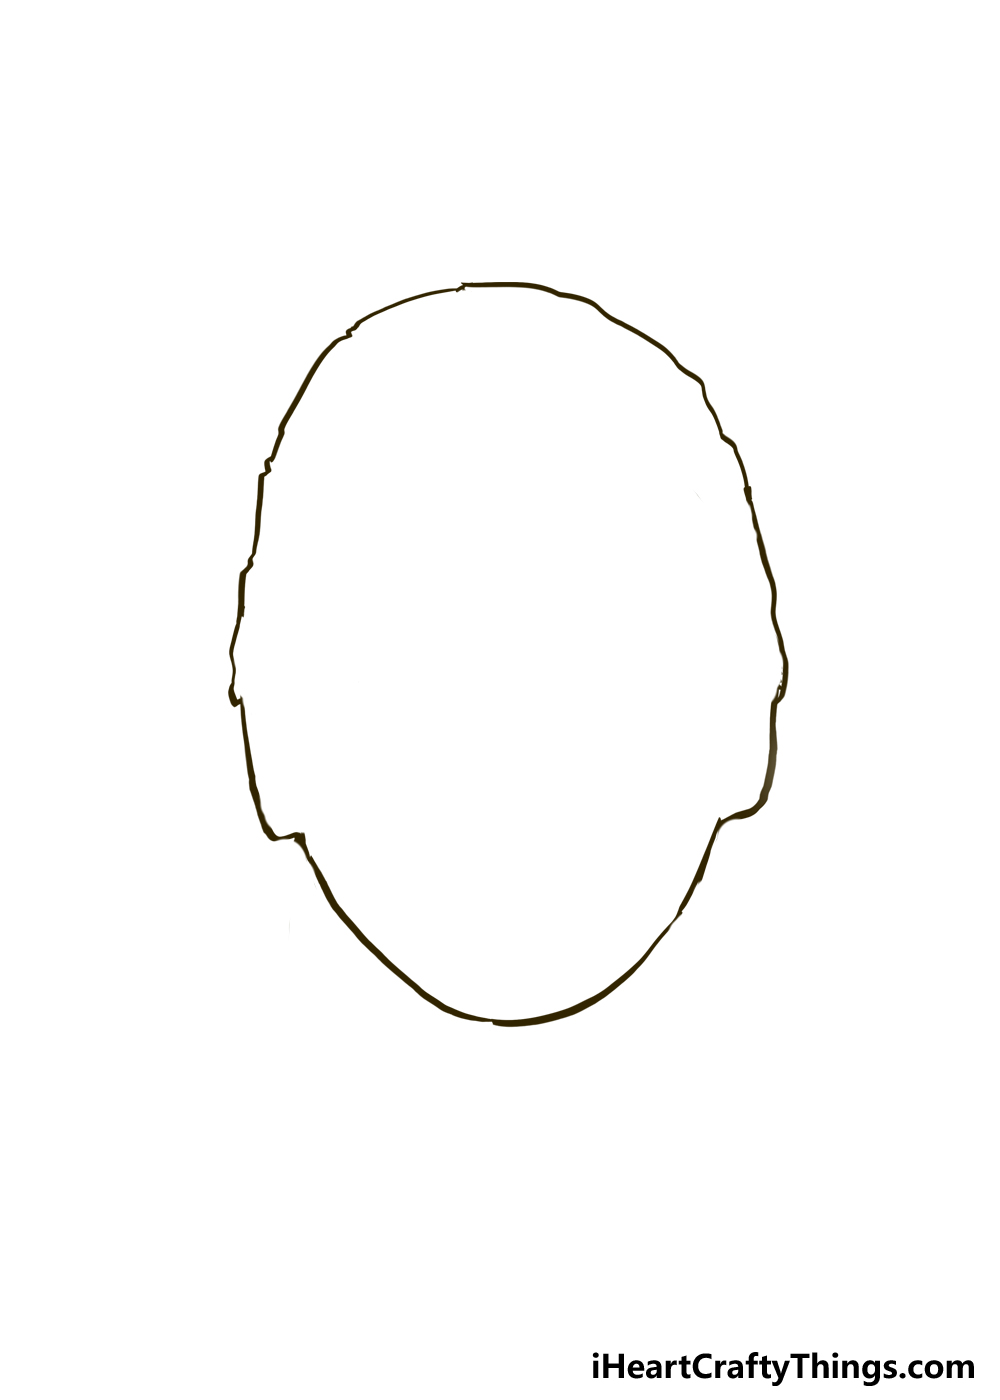
Step 1
When it comes to the design for Venom, it’s fair to say it’s not realistic to how real people look.
For this Michael Myers drawing, we will be focusing on arguably the most famous aspect of the character, his mask.
In the first film, Michael acquires the mask at random, and it became an iconic aspect of the series.
We rarely see Michael Myers without his mask, and something about it makes him more mysterious and scary.
The mask has seen a few different interpretations throughout the years, but the design is more or less the same.
Sometimes the mask has been a bit thinner, like in his film debut, but in others it’s a bit wider.
You could make it a bit thinner if you prefer that look, but in our guide we did make it a bit wider. With that in mind, we can draw the outline for the mask.
Considering it’s a mask, the outline looks like it could be the outline of a regular head! Before you draw the outline, you can prepare by drawing an oval shape with your pencil in order to map out the shape.
If you want to make things even easier, you could draw a vertical and horizontal curved line crossing each other to show where the eyes and nose will go.
When you have the planning shapes and lines in place, carefully draw the head outline as it appears in our reference image. Then, we can move on to step 2 of the guide!
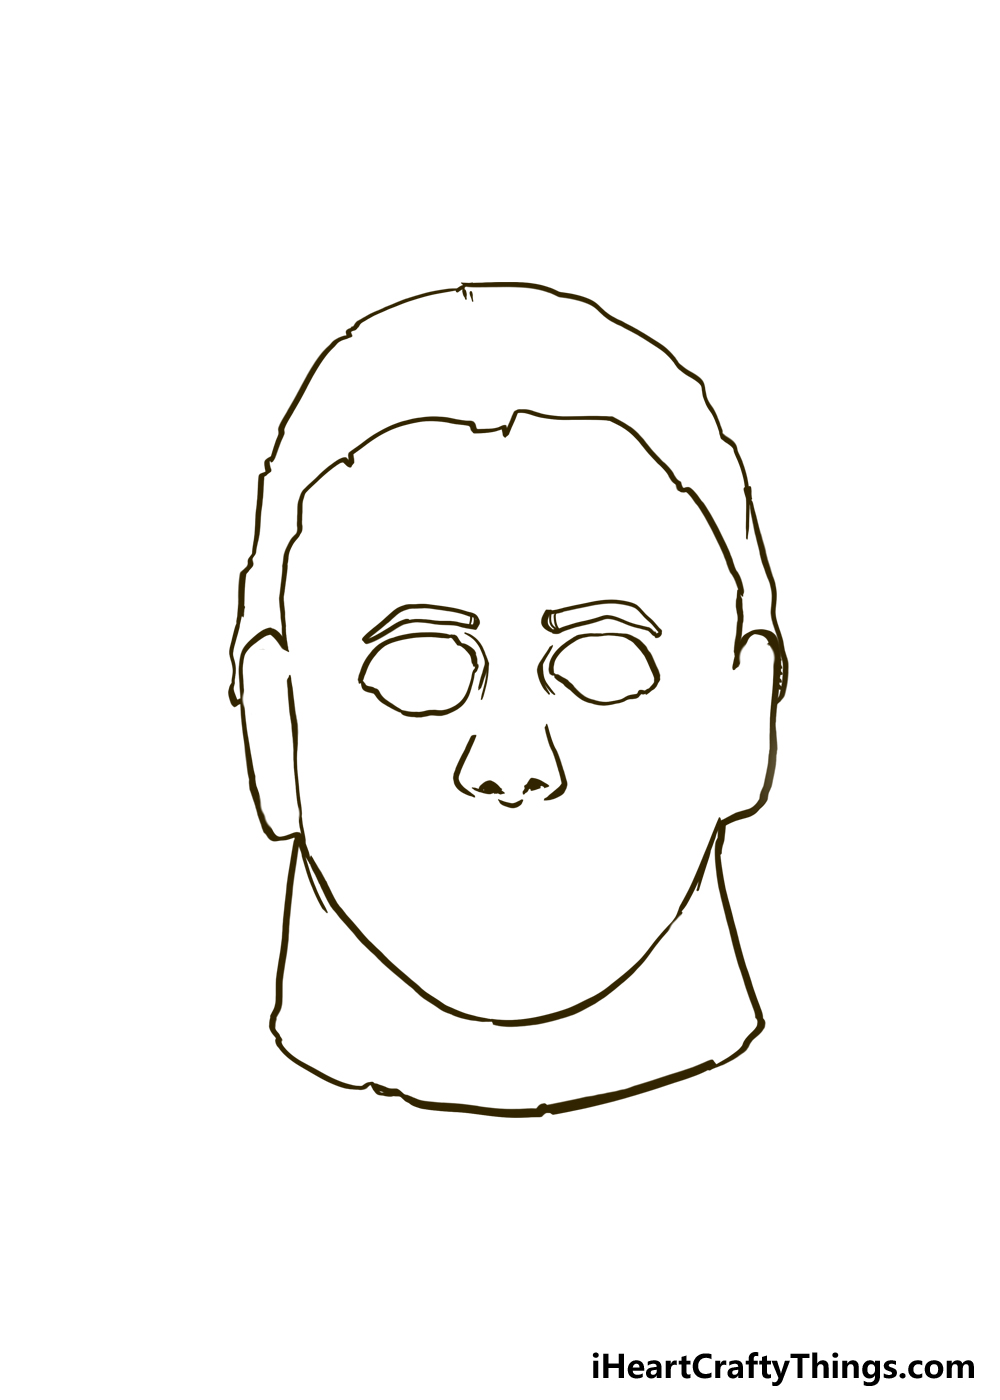
Step 2: Draw the neck for the Michael Myers mask
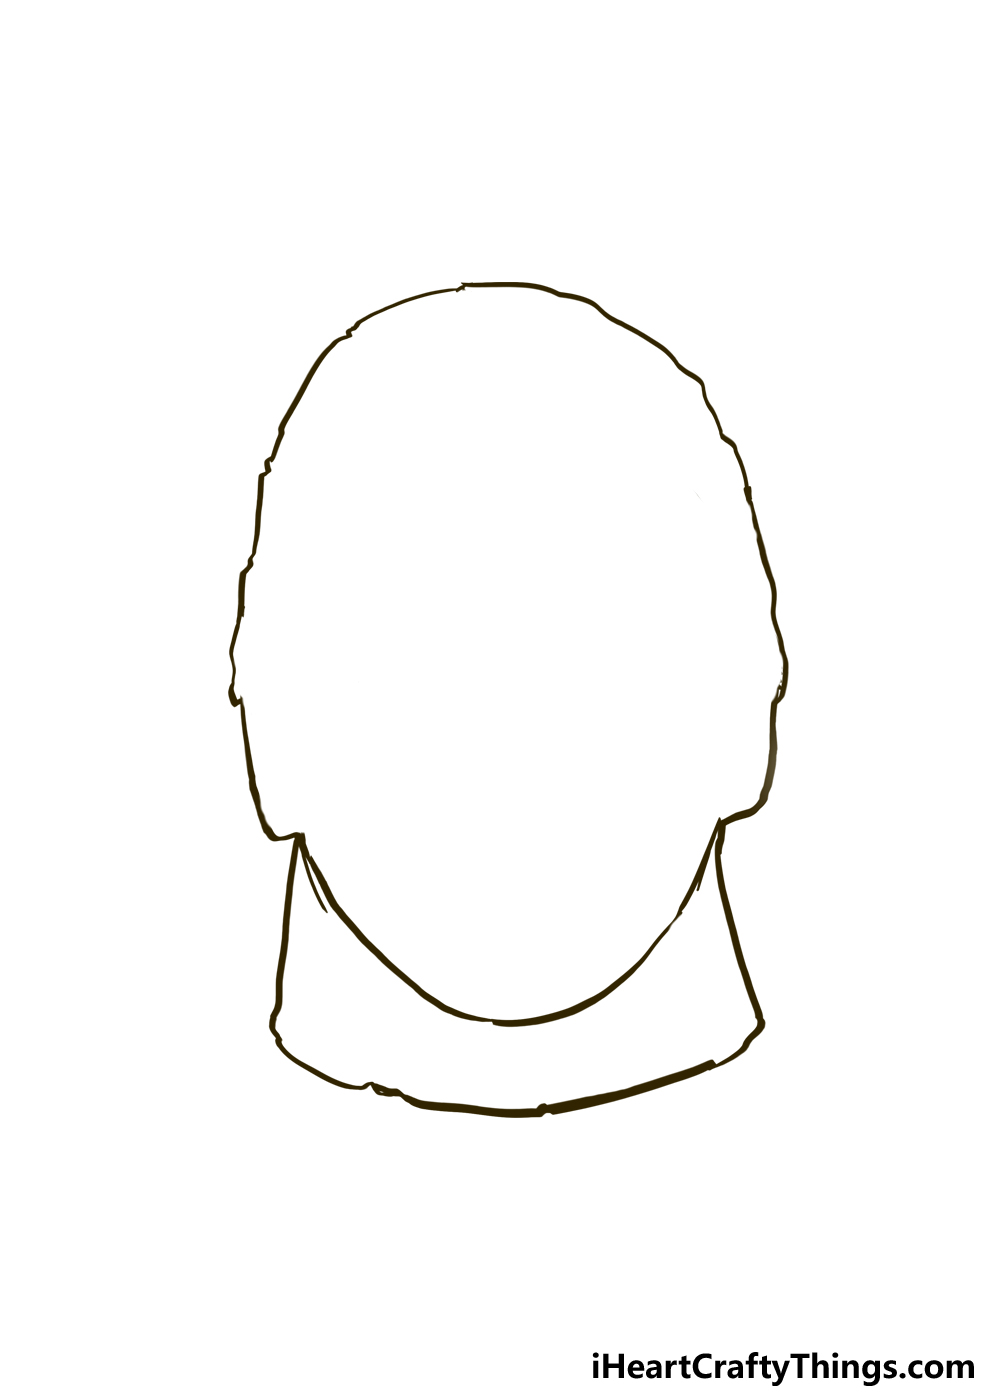
What we are drawing here is, of course, a mask and not a human head. That means that the neck will look different to how the neck of a regular human head would look.
Imagine the neck as it would be in real life, that is to say it would be a thin flap that covers the neck like a skirt. It will also flare out a bit due to the thin material it’s made of.
You can draw the sides of this neck using some relatively straight lines, but the curved base will be a bit rougher and more ragged.
Each side of the mask will begin and end under where the ear protrusions are.
Now, you will see the mask starting to take shape, even though there are no facial features on the mask yet.
Somehow, it still manages to look creepy despite this, but it will look even better when we do add some features.
For a bit of trivia before we move on, the Michael Myers mask was somewhat of an improvisation. The filmmakers were on a small budget for the film and needed a creepy mask.
They found a Star Trek Mask based on actor William Shatner at a store, shaved some of the hair and painted it white.
This choice resulted in horror history, as we would have the iconic and terrifying Michael Myers mask!
With that out of the way, we can move on to step 3 where we will add the first facial features to add some personality to this Michael Myers mask, so let’s do that when you’re ready!
Step 3: Start drawing his facial features
Even though this is a mask, it has many of the facial features we see on a real face. That is, there are eyes, a nose and a mouth, at least in a sense.
We will begin drawing some of these aspects in this step, so let’s see how it can be done. First, we will draw his hairline.
Michael Myers’s mask has a unique hairstyle that’s short on the sides but thick and slicked back on top. It’s got a fairly rough appearance to it, and we will attempt to recreate that.
To do this, we will use some more rough, jagged lines for the curved hairline. For the ear on the left, add a vertical line where you see we did in our reference image.
Next, we will add the eyes and nose. Or, more specifically, we will add the eye holes that his real eyes would see out of.
The eye holes will not be drawn with a smooth line, instead each one will be drawn with a fairly rough outline to give them that creepier look.
His eyebrows will be just above them, drawn as some fairly simple thin shapes with a bit of detailing. Finally, we can draw the nose.
Simply use two thin lines with a curve inward at the bottom of each one with two nostrils between them. That’s all there it is to it for now, and we can move on to the rest of the facial features.
Step 4: Now draw the rest of the facial features for Michael Myers
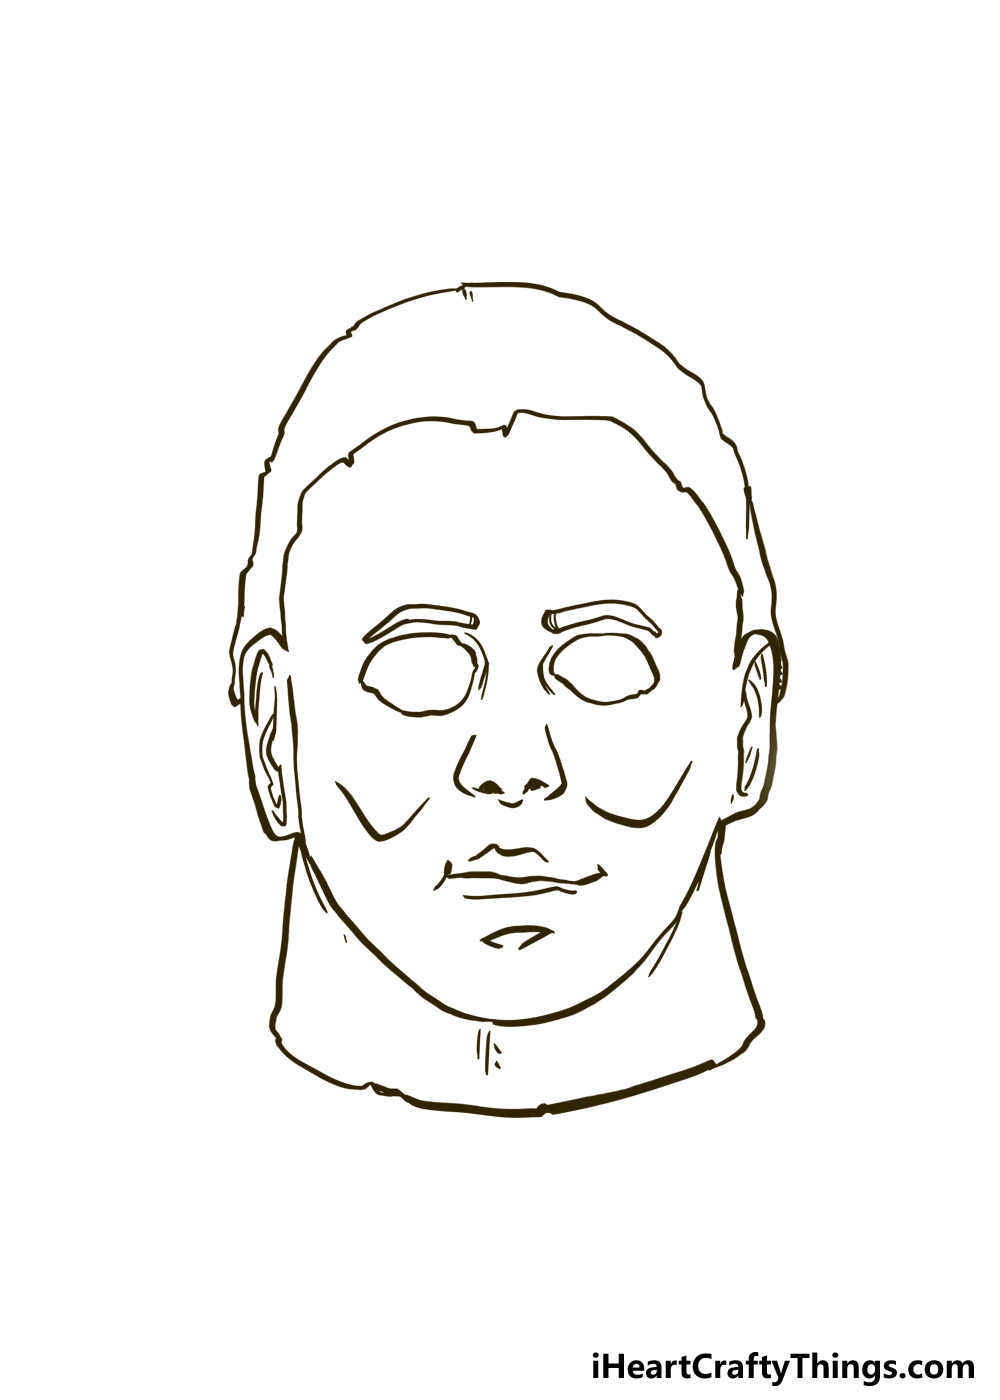
In this fourth step, we will add some more facial features for your Michael Myers drawing. The Michael Myers mask has some pretty distinctive drooping ‘cheekbones’ which we will draw now.
Each one will be drawn using a simple curved line where his cheeks would go. Their starting points should line up with the sides of his nostrils.
Next, we can draw his mouth, which is a pretty simple wavy line. Draw another line like a stretched-out M above it for the top lip, and then a straighter horizontal one beneath it for the bottom lip.
The Michael Myers mask is famous for its neutral expression, so we’re aiming to neither create a smile or a frown for the mask, so try to keep that in mind when drawing his facial features.
Finally, we need to add some simple detailing inside the ear sections to make them more realistic. Then, we’re ready to move on to some final touches in the next step of the guide!
Before you move on, you can go ahead and remove any pencil lines you drew to help with the drawing. They won’t be needed anymore after this, but be careful when you’re erasing them.
If any pen ink is still a bit wet then it can get smudged, and you also don’t want to accidentally erase any lines that you want in the final image.
Step 5: Draw the final details for Michael Myers
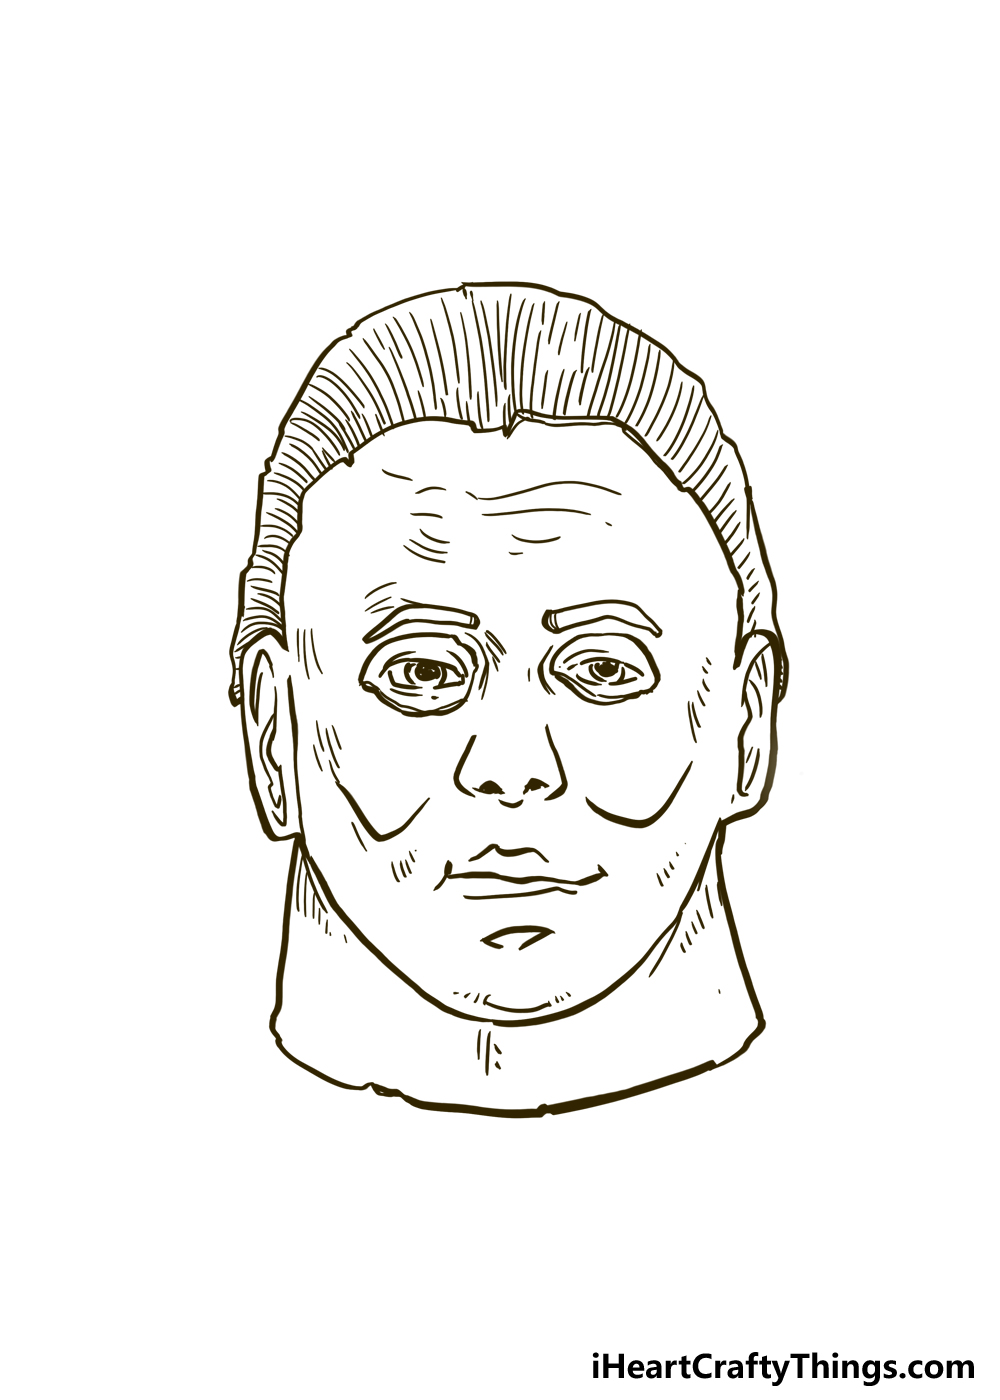
This is already looking like a respectable Michael Myers mask, but there are a few final details that will make it look even more impressive! First, there are the eyes.
When it comes to Michael Myers, there are a few ways that his eyes have been portrayed. In some films, the mask is looser making his eyes harder to see through the eyeholes.
In others, the mask is tighter, allowing us to see his human eyes beneath the mask. This is the approach that we have taken in this drawing, but you could go either way.
If you like to be able to see his real eyes, draw them with some simple curved lines with dots for the pupils.
If you think he looks creepier without being able to see his real eyes, then you can color the eyeholes of the mask black.
Then, we added some simple line details to the face in order to make the mask look more weathered and creased. Some lines on the hair finish it off to make the mask look more convincing.
Now, you can add any other details you would like! For one idea, it could be fun to draw some of Michael’s body beneath the mask.
In all the films, Michael Myers tends to wear a mechanic’s jumpsuit, so that should be fairly easy to add to the drawing.
You could also add characters from the films such as Laurie Strode or maybe some other classic horror villains.
Step 6: Now, finish off with some color for Michael Myers
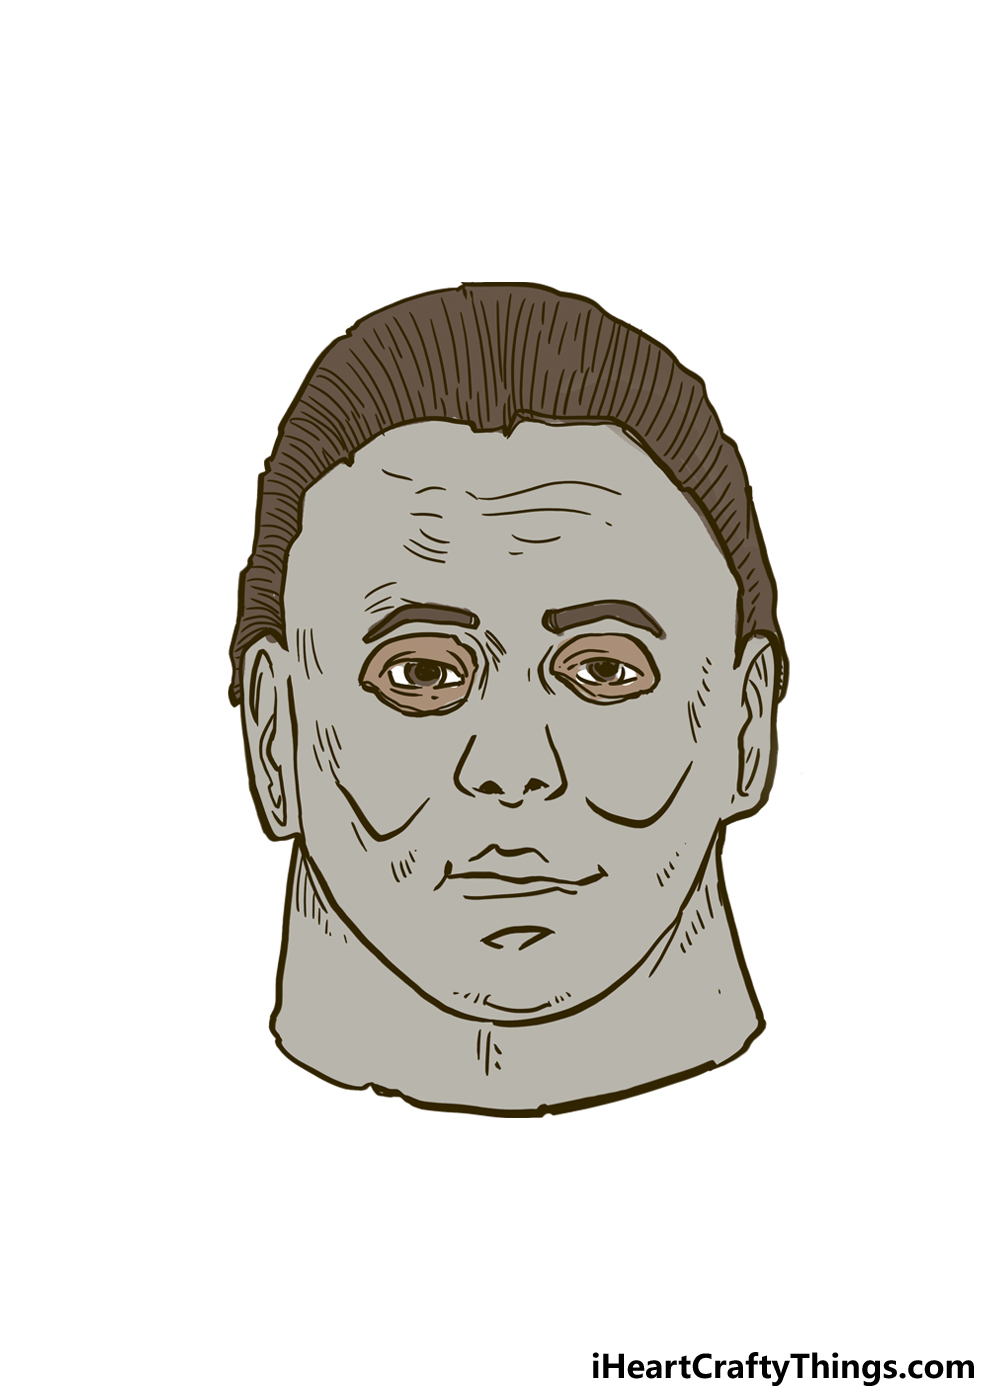
The color scheme for the Michael Myers mask is deliberately quite muted, and we will be representing that for this final step of this drawing of Michael Myers.
For his hair, we will use a standard dark brown color, as shown in the reference image. His mask appears white or grey in the films, so we used a greyish color to give it a more weathered look.
You could make the color lighter or darker depending on your preferences. You could even make it light yellow if you want to replicate the older look from some of the more recent films.
If you added his jumpsuit as we suggested earlier, this will be colored with a dark blue color to match the films.
When coloring Michael Myers, there are so many different art tools and mediums you can use.
If you want to keep the colors on the mask more subtle, using watercolors would allow you to do a light grey wash.
Acrylic paints, crayons or pens would make the colors darker and more intense, however.
There are no wrong ways to do it, and it all depends on what kind of image you want. Michael Myers often lurks in the shadows, so we would show this by having a dark background.
That’s what we would do, but it’s up to you to decide how you would like to portray the background of your own version!
How will you color in this classic horror icon?
Your Michael Myers Drawing is Complete!
Michael Myers may be one of the scariest villains in horror history, but we hope that drawing him was not a scary experience!
In this guide on how to draw Michael Myers, we wanted to break it down into smaller chunks to make it easier and more fun.
Now that you know the basics of drawing the famous Michael Myers mask, you can take it to whole new places. We’ve spoken about a few ideas that you can use to make your drawing more unique.
These included adding a background, as well as adding different characters from the Halloween films and other classic horror films. These are just a few ways that you can do it!
If you have some favorite Michael Myers moments from the films, then you could recreate them using backgrounds and other additions.
You can also change small details to create your favorite version of the Michael Myers mask.
When your drawing is complete, please do share your finished artwork to our Facebook and Pinterest pages for us to see!