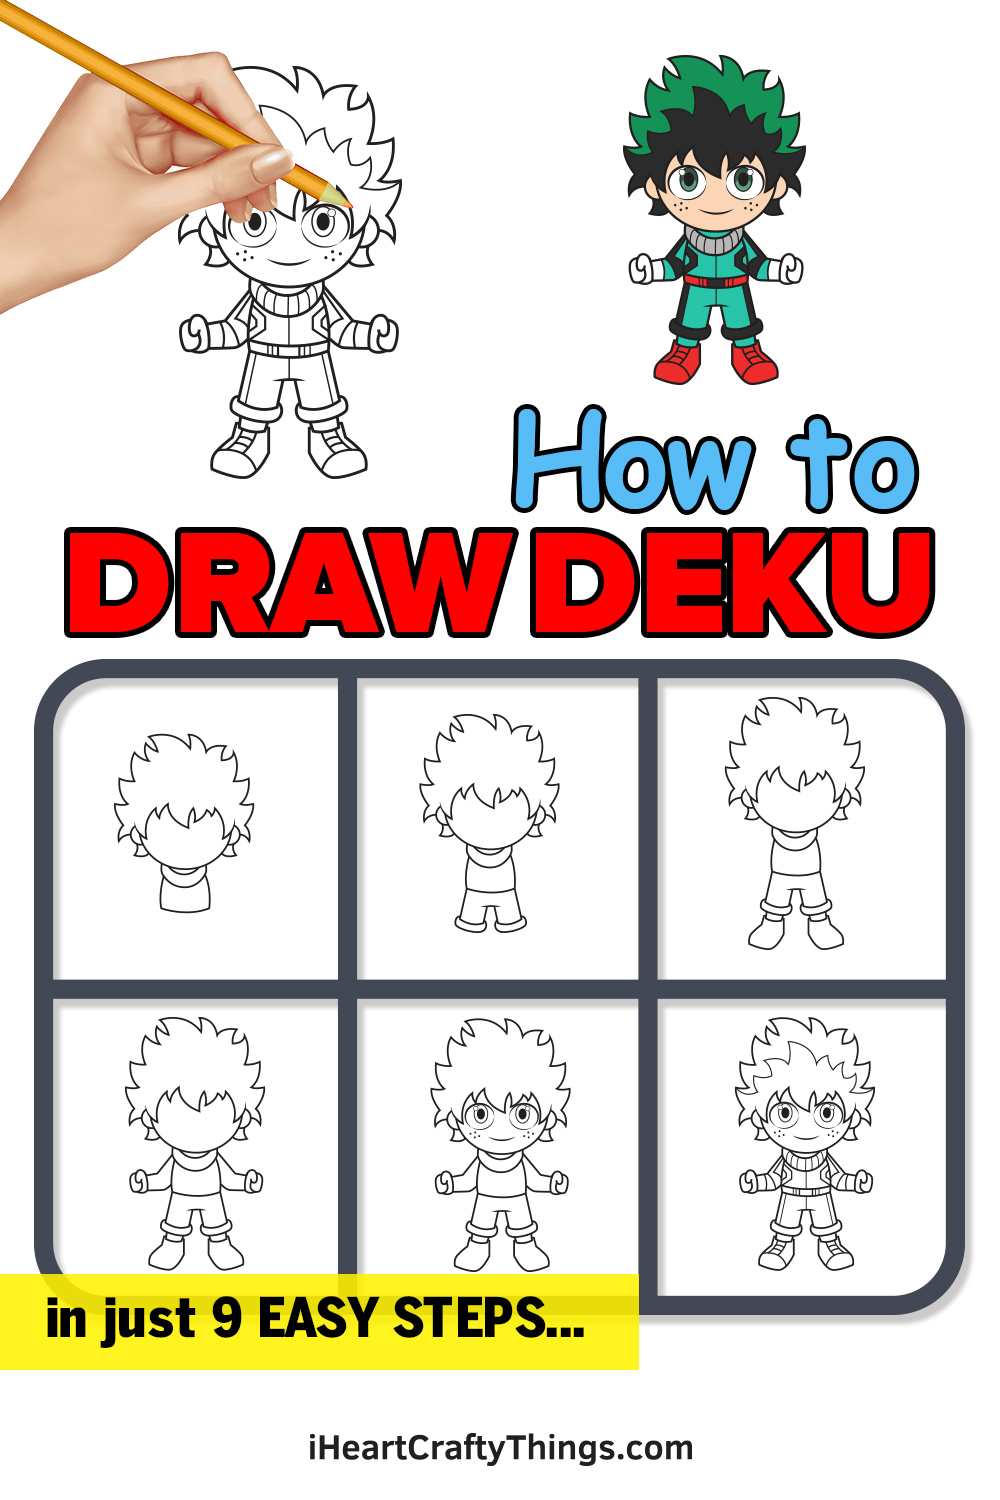
Deku, or Izuku Midoriya to be specific, is the protagonist in the anime and manga series called “My Hero Academia”.
Unlike most superheroes, Deku was born without superpowers. Because of this, he has spent his whole life in pursuit of his dreams of becoming a hero.
The extreme popularity of Deku has created a huge demand for a free Deku drawing tutorial. Now, you’ve asked for it, so we delivered.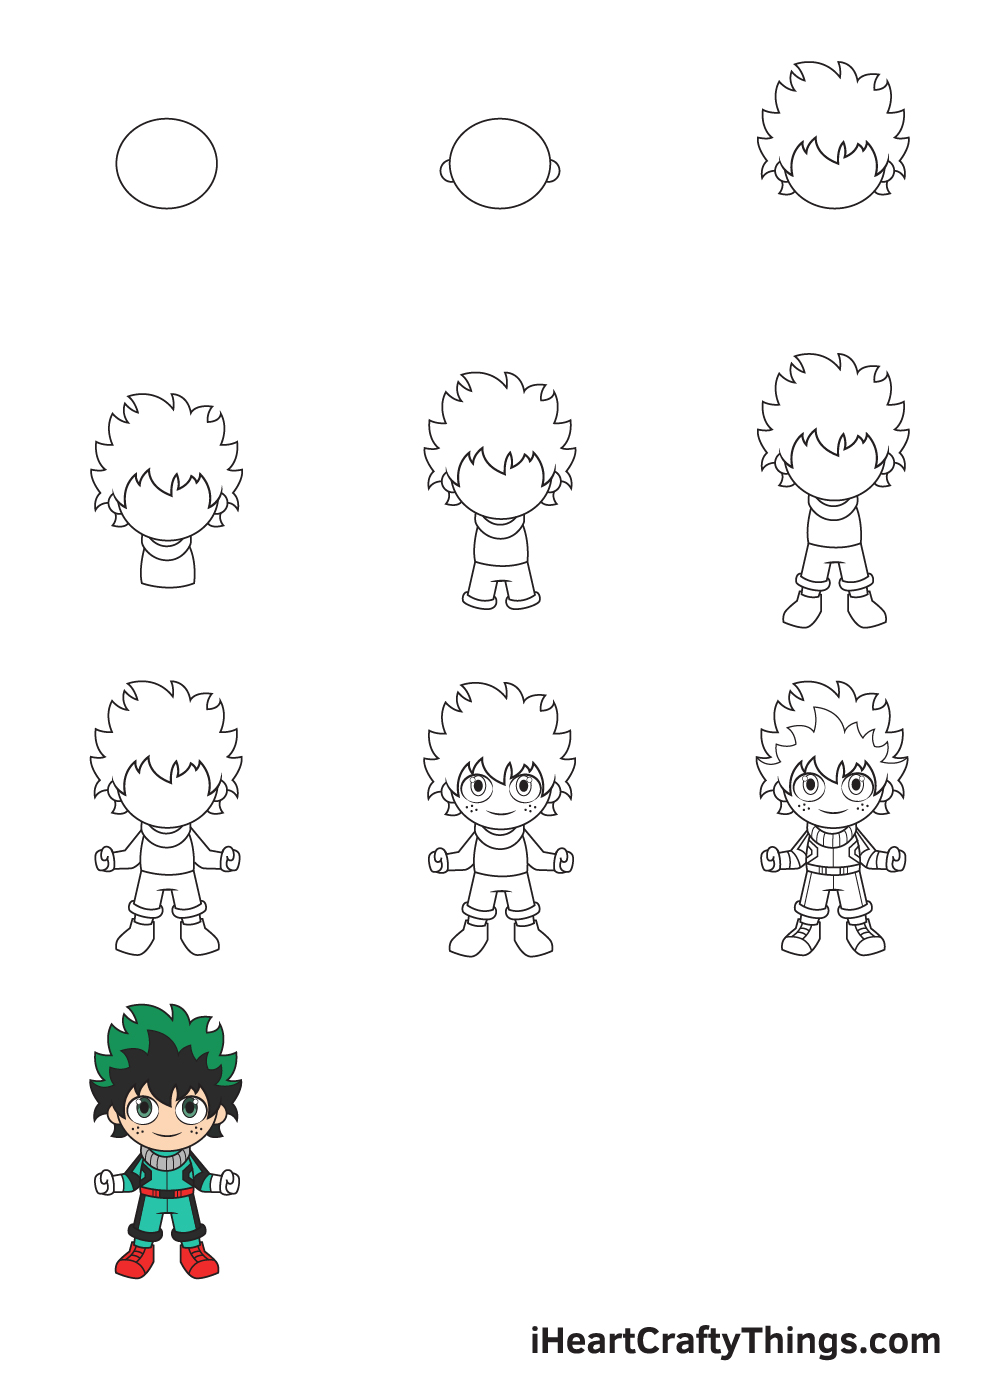
Finally, we’ve created a step-by-step process on how to draw Deku, made easier with 9 easy steps and simple illustrations.
Go ahead and grab a piece of paper along with your favorite drawing tool and let’s draw together!
How to Draw Deku – Let’s get started!
Step 1
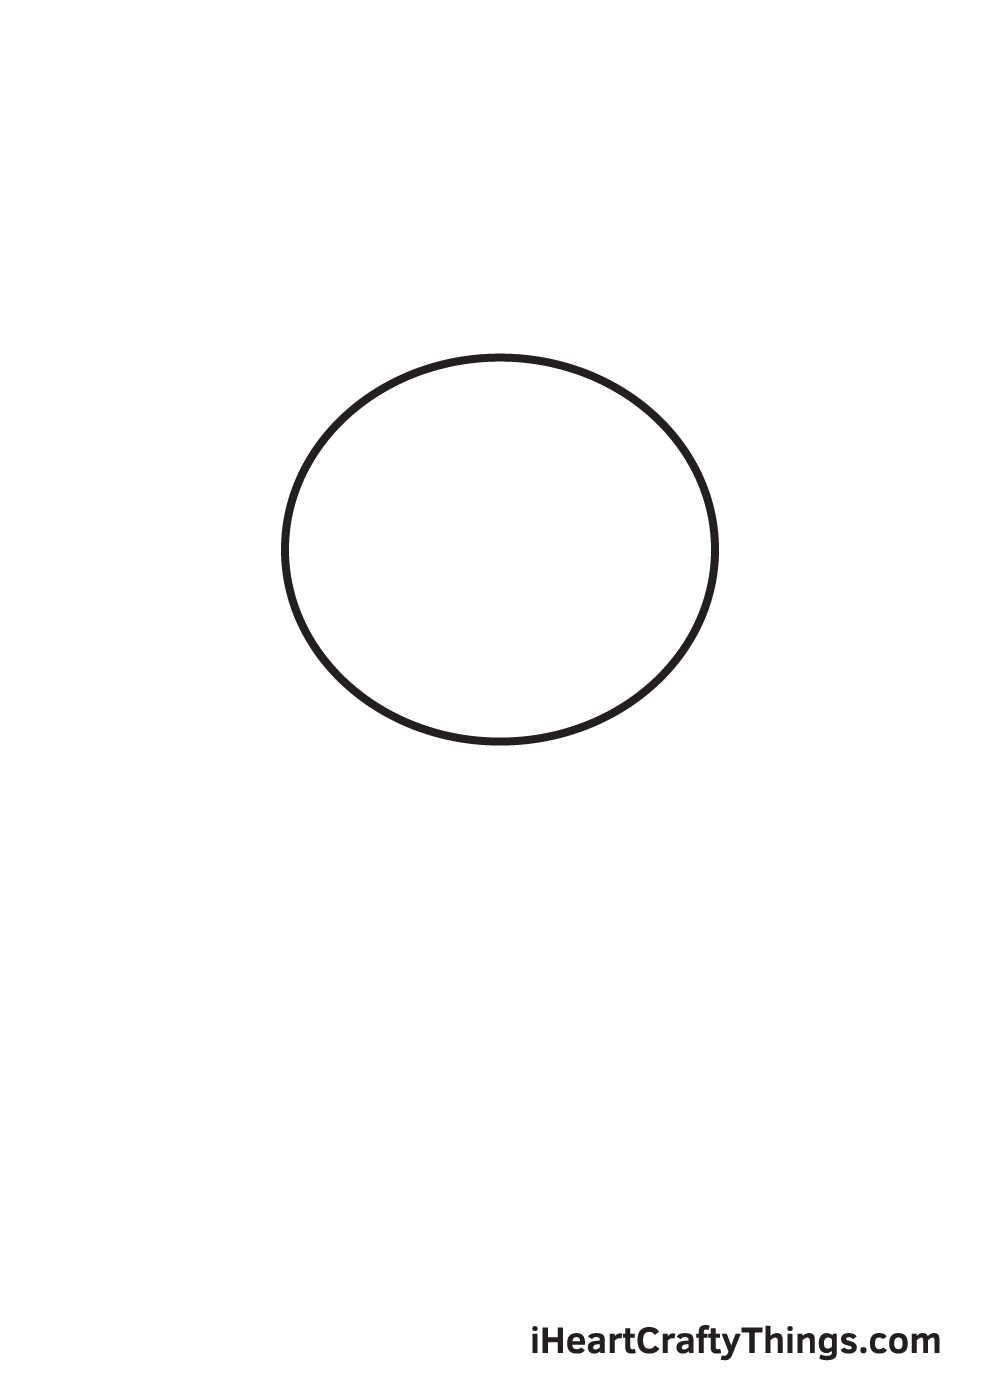
Starting on the upper portion of your paper, draw an uneven circle shape forming the head of Deku. Take note that the shape should have a greater width than length.
Avoid pressing down too hard with your pencil when drawing the outline. It’s important to draw the shape with a light stroke so you can easily remove any unnecessary parts of the shape you no longer need later on.
Step 2 – Create an Outline of Deku’s Head
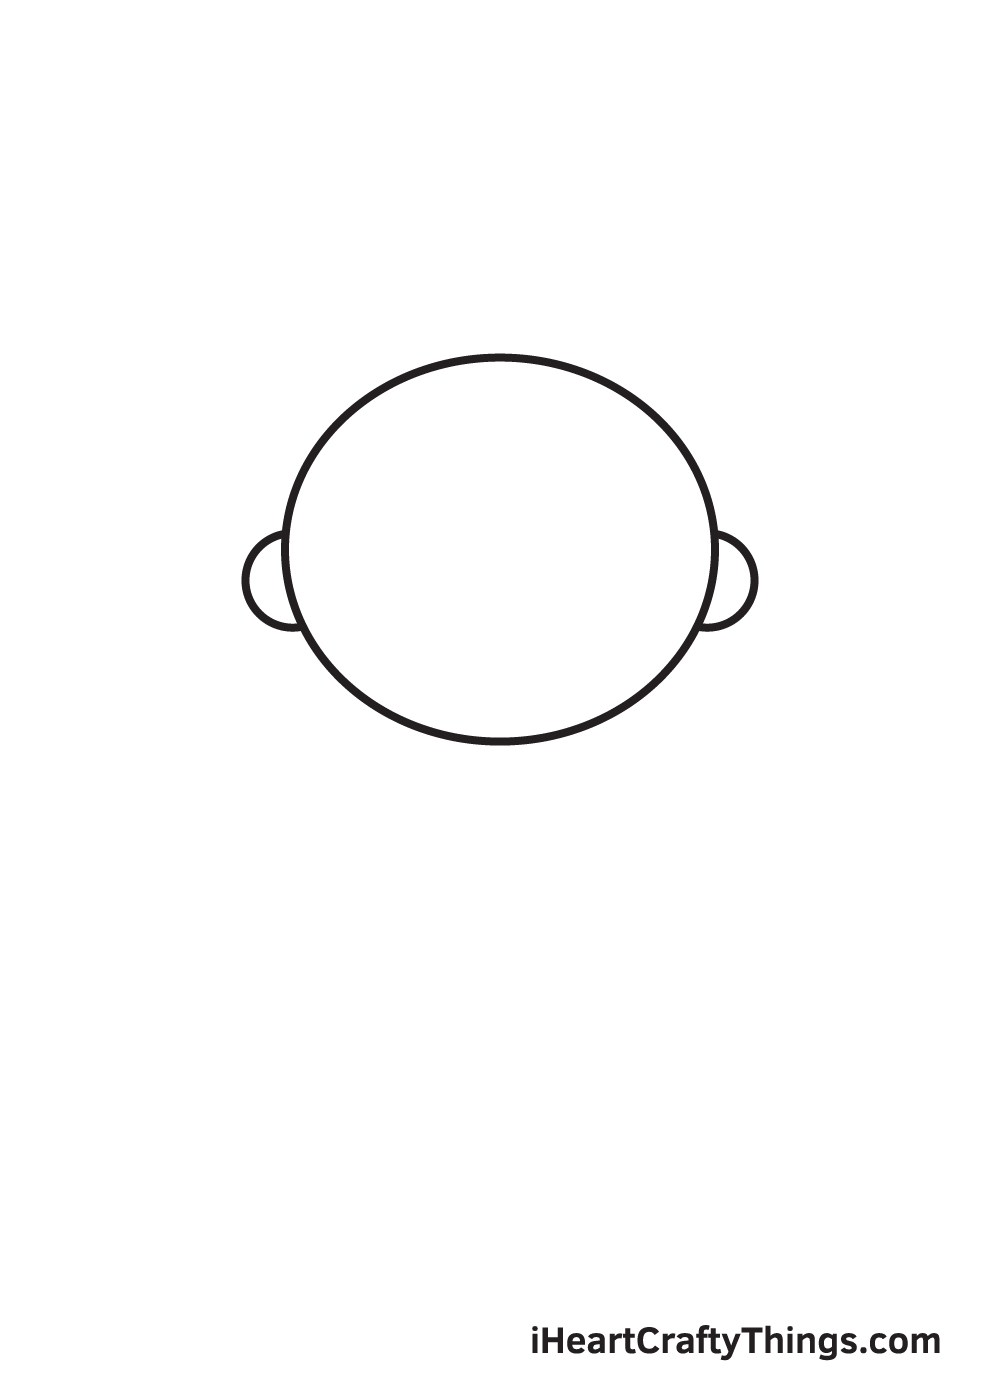
Enclose an ear on both sides of the head by drawing semicircle shapes. This creates both ears of Deku.
The two ears should be even and aligned to each other as much as possible. You can make use of reference lines to make sure that the ears are drawn within the same level.
Step 3 – Then, Draw Deku’s Messy Hair
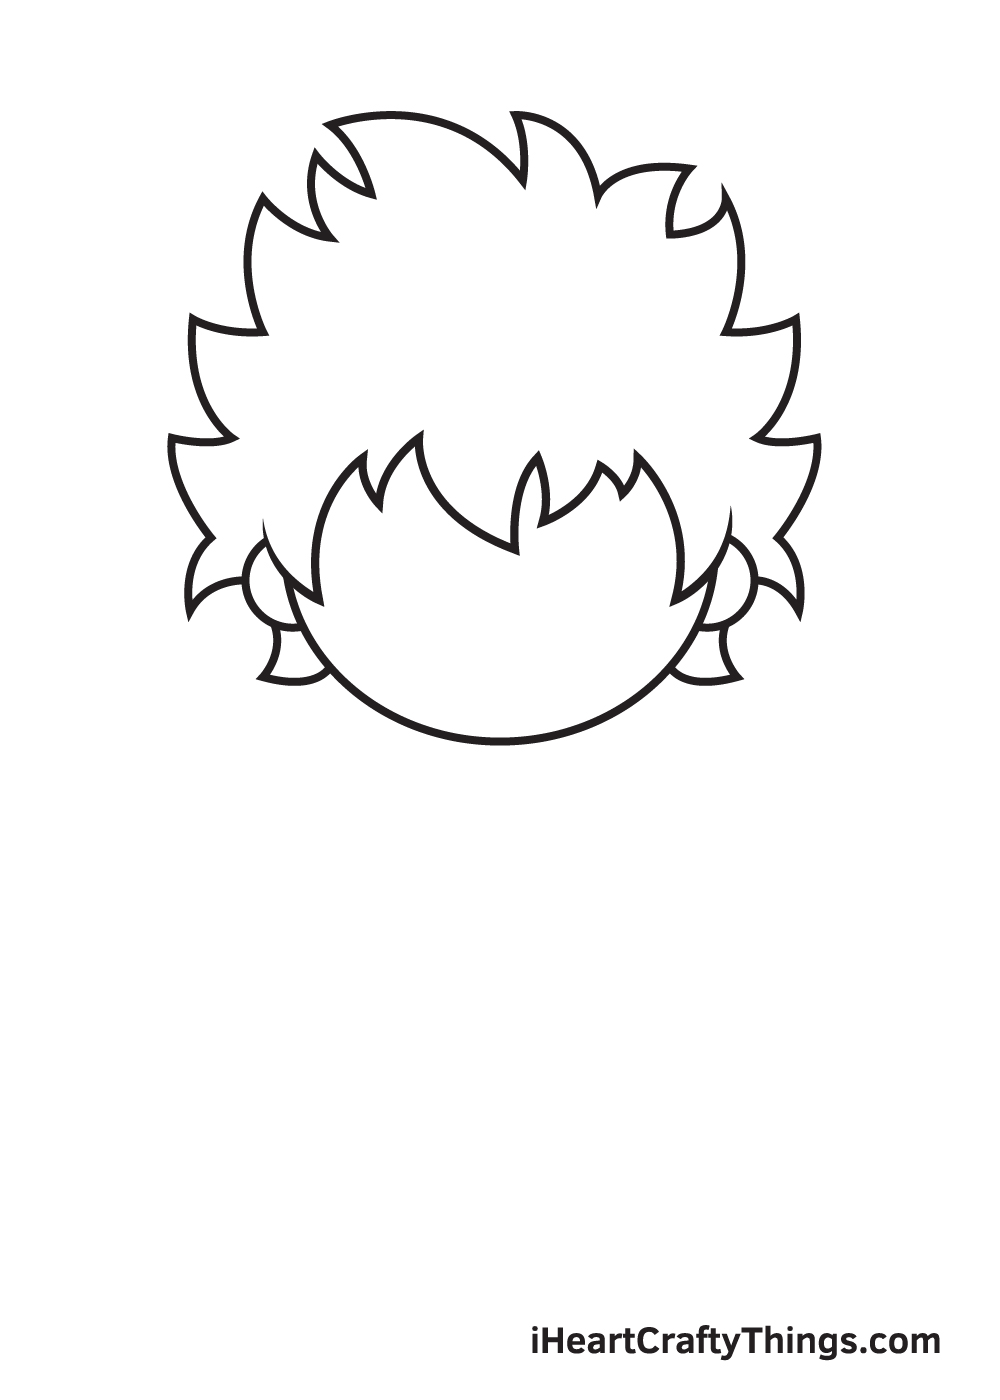
Draw multiple pointed shapes to form Deku’s unique hairstyle. Make sure to add pointed clumps of hair sticking up—it’s one of the most distinct features of Deku!
Also, don’t forget to remove the overlapping line from the outline inside the hair using an eraser! This helps keep your drawing more refined and most importantly, neat and tidy.
Step 4 – Next, Draw the Shirt Deku is Wearing
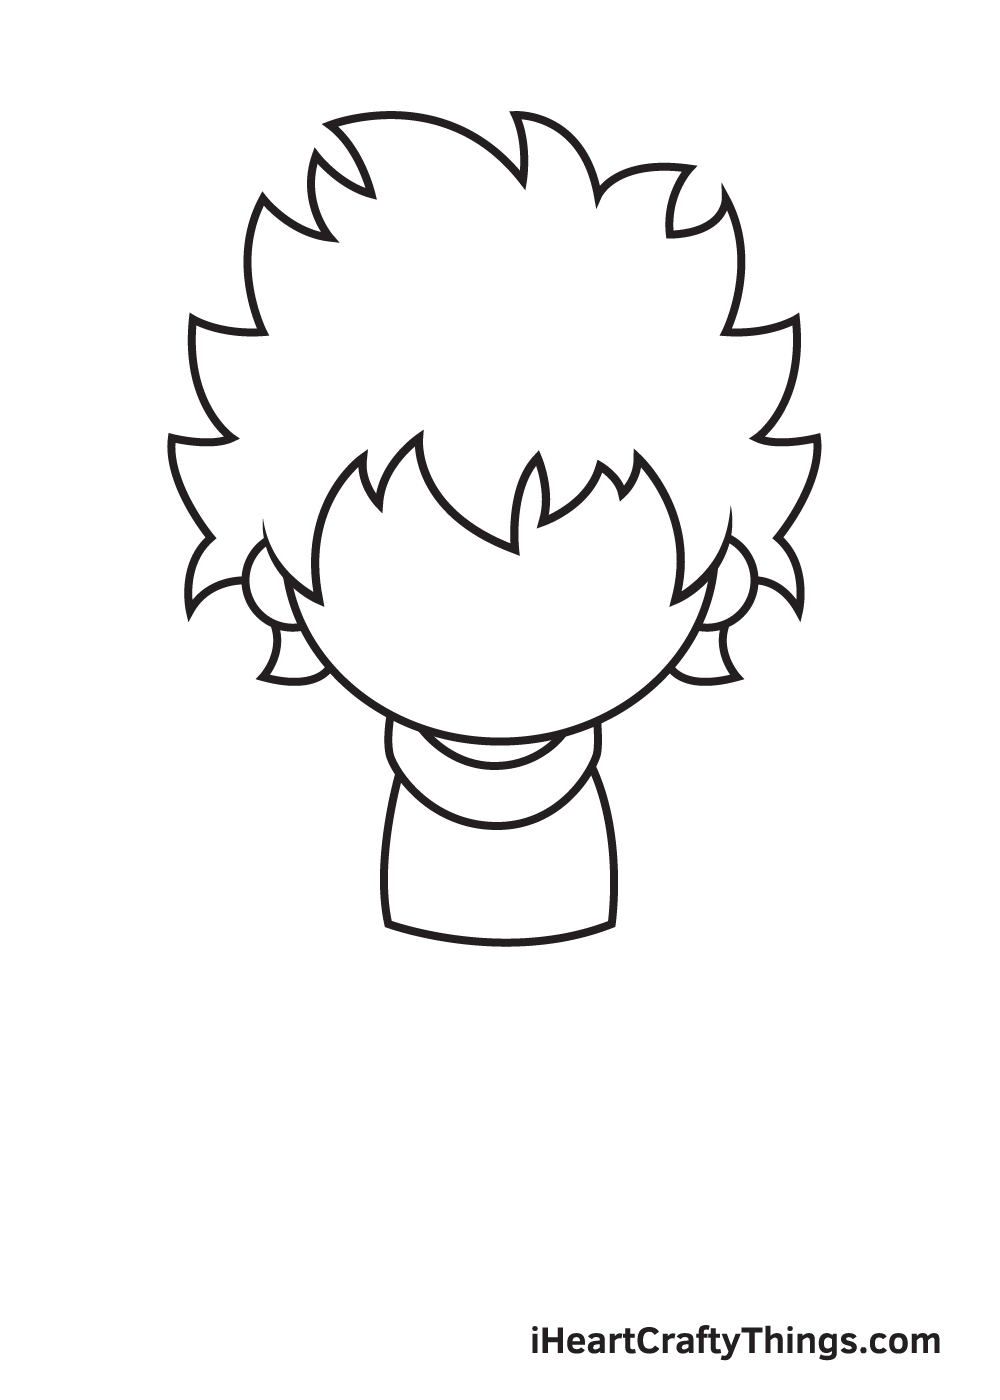
Right underneath the head, draw two parallel curved lines forming the collar of Deku’s shirt. Then, draw two vertical lines on each side with a horizontal line at the bottom to create the shirt itself.
As you can see in the illustration, Deku’s head is relatively larger than its body. That’s how it should really be! So, keep that in mind all throughout the process.
Step 5 – Draw the Trousers Deku is Wearing
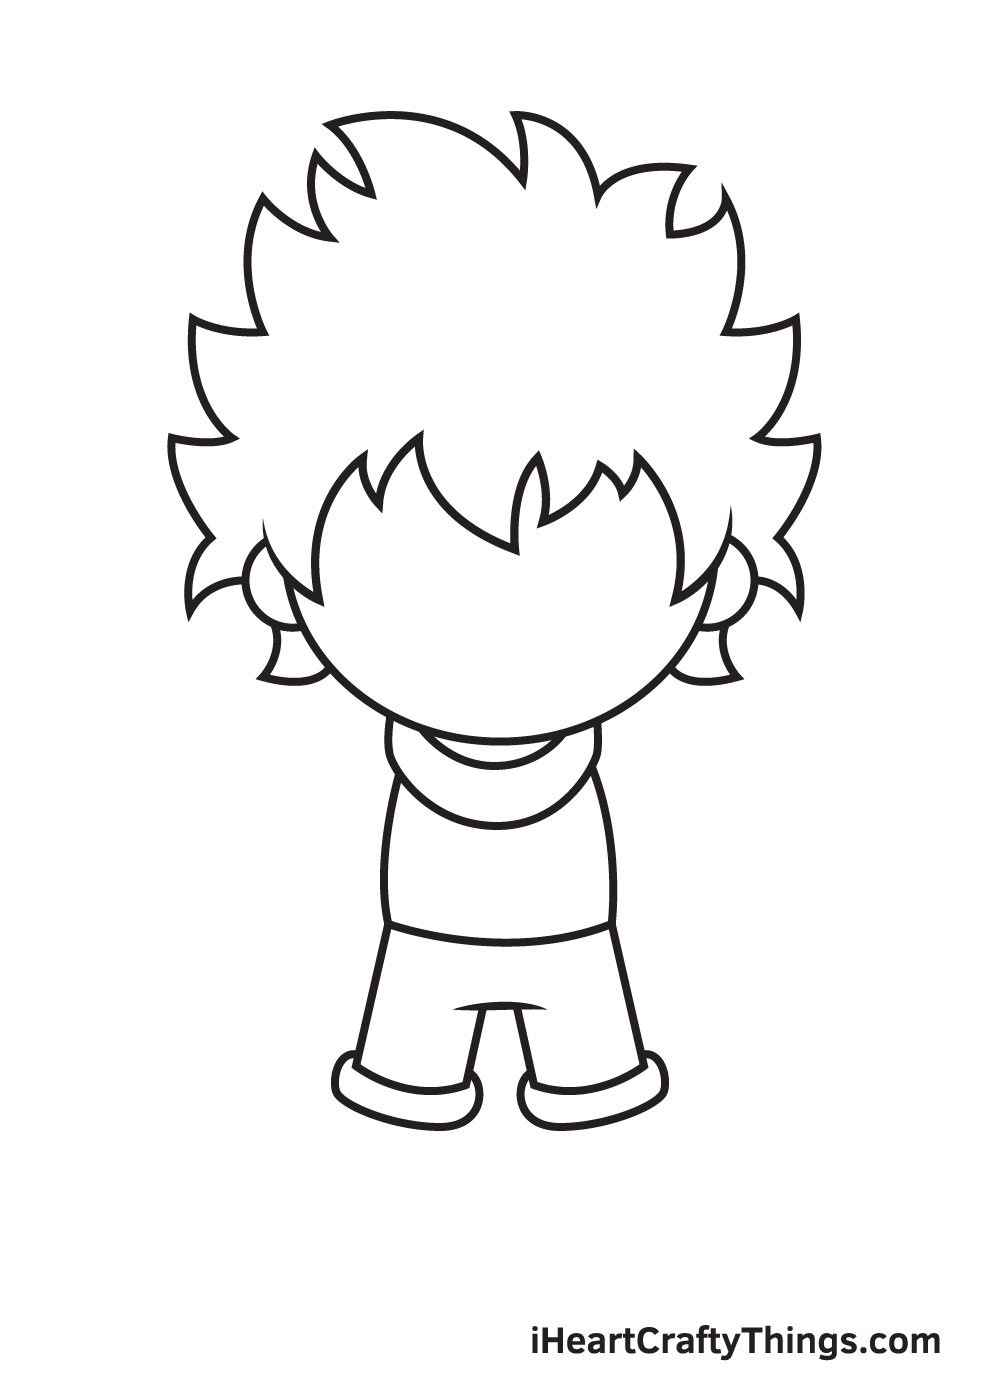
Structure both legs of Deku right underneath his upper body. To achieve this, simply draw an upright rectangular shape with a cuff at the bottom to create one leg of the trousers.
Then, draw a similar figure on the opposite side and there you have it—Deku is now wearing a pair of trousers that are folded at the bottom!
Step 6 – Afterwards, Draw Deku’s Both Feet
Draw a bulky shoe facing opposite directions at the bottom of each leg.
See to it that the form and size of the shoes are identical.
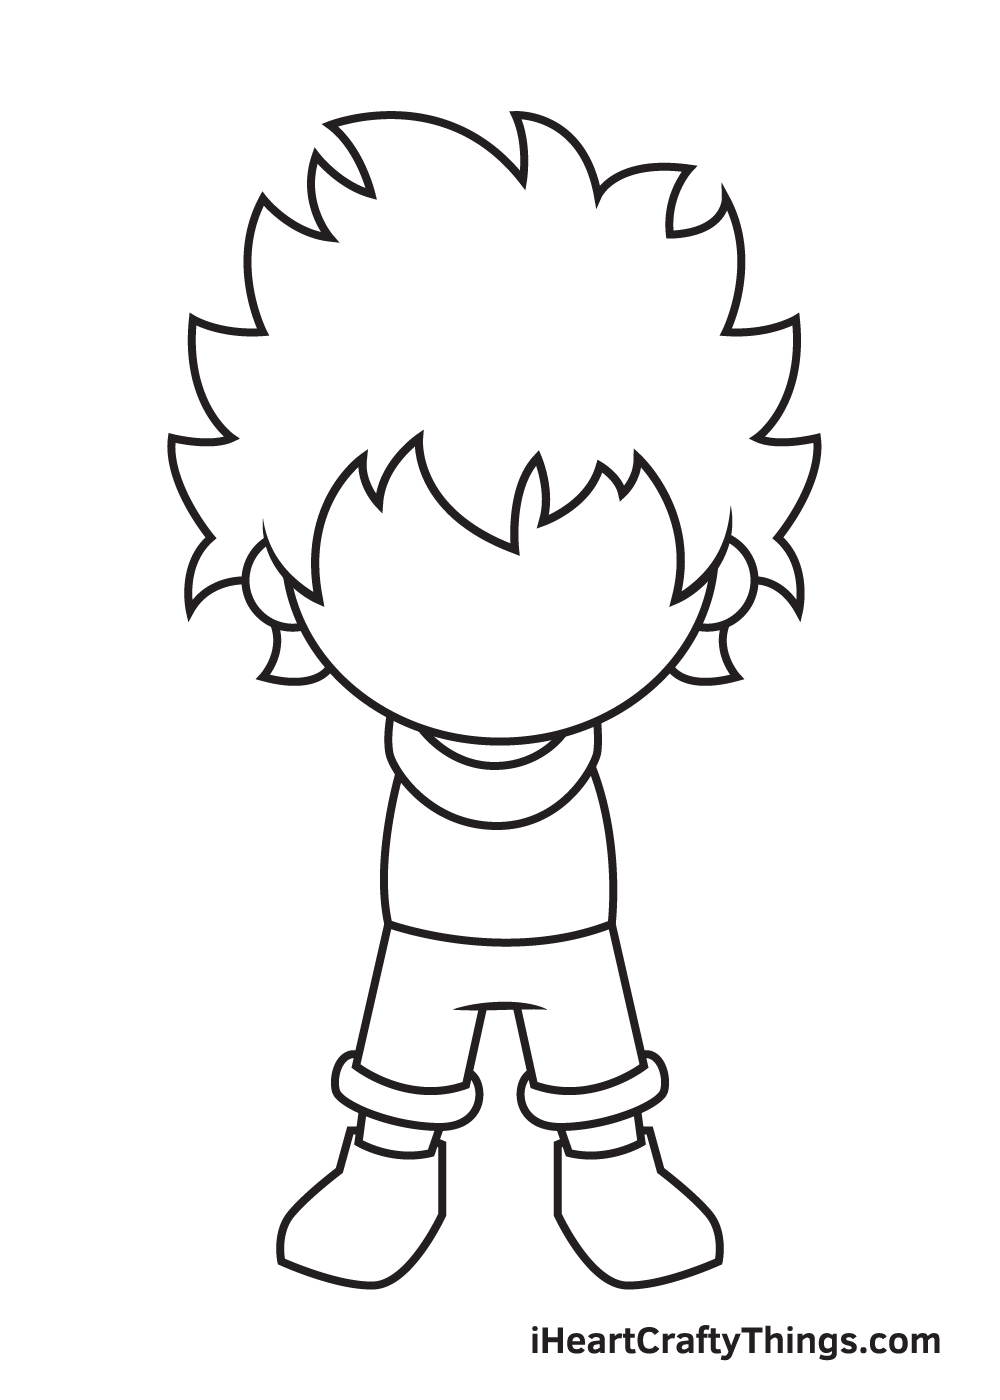
Step 7 – Draw the Left and Right Arm of Deku
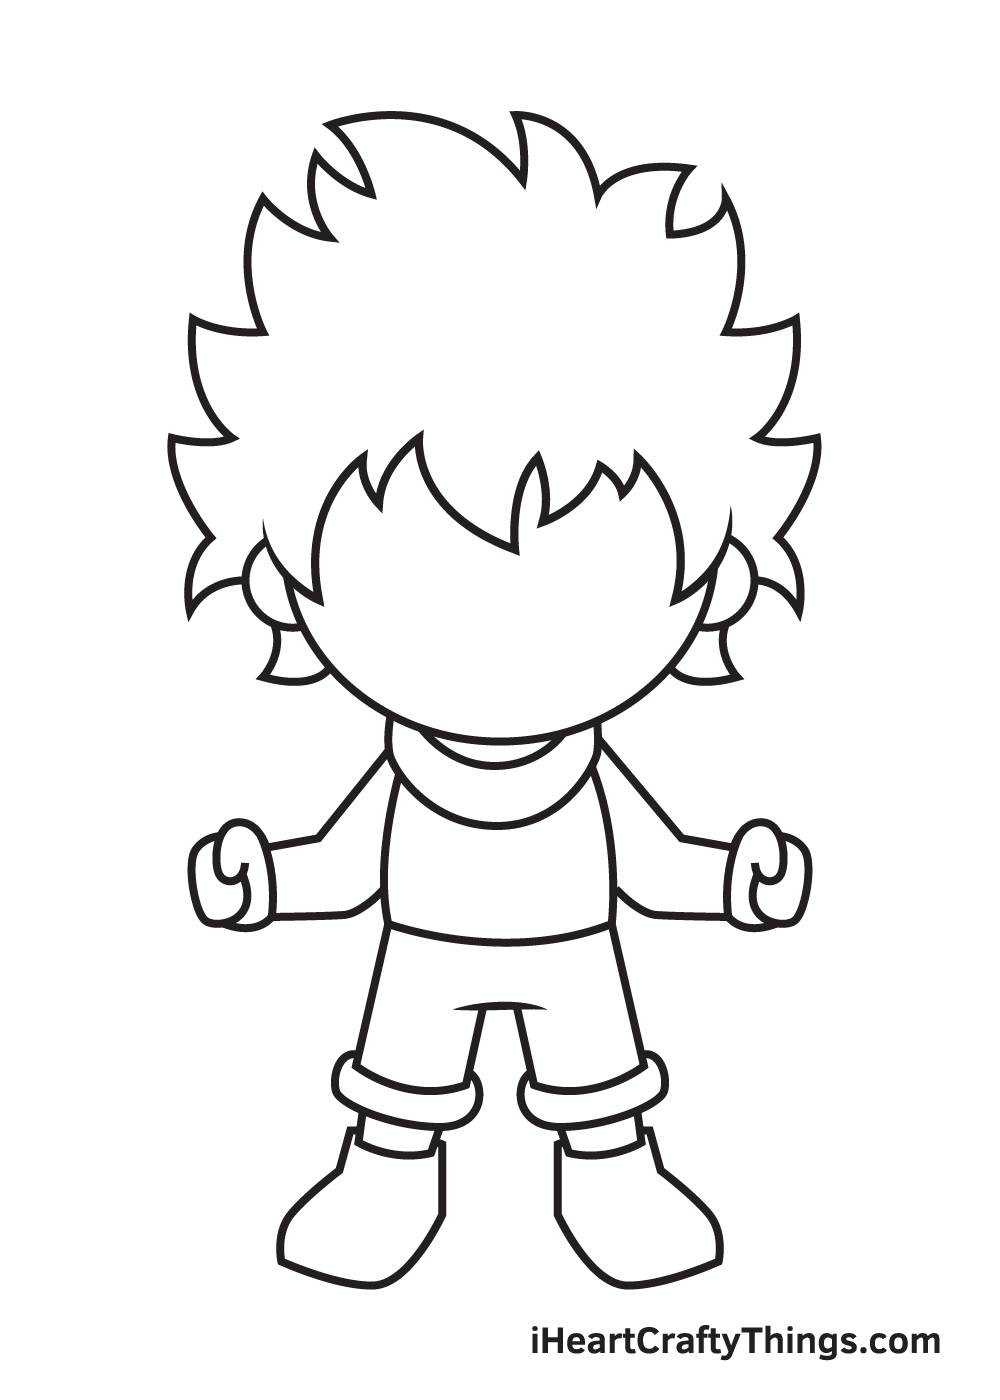
Proceed by drawing a narrow, angled shape forming the arms. Afterwards, draw a closed fist directly connected to each arm.
As you can see in the illustration, the arms of Deku facing the opposite directions.
Step 8 – Draw the Facial Features of Deku
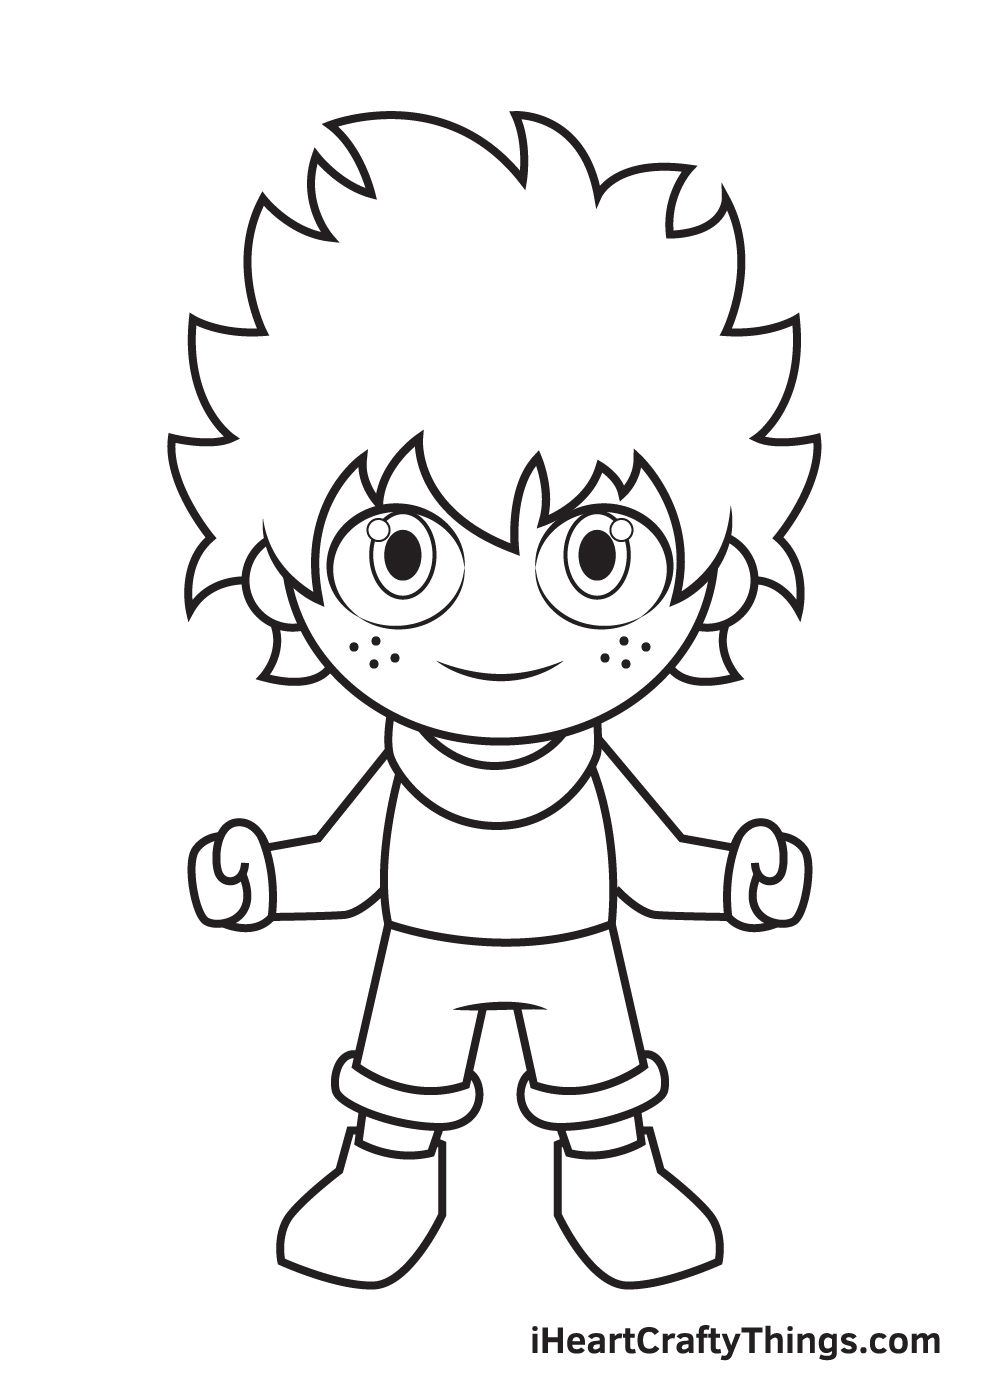
In this step, we will now be working on the features on Deku’s face. We will start with eyes and work our way downwards towards the mouth.
Draw two large uneven circle shapes side by side to create Deku’s eyes. Then, draw a standing oval shape with an inner oval shape inside each eye to create the pupil and the iris respectively.
Afterwards, draw a tiny circle overlapping on the upper part of the pupil. Afterwards, shade the entire iris.
To create the freckles, draw multiple tiny dots underneath each eye on both cheeks. Then, draw a wide curved line in between to add a huge smile on Deku’s face.
Step 9 – Now, Add Details on Deku’s Clothing
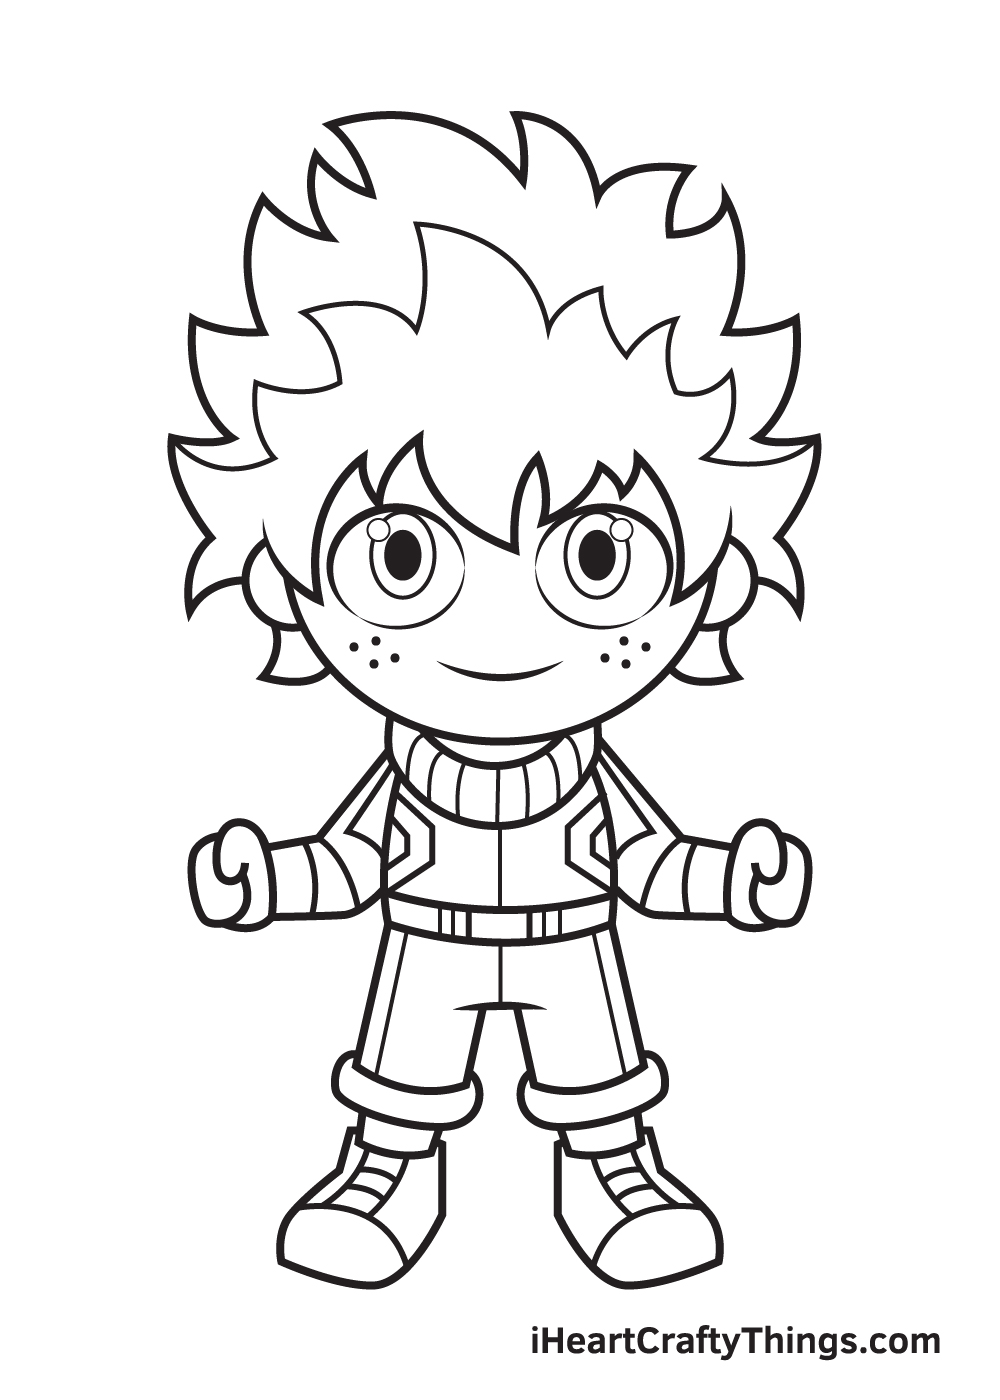
Use the illustration as a guide to help you draw the patterns on the collar, shirt, sleeves, trousers, belt, and shoes. Make sure you don’t overlook anything to complete Deku’s signature battle costume!
Don’t forget to draw an outline in the middle of Deku’s hair following the shape of his hair!
Now that we’ve successfully drawn Deku, it’s time for the part you’ve probably been waiting for—choosing the colors and coloring your drawing!
This is the part where you can showcase your artistic skills and mix and match various colors.
Deku has dark green hair while the color of his outfit is identical to the color of his hair but there are some parts that are colored black and white. His belt and shoes, on the other hand, are red in color.
You can opt to use the original color scheme of Deku or use a unique set of colors. Either way, we’re sure the colors will turn out beautifully!
Have fun playing with colors and watch as Deku ultimately comes to life!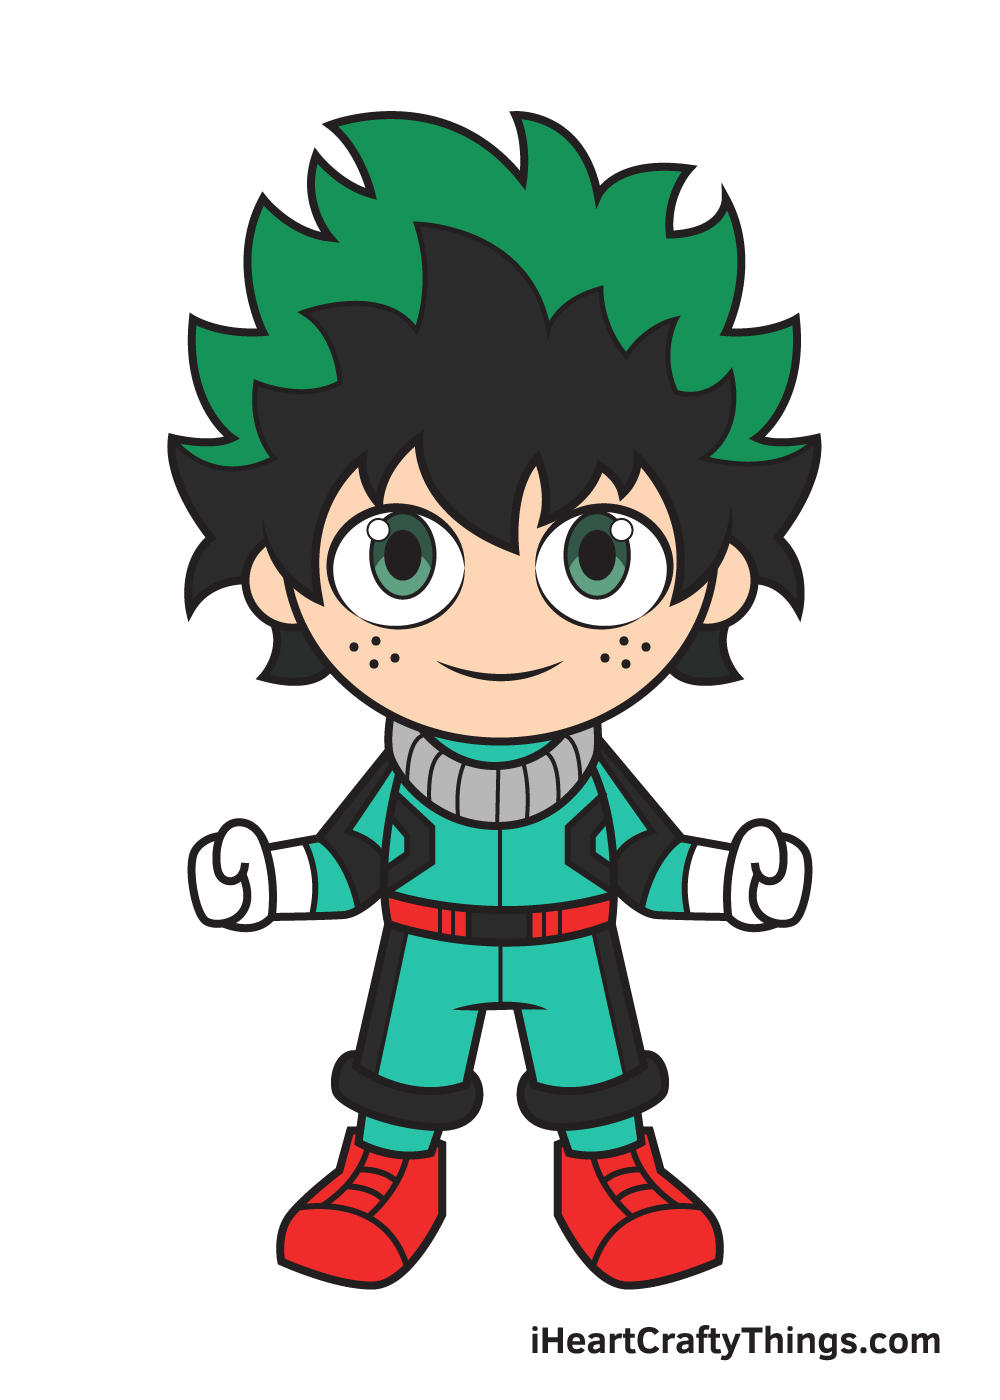
Here’s how you can make your Deku drawing even better…
Make your Deku sketch look even better with these 4 fun ideas to try out!
This drawing of Deku shows him done in a simple, cute cartoon style. This style looks great, but you could also portray him in different animation design styles.
For example, maybe you could use the anime and manga to help you as you draw him to emulate those styles.
These new versions could even be shown next to this cartoon one for extra emphasis on the different styles.
What other styles of animation can you think of that you could use?
Whether you stick with our design or add some new versions to this Deku drawing, it would be fun to add other characters from the series.
There is such a wide roster of characters that you could add! You could pick your favorite heroes and villains from the series and maybe try to portray them in the style that you chose for Deku.
Which of your favorite characters would you like to add to this artwork?
Once you have decided on the characters you would like to include, you may also want to add a background. Doing this would be a great way to replicate your favorite scenes and moments from the series.
Once again, if you stuck with the cartoony style of this design then you could draw the background in a similar style. If you’re feeling extra creative, you could even design a unique setting for him to be in!
Where do you think Deku could be in this drawing?
Finally, you could put your own spin on this Deku sketch by playing around with colors and art mediums. The colors we used for this drawing are inspired by the series, but you could also give him a color makeover.
Or, you could make the colors have a different intensity by using softer or more intense art tools and mediums. There are so many ways you can use colors to make a drawing look completely different.
Your Deku Drawing is Complete!
It was a lot of fun learning how to draw Deku, isn’t it? With the help of this extensive guide, it doesn’t matter if you’re a beginner or an expert in drawing—anyone can draw Deku by following the instructions listed above.
Which animated character would you like to learn how to draw next? Let us know and we’ll do our best to fulfill your wishes.
In the meantime, check out our “How to Draw” catalog to see drawing tutorials of various animals, objects, and characters that you might find interesting!
Once you’ve finished your masterpiece, don’t forget to take a picture of your artwork and share it on our Facebook page and Pinterest.
Don’t be shy! We’re sure it looks incredible because you’ve worked hard for it.
We’re excited to see your awesome Deku drawing!