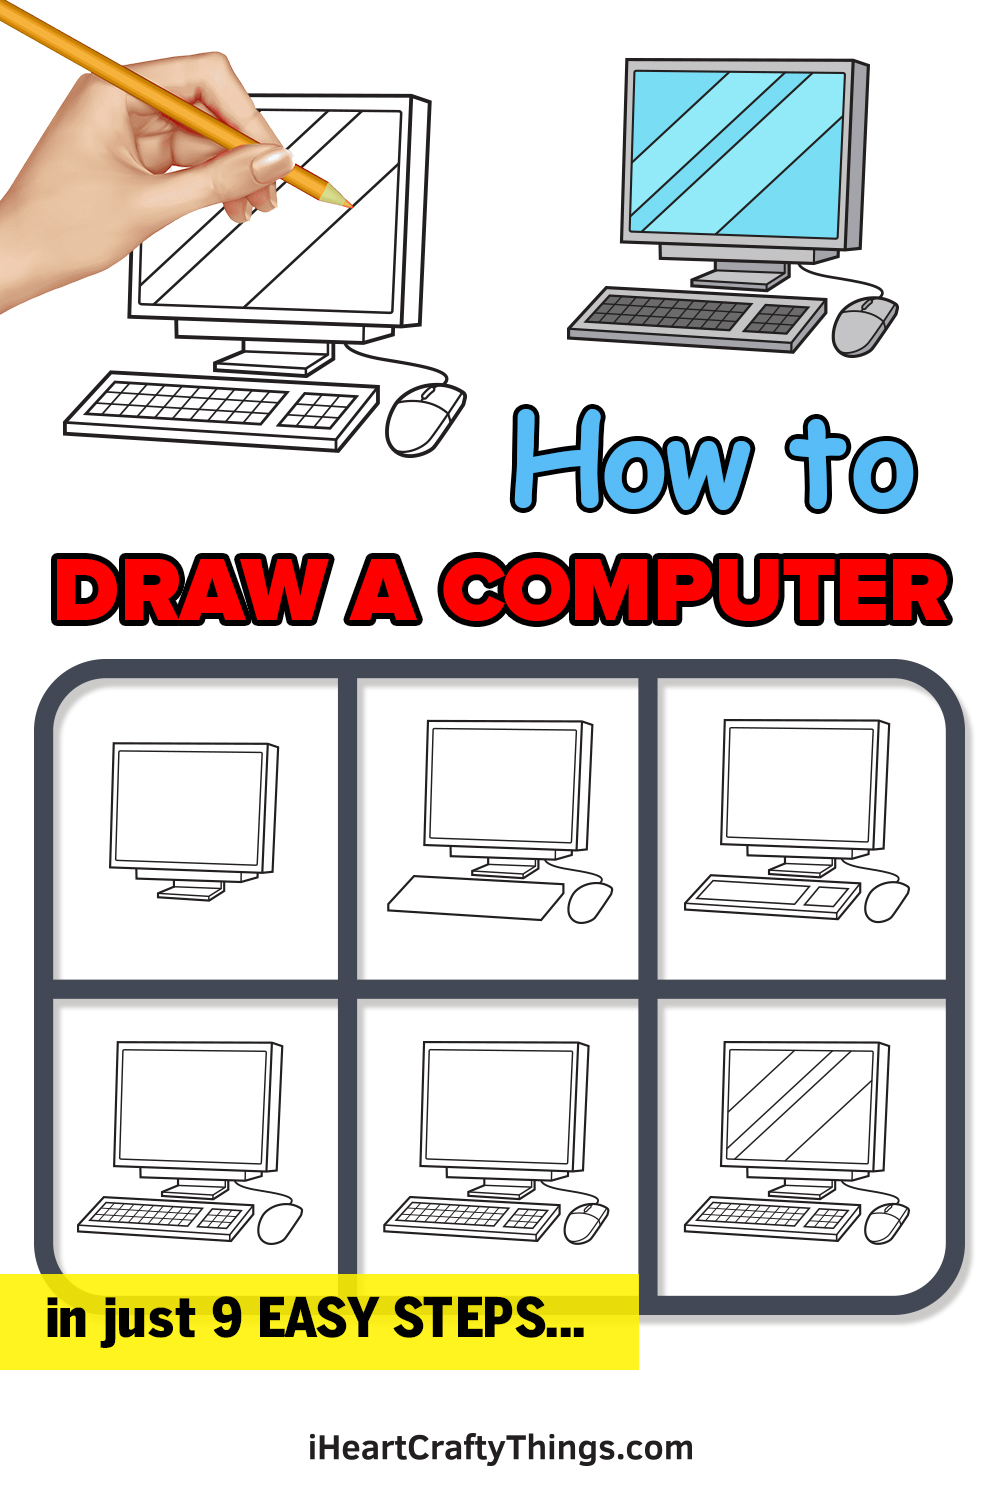
Design your dream setup with this guide on how to draw a computer! This tutorial for kids will show you everything you need to know about making this drawing.
We all use computers in some form or another pretty much every day. There’s a good chance you’re reading this on a computer, in fact!
There are so many computers and components that you can use for work, video games, content creation or whatever you need it for.
If you would like to design your very own computer setup, then this guide will show you how. I’ll take you through all of the steps and explain each one.
By the end, you will not only be able to make the drawing but also add your own background details and additional elements.
See How To Make Your Computer Drawing
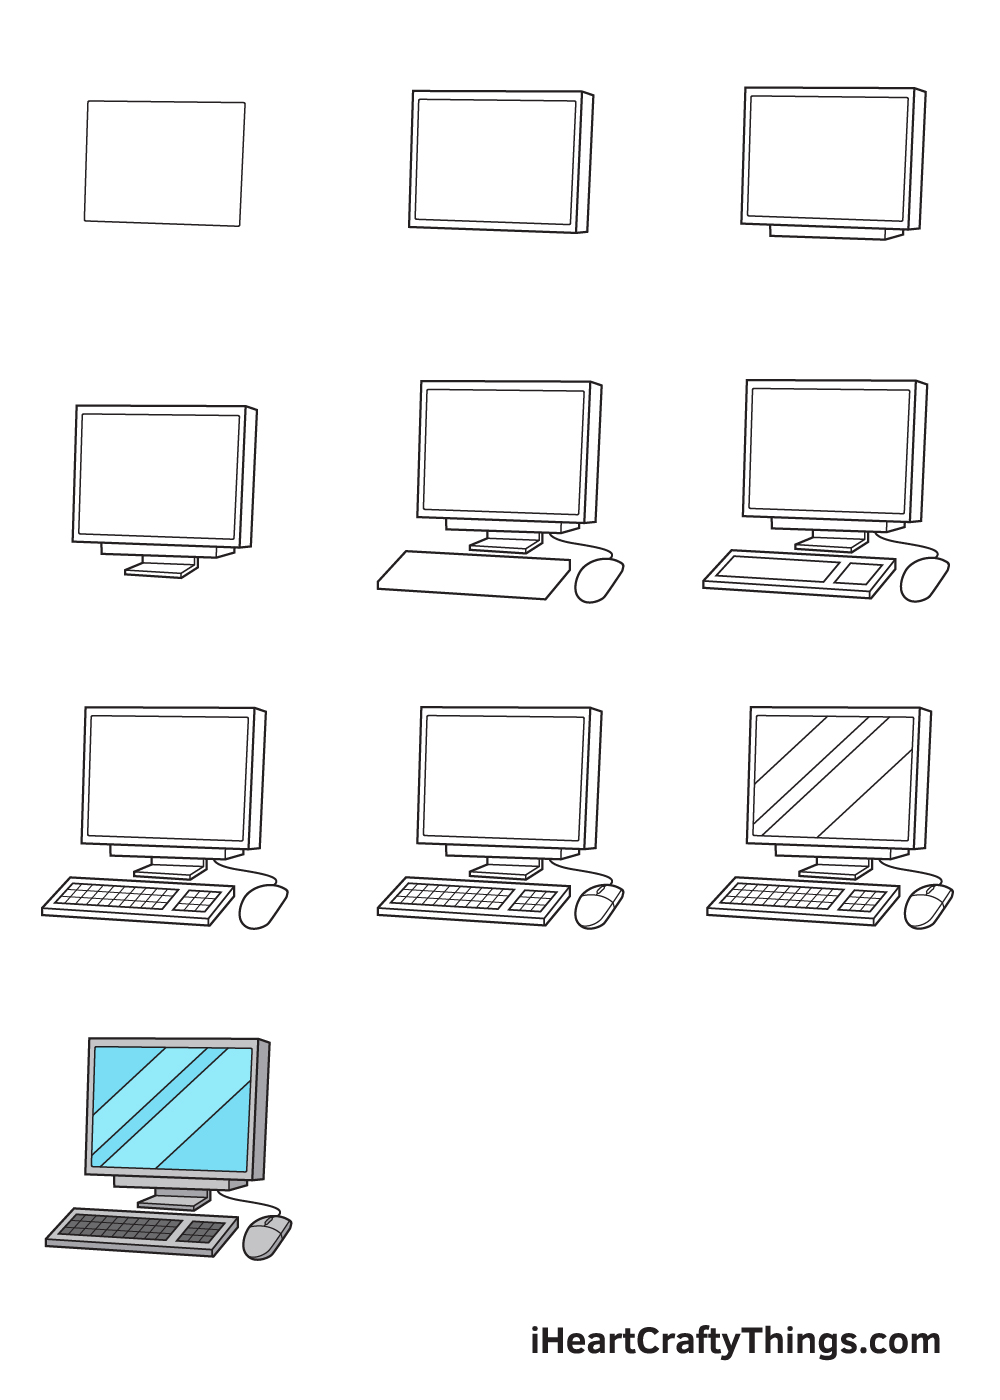
How to Draw a Computer – Let’s get started!
Step 1

On the upper portion of your paper, draw a square shape that is slightly tilted sideways. When drawn correctly, the shape should almost look like a parallelogram.
Don’t hesitate to use a ruler to assist you in drawing the straight lines for all four sides of the square. This will enable you to draw a flawless square shape quickly and effortlessly.
Step 2 – Draw the Inner Outline of the Monitor
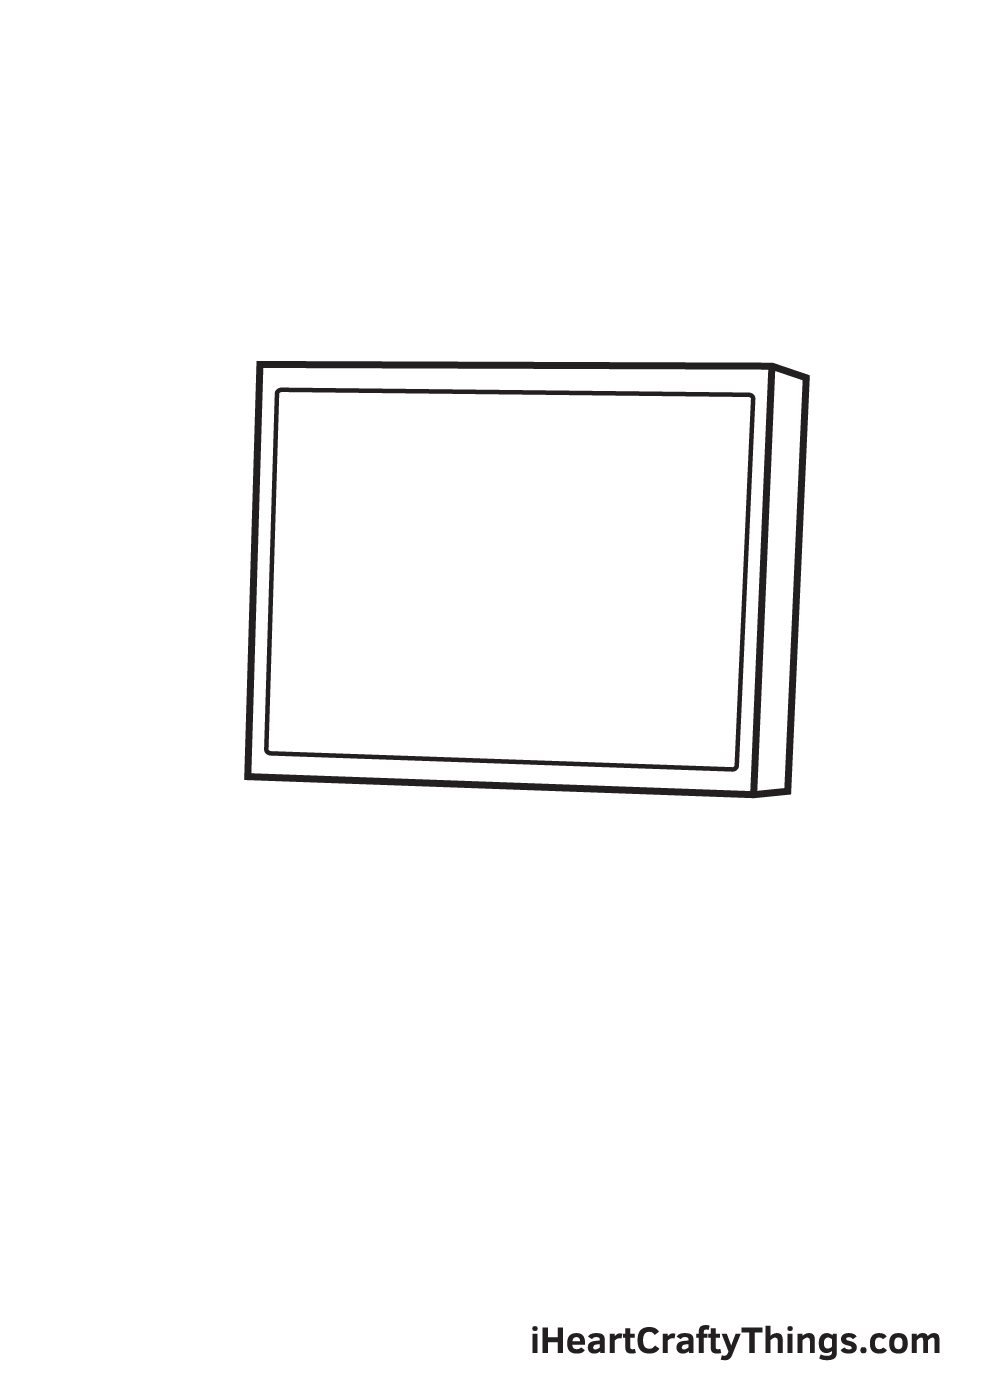
Draw a square shape outside the outline we drew in the previous step.
Make sure to draw another line parallel past the right edge of the monitor to give it a three-dimensional appearance. This will help make your computer drawing stand out more.
Step 3 – Structure the Foundation of the Monitor
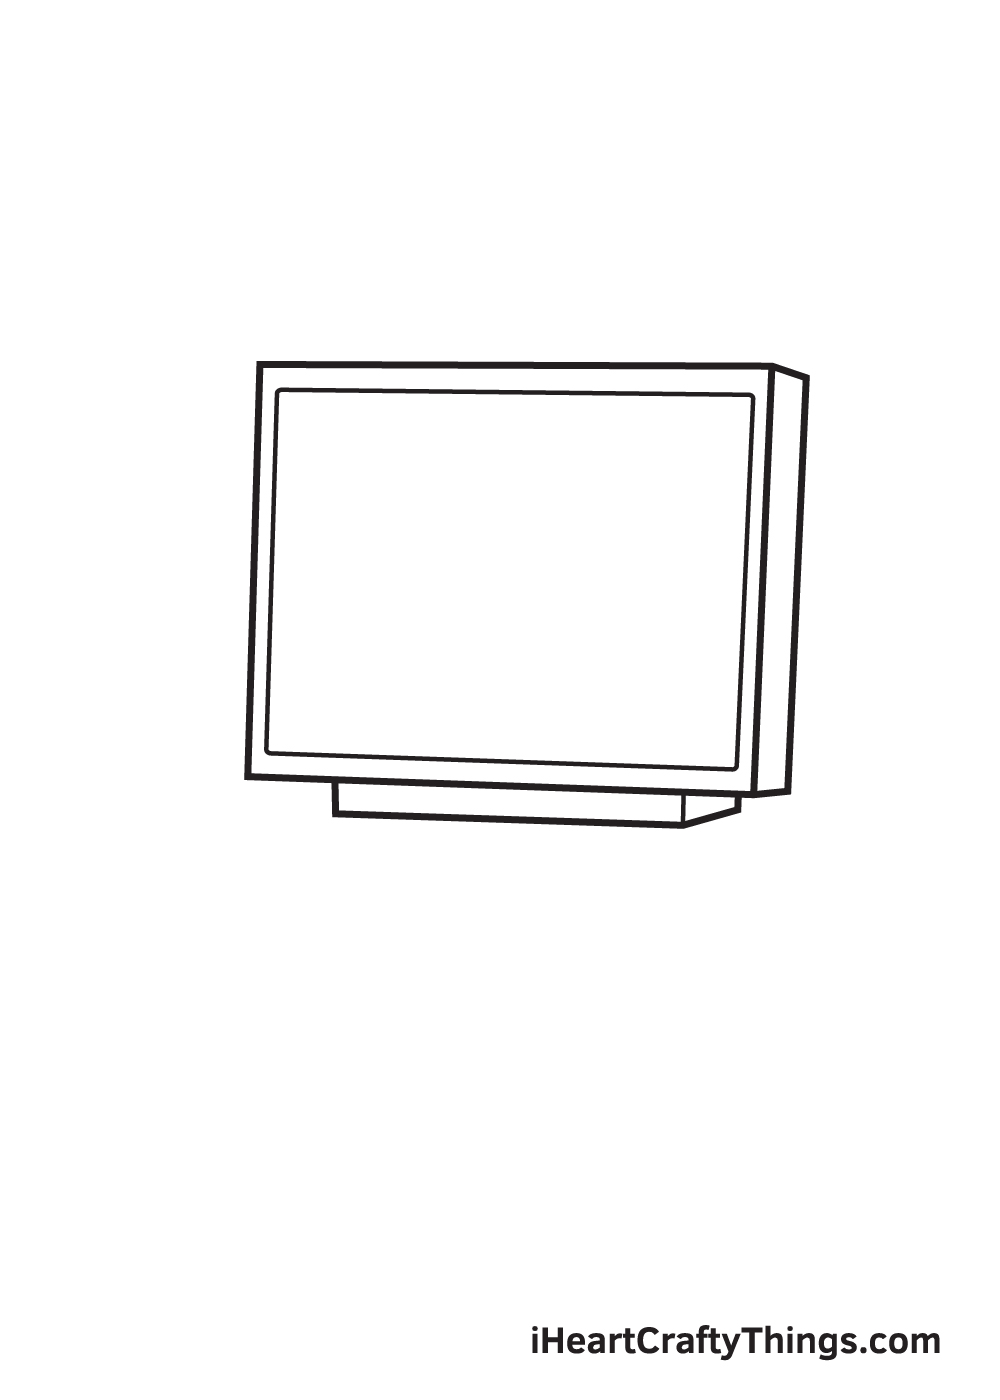
Continue by drawing a narrow rectangular shape below the monitor.
This will serve as the support of the monitor attached to the stand, which we will be drawing in the next step.
Step 4 – Afterwards, Draw the Monitor’s Stand
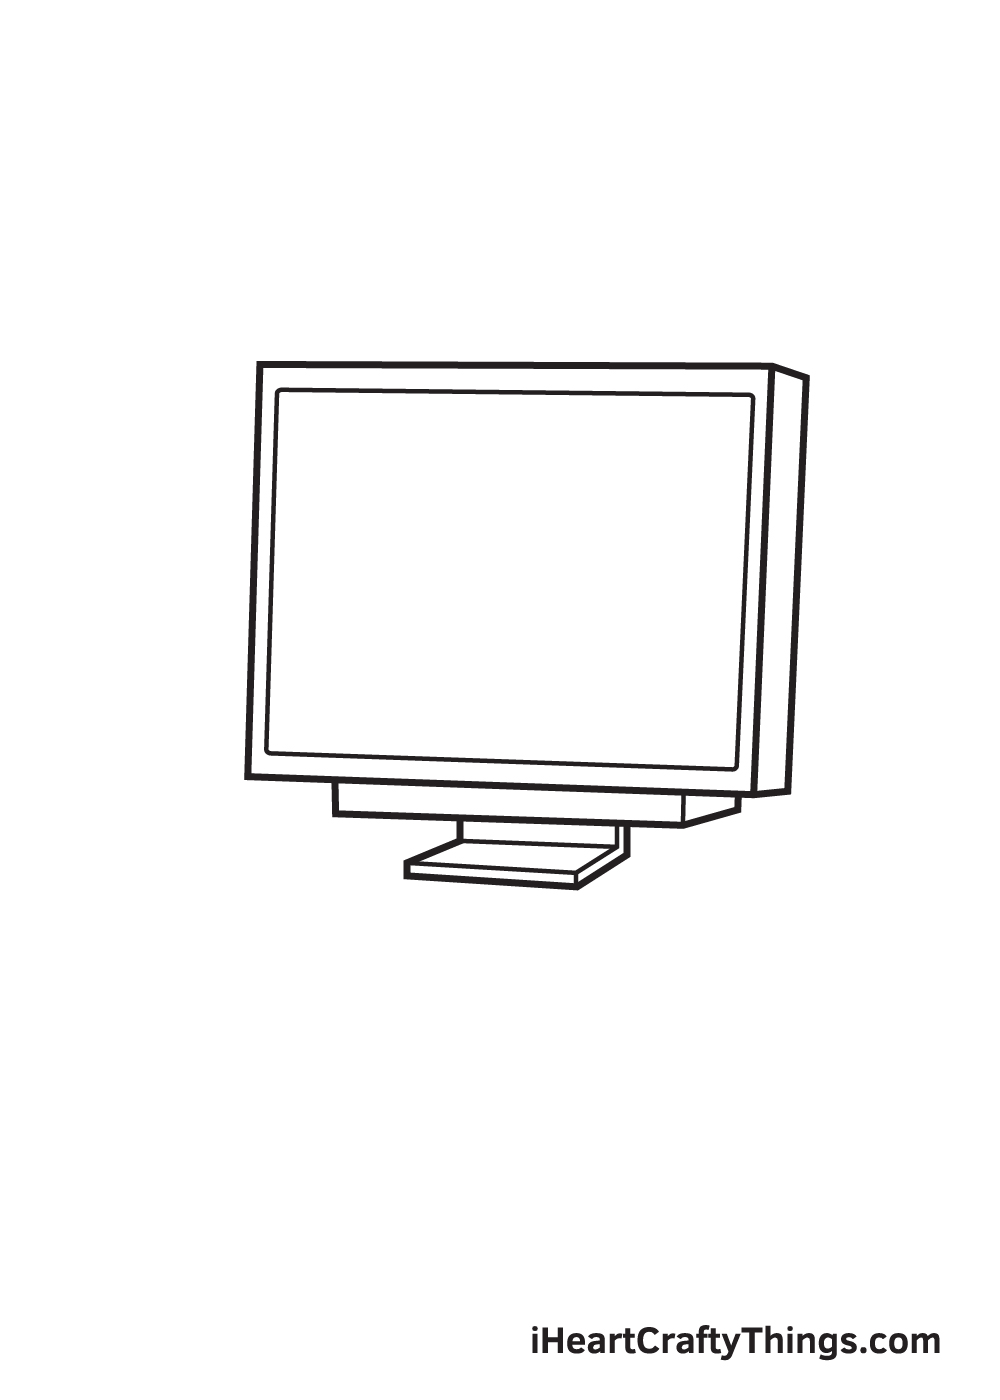
Right underneath the rectangular shape we drew in the previous step, create the stand of the monitor by drawing two connected rectangular shapes.
The first one should be upright while the other one is laid flat on the surface, as shown in the illustration.
There are also monitor stands in various forms, so don’t hesitate to draw whichever you prefer!
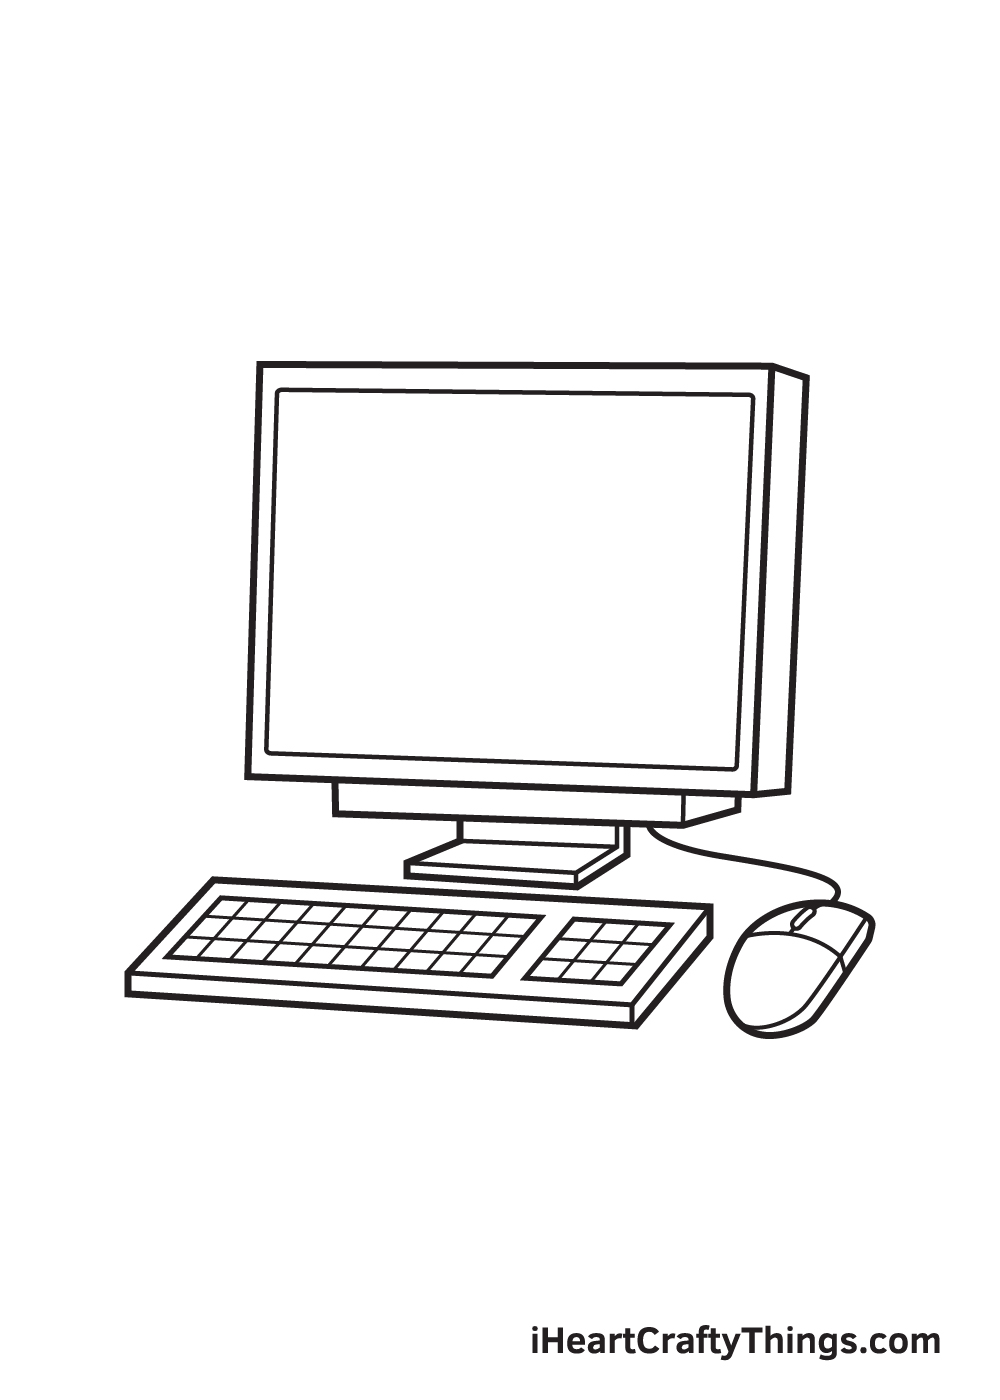
Step 5 – Outline the Keyboard and the Mouse
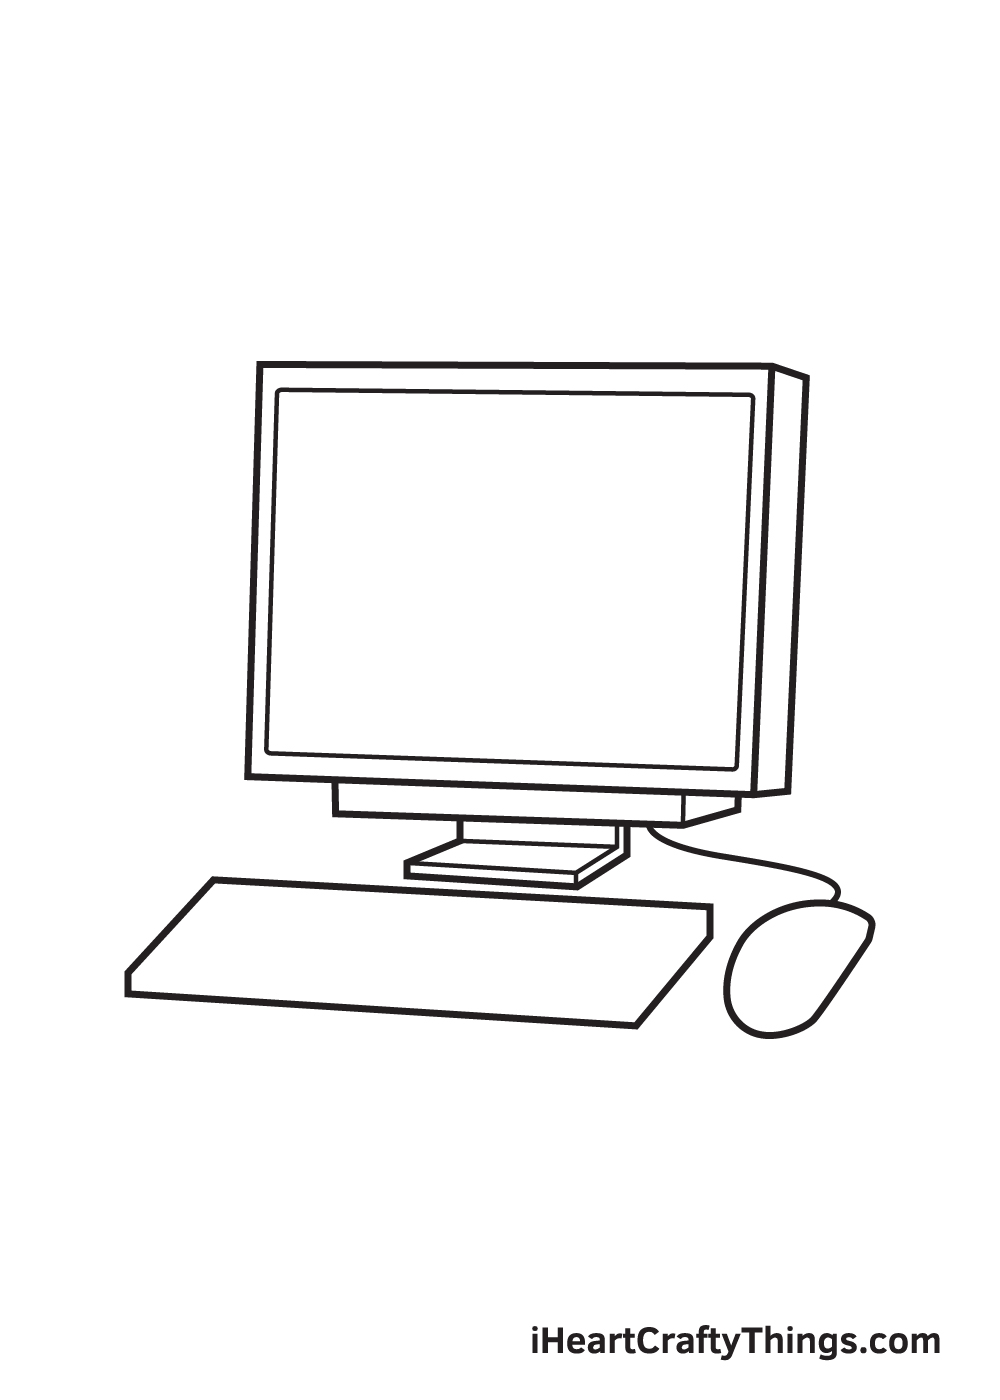
Now that we have successfully drawn the monitor and its features, we will be working on the keyboard and the mouse next.
In order to create the keyboard, draw a parallelogram shape. The mouse, on the other hand, can be formed by simply drawing a diagonal, irregular oval shape with a flat bottom.
Step 6 – Now, Outline the Keypad in the Keyboard
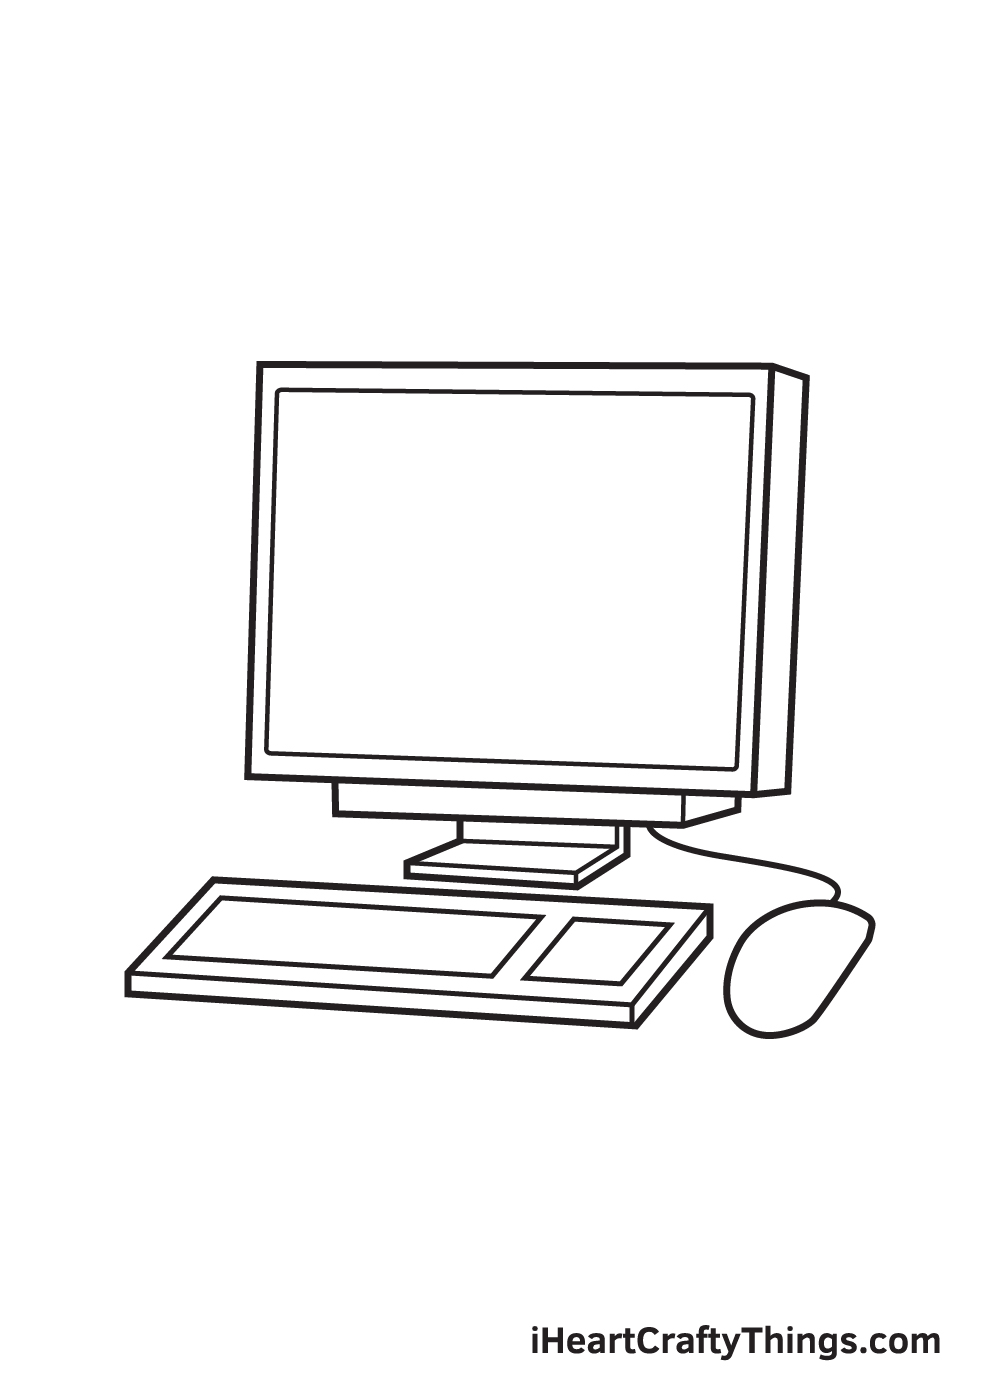
Within the keyboard, draw a tilted rectangle shape on the left side and a tilted square shape on the right side. This outlines the keypad where all the alphabetical and numerical keys will be placed.
Bear in mind that the outline of the keypads should be aligned with the outline of the keyboard to keep it symmetrical.
Step 7 – Draw All the Keys in the Keyboard
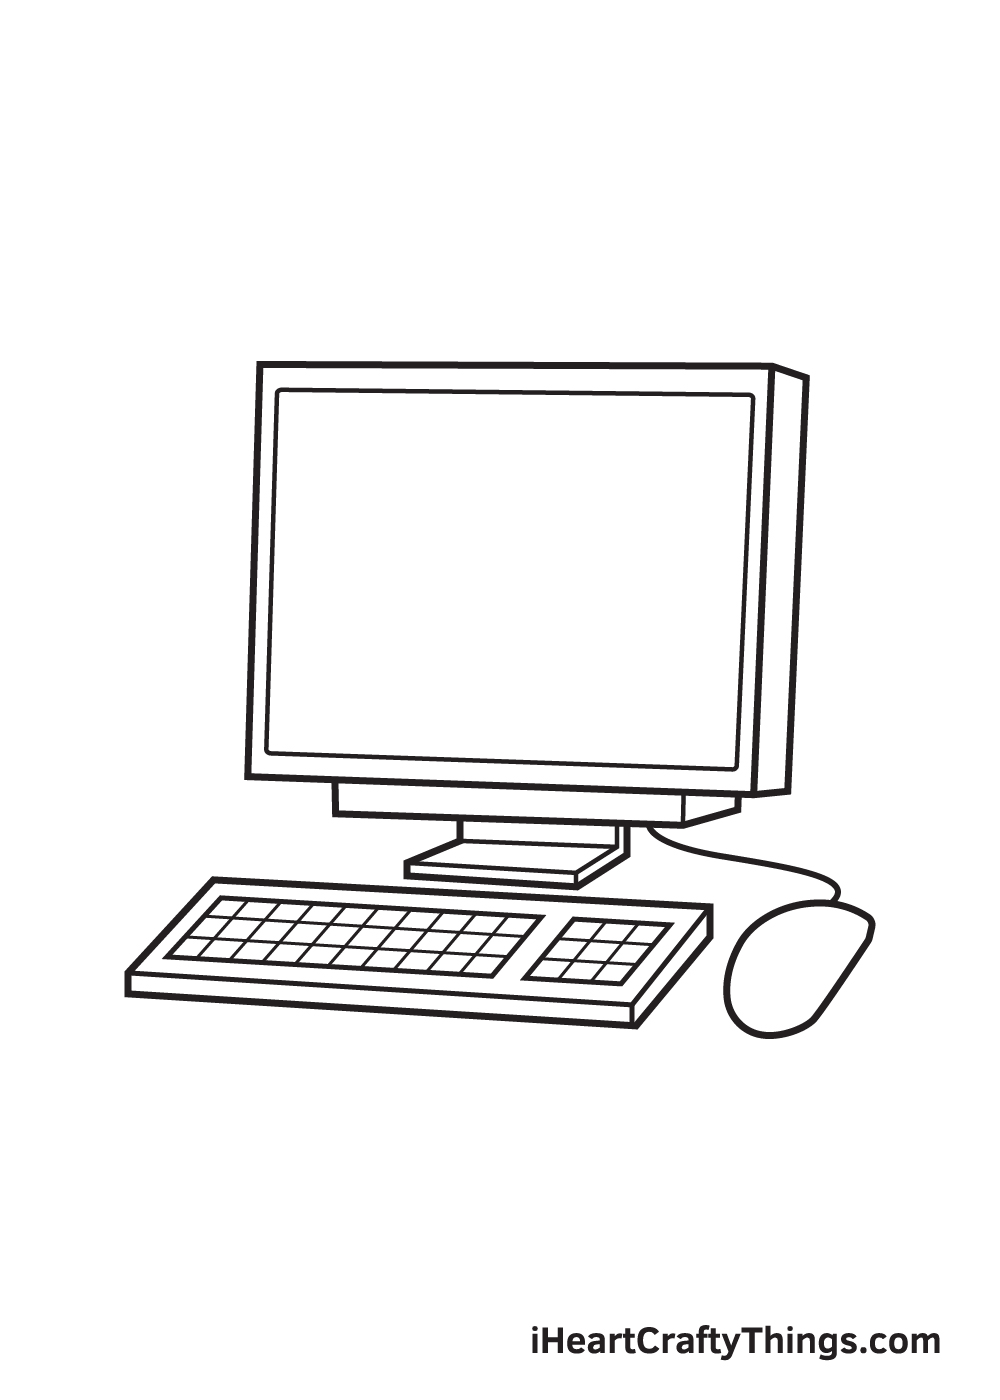
Draw overlapping horizontal and vertical lines inside both the alphabetical and numerical keypad. When drawn correctly, it should look like a square grid, as shown in the illustration.
Make sure that the spaces and lines of the keys are even and proportional by using a ruler.
Step 8 – Add Details and Patterns on the Mouse
We have completed drawing the details of the keyboard in the previous step, now it’s time to add the features of the mouse in your drawing.
Start by drawing a horizontal line across the mouse, dividing it between the top and the bottom. Afterwards, draw the scroll wheel right above the line. The scroll wheel should be situated in the middle, in between the left and the right button.
Don’t forget to draw a line at the bottom following the outline of the mouse to create a dimensional effect!
Step 9 – Add Patterns on the Monitor
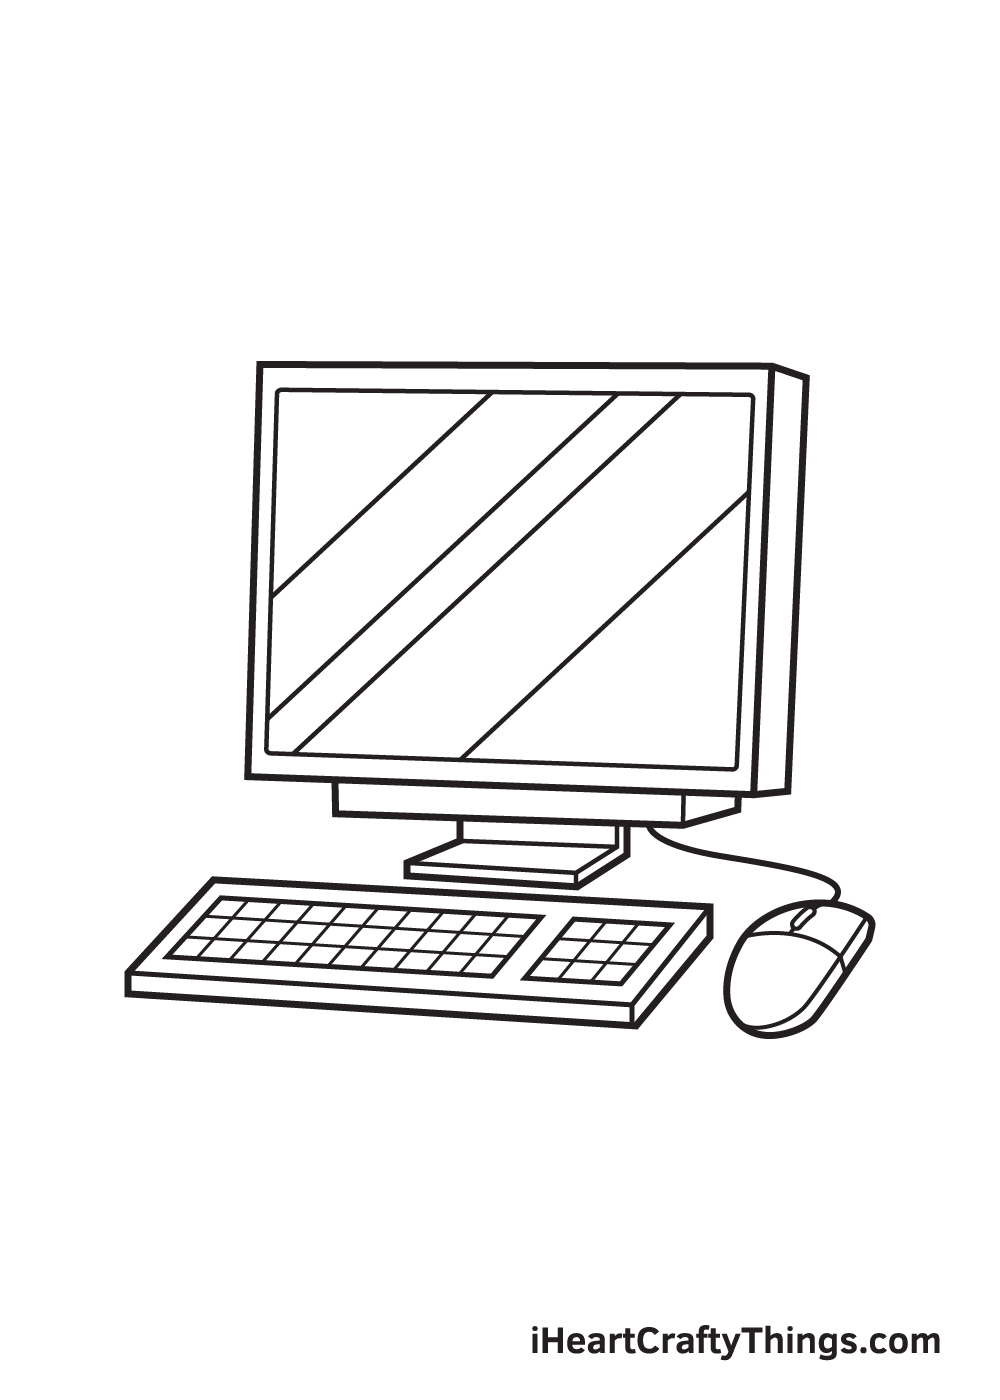
Draw multiple diagonal lines across the monitor to create an illusion of “reflection”. Screens, like computer monitors, are typically reflective, thus they create visible diagonal patterns.
By adding these lines on the surface of your monitor screen, your drawing will look more realistic!
As you can see in the illustration, our computer drawing has finally come to life! Now, all it’s missing is a splash of colors to make your drawing colorful.
Now, it’s time for the most exciting and fun part—picking the colors and coloring your drawing! This is the part where you can showcase your artistic skills
Computers used to come in colors black and white only. However, in today’s modern world, computers now come in a broader range of colors, including gold, silver, rose gold, and other vibrant colors! This gives you a lot of color options when coloring your drawing.
Go ahead and pick your favorite colors and use them to make your computer colorful!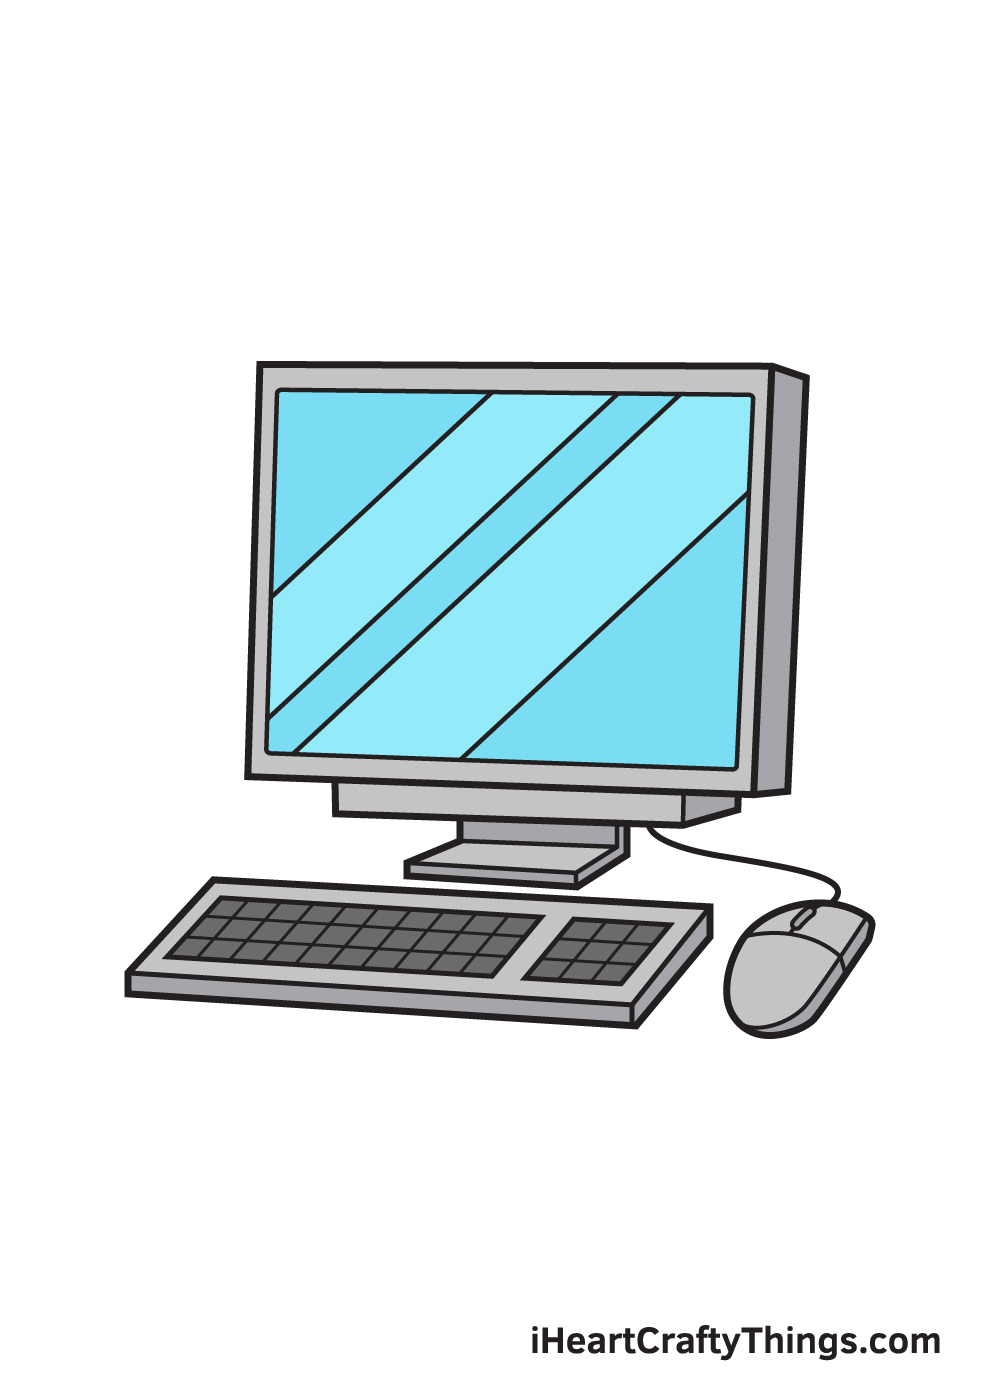
5 Tips To Make Your Computer Drawing Even Better!
These tips on how to make your computer sketch even better will make it even cooler!
Computers can be used for many things, from typing documents to playing the latest games. You could show what this computer is being used for by adding some details.
If you wanted to do this, simply remove the reflective lines from the screen so it’s blank. Then, you could add whatever activity you want to the screen.
We mentioned two possibilities, but what else do you think this computer drawing could show off?
This drawing of a computer has the basics with a keyboard and mouse, but there are other accessories that computers can have. Some examples would be headphones, USB devices or gaming controllers.
You could show what you would be using with this computer by drawing some more objects around it!
Taking the previous suggestion even further, you could make this computer sketch even more complete with a background. You could draw it on a desk and show what else you would have on it.
This could include those accessories we mentioned before but could also include some more ordinary objects. Maybe there could be a pot plant or a mug for a few ideas.
What else could be on the desk beside this computer?
Computers come in many different shapes and sizes, so once you have the hang of this computer drawing you could create a different variation.
Maybe you or a family member have a desktop computer, and if that’s so then you could use it to help you change the screen or keyboard details. This would be a great chance to design your ideal computer setup!
Computers also come in many different colors, so you can really go to town with the colors you choose. These could be dark and muted or colorful, neon shades.
Additionally, you could also draw some stickers and other fun personalization details onto the side of the computer.
By playing around with art tools and mediums, you can also achieve some wonderful results!
Your Computer Drawing is Complete!
We hope you enjoy this step-by-step computer drawing tutorial. If you like using a computer, then you’ll definitely have fun drawing one!
The best part about this tutorial is that it gives you an opportunity to hone your artistic skills.
It gives you complete freedom to customize the drawing and handpick a unique set of colors that you will be using to color your drawing with.
We are always updating our catalog of “how-to-draw” series, so make sure you keep re-visiting our website to continuously enjoy newly uploaded drawing tutorials.
If you would like to see a drawing tutorial of a subject we haven’t covered yet, let us know about it!
Once you’ve successfully drawn a computer and colored it, don’t forget to show off your masterpiece.
Take a picture of your awesome drawing and share it on our Facebook page and on Pinterest.
We can’t wait to see your colorful computer drawing!