When it comes to animals that inspire fears and phobias, snakes will often be at the top of the list.
They can be big, small, colorful or dull and some are harmless as worms while others can be instantly deadly.
The cobra is one of the most recognizable of all snakes, and they are known for their hoods and their dangerous nature.
They may be one of the more feared snakes, but they are also one of the most beautiful, leading many to want to learn how to draw a cobra.
If you are looking to recreate this amazing creature then you have come to the right place!
Our step-by-step guide on how to draw a cobra will show you how you can draw this snake easily while having lots of fun!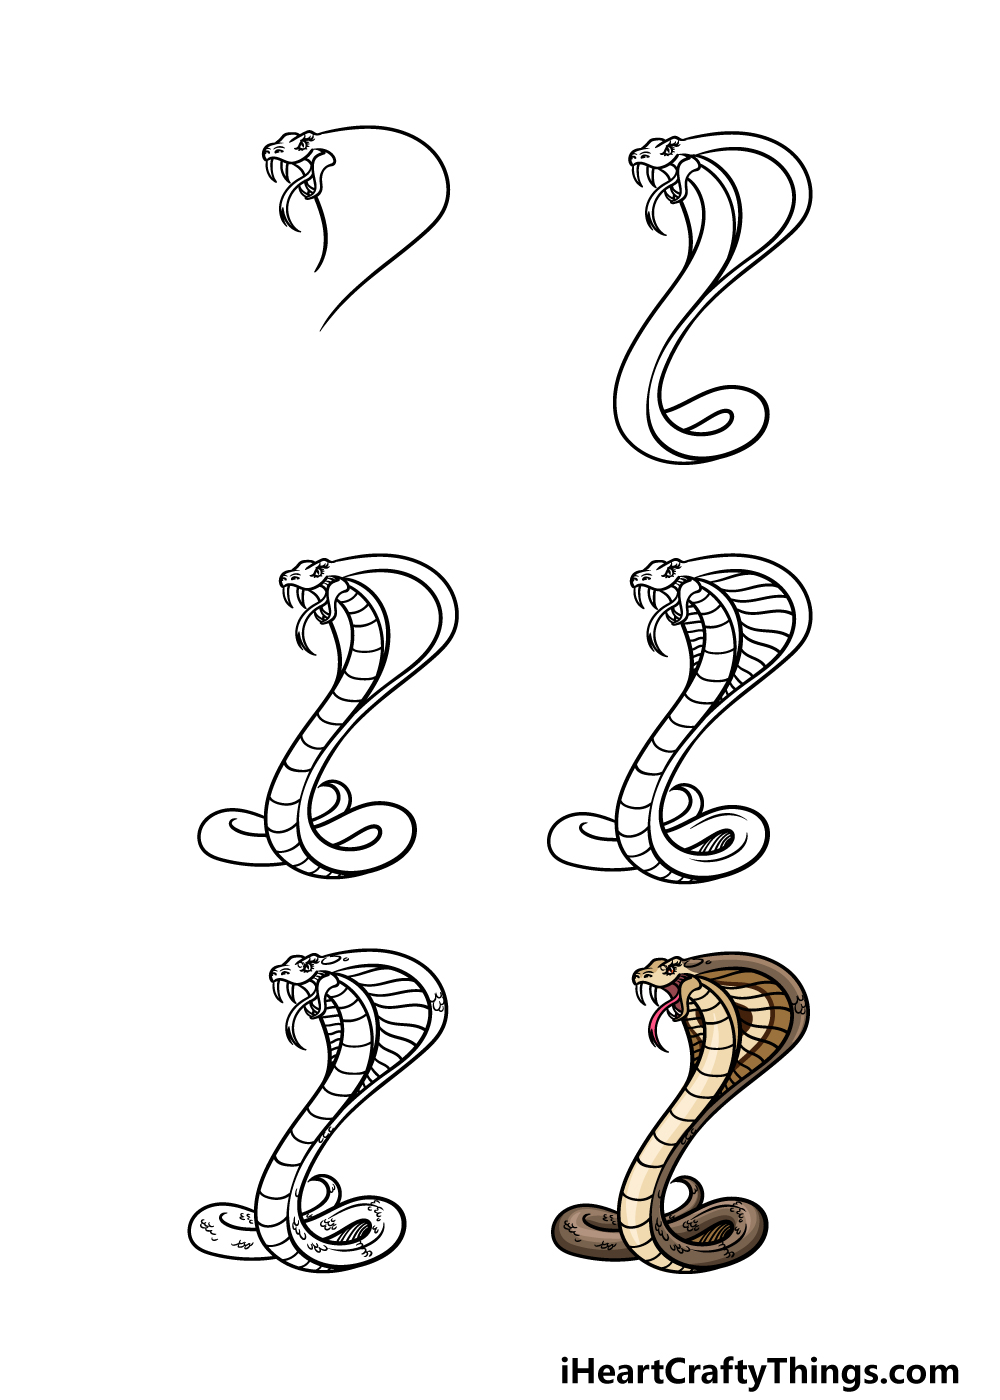
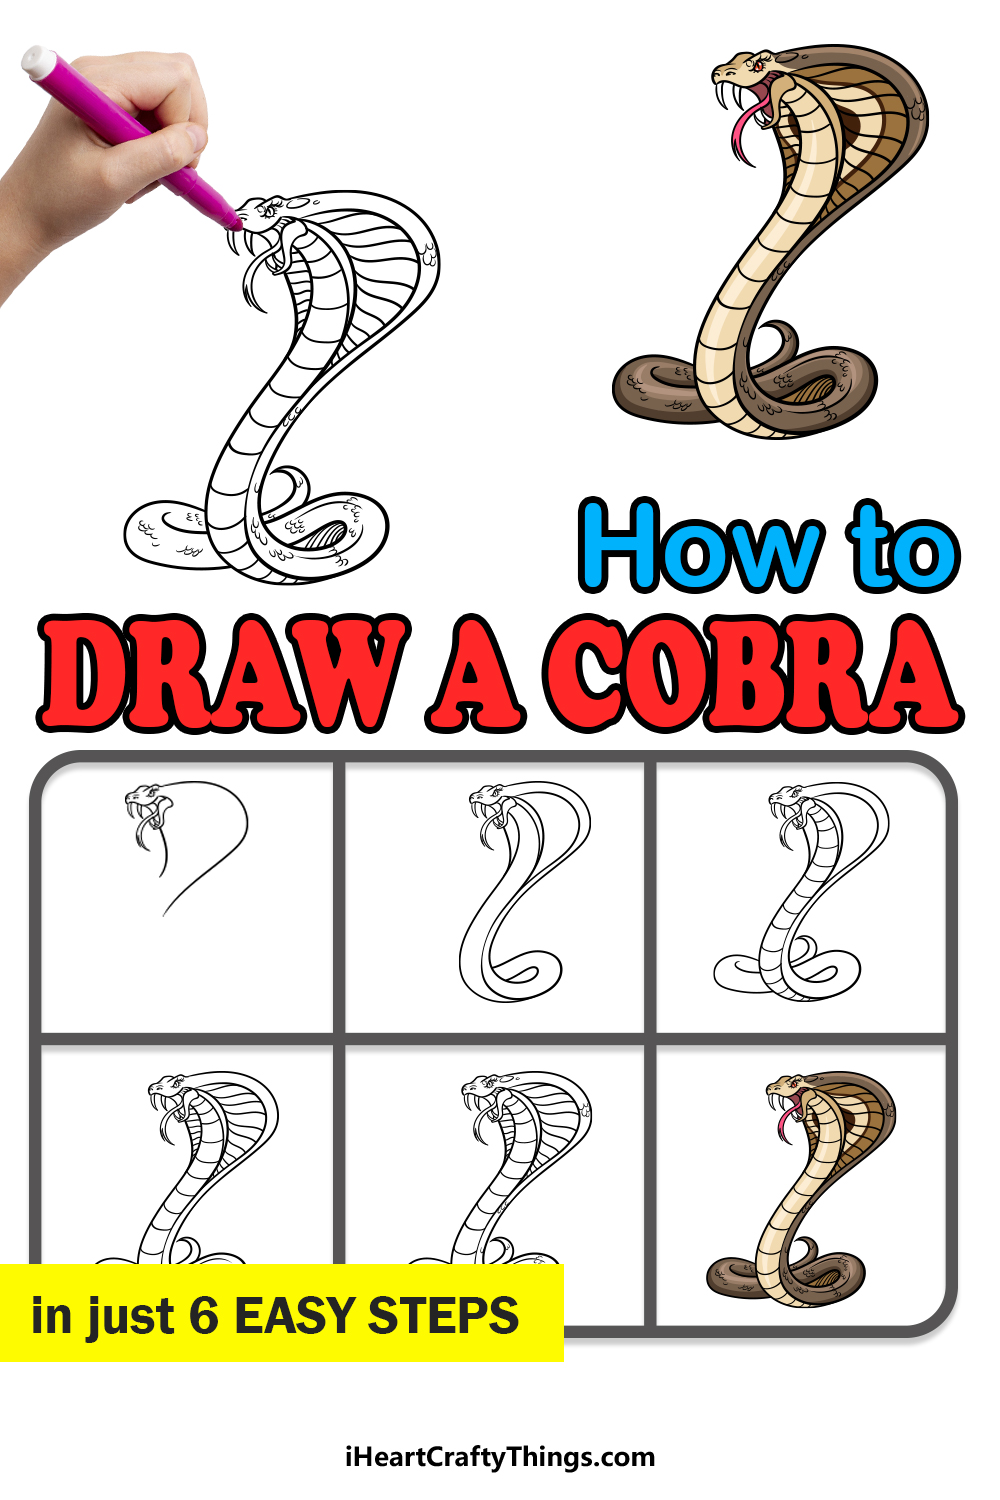
How to Draw A Cobra – Let’s Get Started!
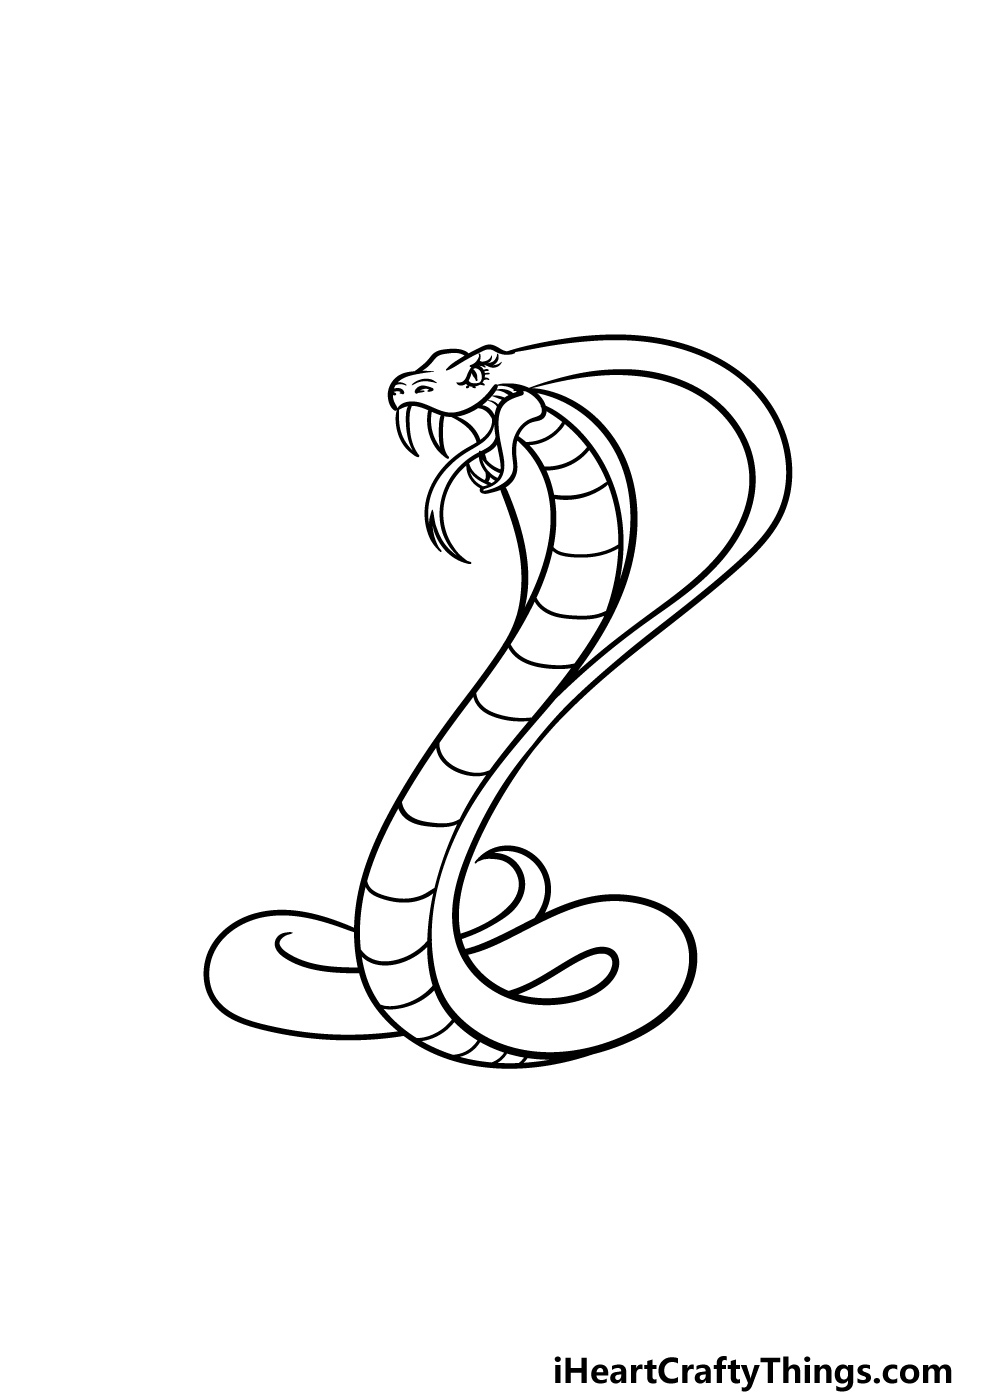
Step 1
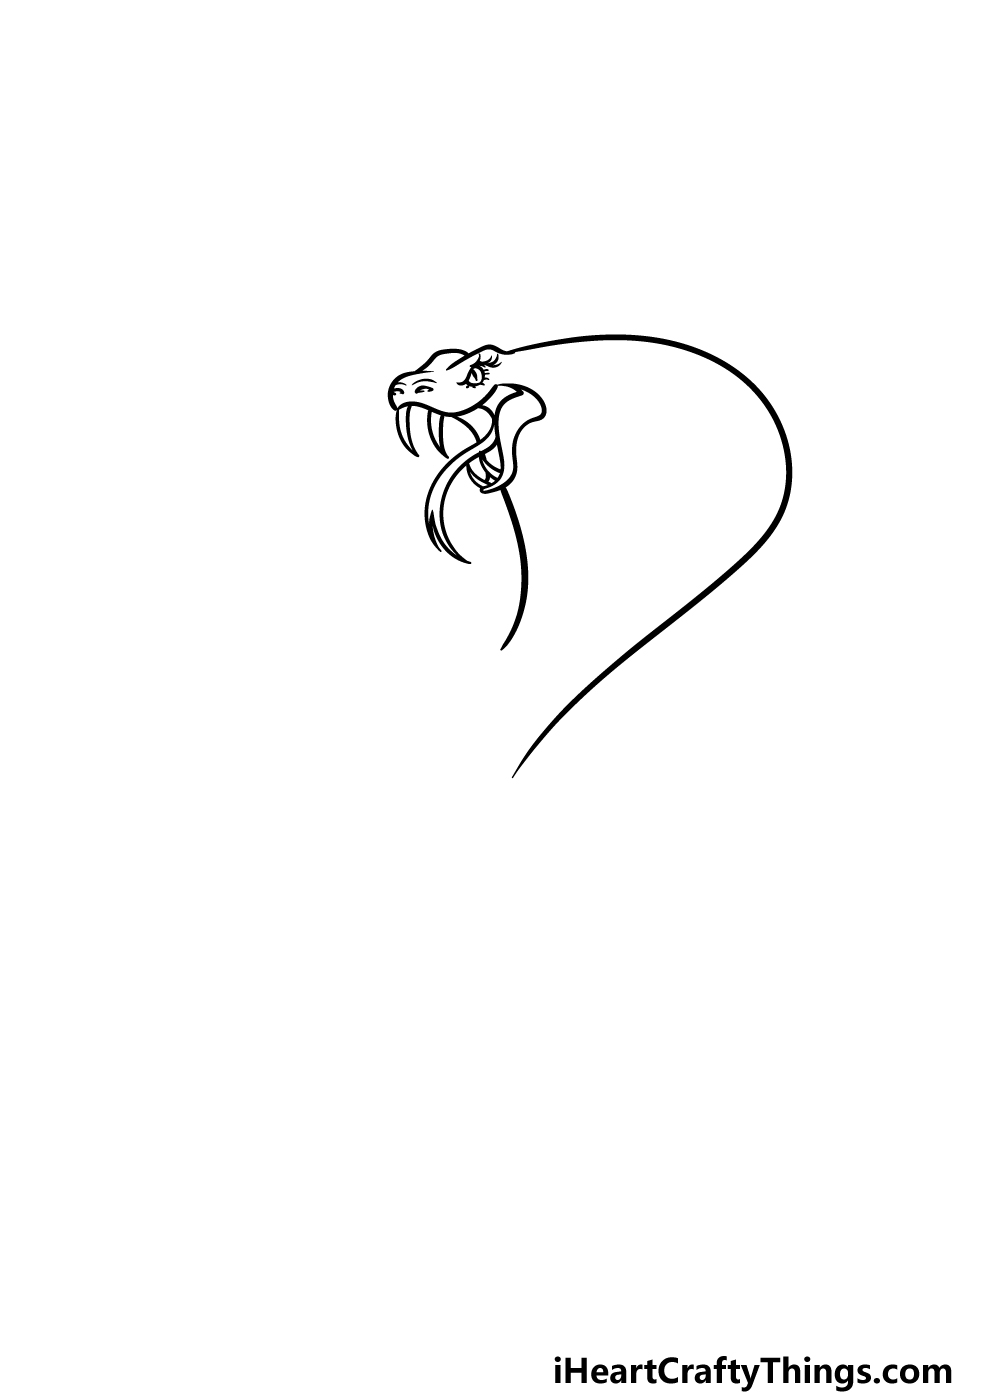
As mentioned in the intro, perhaps the most recognizable aspect of the cobra is the distinctive hood around their face.
That is what we will be starting with in this first step of our guide on how to draw a cobra. First, let’s start with the face.
Using some rounded eyes, we will be drawing the eyes, and they will be at an angle to make the cobra look nice and angry!
Then we will use some more curved lines for the top of the head. The mouth will go next, and it wouldn’t be much of a cobra without some fearsome fangs!
We will draw them using some curved lines that meet in a sharp point extending down from the roof of the mouth.
Finish off the mouth with the bottom of it, which will have two smaller fangs poking up. Then there will be some wavy lines for the forked tongue.
Finally, use some rounded, wavy lines for the hood of the cobra as shown in the reference image.
Step 2 – Next, draw more of the body and some hood details
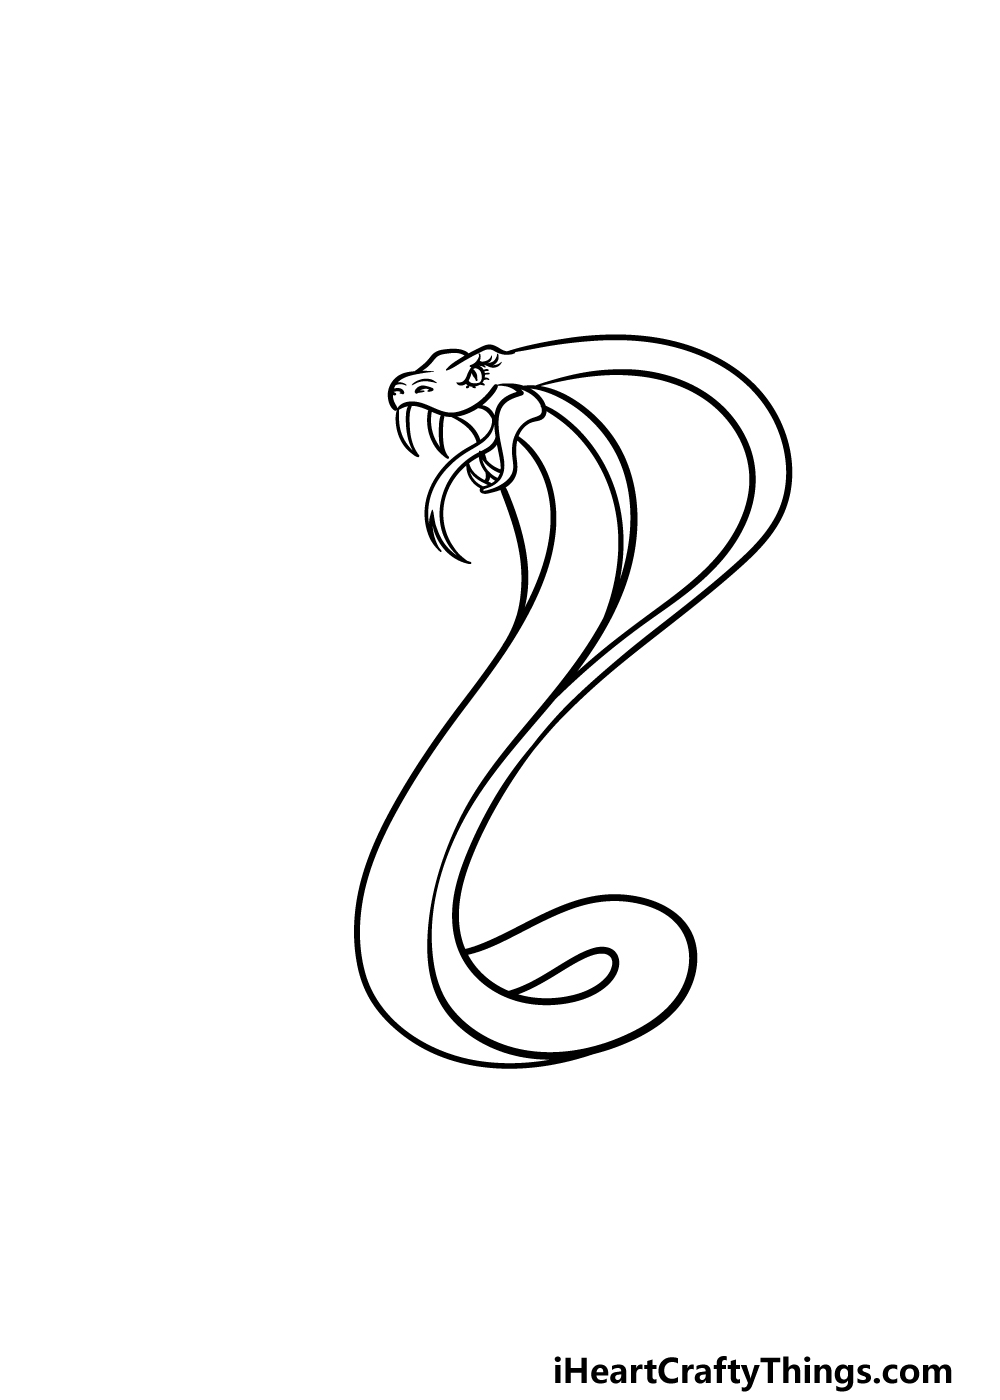
For this second part of your cobra drawing, we will be drawing some more of the body along with some detailing for what you drew in the previous step.
Start by drawing some lines coming down from the face, and then extend these lines until they twist into the lower body of the cobra.
This can be a bit tricky to get right, so make sure that you follow the reference image closely as you draw!
Then, we will add more rounded lines inside of the hood for some extra detail there. Once you’re happy with how it looks, it will be on to step 3!
Step 3 – Draw more detailing and the rest of the body
We will be adding some more details and parts of the body in this step of our guide on how to draw a cobra. First, draw some lines across the narrow front section of the cobra.
These lines represent ridges on the cobra’s body that help to provide friction as they slither around.
Then we will use some more rounded lines for the rest of the body outline, and these will end in a sharp point for the end of the tail.
Step 4 – Now, add even more detail to the cobra

Now that you have the outline of the body and head for your cobra drawing completed, we can start to add some more detail to it.
The main detailing that we will be adding in this part will be on the interior of the hood. Draw some wavy lines across the outer interiors of both sides of the inner hood for these details.
Then, we will add some shading details to the tail at the point where it is bent at the base of the snake.
Once you have drawn these details, we will be ready to finish off with some final touches in the next step before you color in your awesome drawing!
Step 5 – Finish off your cobra drawing
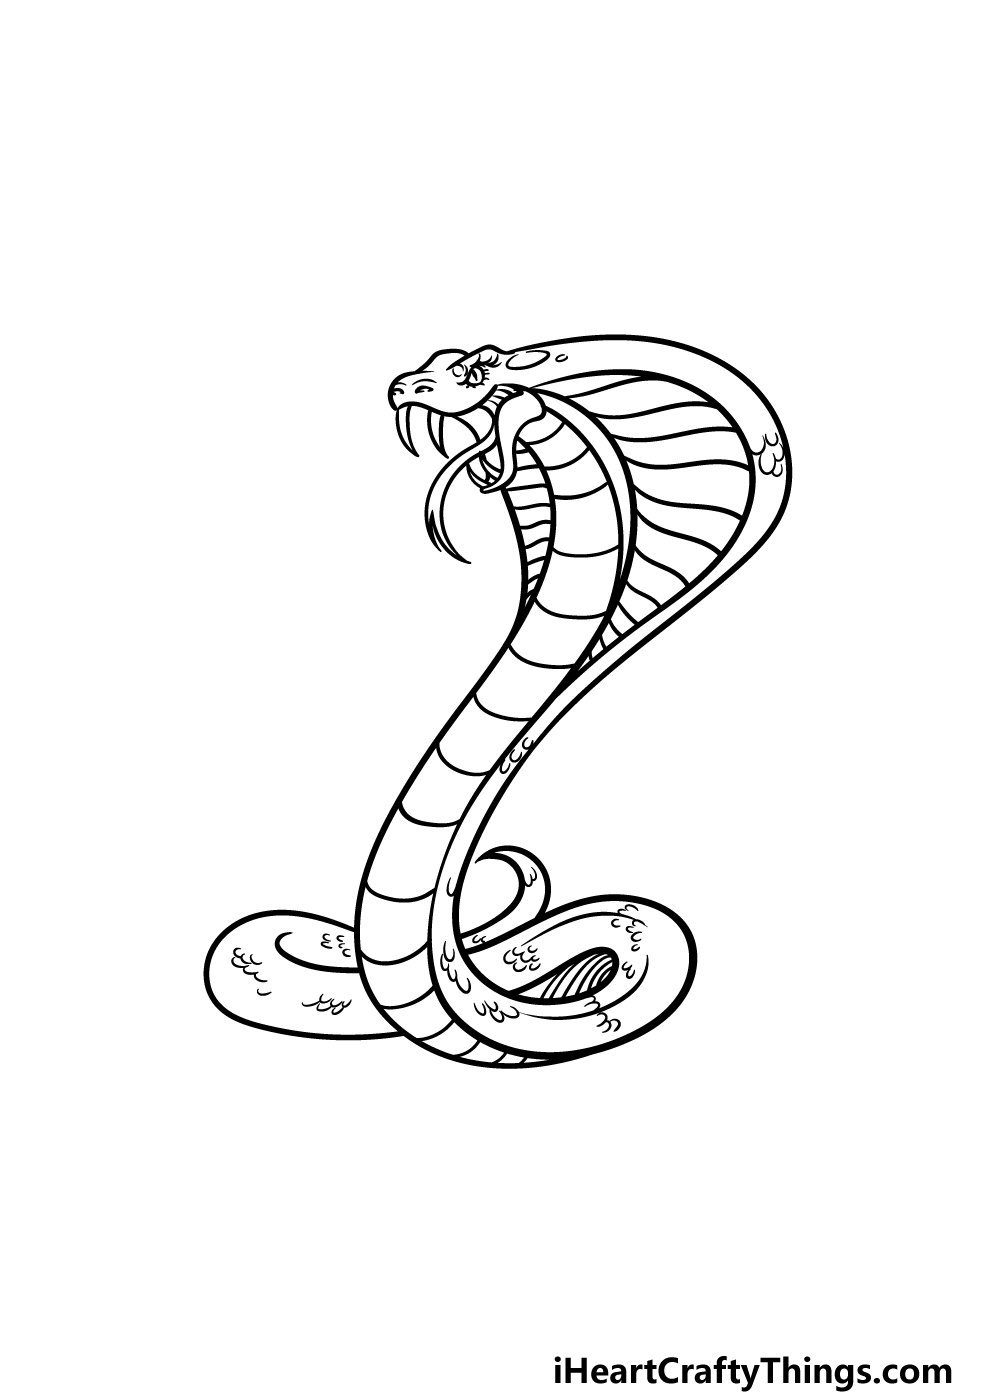
We will be finishing off some final details in this step of our guide on how to draw a cobra! To do this, we will be adding some small rounded lines connecting to one another throughout the body of the snake.
This will help to show some scale details for the cobra’s skin. Once you have drawn these, you will be ready to proceed to the final step!
Before you do that, this is your chance to get creative with your own touches. You could draw a background for one idea, and this would be a great way to shoe the environment you would imagine this cobra living in.
What extra details or elements will you add to finish off this image?
Step 6 – Finish off your cobra drawing with some color
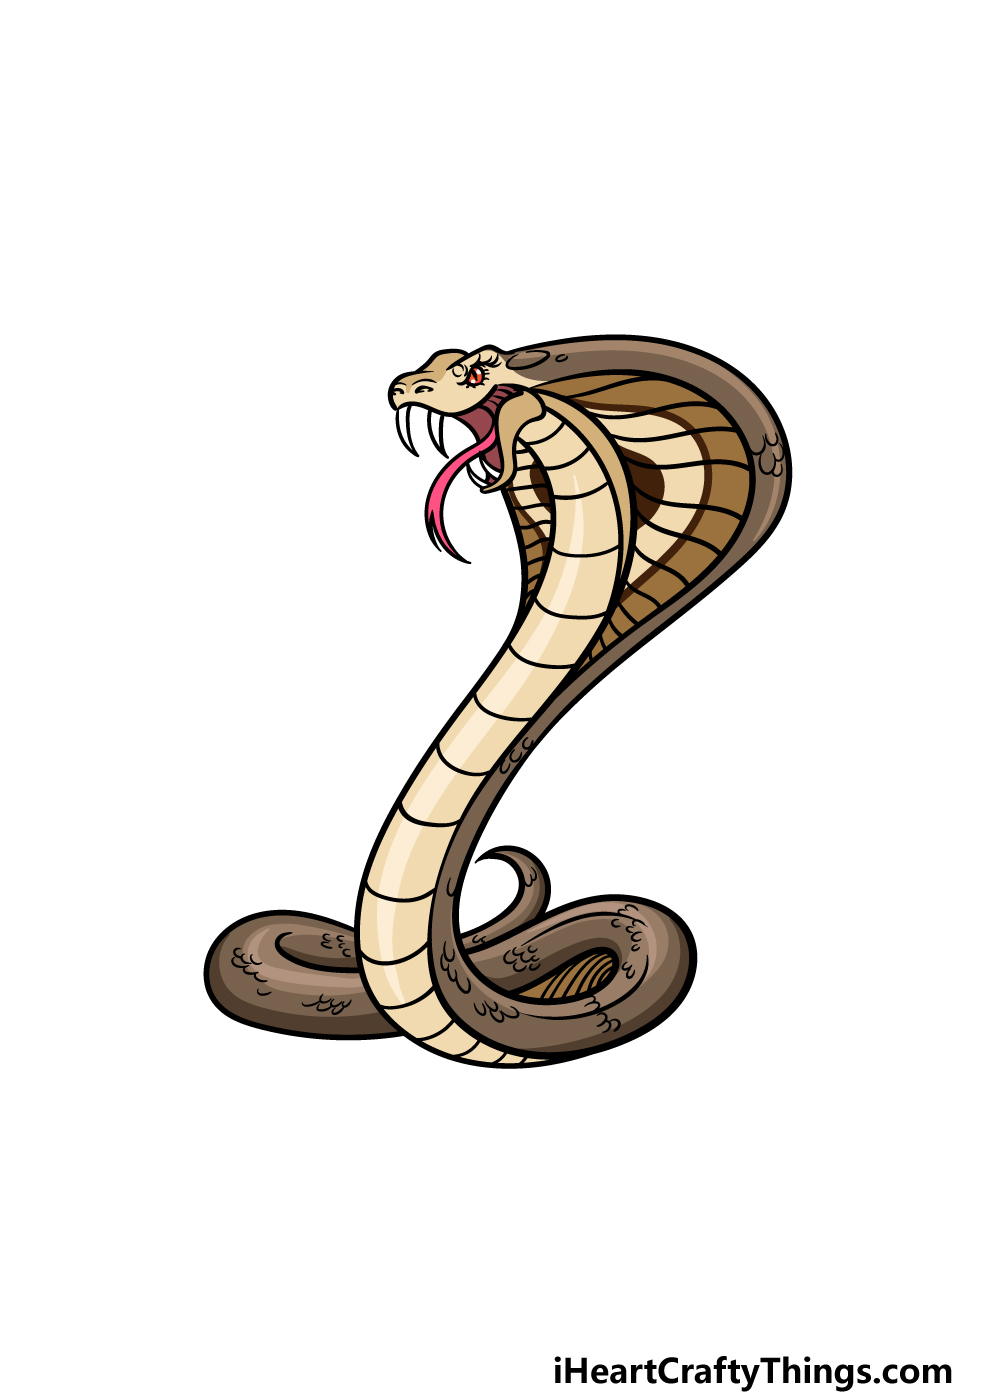
You have arrived at the final step of your cobra drawing, and in this one you can finish it off with some incredible colors!
Cobras in real life are typically not that brightly colored, and that’s why in our reference image we went with some more muted brown and beige shades.
Even though the colors we used are more muted, we still incorporated them in a color pattern in the hood and throughout the body to give the colors more vibrancy.
These are the colors that we chose, but when it comes to the final colors nd mediums that you use it will be completely up to you!
Here’s how you can make your cobra drawing even better…
Make this awesome snake look even better with these tips for your cobra sketch!The pose we created for this cobra drawing is really cool as it looks like it’s about to strike! If you wanted an alternative look, you could tweak the design to be a bit different.
For instance, you may prefer to make the cobra face us directly for a far scarier sight! If you wanted to create a look like this, you could use some photos of cobras to make it easier for you to draw.
What other poses could you do?
The cobra is one of many awesome and fearsome snake species we have in our world. It could make this drawing of a cobra even better if you were to add some different snakes!
You would have thousands of different species to choose from, and it all depends on your preference. Maybe you could add a big anaconda or the deadly black mamba.
These are two of countless species, and you may already have some in mind that you could add. Can you think of some snake species you would like to add?
It can also really take a drawing to the next level if you add a background. The cobra can be found in many environments, although they commonly live in forests.
This means you could add a lot of vegetation around this one for a vibrant background. You don’t have to stick to areas they can be found in though!
What are some other settings you could use for the background of this cobra sketch?
Then, you can play around with different colors for this cobra drawing. We went with a muted brown color scheme for our example, and this looks nice and realistic.
Again, you don’t need to stick to what is realistic, and you can really experiment with different colors. When coloring, you should also choose your mediums wisely.
The cobra is quite thin and windy, so mediums that allow for greater precision would serve you well!
Your Cobra Drawing is Complete!
In real life, cobras may be a scary animal to encounter, but we hope that this guide on how to draw a cobra helped to make sure that it wouldn’t be scary to draw!
We aimed to make this drawing as easy as possible by breaking it down into simple steps to follow, and we hope that it made it easy and fun for you to do!
Now is your chance to get even more creative with it, as there are lots of ways to put your own spin on this picture to finish it off.
Whether you add some cool details, draw more features or experiment with colors and mediums, you have tons of ways to personalize this drawing!
You don’t have to stop here either, as we have many more amazing guides for you to enjoy on our website. We update the list frequently, so you’ll want to keep checking in often!
Once your cobra drawing is complete and ready, please do share your fearsome artwork on our Facebook and Pinterest pages!