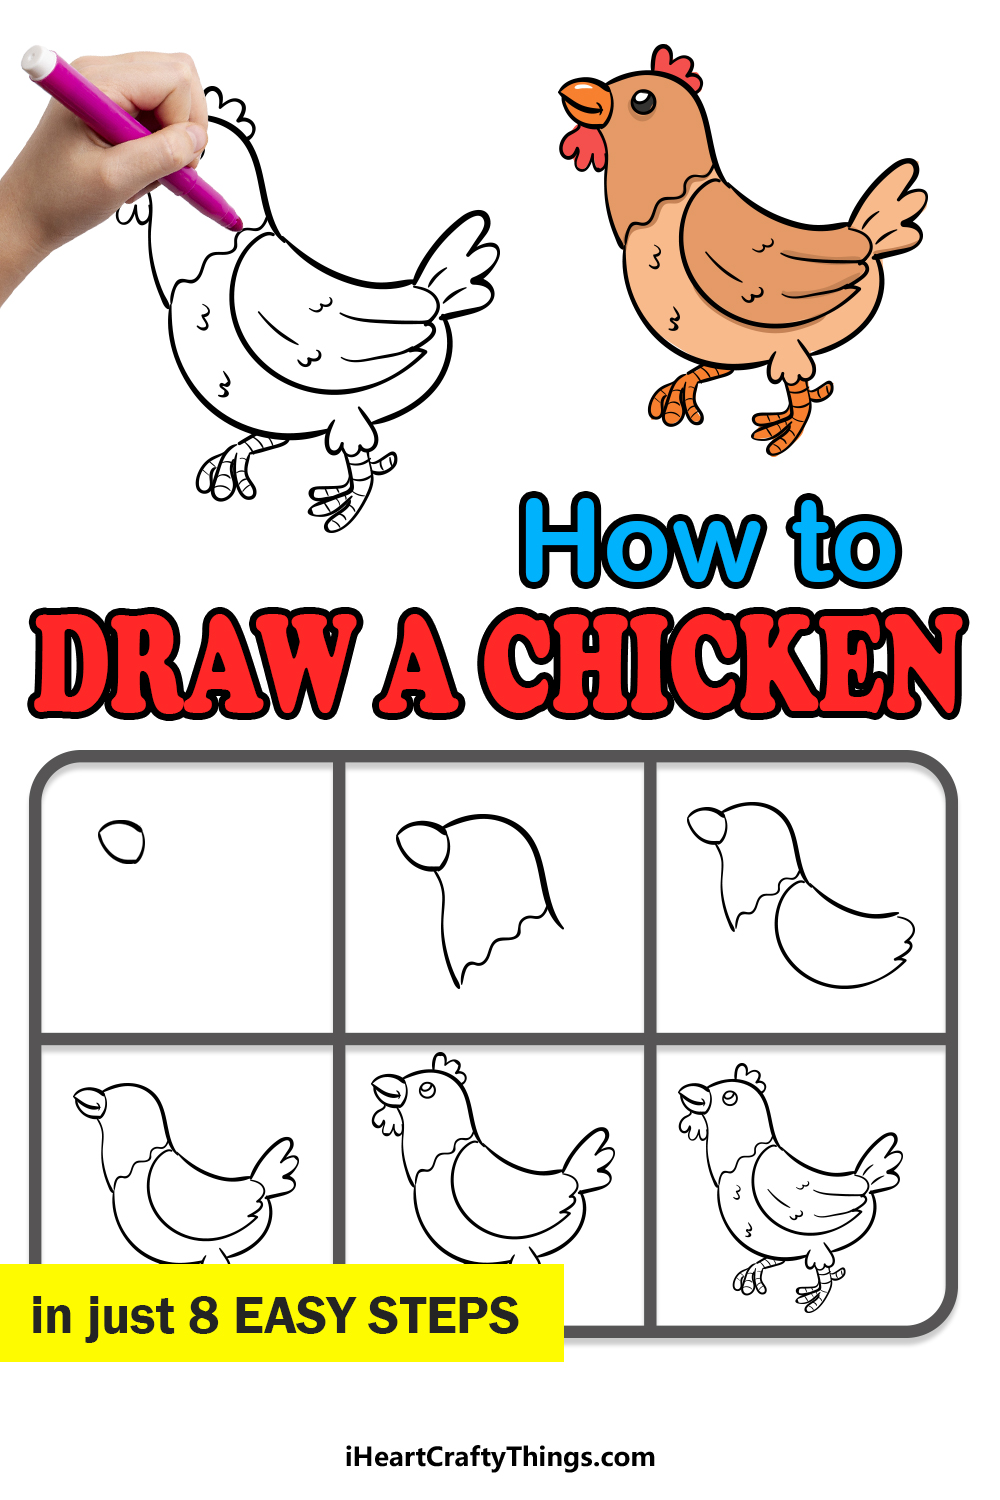
It doesn’t get easier than this to learn how to draw a chicken! This tutorial for kids was made to help anyone follow along to create a chicken friend of their own.
Chickens are a common sight on any farm, and they are entertaining to watch as they run around and get up to mischief. They also have a really distinctive look that can be a bit hard to replicate in a drawing.
That’s why this guide was created, as it will show you how to make this cartoon chicken design. Even though it is drawn in a cartoon style, it still has all of the aspects you would expect on a chicken including the feathers, beak and claws.
It’s such a cute interpretation of a chicken, and you’re moments away from creating it for yourself. Let’s begin and create this little chicken character together.
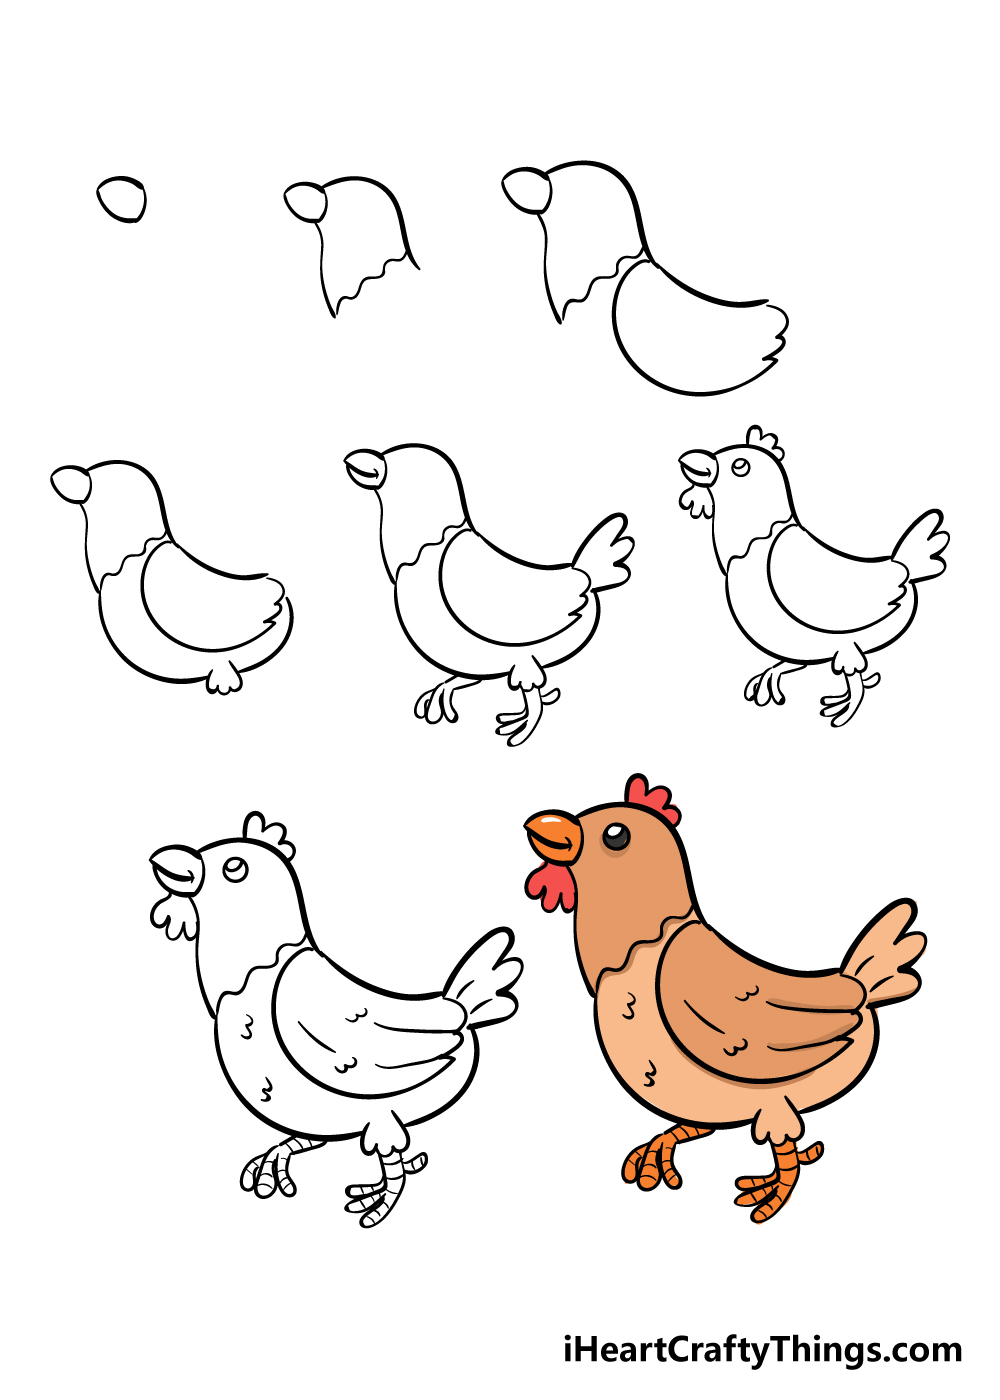
Learn How To Make Your Chicken Drawing With These Steps
How to Draw A Chicken – Let’s get Started!
Prepare For This Chicken Drawing Before You Start
It’s almost time to begin this drawing in the first step, but we wanted to give you a few tips on how you can prepare for your drawing. You may feel like preparing for a simple cartoon drawing is unnecessary, but it can be very helpful!
Firstly, we would recommend starting with some pencils, even if you will be using a pen for the final drawing. Then, press as lightly as you can on the page so that these will be easy to erase later.
You can build up the drawing in layers and then use the steps in the guide over your planning. Start by drawing a very, very rough version of the drawing.
Just quickly sketch some loose shapes that are vaguely in the shape of the final drawing. This also allows you to plan out the background if you’re planning on drawing one.
You can draw a shape that tells you ‘That’s where the barn will be’ or ‘That’s how big that egg should be in relation to the chicken. Even if it’s very basic shapes, it will help you keep the perspective consistent.
It also allows you to ensure that everything will fit on the page. When you’ve reached the end of the guide and have the whole drawing, you will be able to erase the lines and no one will ever know they’re there!
You could also prepare by looking at photos not only of real chickens but also pictures of existing cartoon chickens. You’re not cheating by doing all of this preparation!
In fact, professional artists will prepare a LOT before starting a drawing, so there’s no shame in it! Now, we can dive in and take on the first step of the guide.
Step 1
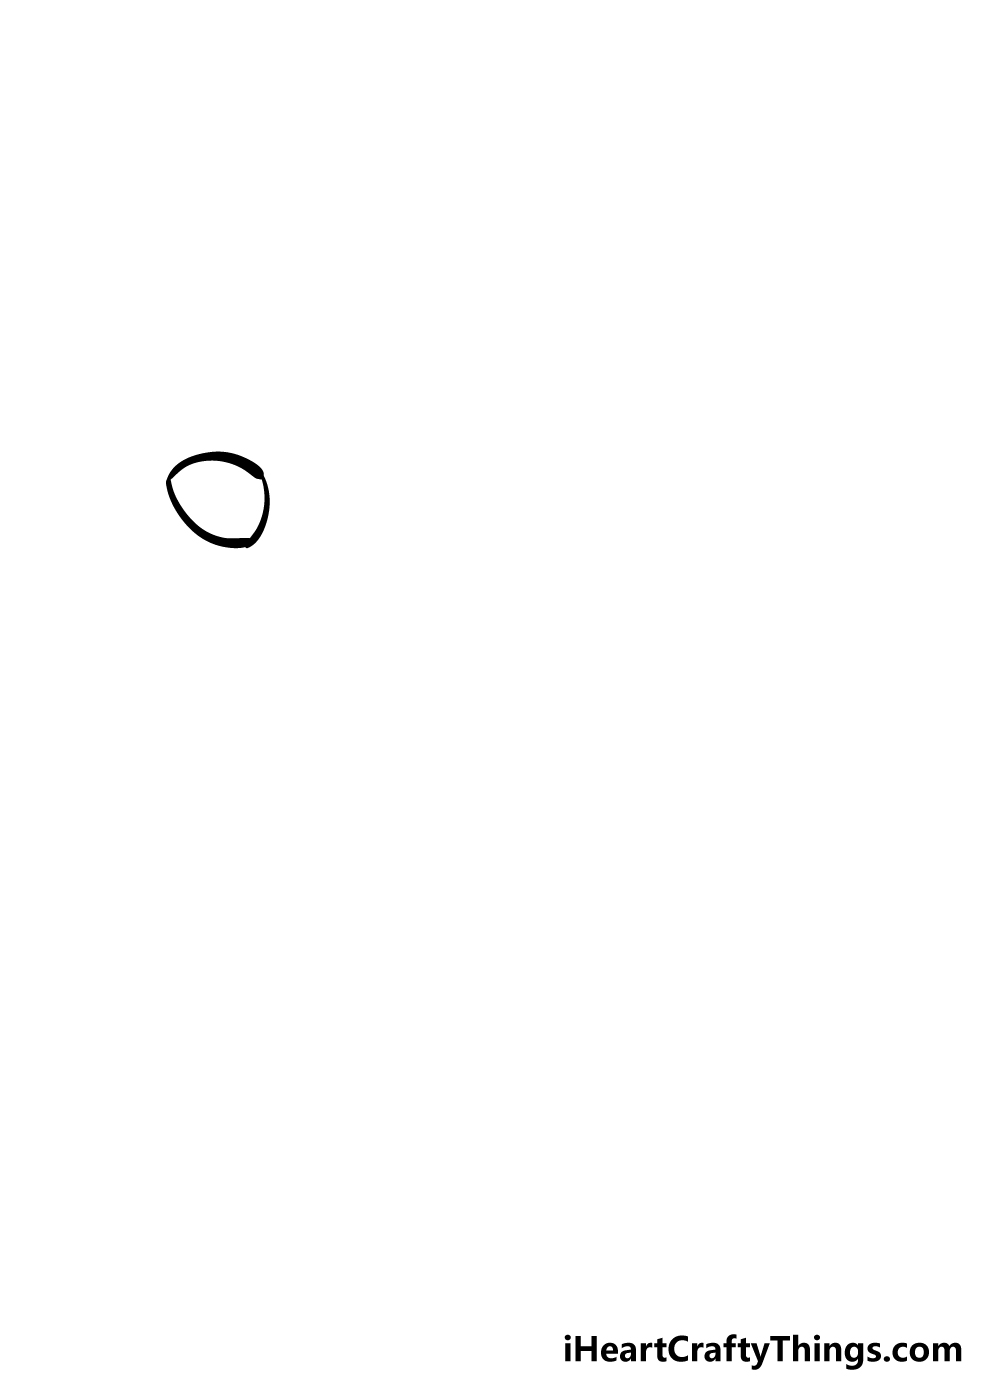
To kick off this guide on how to draw a chicken, we shall start with something that every chicken needs: a beak!
To add in a beak for your chicken drawing, simply start with a rounded shape that has a slight point on the left-hand side of it. Once you have the beak drawn, we can move on to the next step!
Step 2 – Now, you can draw in a head for your chicken
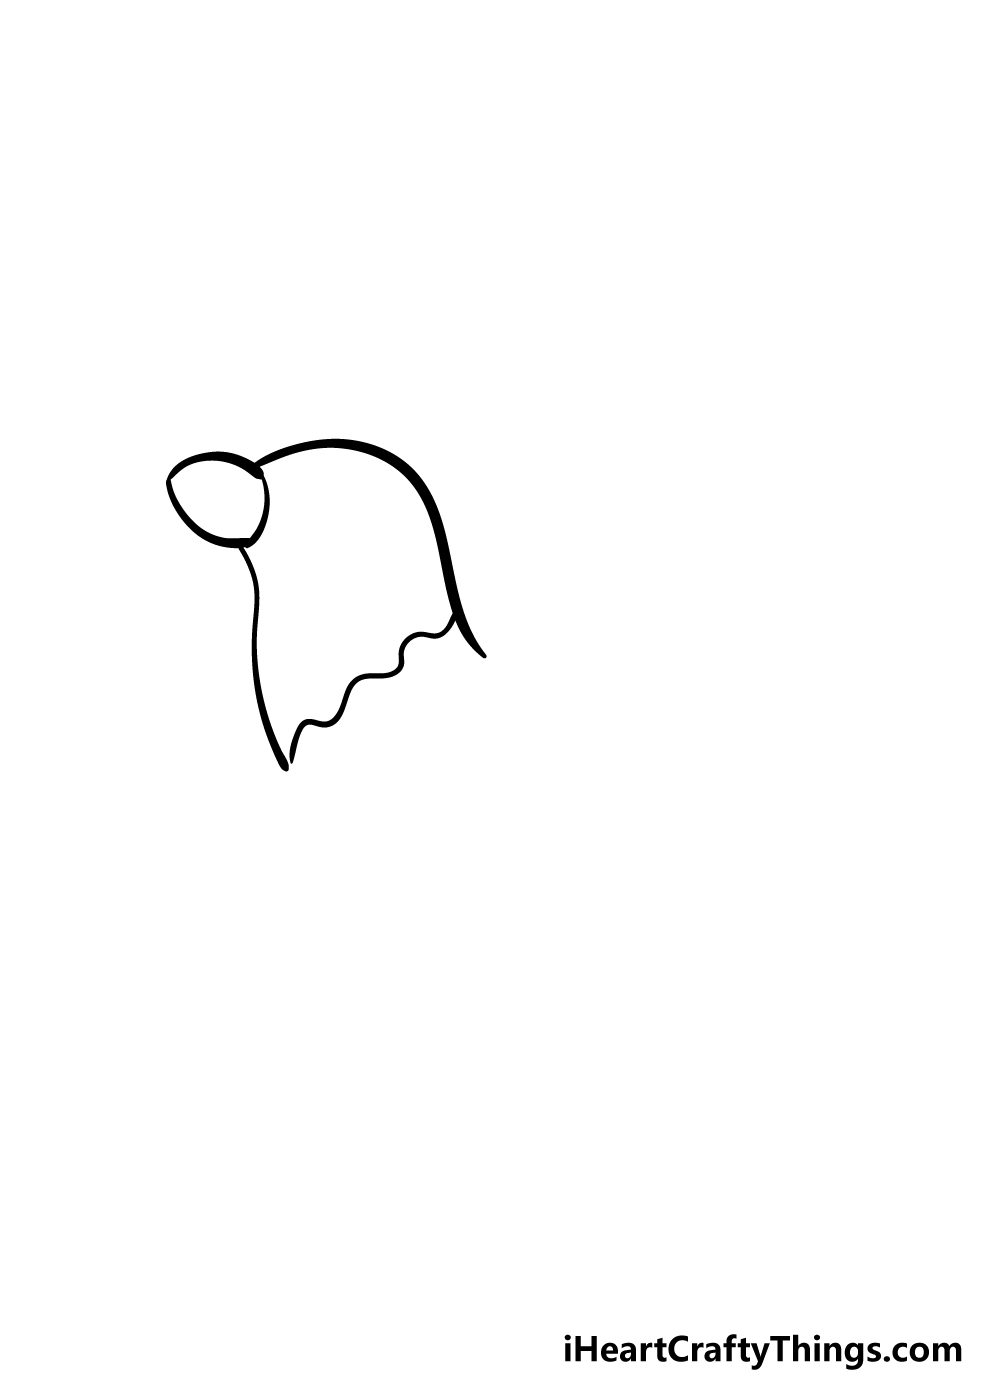
With the beak of your chicken drawing finished, you can start to draw in a head for it. Start this off by drawing in a long, curved line coming out from the top of the beak.
Then, add in another curved line coming out from the bottom. Lastly, draw in a wavy line between them to give a feathery look.
Step 3 – Give your chicken a wing
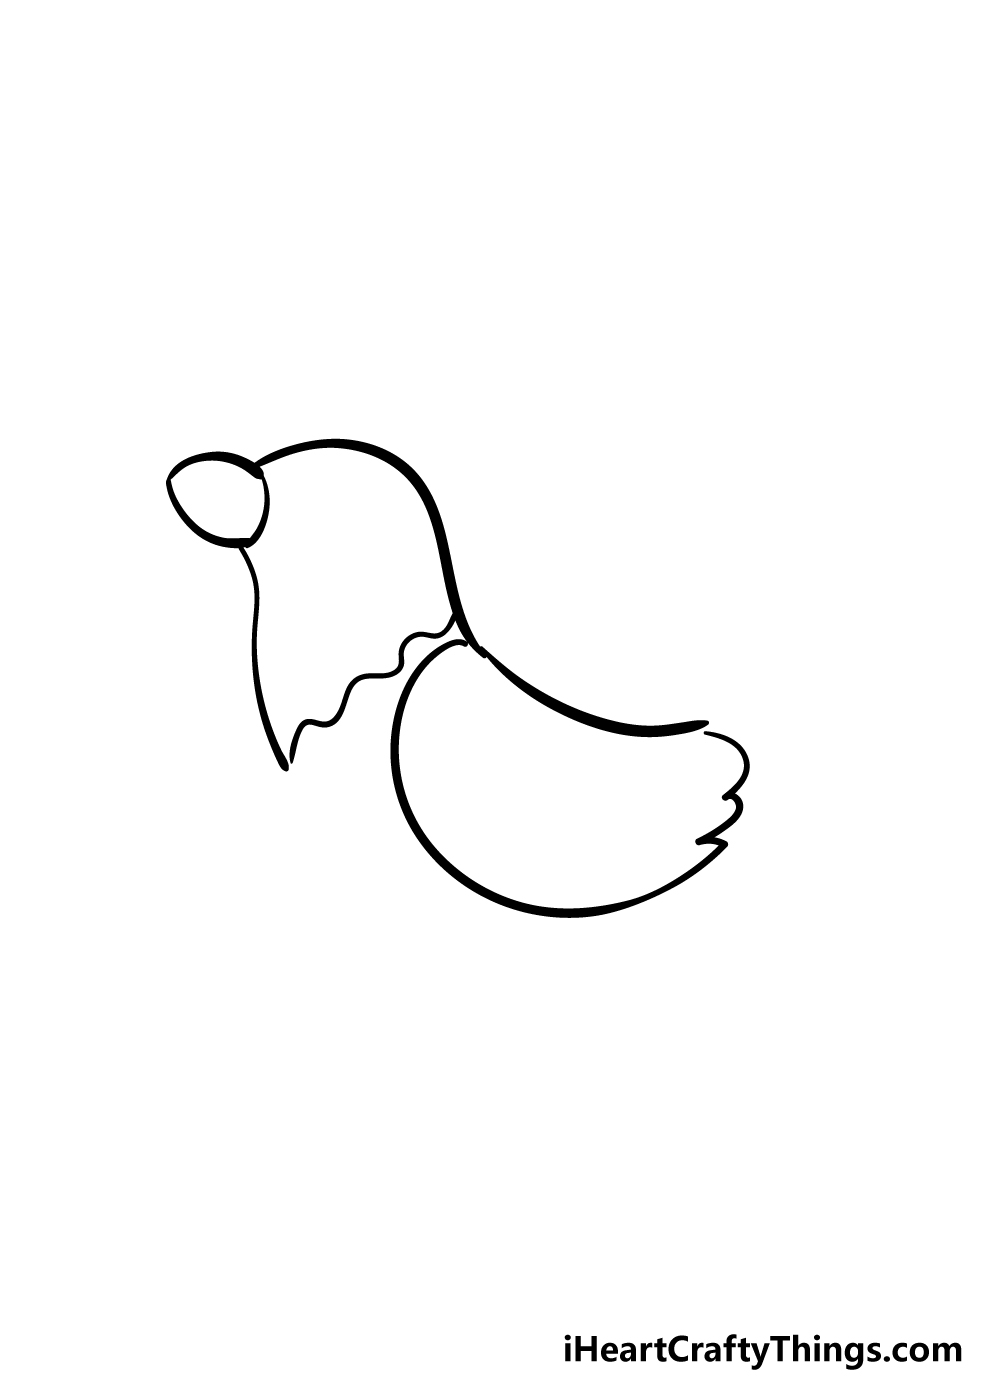
For the next step of our guide on how to draw a chicken, we shall add in a wing for it. This wing will be made up of some curved and wavy lines, as you can see in the reference picture.
It will extend from just below the head and neck that you drew in the previous step, and the image will give you an idea of how far back it should extend.
Step 4 – Next, give your chicken a body
Chickens have a distinctive body shape, and we will try to replicate it in this step of your chicken drawing.
To draw in a body for your chicken, simply use some curved lines extending from below the front of the neck and from the back of the wing.
Be sure to leave a wavy shape at the bottom of the body for where we will be adding the legs later.
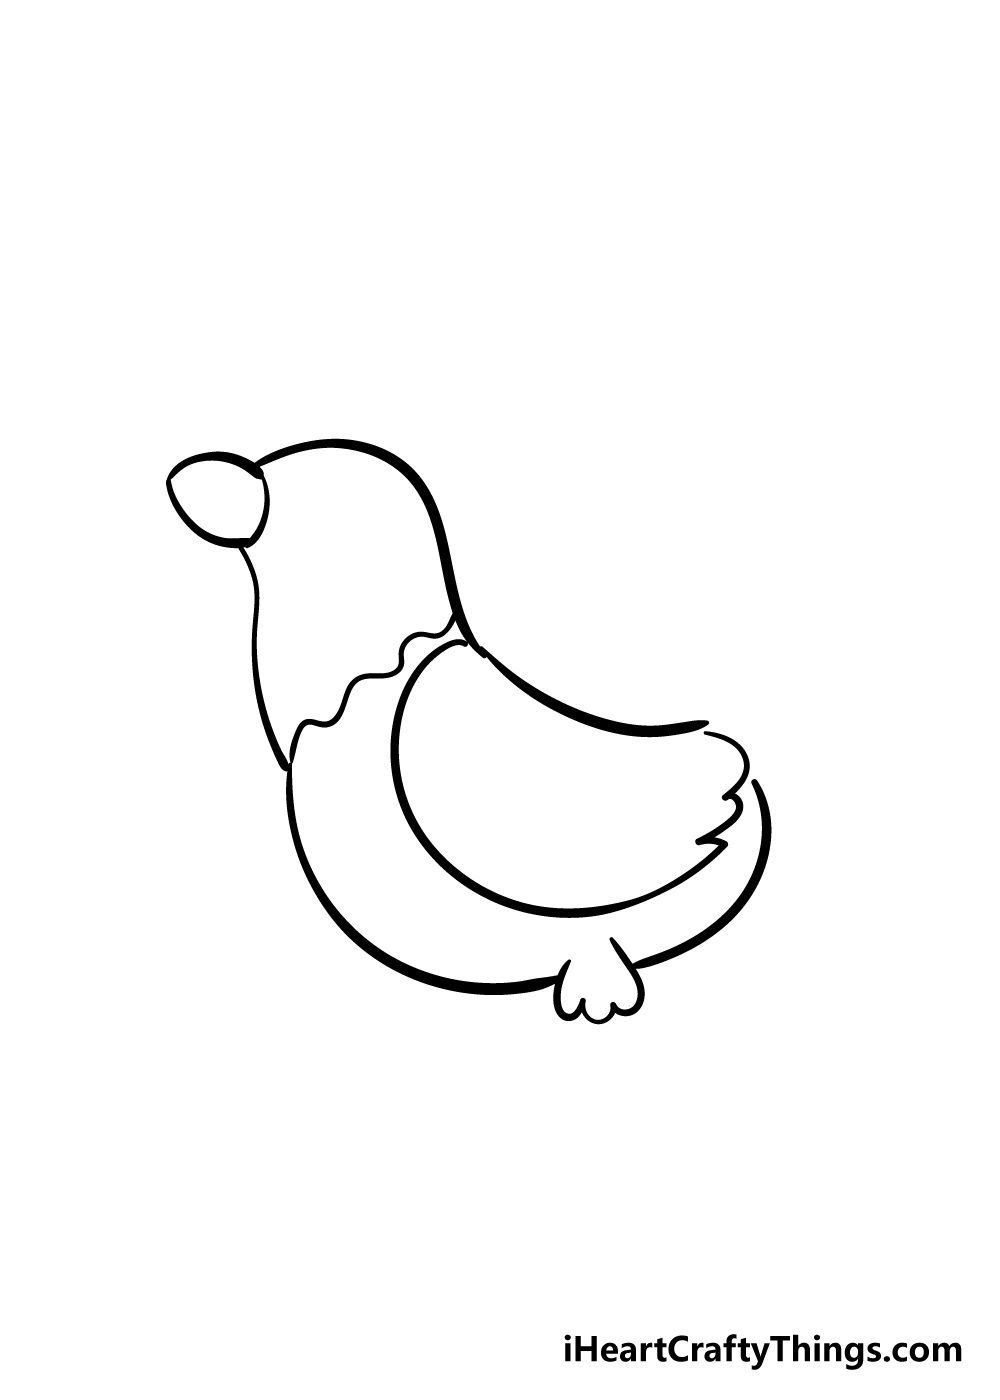
Step 5 – Now, draw in the legs, mouth and tail

In this next step of our guide on how to draw a chicken, we will be adding in some more distinctive details. First of all, use a line in the beak to give your chicken a smiling mouth.
Then, use some curved lines at the back of your chicken to give it a nice feathery tail!
Lastly, we shall be giving your chicken drawing some legs. These will be made up of some curved and straight lines to form the legs and feet as they appear in the image.
The legs will come out of the shapes that we left on the underside of the chicken’s body in the previous step
Step 6 – Next, give your chicken some facial details

Your chicken is really coming together now! It wouldn’t be much of a chicken without some facial details, though, so let’s add them in this step.
For the eye of the chicken, you can use a circle within a slightly larger one to form it. You could even change the eye details a bit if you would like a different expression for it!
Then, you can use some curvy lines to create the waddle underneath the beak and then the crest of the chicken on top of the head. Then, it’s on to some final details!
Step 7 – Add in some final feathery details
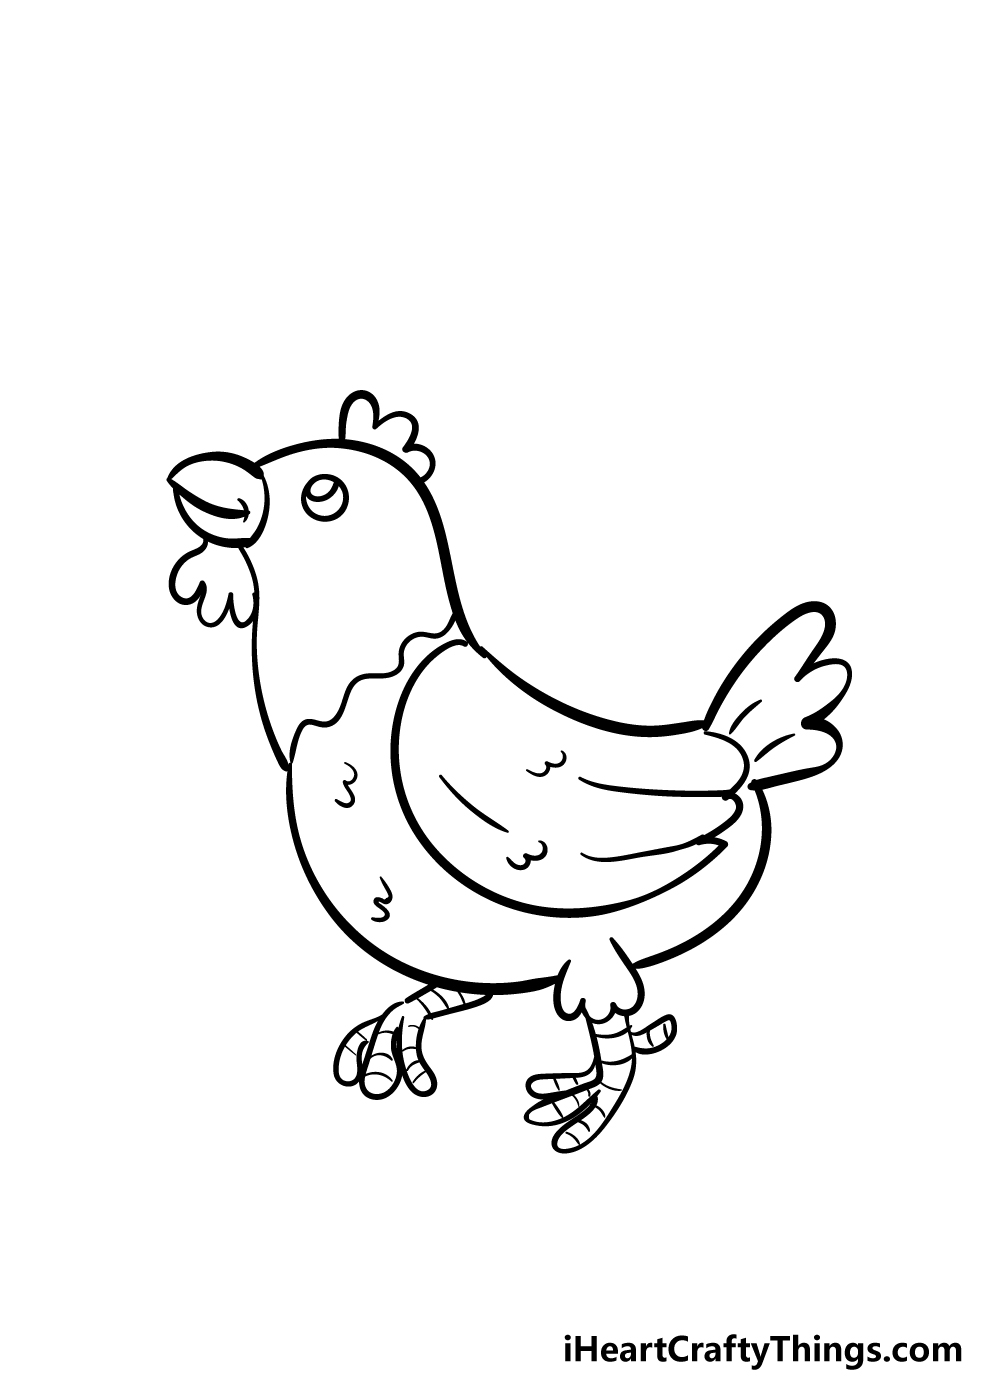
With your chicken drawing almost done, you just need to add some last little details to finish off the drawing before moving on to the coloring in.
To start with, we have some details that are made up of some curved lines throughout the chicken to create a feathery look.
We also have some lines on the wings and tail of the chicken for some extra feather texture.
Lastly, you can use some lines on the legs to give them some texture as well!
These are the details we thought would look good, but you can also add some more of your own that you think would look great on your drawing!
Step 8 – Now finish off your chicken with some color
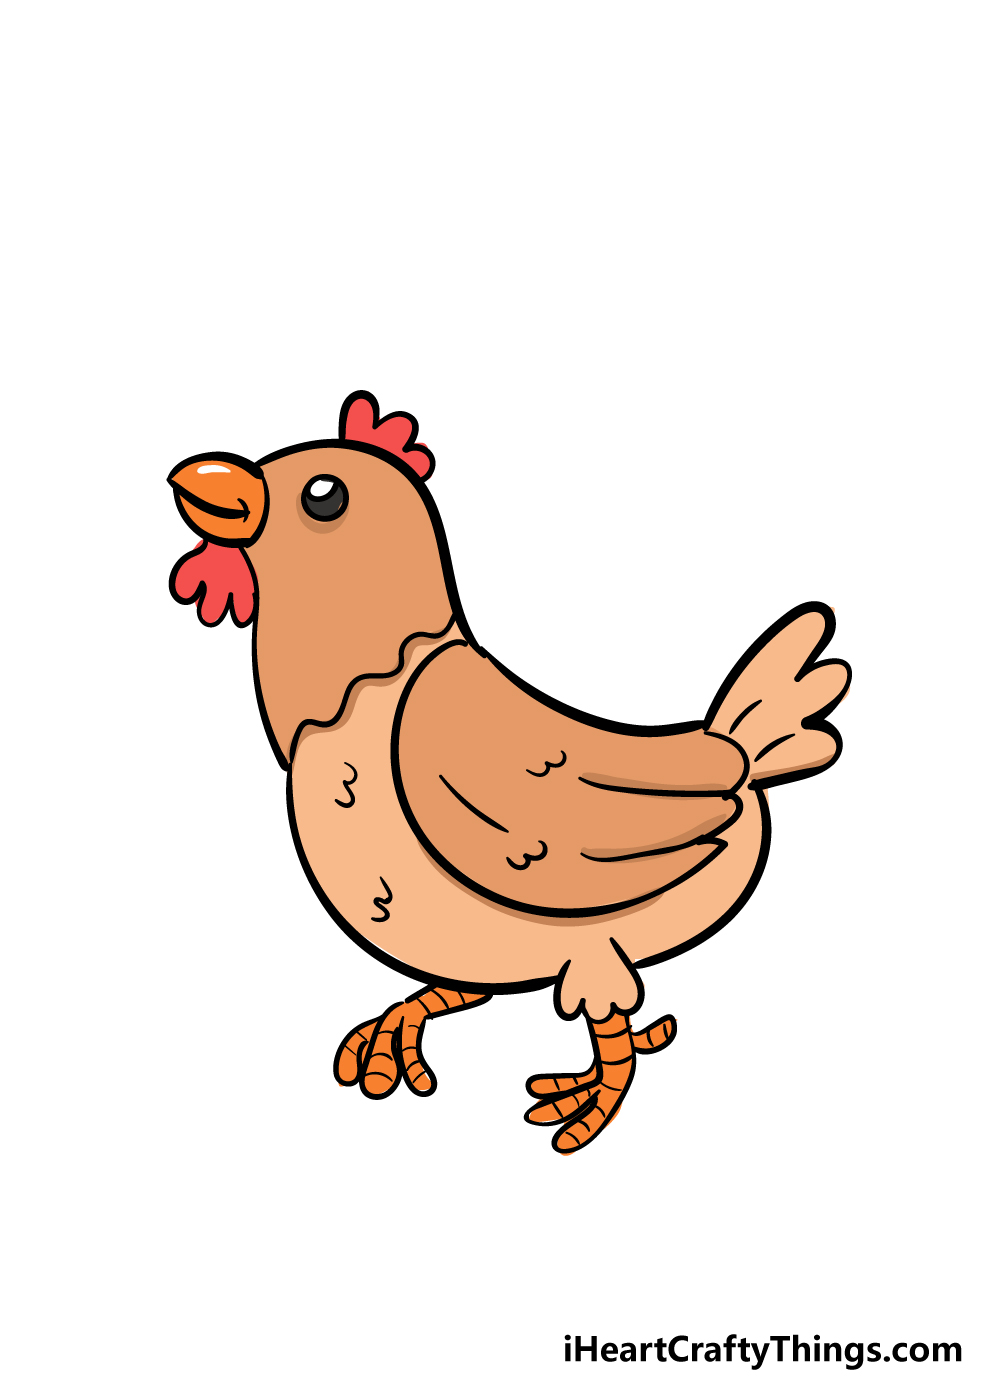
The final step in this guide on how to draw a chicken happens to be one of the most fun of all the steps!
Your drawing needs some beautiful colors to really bring it to life, so this is your chance to show us how creative you can be!
We’ve shown you how we would color it in for our example, but you should feel free to use any of your favorite colors!
Will you keep the colors more realistic to make it look like a real chicken, or will you let your imagination run wild and make your chicken look more stylistic with some bright colors?
There’s no limit to what you can do, and once you choose your colors you merely need to decide which fun art tools and mediums you should use to finish off your artwork!
5 Tips To Make Your Chicken Drawing Even Better!
Make your chicken sketch even better with the help of these 5 tips!
If you see a real chicken on a farm or anywhere else, they will often be surrounded by many other chickens and roosters.
For that reason, it could be fun to add some friends to your drawing of a chicken!
You could limit it to more chickens like this one, but you could also add some roosters as well. How many chickens would you like in this scene?
Adding more chickens is just one way of populating this image. If you have ever been to a farm, you will see that there are often many other types of animals.
Pigs, horses, goats and cows are some of the animals you can see on a farm, and some of these could be added to make this a more complete scene!
If you really want to go ahead with the farm feeling, you could add a farmer to this chicken drawing. If you were to do this, it could be fun to base the farmer on yourself or someone you know.
If you’re nervous about drawing a person, you could draw them in a similarly simple cartoon style to the one that we used for the chicken.
Adding a farmer would work well with our previous suggestion as well!
By adding a background, you can fully finish off the scene that you are building. We have spoken a lot about a farm setting for this artwork, but it’s not the only way that you could add a background.
A farm setting would be fun, but what other settings could you use for the background?
Finally, we think it would be fun to use some interesting art tools and crafts to color your chicken sketch. For example, you could make feathers by cutting them out of construction paper.
Then, glue these feathers in layers on the chicken’s body and it will look like it has some real feathers! Can you think of any other techniques you could use?
Your Chicken Drawing is Complete!
We really hope you had an amazingly fun time learning how to draw a chicken using this step-by-step guide!
Hopefully, now that you have a completed chicken drawing in front of you, you came to realize that this drawing challenge didn’t have to be hard when you have a guide to help you!
Now that your drawing is complete, how will you put your own spin on it?
Your color and art medium choices are just a few ways that you can personalize it, but you could even take it a step further and draw in a fun background for your chicken! We can’t wait to see what you decide to do.
We have many more great step-by-step drawing guides coming out for you soon, so please remember to check our site frequently to catch all the new ones coming out!
We would also like to see your amazing chicken drawing, so please do share it on our Facebook and Pinterest pages when it’s done so we can marvel at your creativity!