A ring can mean many things. Sometimes it can be as simple as being a fashion statement that just looks nice!
Sometimes it can be a symbol of love and devotion that signals that your heart is taken by someone else.
No matter what it may mean to you, there’s no denying that a ring can take on many designs and appearances. Even though they can be quite simple in structure, it can still be hard to learn how to draw a ring.
The guide that you’re about to embark on aims to take all of that difficulty out of it, though!
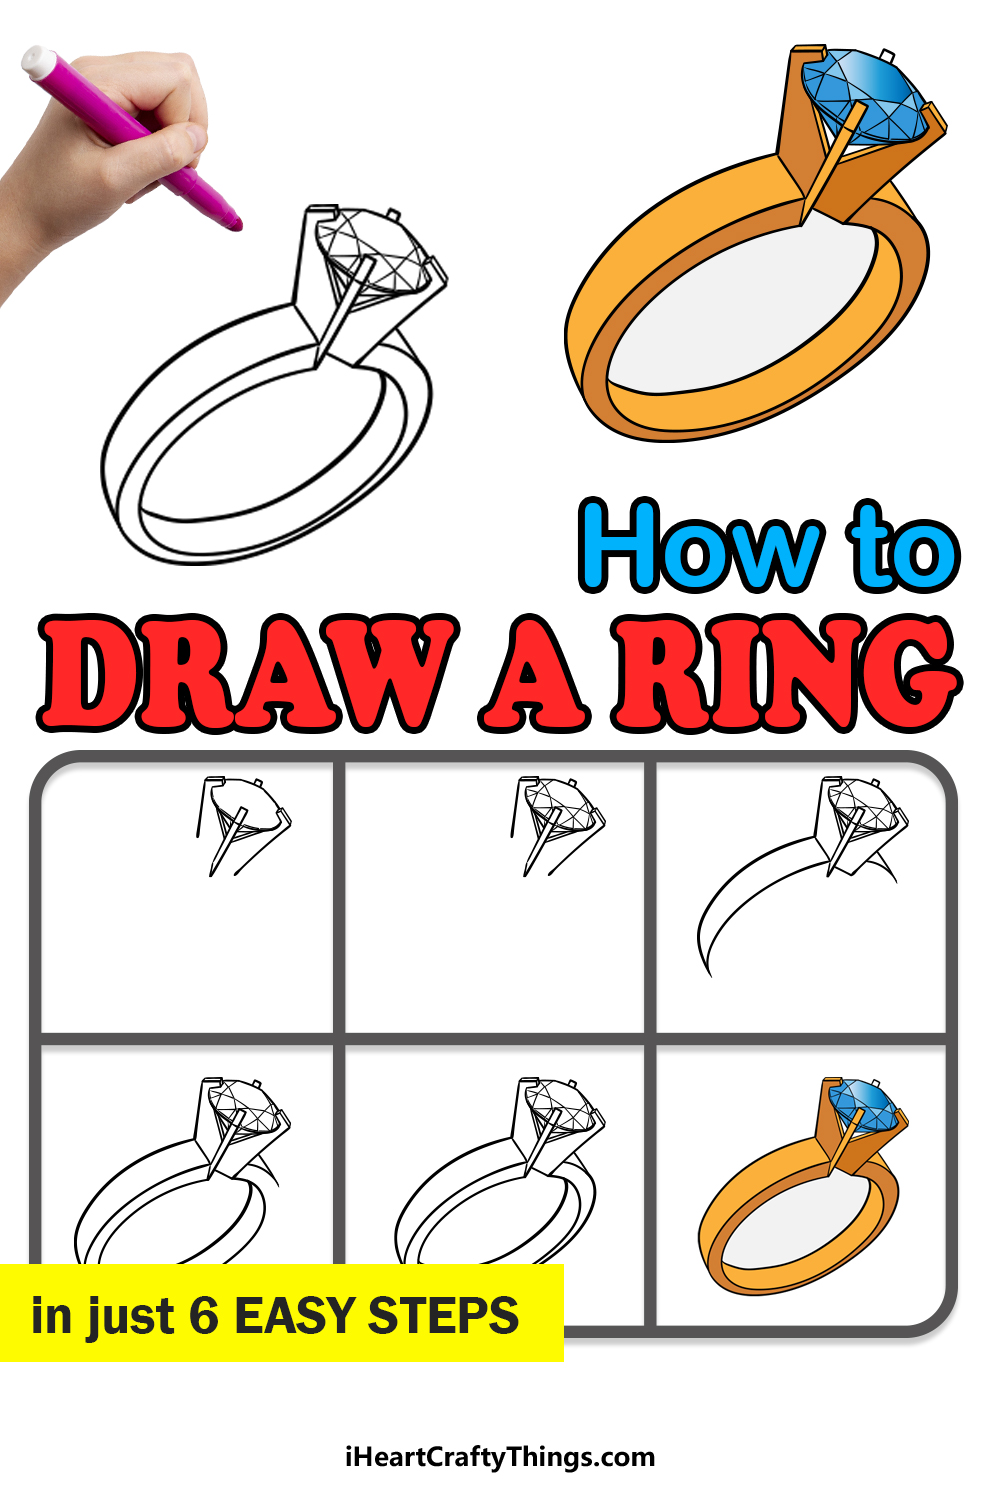
This step-by-step guide on how to draw a ring will let you unleash your inner jewelry designer!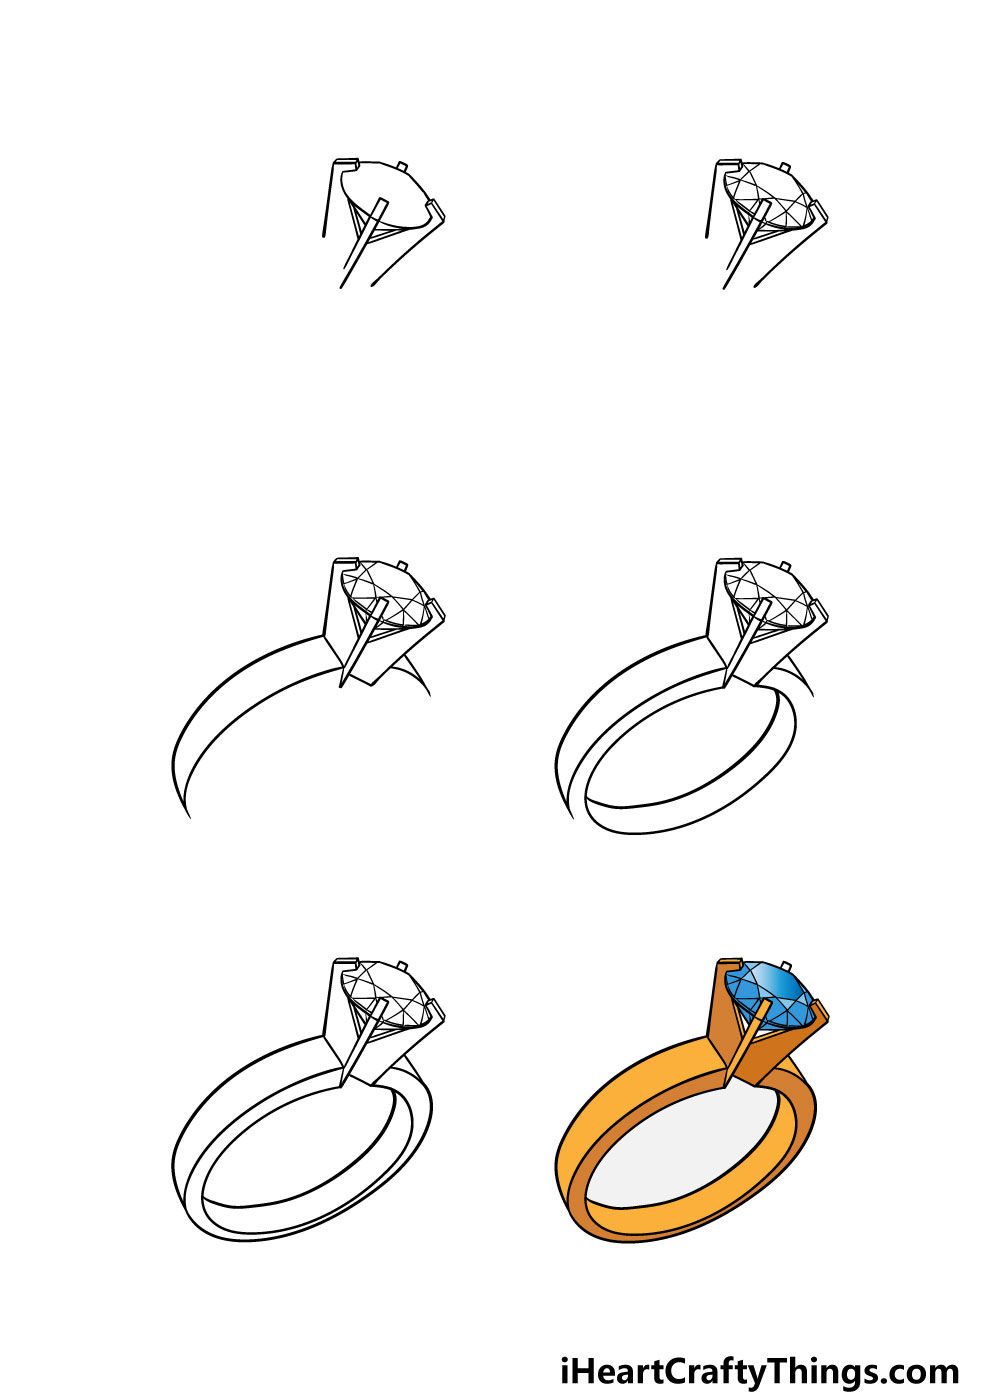
How to Draw A Ring – Let’s get Started!
Step 1
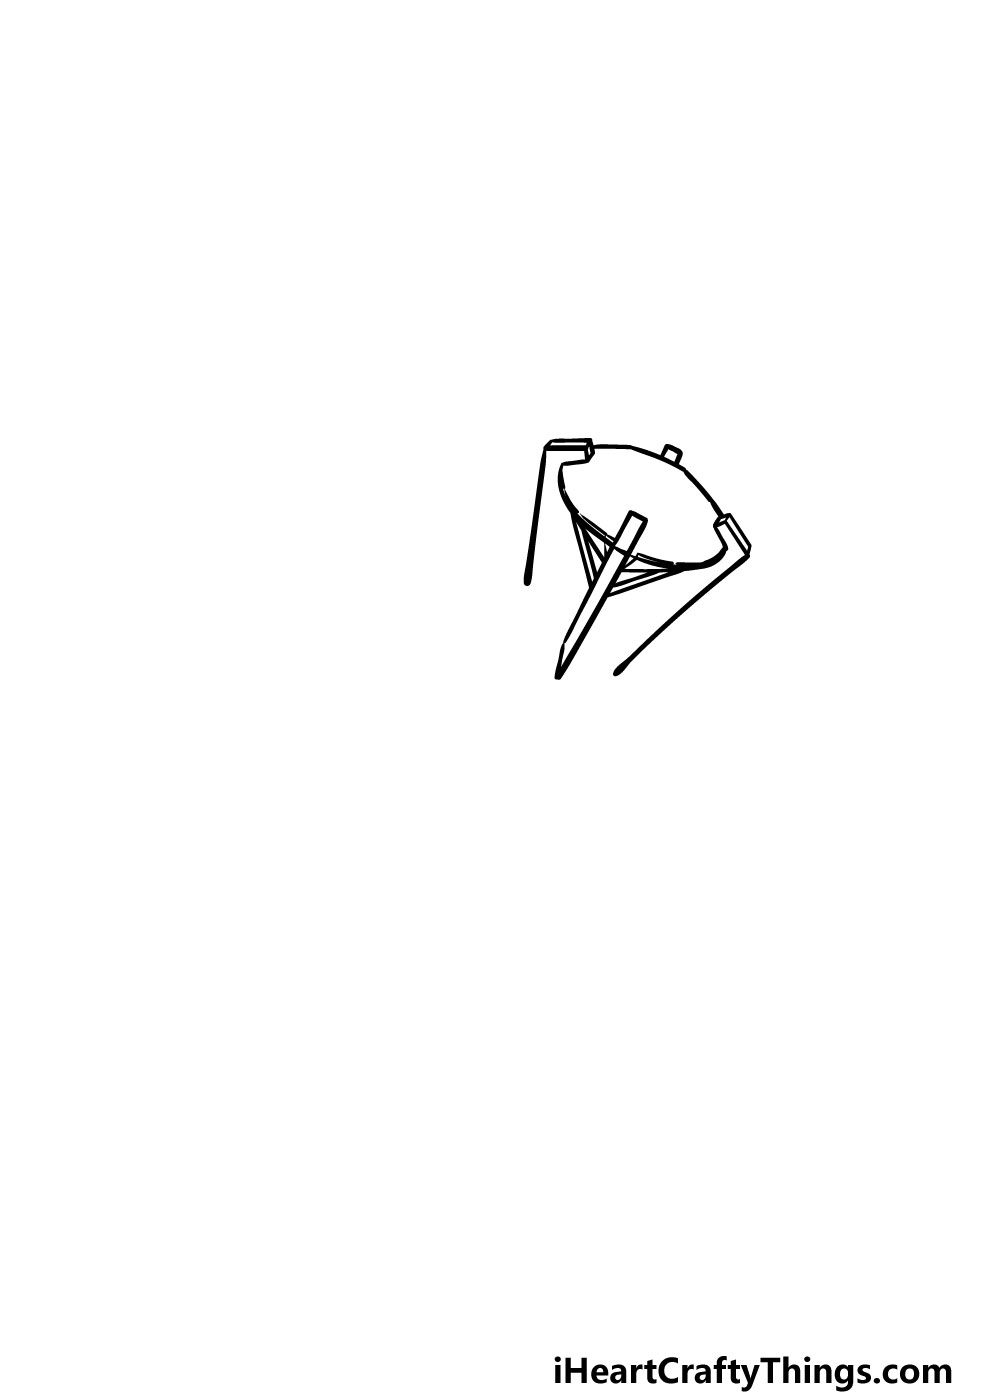
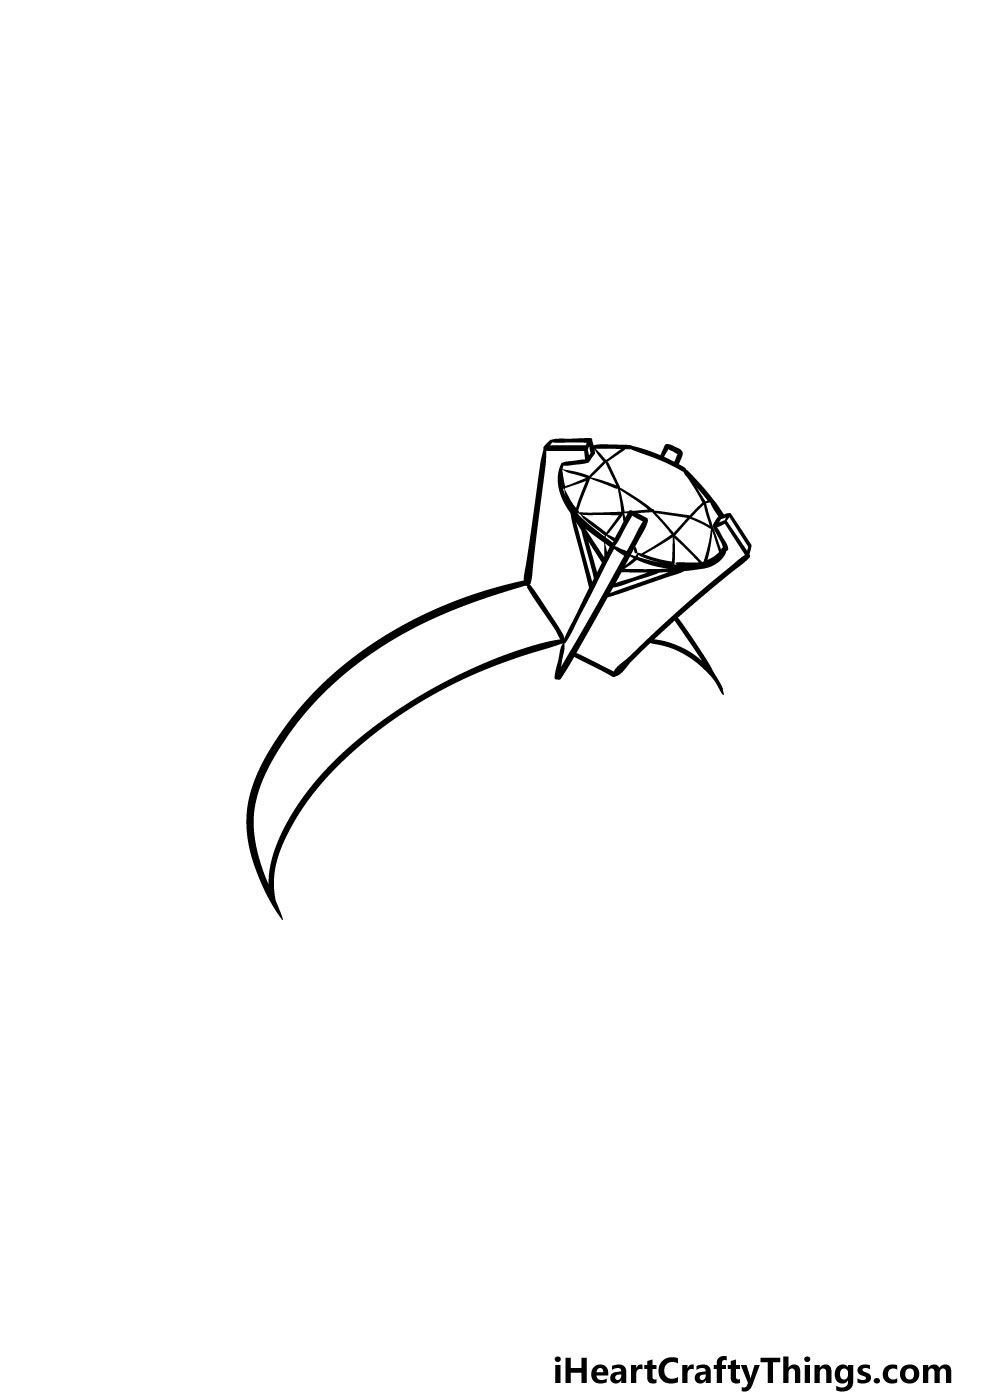
For this first step of our guide on how to draw a ring, we will be starting with the diamond affixed to the ring.
The ring is held in with four small ‘arms,’ which will be drawn with some straight lines. The diamond that the arms are holding will be drawn with a combination of straight and rounded lines, as shown in the reference image.
You could use a ruler for some of these aspects to make your job a bit easier!
Finally, there will be more straight lines underneath the diamond for part of the structure holding it in place. That’s all there is to it for this part and you’re ready for the next step!
Step 2 – Add some details to the diamond
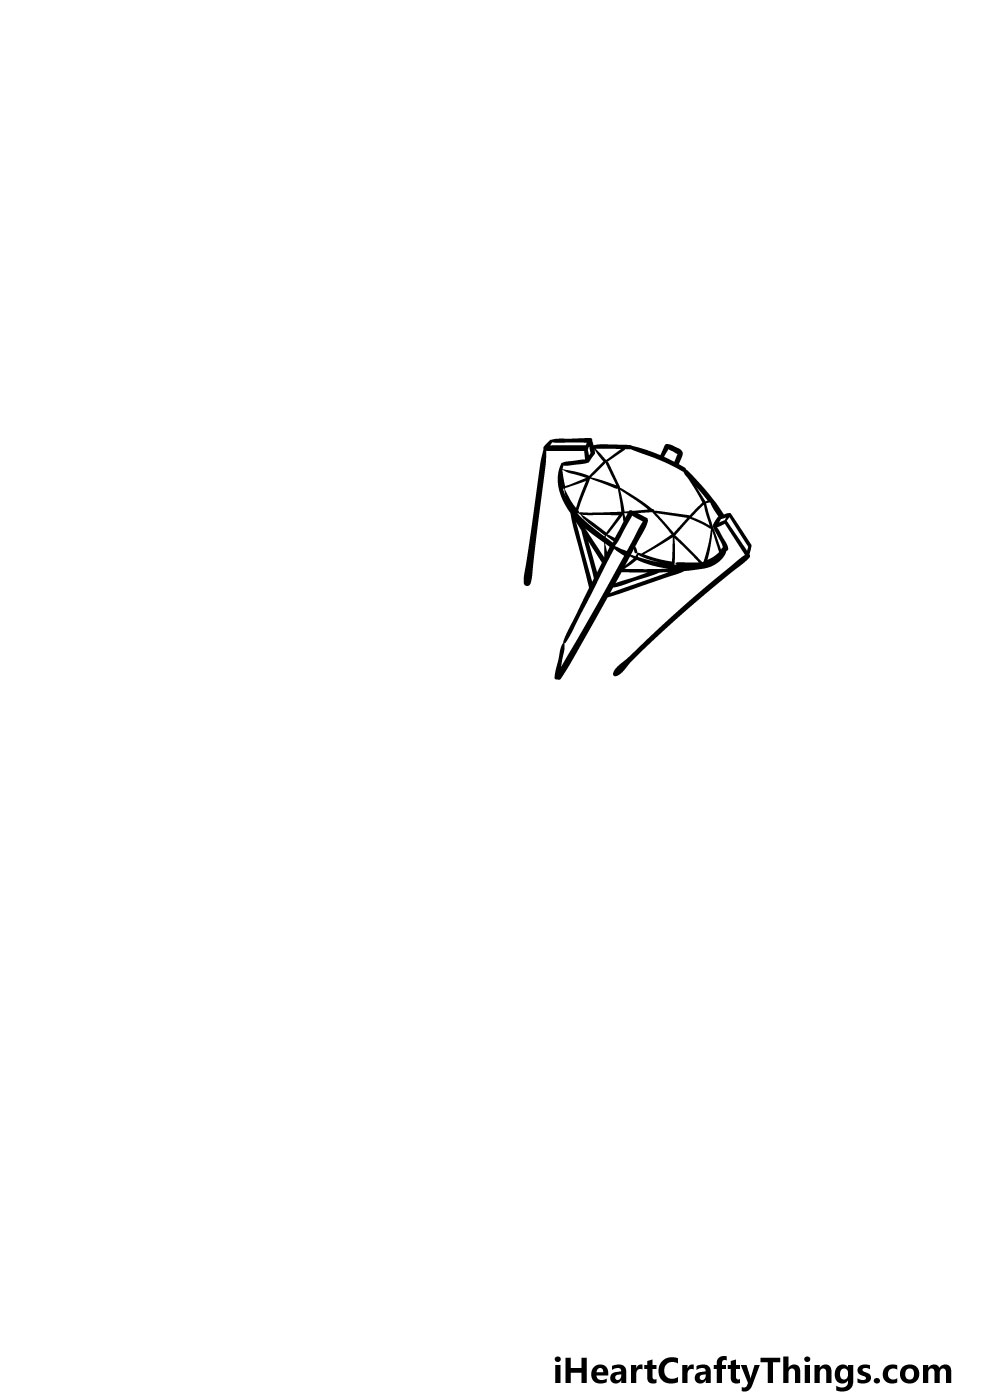
Diamonds are ground down until they have many flat sides to them. These sides are what we will be adding to your ring drawing now.
You can create these edges by drawing several straight lines that crisscross to form some triangular shapes. Once again, you could make your life easier by using a ruler to create your lines.
The part on the very top of the diamond will be by far the largest of these sides. It may look complicated, but if you follow the reference image closely then you should have no problem with it!
Step 3 – Now, start drawing the curve of the ring itself
A diamond on a ring is all well and good, but it wouldn’t stay on a finger very well if not for the ring itself! For that reason, we will be drawing the ring in this step of our guide on how to draw a ring.
To do this, you will be drawing what will look almost like a crescent moon shape attaching to the ring.
This will be drawn with some curved lines that connect in a sharp point. It can be a bit tricky drawing a smooth, curved line so be sure to take your time with it until it looks like our reference image!
Step 4 – Next, draw the circular inner section of the ring
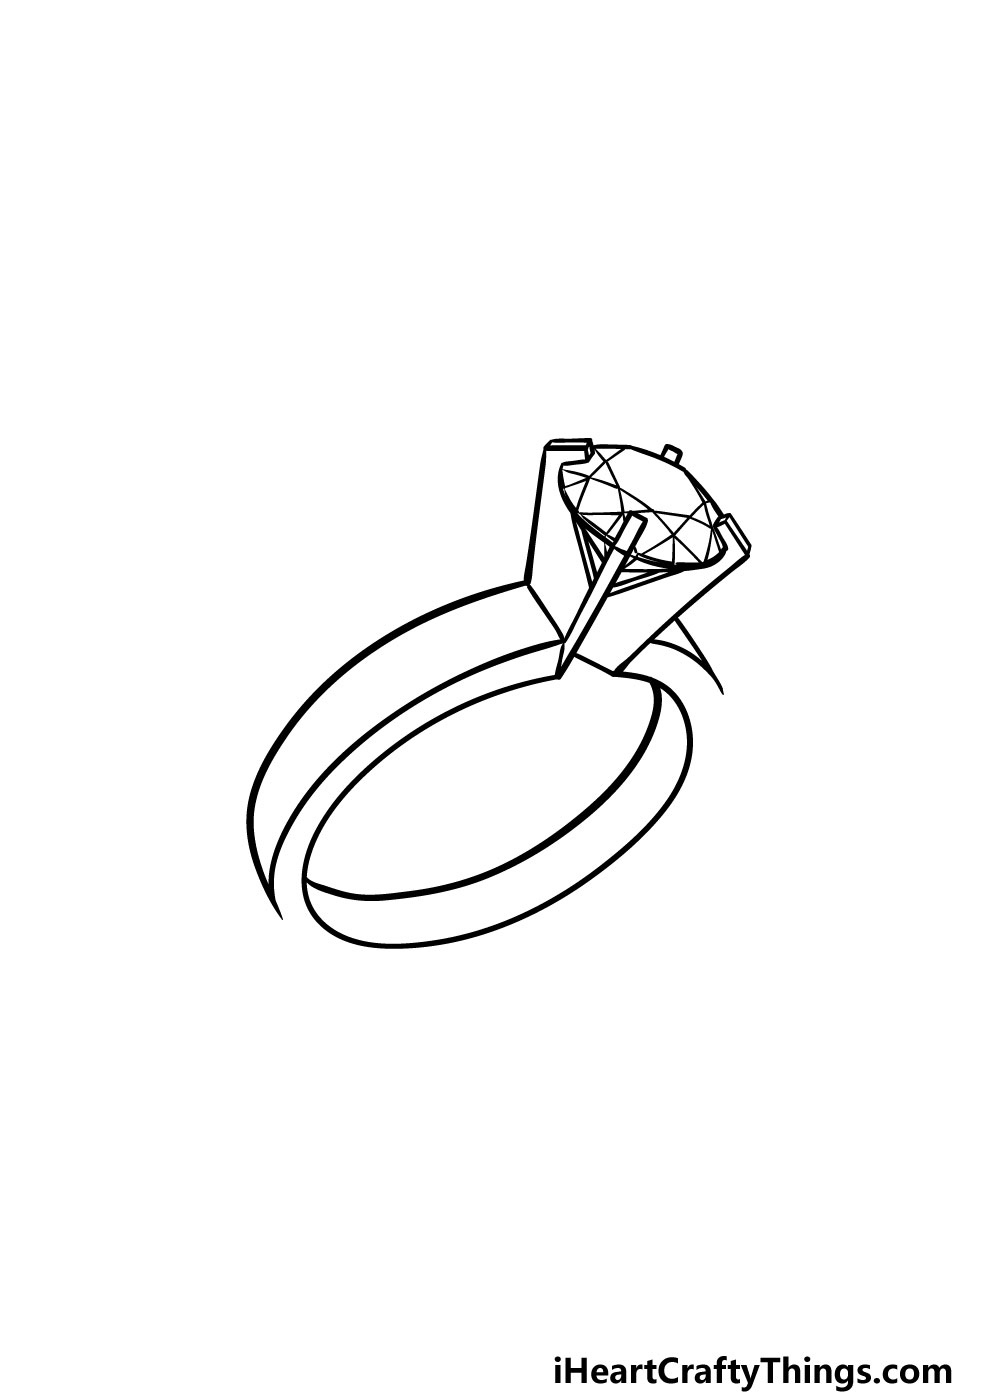
For this next part of your ring drawing, you will be drawing the circular inner portion of the ring. First, draw a thin oval that begins and ends from the structure holding the diamond.
Then, you can draw a line inside of this oval that runs parallel to the outer rim to create a 3D effect for this hole.
It may sound complicated here, but once you refer to the image it will all make sense!
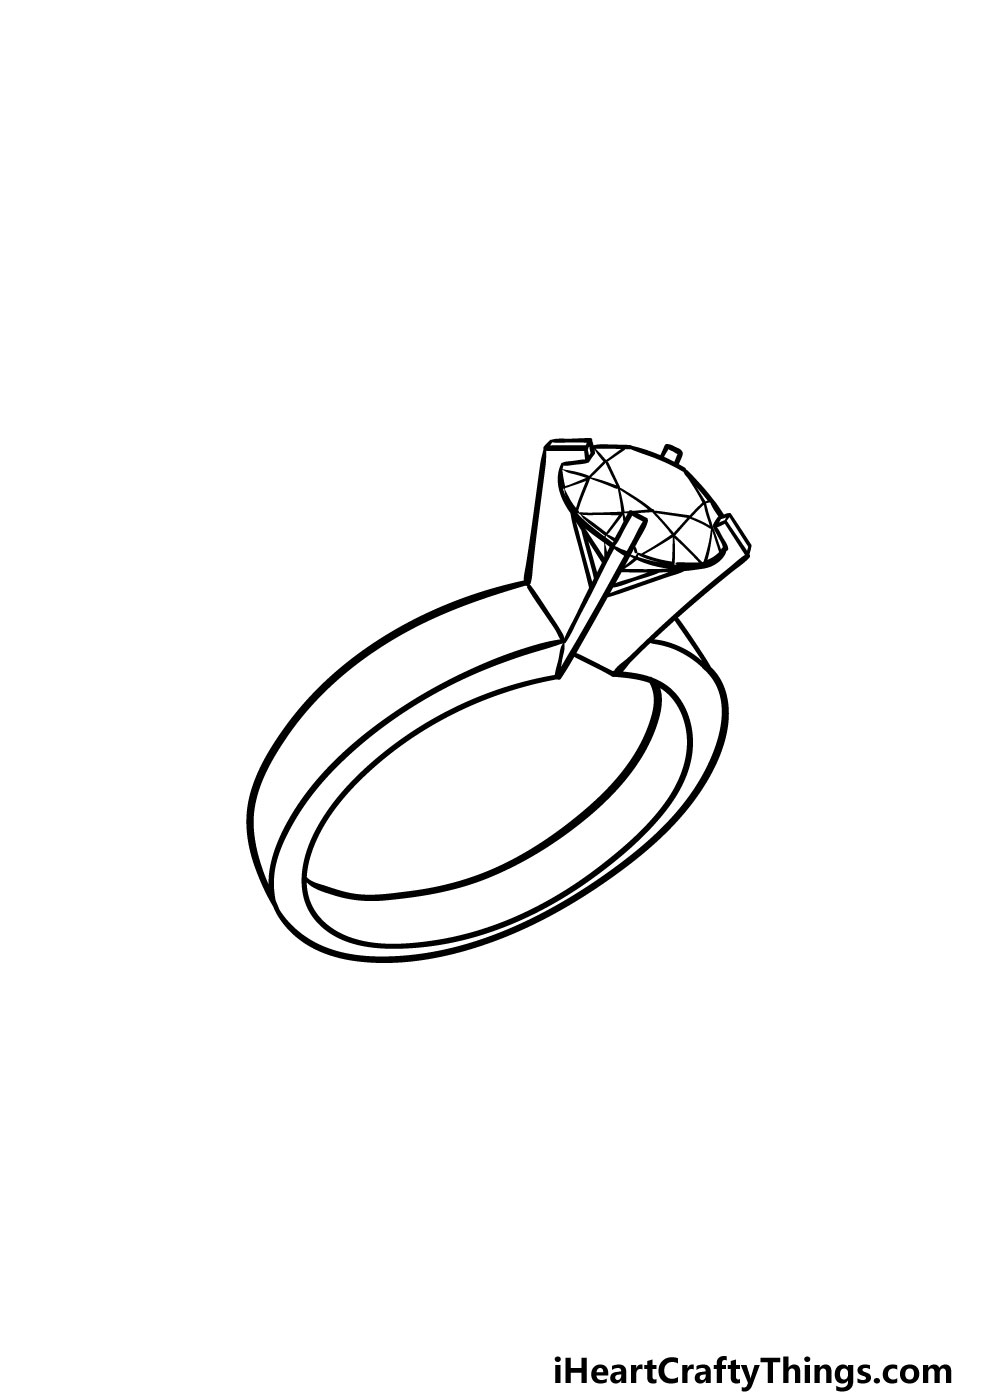
Step 5 – Now, you can add the outer rim of the ring
It’s almost time to bring your ring to life with color, but we have just a few details to add in this guide on how to draw a ring.
First, you will need to draw one more curved line to create the outer rim of the ring. That will finish off the ring and also finish off creating some depth for it.
Before you move on to the final step, you can add any other details that you may want! Perhaps you could design an inscription on the inner surface of the ring.
If you have your own ring such as a wedding or engagement ring, then you could maybe change up the design of your drawing to look like your real-life ring!
Another fun idea would be to draw more pieces of jewelry that you think would go well with this ring. How will you finish off this drawing?
Step 6 – Finish off your ring drawing with some color
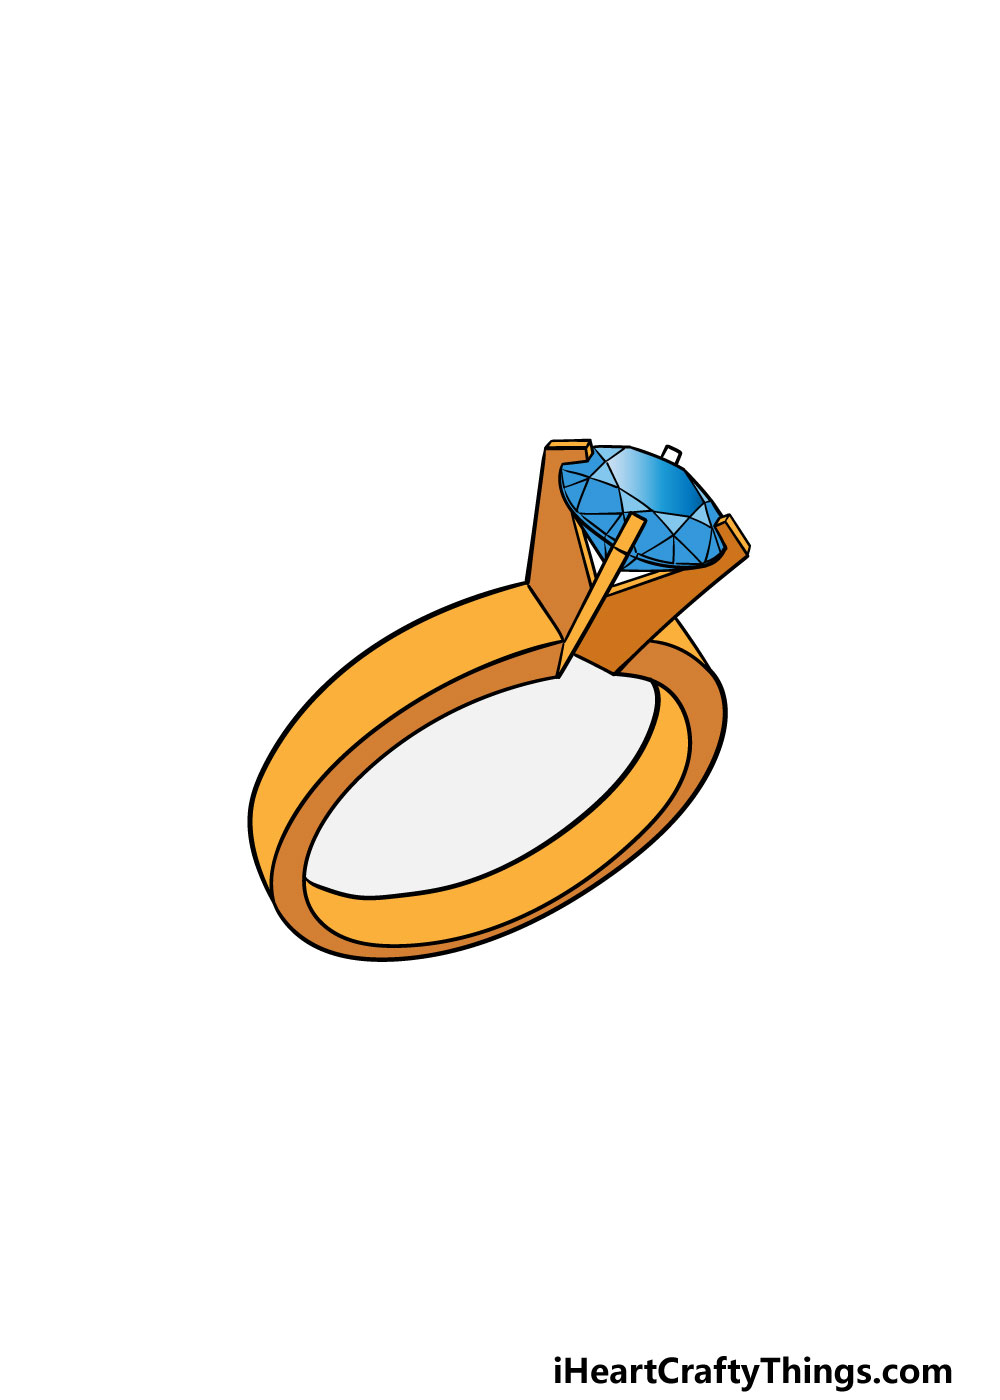
That brings you to the final step of your ring drawing! Now that you have done such a great job creating this drawing, you can now have some fun coloring it in.
For our image, we used some shades of yellow for the metallic parts of the ring while using a light blue for the diamond.
This is just one approach that you could take, and this step is where you get to take over and use any colors that you like!
Diamonds and stones come in all manner of colors and designs, so you have many options for how to color it in.
If you drew any background elements or extra details, then you can use those to inject even more color into your drawing!
For some extra detail, you could incorporate some crafts alongside your favorite art mediums. For example, you could use some glitter on the diamond to give it a real sparkle!
3 More tips to make your ring drawing easy!
Make your easy to draw ring artwork even easier with these fun tips we have for you!
One of the best features of this ring drawing would have to be the diamond embedded in it. We love how it looks, but it could also be considered the trickiest part of the drawing.
This is a feature we think could be changed or even removed if you’re having a hard time with it. For instance, you could remove the details and simplify areas such as the diamond itself or the fitting.
As we mentioned, you could also remove these entirely if you don’t mind the new look the ring would have.
Another feature of this ring sketch that we like is how it has a flat edge at the side. Once again, this is a feature that improves the image but makes it significantly trickier to draw.
If you just can’t seem to get the hang of this detail, you could also change it. Rings come in so many different shapes, sizes and variations, so you could draw one that has a simpler shape.
Removing or changing details like this doesn’t make the drawing worse, it just makes it different! You might even find that you have a design you prefer at the end of it.
What are some other details you could change?
Finally, you could make your drawing of a ring so much easier if you use a real ring to help you. Having the physical object can not only make the details easier but can also help if you want to draw it at a different angle.
If you have a friend or a family member that owns some nice rings then you could borrow those to help you. Just be sure to ask for permission, as rings are often valuable to people!
If you don’t have any rings or don’t know anyone who does, you could find other ring-like objects and use them as a substitute. If all else fails then you could look up pictures online!
Your Ring Drawing is Complete!
With that, you have completed this guide on how to draw a ring! You did a fantastic job and you ended up with an incredible drawing.
This ring was a trickier drawing than it may have first appeared to be, but by using this guide we hope that it was not only easier than expected but more fun too!
Now you get to take over and finish off this drawing with your own details. We mentioned a few ideas you could use, such as drawing a background or more jewelry to go with it.
By combining these ideas with your favorite art mediums you have a lot of freedom for how to make this picture your own!
When you’re ready for more drawing fun, we hope to see you on our website! We have many amazing drawing guides for you to enjoy there, and w upload new ones frequently.
Once your ring drawing is complete, we would love to see it! You can show us by sharing it on our Facebook and Pinterest pages for us to enjoy.