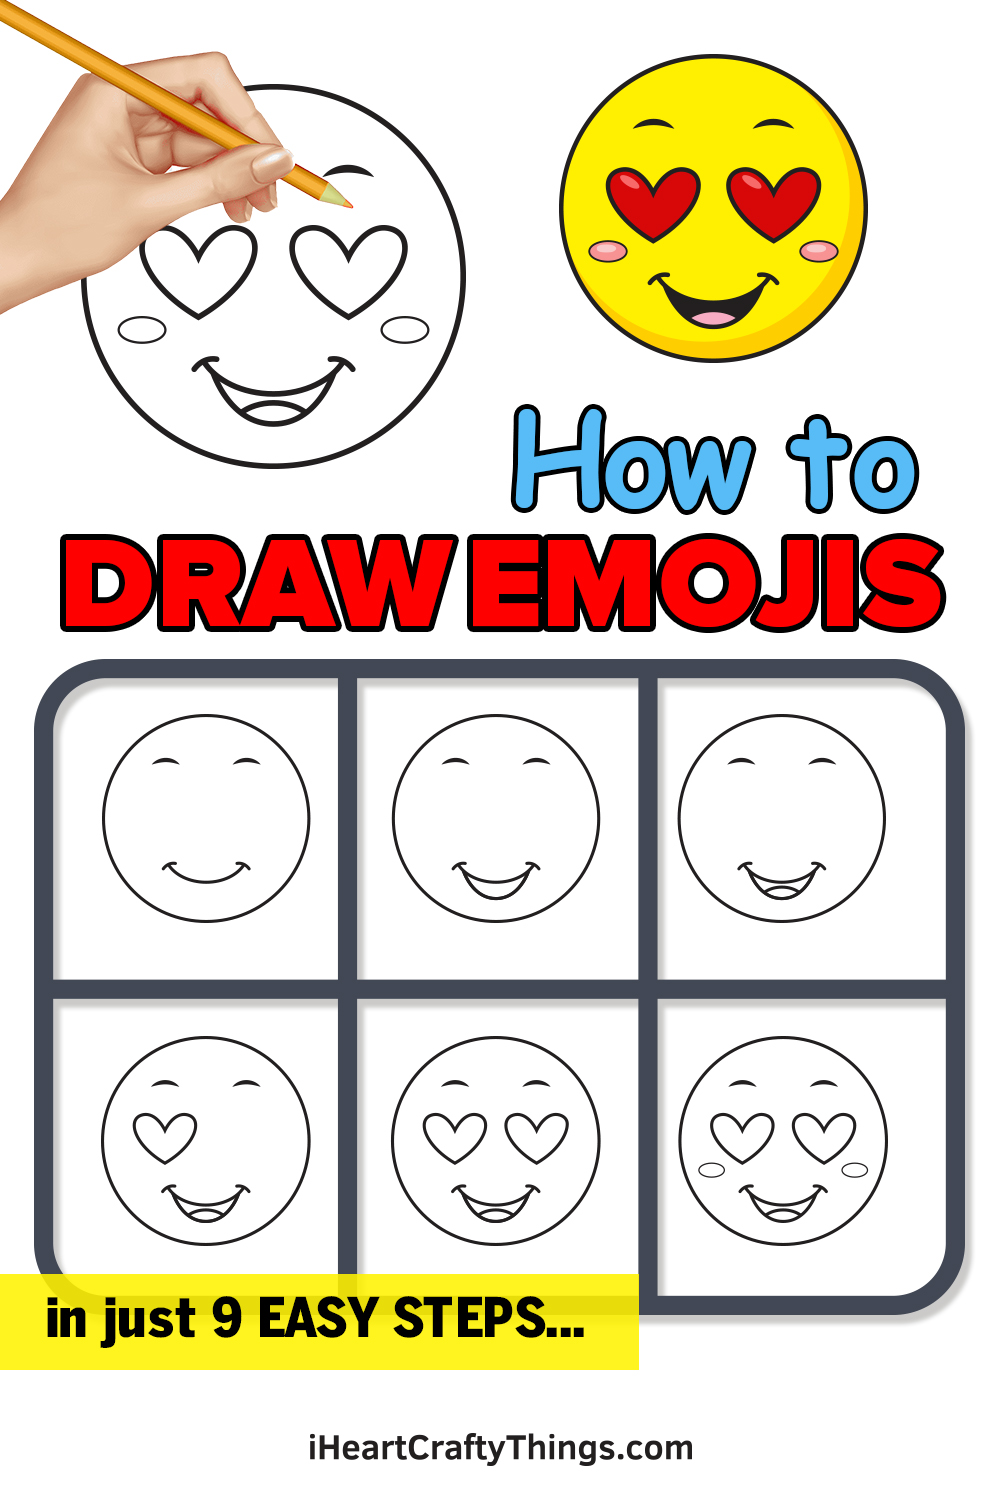
This guide on how to draw emojis for kids is perfect for all ages to enjoy. You’re about to learn the easiest way to draw some fun emoji designs.
Emojis have become a huge part of our daily lives. People of all ages send emojis in their daily conversations, and they can be a great way to add a bit of expression and emphasis to what you’re saying.
Every emotion you can think of has an emoji attributed to it, and it’s not often you encounter a situation where you seek an emoji that hasn’t been made.
This guide will show you how to draw a happy face with heart eyes, but once you have the hang of it you could change some of the details to recreate your favorite emojis.
So let’s begin and put a smile on your face!
See How To Make Your Emojis Drawing
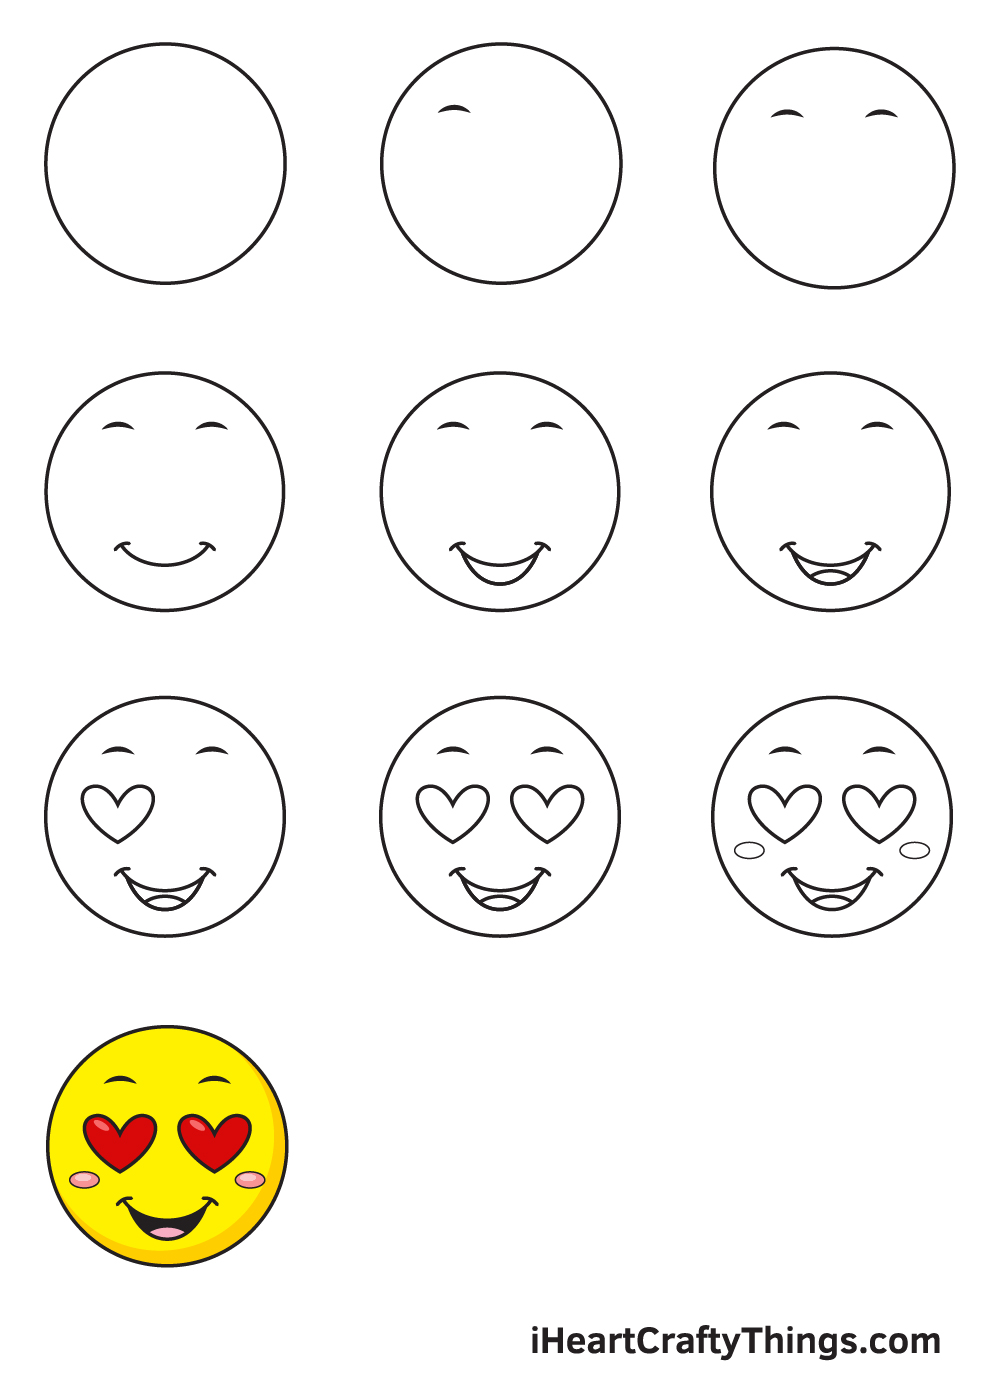
How to Draw Emojis – Let’s get started!
Step 1
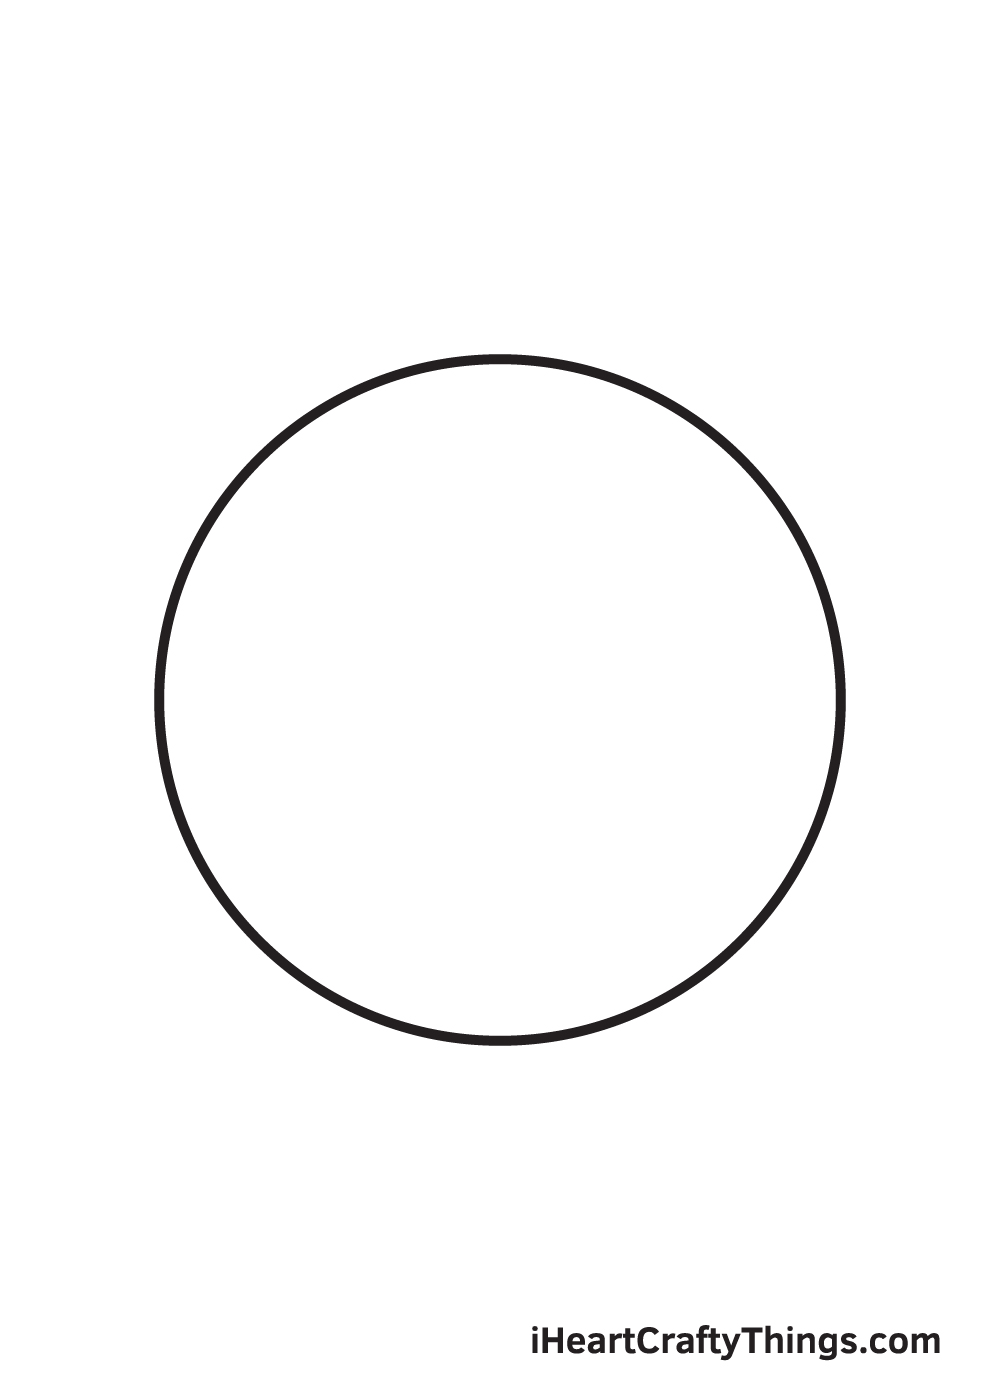
Starting in the middle of your paper, draw a perfect circle to create the outline of the emoji’s face. If you can’t freehand a perfect circle, don’t worry!
There’s a tool that you can use to aid you in drawing a flawless circle, which is called a “compass”. Feel free to use it if you like!
In order to ensure that the circle will be drawn in the middle, draw a vertical and a horizontal line across your paper.
These will serve as your reference lines to help you determine the perfect spot to draw your circle in. Remember, the point where the two lines meet should be positioned in the middle of your circle.
Step 2 – Draw the Left Eyebrow
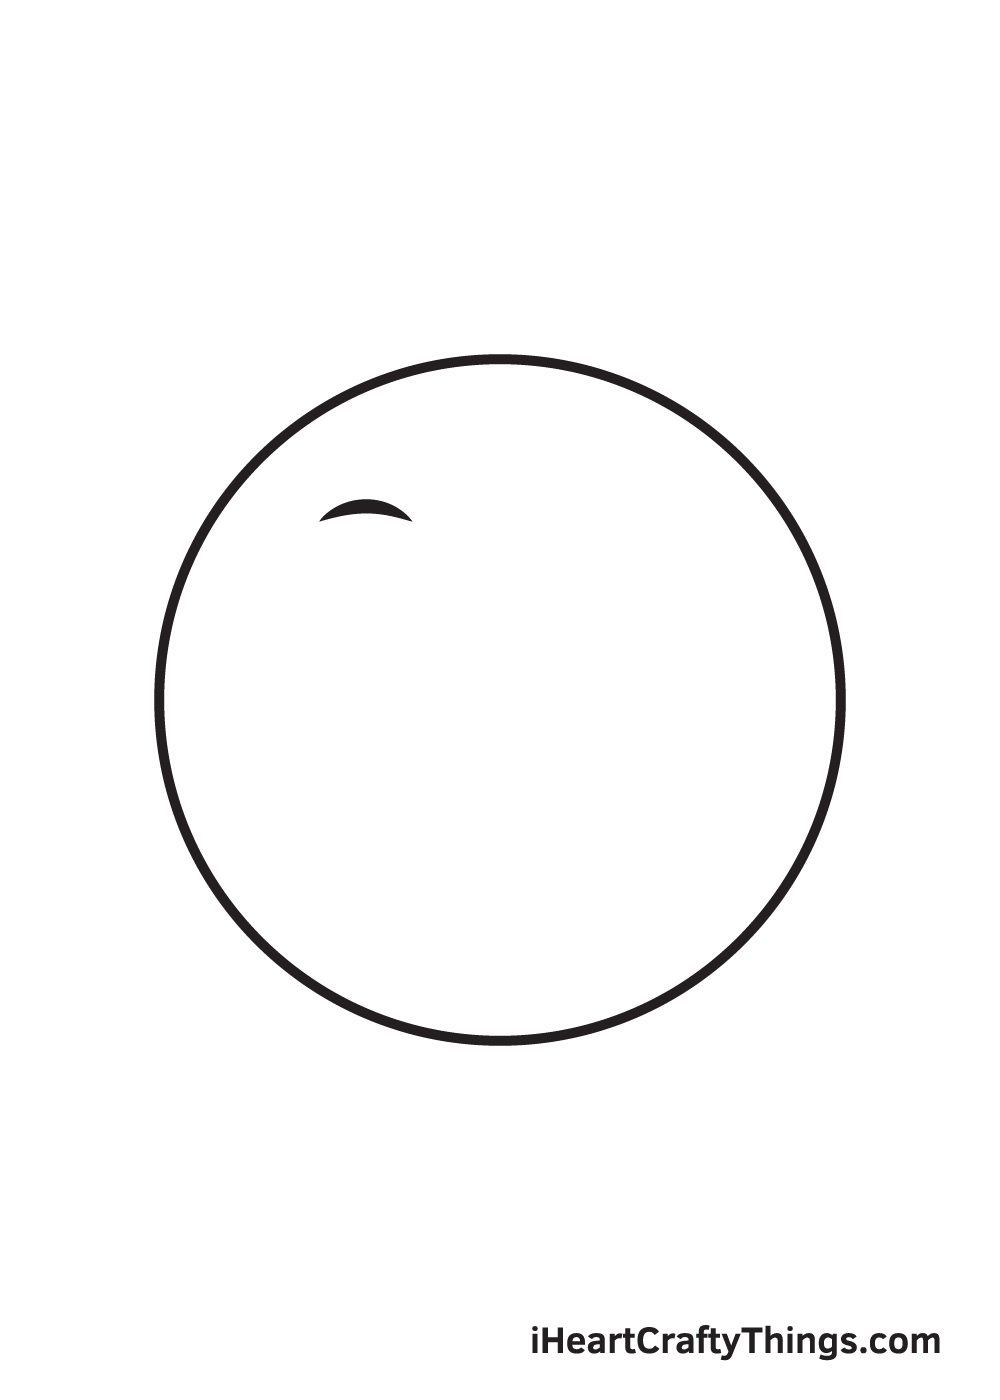
Draw a downward curved line on the upper left corner within the circle to create the first eyebrow.
Step 3 – Next, Draw the Right Eyebrow
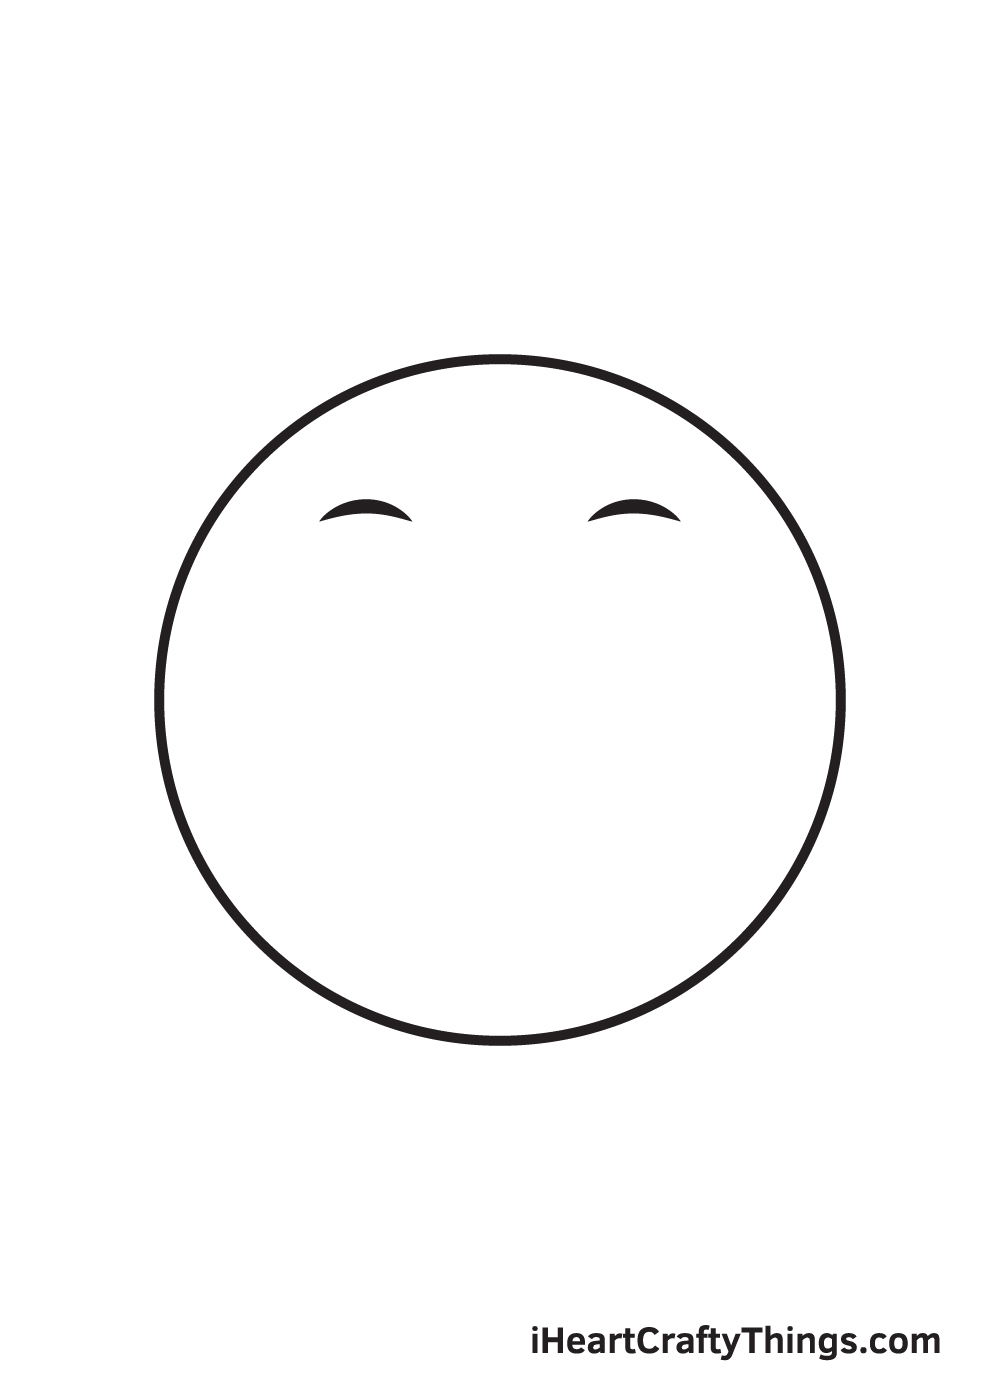
Right beside the first eyebrow, draw a second curved line to complete the eyebrows. Make sure that the eyebrows are even and aligned with each other.
Step 4 – Now, Draw the Emoji’s Mouth

At the bottom part of the emoji’s face, draw a wide upward curve. When drawn correctly, this curve should represent the upper lip of the emoji.
Step 5 – Put a Wide Smile on its Face
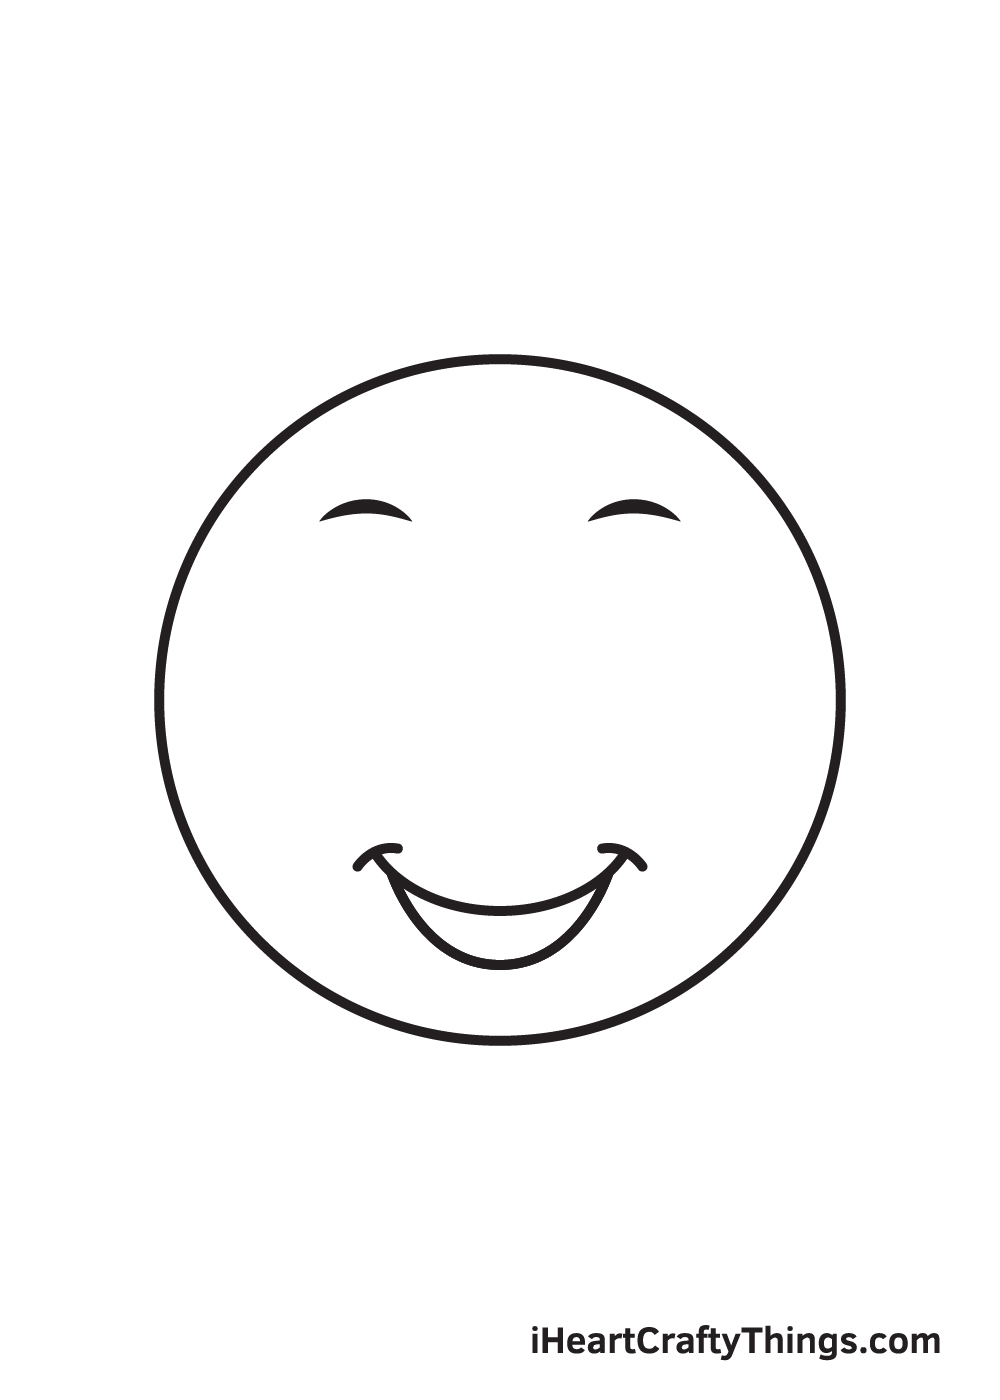
Draw another upward curve at the bottom of the mouth, connecting both ends together. This will be the bottom lip of the emoji.
In this step, however, the curve should be slightly lower than the one in the previous step. This will create the impression of a huge grin.
Step 6 – Draw a Tongue Within the Mouth

Inside the mouth of the emoji, draw a downward curve to form the tongue. After finishing this step, you should now be able to see the emoji’s big smile.
Step 7 – Draw the Left Eye

Right underneath the left eyebrow, draw a heart shape. This will be the first heart-shaped eye.
Step 8 – Then, Draw the Other Eye
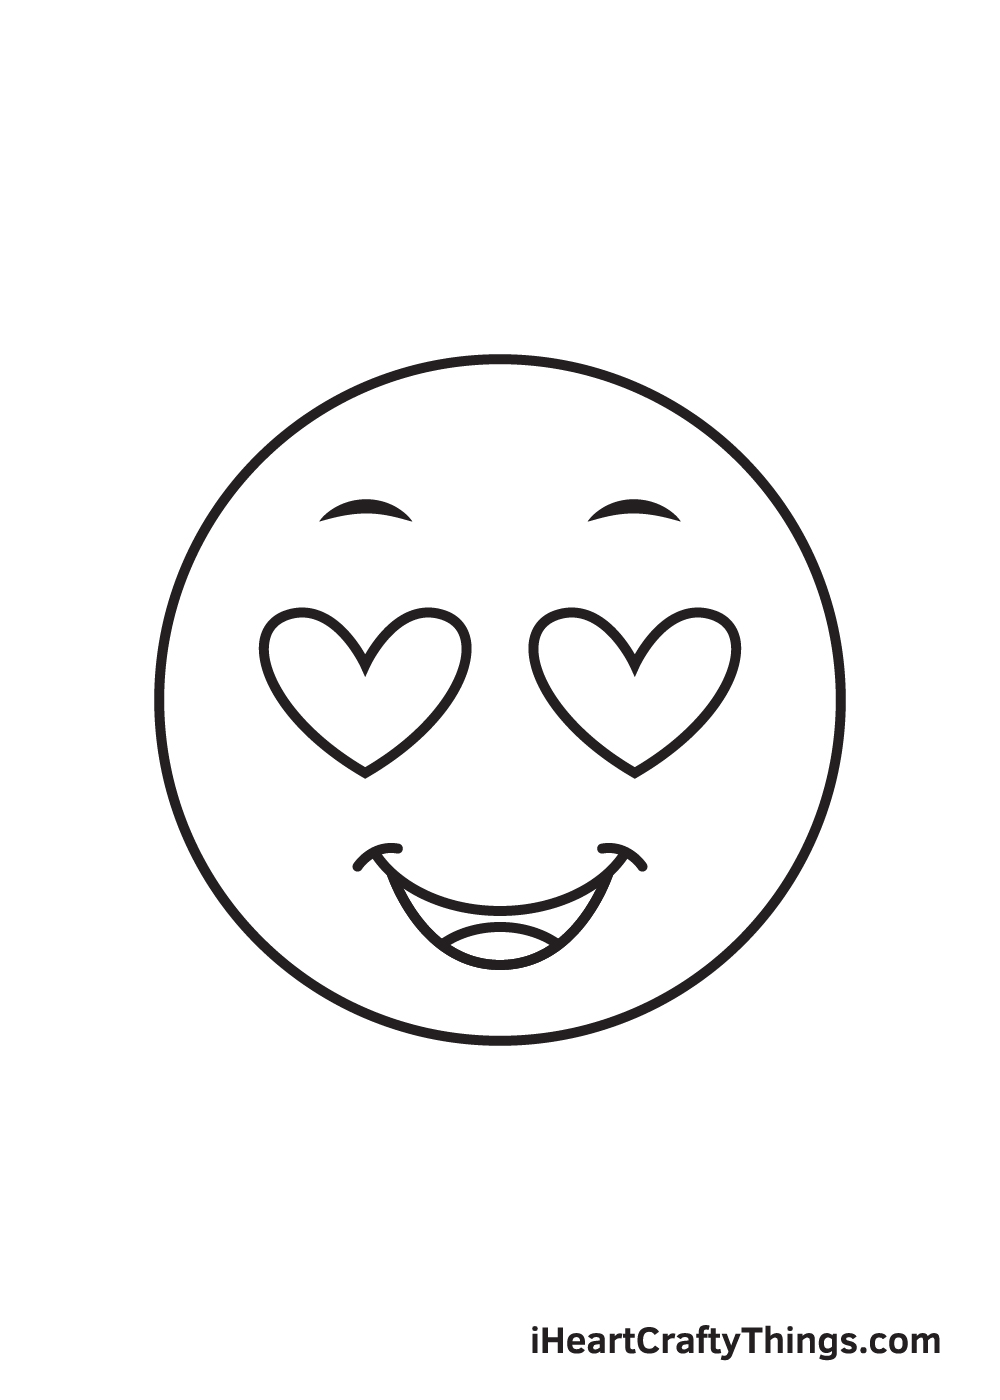
Now that we have finished drawing the first eye, we will be working on the other eye next.
Beside the left eye and underneath the right eyebrow, draw a second heart shape to complete the eyes.
Make sure that the heart-shaped eyes have the same size. It is also crucial to ensure that they are even and aligned to each other.
Step 9 – Create a Blushing Effect
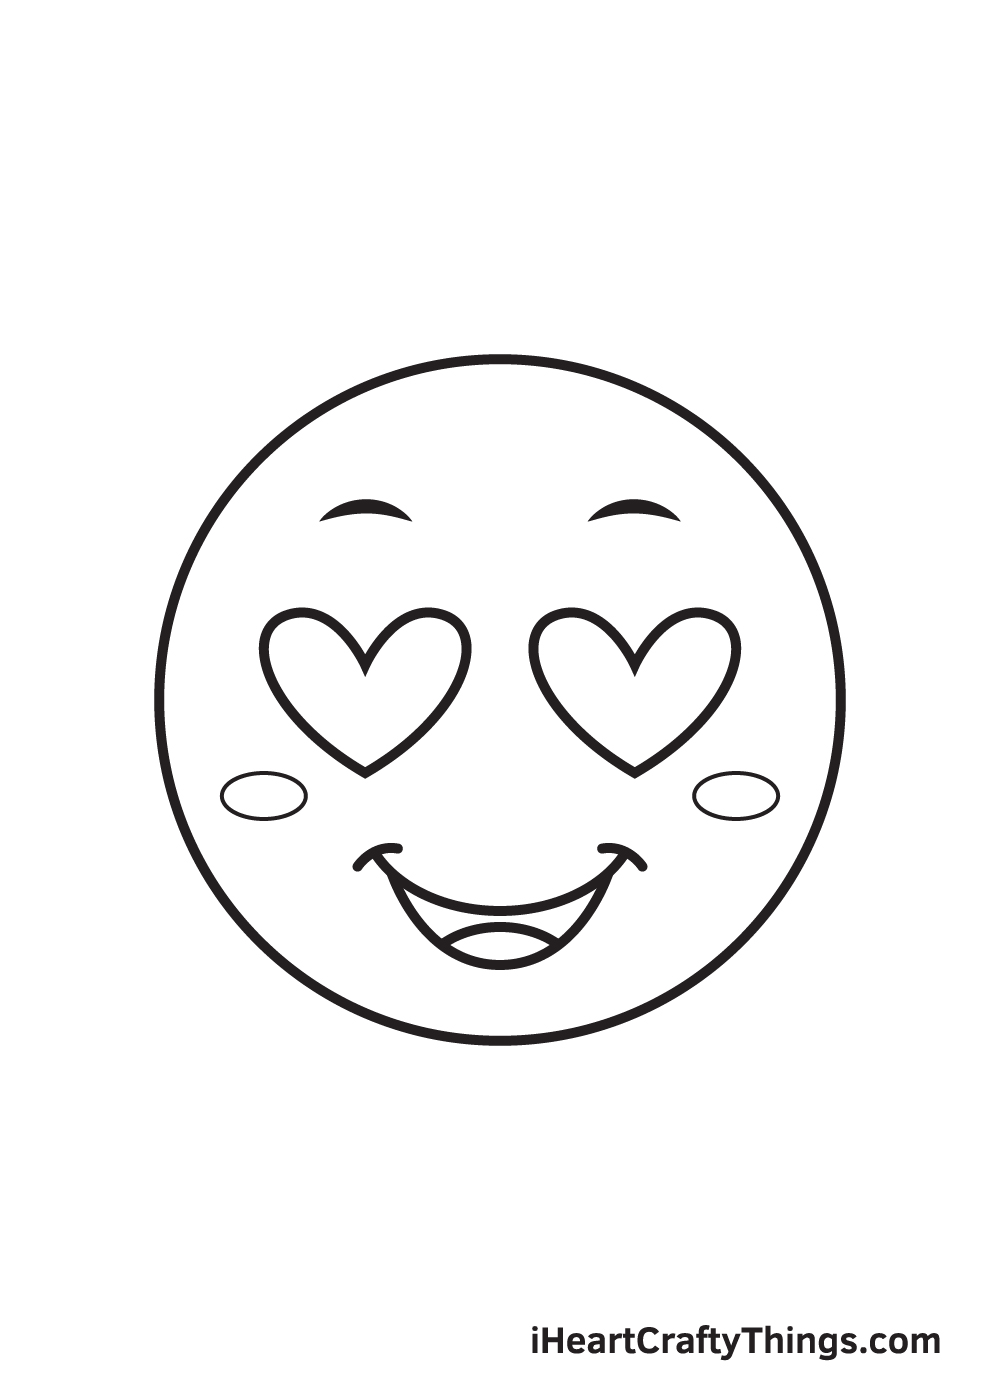
Below the heart-shaped eyes, draw two tiny sideways oval shapes to create the illusion of a “blushing effect.” This blush may seem small and insignificant, but it actually emphasizes the facial expression and the emotion of your emoji.
Here, you can see the emoji drawing is nearly finished! The only thing it’s missing is a dash of multiple colors to complete your artwork!
Finally, here is the most exciting part—filling in the colors for your awesome drawing! This is the part where you can show off your artistic skills and your ability to mix and match various colors.
This heart eyes emoji is originally colored yellow with red heart-shaped eyes. However, don’t let the standards stop you from experimenting with different colors.
Feel free to color the emoji using any color you prefer. After all, it’s your work of art!
Don’t forget to add a hint of color to your emoji’s flushed cheeks!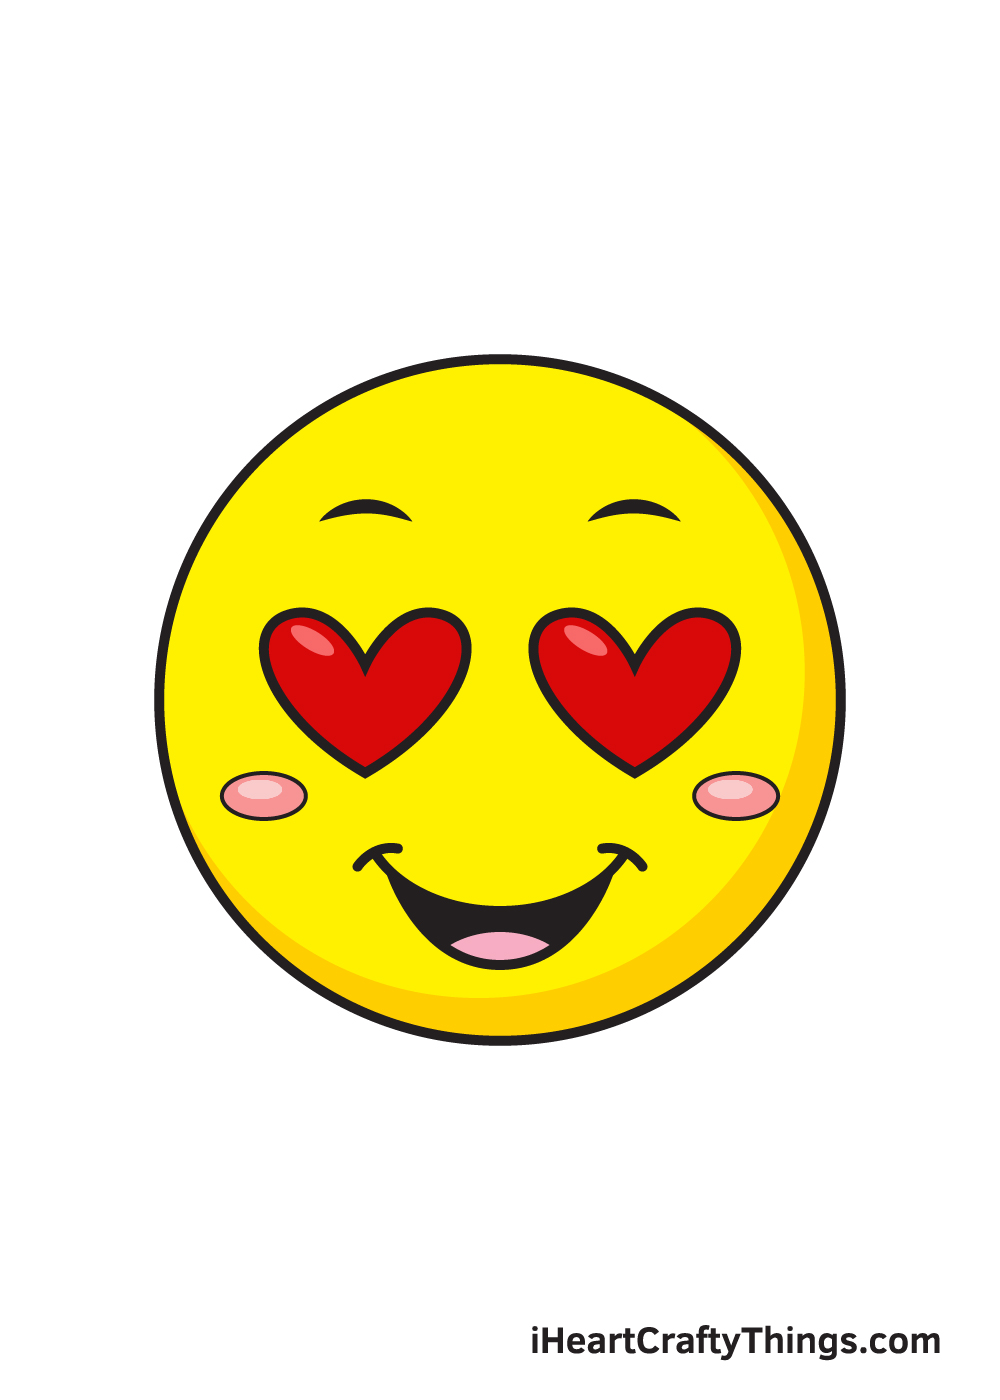
5 Tips To Make Your Emoji Drawing Even Better!
These tips for your emoji sketch will definitely put a smile on your face!
This drawing of an emoji is really feeling the love! We included some red hearts into the design, but there is always room for more.
You could make this emoji look even more lovely by adding as many different hearts as you like.
They could be all kinds of different shapes, colors and sizes.
How many more do you think will finish off this emoji?
There are other small changes you could make to make this emoji more personalized. For example, you could add some pupils to the eyes or maybe add a tongue hanging out from the mouth.
These would be great to make your drawing more personalized to yourself to make it even more unique! What are some small changes you could make?
Another interesting way that you could take this emoji drawing even further would be by adding some limbs for it. This way, you would make it a complete cartoon character.
The limbs could be drawn in a simple cartoon style and they would still effectively turn this emoji into a complete character. The only question is what poses could you portray?
Once this emoji looks exactly as you want it, you could add some emoji friends for it to hang out with! You only have to look at the text box of any phone to see you would have dozens to choose from.
Whichever emotion you can think of probably has an emoji that could be used for this image. Or, you could even try your hand at creating your very own emoji face to add!
Finally, you could complete this emoji sketch with a background setting. There are so many different ways that you could go about doing this.
Emojis are bright and colorful, so the background could reflect this. You could choose a location and then have this emoji and any extras hanging out.
It could be anything from a party to a mall or any other place you can think of!
Your Emojis Drawing is Complete!
We hope you enjoy this step-by-step tutorial on how to draw a cupcake. With this guide, you can surely draw and color emojis along with its complex features and elaborate details in no time.
And the most fun part is, you can customize its flavors and play with various colors as much as you like! While you’re at it, why not try using different coloring tools as well?
Once you’ve finished your masterpiece, we’re certain you must be feeling very proud of yourself—as you should be! Completing this emojis drawing is definitely fulfilling.
Make sure to show off your work of art and share it on our Facebook page and on Pinterest. We’re sure it looks amazing!
We can’t wait to see your colorful emojis drawing!