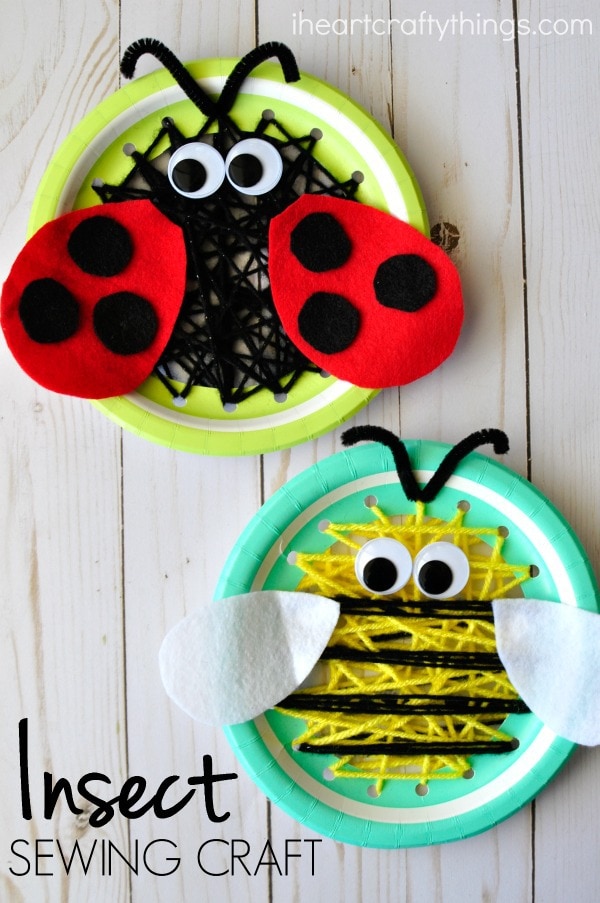
Our love for paper plate sewing crafts continues to grow, especially after we made this darling insect sewing craft this week.
These cute little insects are a fabulous compliment to the spring season and they are perfect for beginning to teach children how to sew. We chose to make colorful bees and ladybugs as our insects but you can get as creative as you want with this fun spring sewing craft.
Your little ones may even choose to design their own kind of bug.
This post contains affiliate links to the products mentioned. Read our disclosure policy for more information.
Supplies Needed for this Insect Paper Plate Sewing Craft
- small paper plates
- small bowl for tracing
- pencil
- yellow and black yarn
- yarn needle
- white, black and red felt
- wiggly eyes
- scissors
- hole punch
- tape
- tacky glue
Instructions for Making this Paper Plate Insect Sewing Craft
1. Trace circle on the back of paper plate
Place your small bowl on the back of your paper plate and trace it with your pencil. You’ll want to make sure there is some room on the outside of the circle for your holes so don’t make the circle too big.
2. Cut out circle
Poke your scissors into the center of your paper plate and cut out the traced circle.

3. Make holes around perimeter of circle
Make holes around the perimeter of the circle with your hole punch.
4. Thread one end of yarn through yarn needle and tie a knot, fix other end to the back of paper plate
Cut off a section of yellow yarn to thread through the holes. The amount you’ll need will depend on how big your paper plate is. The sections we used were about 10-12 feet. Thread one end of the yarn through your yarn needle and tie a knot to secure it in place. Tape the other end of the yarn onto the back of your paper plate.
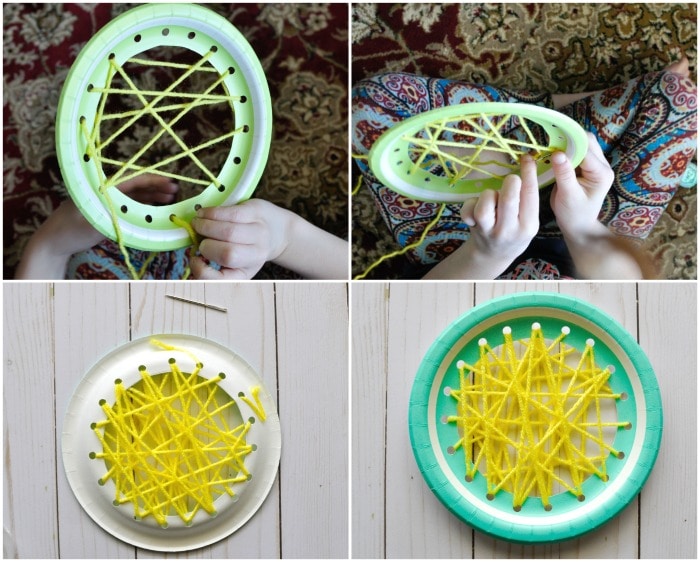
5. Sew down and up the holes around the circle until you reach end of yarn
Now it’s time to sew your paper plate insect craft. Pull the yarn needle up a hole in the back of the paper plate to the front of the paper plate. Pull the excess yarn all the way through the hole each time you sew. Then continue sewing down and up the holes around the circle until you reach the end of your yarn. Cut the yarn needle off and tape the end of the yarn onto the back of your paper plate.
6. Sew some black stripes across bee body
When making your bee, you’ll also need to thread a piece of black yarn and use it to sew stripes across your bee body. We made about 3 passes through each hole in our stripes to give them some thickness.
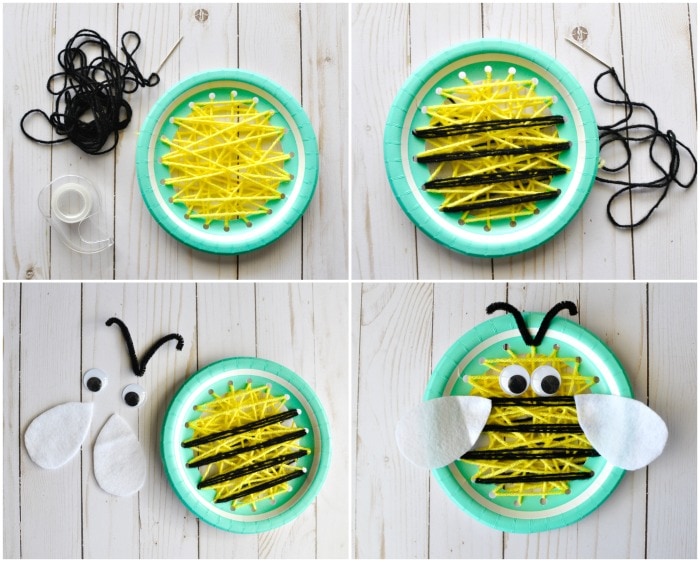
7. Cut out bee parts
Cut out two bee wings out of your white felt. Also, cut a black pipe cleaner in half for antennae. Fold the pipe cleaner in half and curl down the ends.
8. Attach bee antennae
To attach the bee antennae, poke the folded end of the pipe cleaner down into the hole at the top of your bee. Then fold it up behind the back of the paper plate and tape it in place.
9. Glue on eyes and wings
Finish your paper plate insect sewing craft by gluing on your wiggly eyes and felt bee wings with your tacky glue.
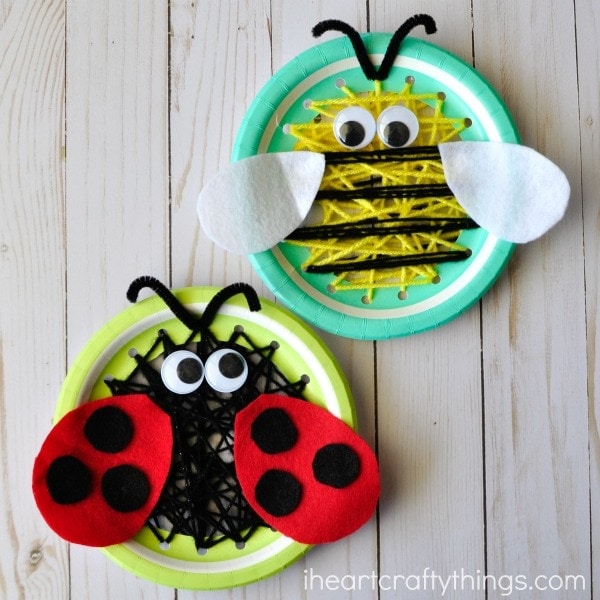
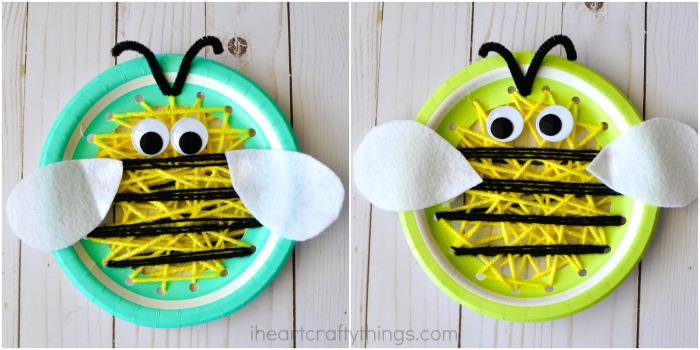
Above you can see my bee pictured on the left and my daughter’s bee pictured on the right. Besides cutting out the bee wings for her out of the felt and threading her yarn needle for her, she completed the project all on her own. She is a Kindergartner, age 6 1/2. She has done sewing projects like this before so she required little assistance, but kids her age might require more assistance.
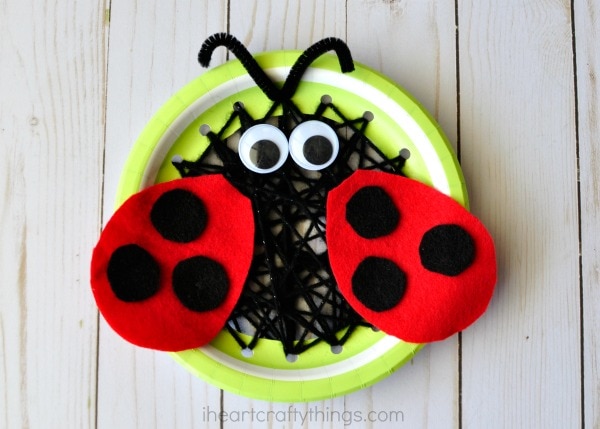
How to Make the paper plate ladybug sewing craft
To make the ladybug, follow the same steps we used for the bee except sew black yarn around your paper plate instead of yellow. Then use red and black felt to create the ladybug wings.
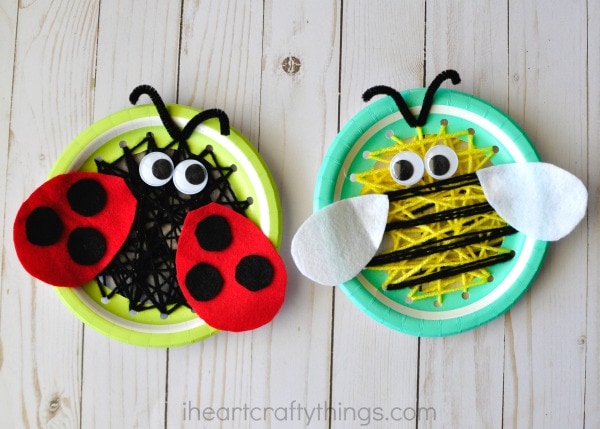
Aren’t they daring?! We intend to make a few more insects and connect them together to make a fun spring banner to hang up in our home.