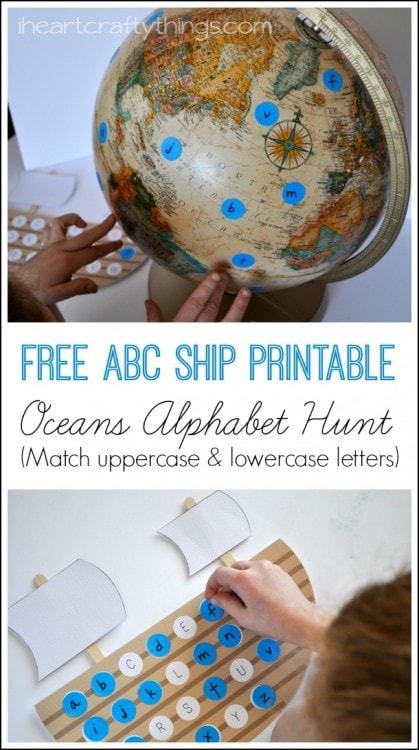
If you are a regular here, you know that I love finding fun ways for my daughter to practice her uppercase and lowercase letters with fun Alphabet games. This week I looked at our globe sitting on our mantel and I thought it would be a great resource for creating a fun Alphabet Ocean Hunt game for my preschooler. Not only did my daughter have a blast with the game but we also talked about the World, the difference between oceans and lands on the map, and she learned where we live on the globe. The free ABC Ship Printable included in this post couples great as a simple preschool craft too.

This post contains affiliate links for your convenience. Read our Disclosure Policy for more information.
Supplies you will need:
- Globe (or world map)
- ABC Ship Printable
- 3/4″ blue removable circle stickers
- black marker
- 2 craft sticks
- tape

How to get the alphabet game ready:
1. Print off the ABC Ship Printable
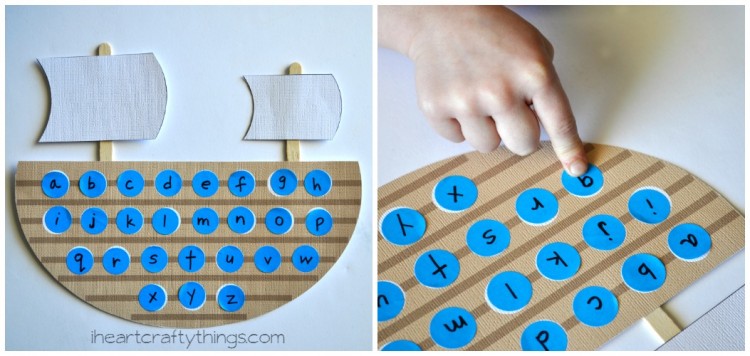
Start by printing off the ABC Ship Printable. I also made a blank version of the ship if you want to customize your game. Have your preschooler cut out the ship and the sails. Tape the sails at the top of your craft sticks and then tape the craft sticks onto the back of the ship.

2. Prepare stickers by writing letters on them
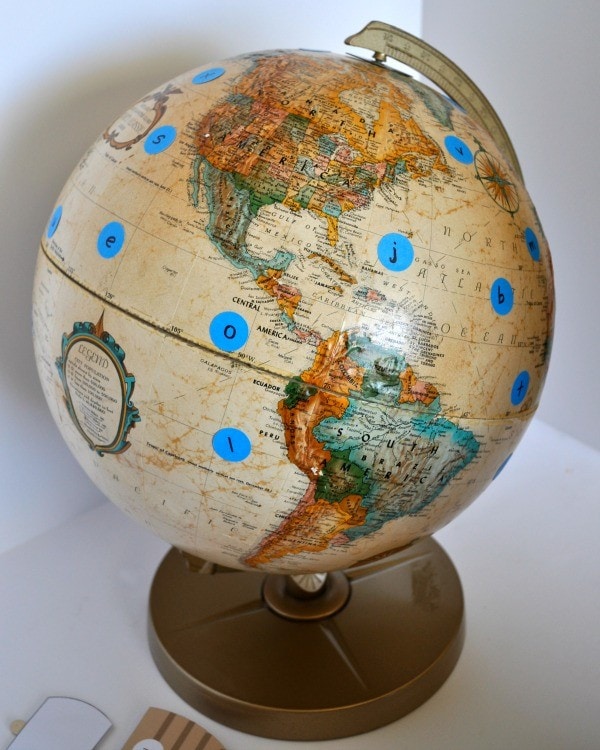
Write the lowercase letters onto your removable circle labels and place them all over your globe in the oceans. You are now ready to start the activity.
How to play the game:
I used blue stickers because I thought they would look like windows on the ship. When we started the activity I told my preschooler the ABC Ship had lost it’s windows and she needed to search the oceans around the World to find them and put them back in their correct spot. You can play a few different ways:
1. Glue the stickers starting with A
Start with A. Have your preschooler find the lowercase A on the globe and then put the sticker onto the uppercase A on the ship. Continue working through each letter until the ship has all of it’s letters.

2. Allow kids to match letters they want
Let your preschooler choose which letter they want to match up. Have them look around the globe and remove one sticker at a time and match it to the correct uppercase letter on the ship. Continue until the ship has all of it’s letters.

During the activity I asked my daughter lots of questions like “What letter did you choose to match?” “What sound does that letter make?” “Can you think of a word that starts with that letter?” etc. After she had matched all the letters we used the boat as a way for her to point and practice saying her ABC’s.
As I mentioned at the top, while we had the globe out we also talked about maps and what their purpose was. We took a good look at all the Oceans in the World, what their names were and what Ocean was closest to where we live. She had a lot of questions and I loved having a little maps and geography lesson with my preschooler.