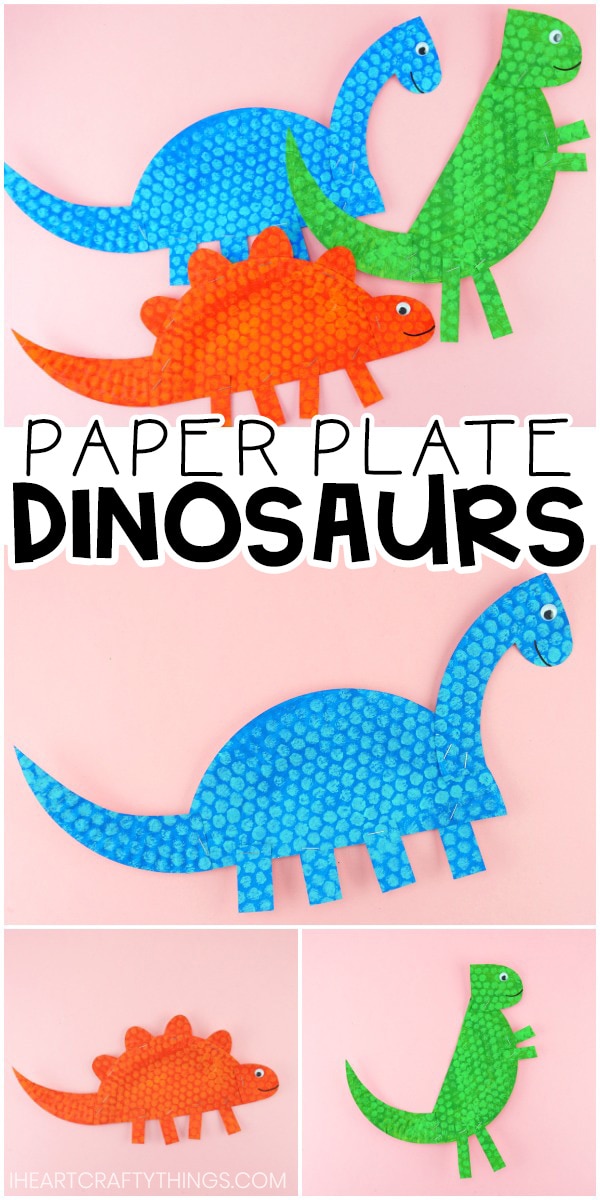
Do you have kids who love anything dinosaur related? If so, this fun dinosaur craft is going to bring a huge smile to their faces. Making paper plate dinosaurs was a go-to craft idea when my kids were little. When they were preschoolers they never grew tired of designing and constructing their own diy dinosaur creatures.
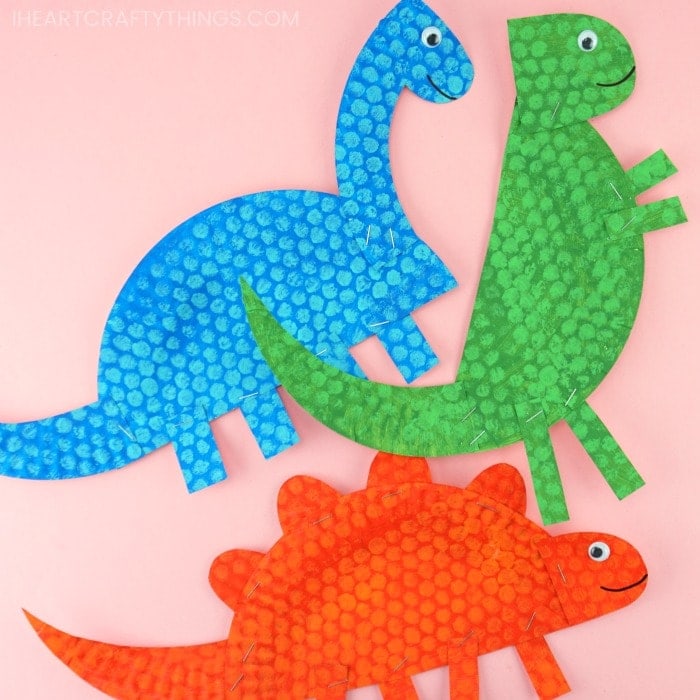
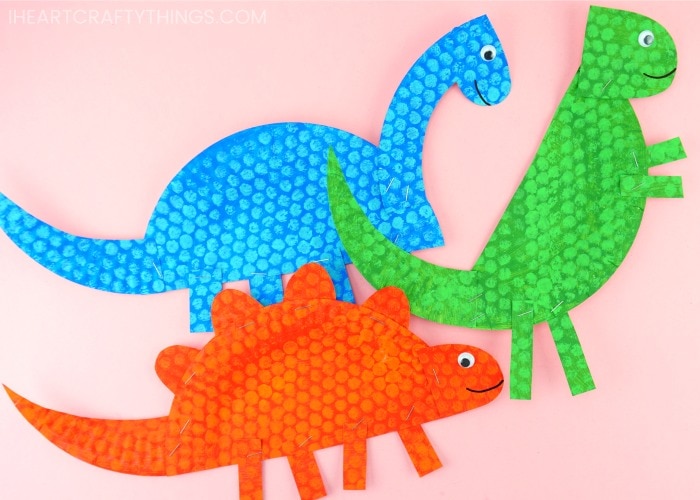
So today I’m super excited to share my secret with you of how to make three different types of dinosaurs using a single paper plate. The templates are so simple to draw on your own, you don’t even need a printable dinosaur pattern.
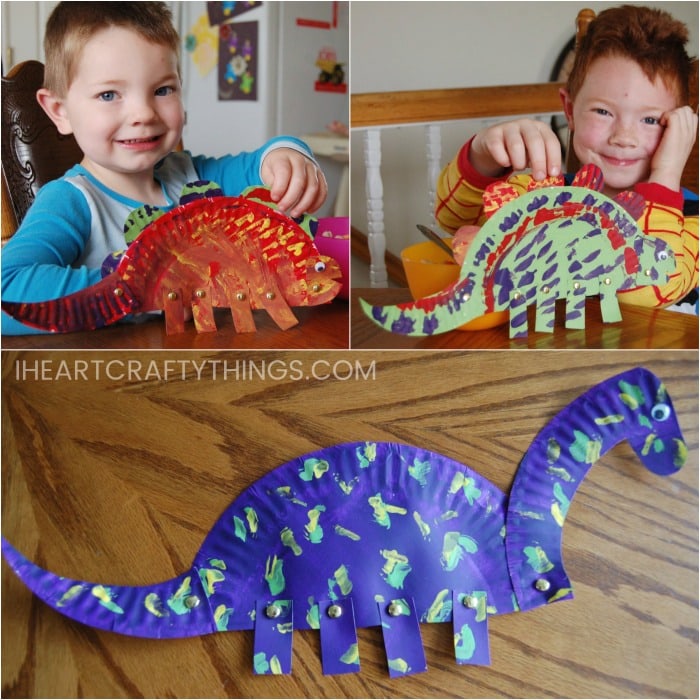
When my middle child was 4 years old, he was a dinosaur loving preschooler. He seriously breathed dinosaurs 24/7.
His love for dinosaur themed activities went beyond just playing with the billions of plastic toy dinosaurs we had laying the house too. He created his own dinosaurs with random objects he played with like crayons, our abc magnets on the fridge and our wooden blocks.
Our library bags were constantly overflowing with dinosaur books every week and he was determined that if he dug deep enough in the sand box he was sure to discover some dinosaur bones or dinosaur fossils in our backyard.
It came as no surprise that he lived for creating dinosaur art projects and dinosaur themed arts and crafts activities.
Keep reading this crafts activity tutorial to discover how easy it is to make a Tyrannosaurus Rex, Brontosaurus and a Stegosaurus craft out of a paper plate. Don’t miss our video tutorial at the end of this post!
This post contains affiliate links to the products mentioned. Read our disclosure policy for more information.
Supplies needed for making paper plate dinosaurs
- paper plates (the best kind for this craft are the cheap ones)
- acrylic paint
- sponge paintbrushes
- bubble wrap (totally optional, but I love the fun texture it gives the dinosaurs)
- black marker
- googly eyes
- scissors
- glue or a stapler
Instructions for making these Dinosaur Crafts for Kids
1. Paint front side of paper plate
Begin by painting the front side of a paper plate with acrylic or tempera paint. Let the paint dry completely.
2. Paint a section of bubble wrap and transfer the bubble texture onto paper plate
Cut off section of bubble wrap that is about half the size of your paper plate. I love to save any bubble wrap we get from packages to use for arts and crafts projects like this one.
Paint the bubble side of the wrap with a different shade of color than what you used in step 1. Place the painted bubble wrap down onto the first half of your paper plate. Use your hands to gently rub the wrap to transfer the bubble texture onto the paper plate. Then carefully peel the bubble wrap off your paper plate.
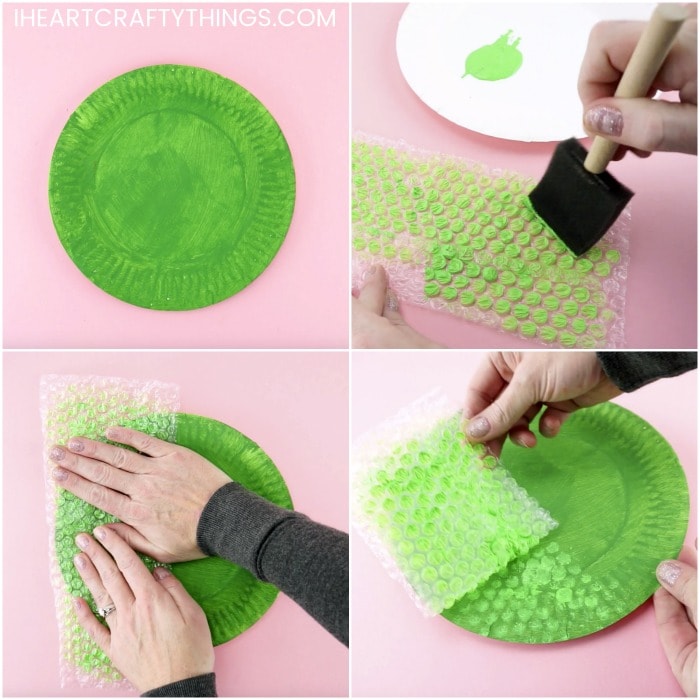
Add more paint to the bubble wrap and print it on the second half of your paper plate to completely cover the paper plate with the bubble texture. This is painting technique is a fun way to create a scale-like texture on your dinosaur skin.
3. Draw dinosaur template on the other side of plate
Once the paint is completely dry on your painted paper plate, turn it upside down to draw the dinosaur template on the bottom of the paper plate with a black marker.
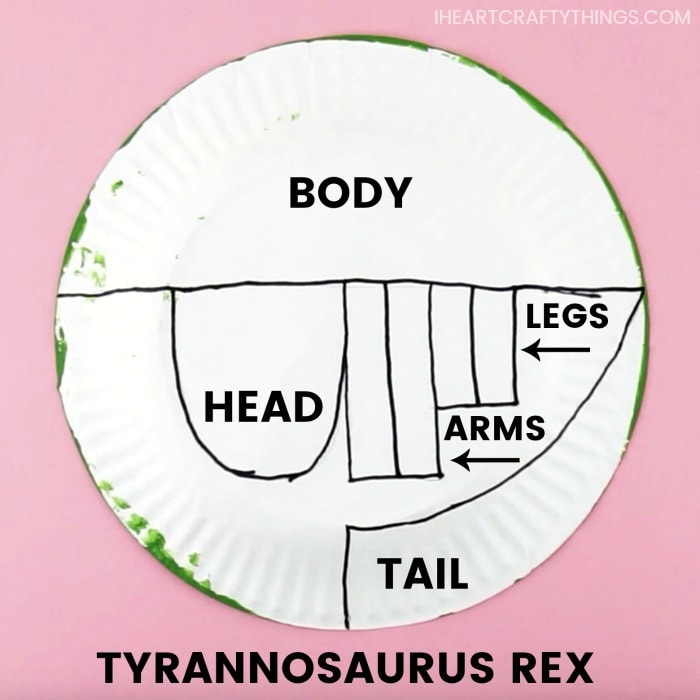
If you are worried about making a mistake you can use a pencil to draw the pattern on the back of the paper plate first, and then trace over it with your black marker.
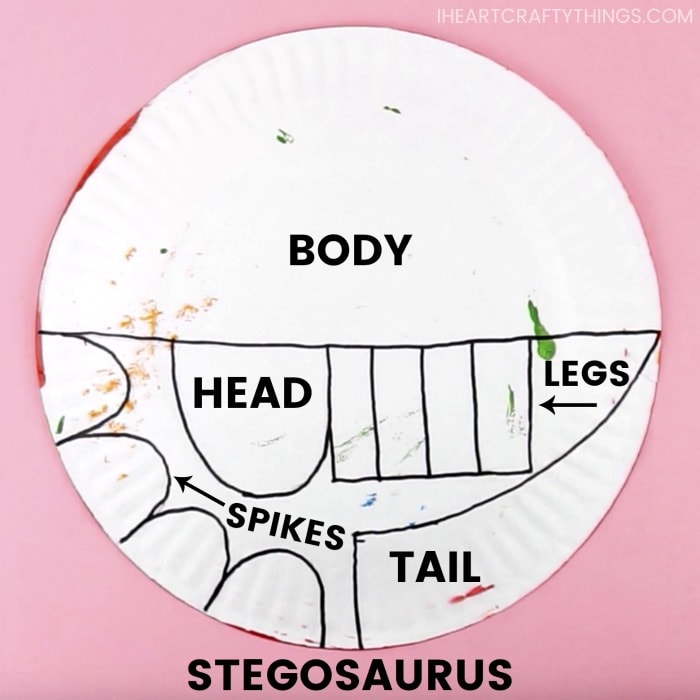
Use our pictures as a guide for drawing either a Tyrannosaurus Rex, Brontosaurus or a Stegosaurus template on the back of your painted paper plate.
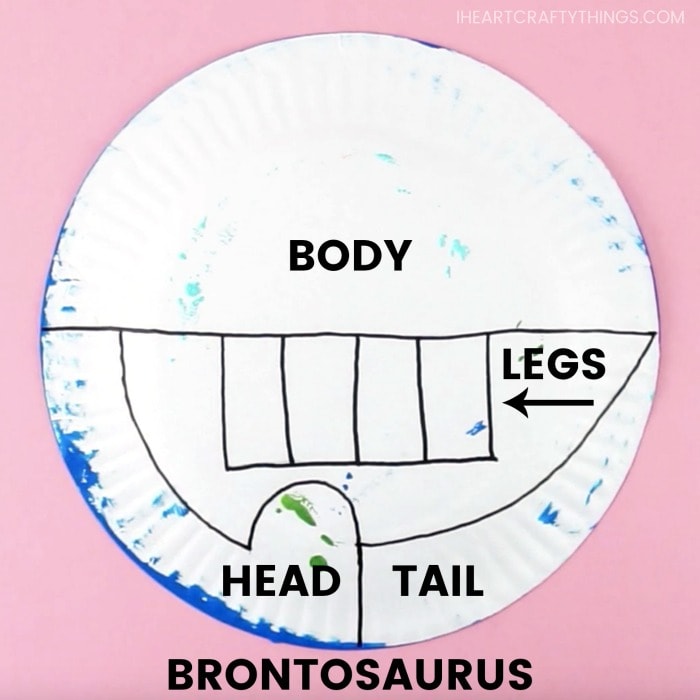
You can see from my photos that you don’t need to worry about the template being perfect. The different pieces like the dinosaur feet, arms and head are very forgiving so don’t stress too much about having them exactly the same size.
4. Cut out dinosaur pieces
Use scissors to cut out the different pieces of the template.
5. Attach different pieces of dinosaur together
Use a stapler or glue stick to attach the different pieces of the dinosaur together. As an alternative, you could also attach the pieces together with metal brads so that your dinosaurs arms, lets and tail are movable. This is an especially fun option if you want to use them as dinosaur puppets.
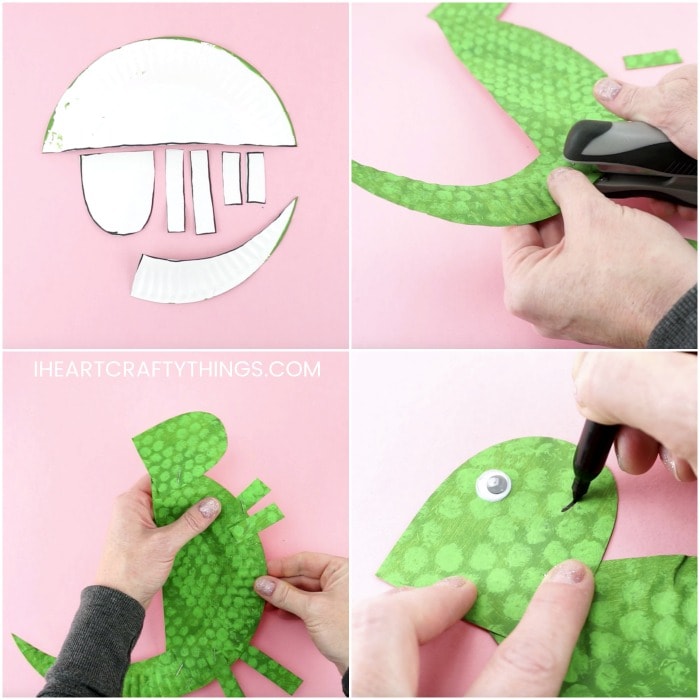
6. Add eye, draw a smile
To finish making your fun dinosaur craft, glue a googly eye on your prehistoric creature. Then draw on a smile, or some big scary teeth. Hee hee!
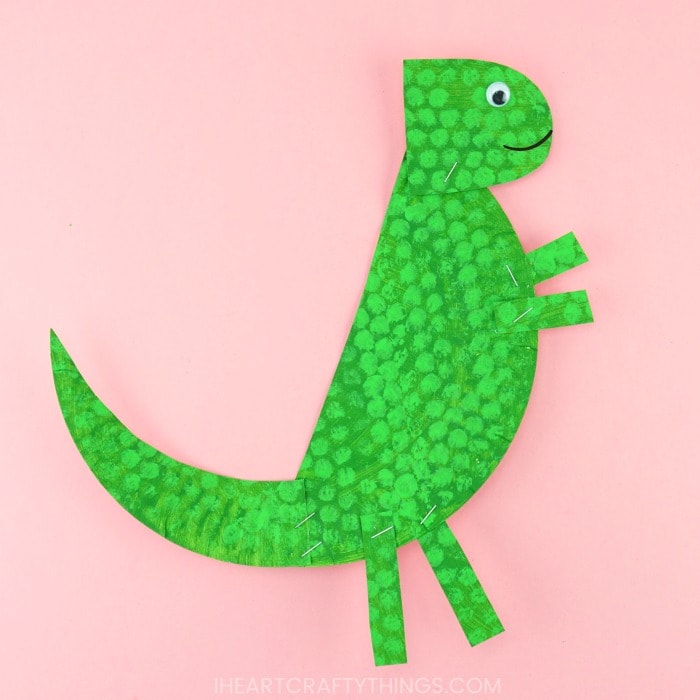
My favorite part of these simple dinosaur crafts for kids is how after making them, kids can play with them and use them as dinosaur puppets.
Don’t you love how the stamped bubble wrap in a different color adds a fun texture to the dinosaur craft? If for some reason you aren’t a fan of it, or if you need to simplify the craft, you can omit this step.
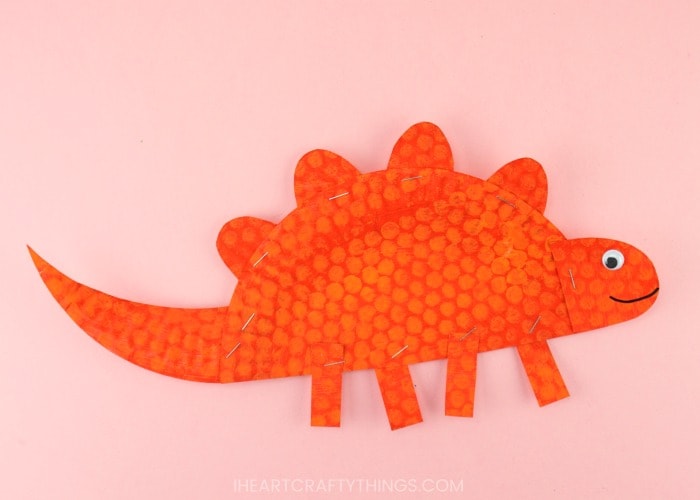
Kids can also color their paper plate with crayons or markers for a super simplified version of the craft activity. This would be a great option if you are having a dinosaur themed birthday party and want to make this craft with kids at a craft table for an activity.
Another fun option to add texture to your dinosaurs is to make tissue paper dinosaurs. If you don’t want to get out the paints, simply glue colorful tissue paper squares all over your paper plate and allow it to dry.
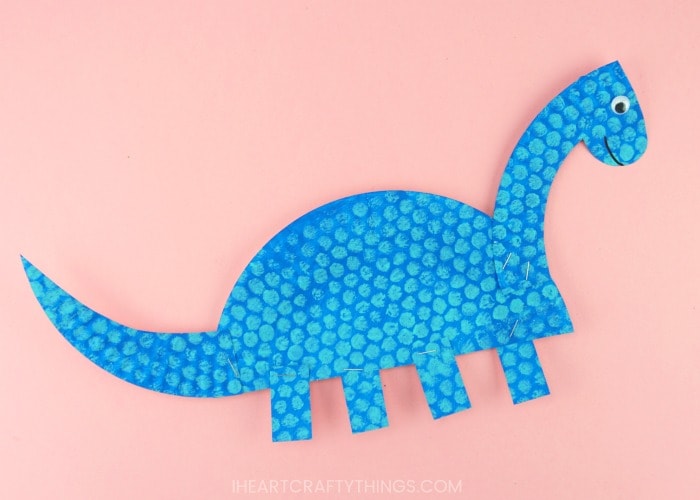
Video Tutorial: How to Make three different Dinosaurs with a Paper Plate
Watch the video below for a step by step guide on how to make this fun dinosaur craft with our handy templates we shared above.
Find more easy summer craft ideas for kids and paper plate crafts by browsing the categories at the top menu bar of our website.
