These colorful St. Patrick’s Day Windsocks are a fun and easy craft for preschoolers and kids of all ages to make for St. Patrick’s Day.
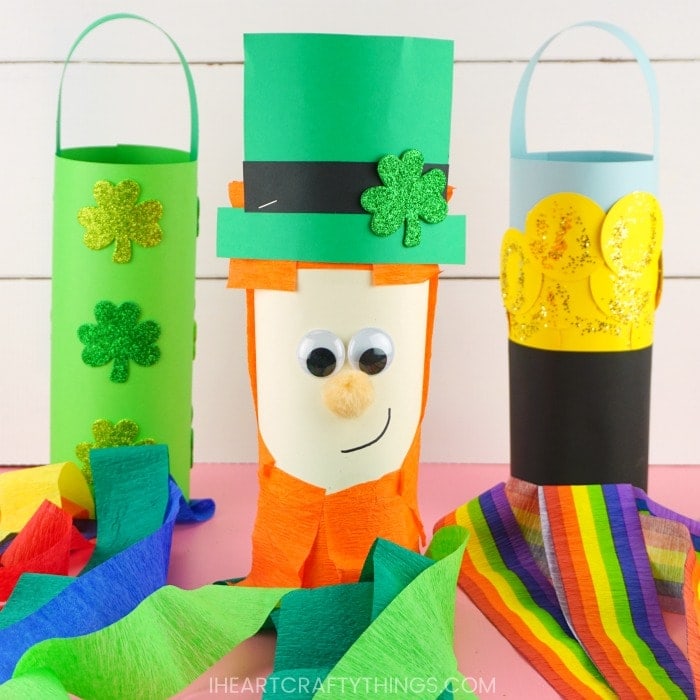
Looking for a fun way to celebrate St. Patrick’s Day this year? These darling windsocks are sure to be a hit at home or school!
We have three different unique designs for you to choose from: A leprechaun, pot of gold and a shamrock rainbow windsock. Kids can choose to make their favorite design, or have fun making all three.
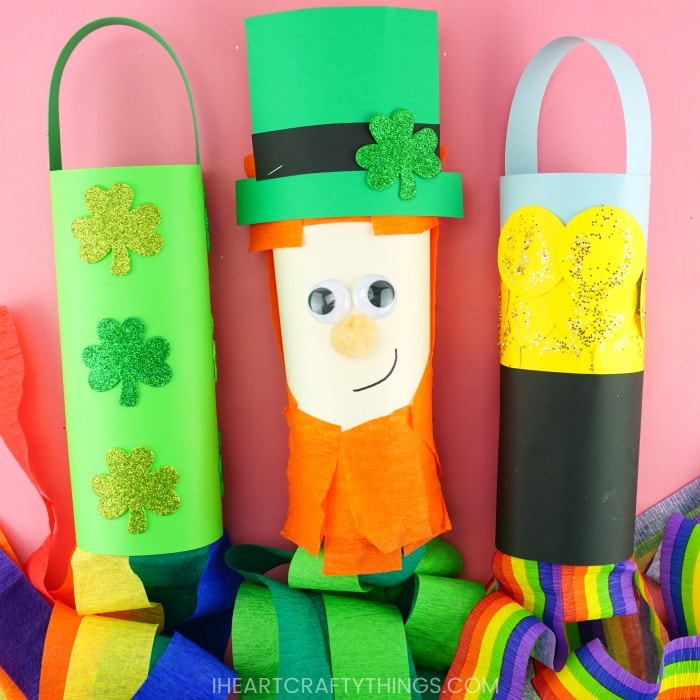
St. Patrick’s Day Windsocks
After making these colorful St. Patrick’s Day windsocks, hang them up from the ceiling on display. Kids will love watching their creation dance and spin around the classroom or inside the home.
Read our how-to tutorials below for how to make each of the different windsocks. You’ll also find watching our step-by-step video tutorial inside this post to be helpful too before you get started.
Supplies need to make your Windsock Crafts:
This post contains affiliate links to the products mentioned. Read our disclosure policy for more information.
- colored cardstock paper or construction paper (cream, green, black, blue, yellow, orange)
- Leprechaun Hat Template <—– Download the Leprechaun Hat HERE
- crepe paper (We found our rainbow crepe paper at Zurcher’s, a local party store.)
- 2-inch circle punch
- shamrock stickers
- peach pom-pom (We received our pom-poms from our friends at OrientalTrading.com. All opinions expressed are my own.)
- 1-inch googly eyes
- black marker
- gold glitter
- scissors
- glue stick
- pencil
How to Make a Pot of Gold Windsock
Bring some luck to your St. Patrick’s Day by making this sparkly pot of gold windsock craft. The rainbow crepe paper adds an extra fun touch to this windsock, don’t you think?
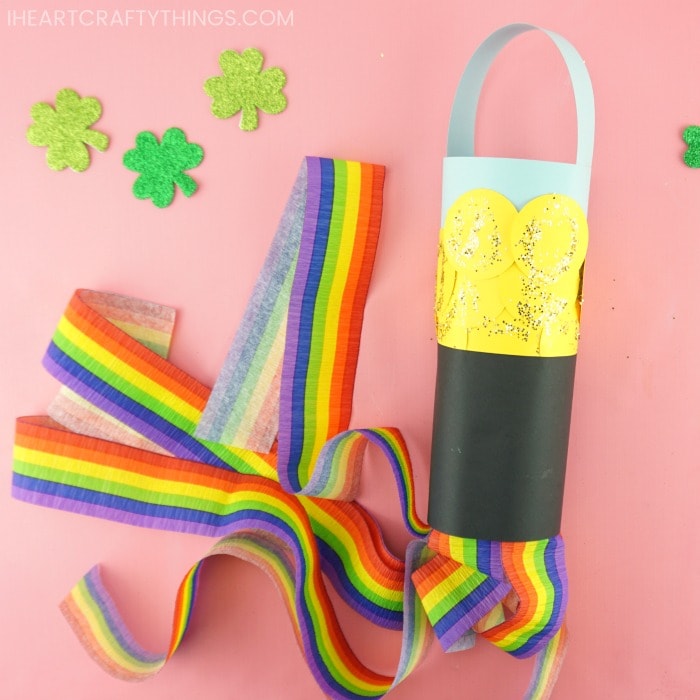
Step 1: Use a 2-inch circle punch to cut out a handful of circles for your gold pieces. Each child will need about 12-15 circles for their windsock.
Step 2: Mark the center of a blue sheet of cardstock with a pencil so children can see where you place their yellow circles. Use a glue stick to glue several yellow circles along the middle line of the paper. Add a few different layers of the circles so it looks like you a full pot of gold.
Related: Spring Windsock Crafts
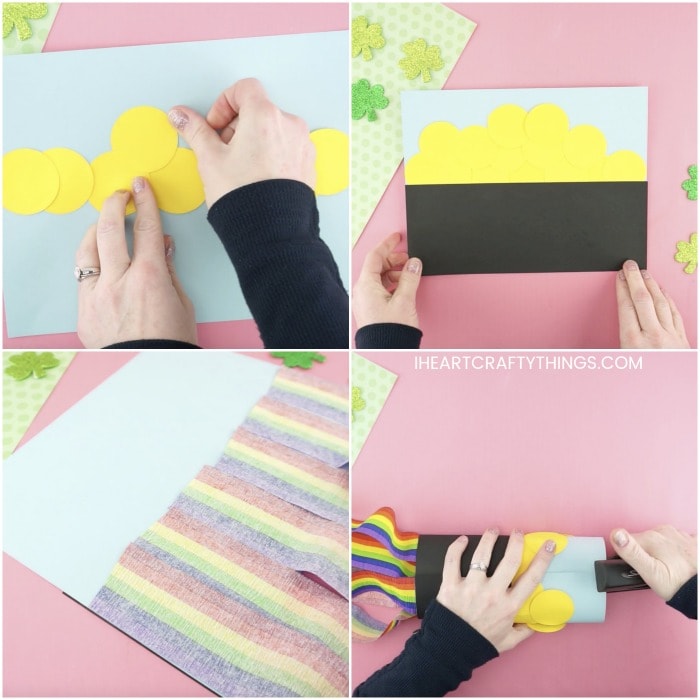
Step 3: Cut a sheet of black cardstock in half so you have two sections that are 4 1/4-inches by 11 inches. Add glue to one fo the back of the black sections and glue it at the bottom of your blue cardstock to make the pot.
Step 4: Turn your pot of gold windsock face down. Cut out six strips of 18-inch rainbow crepe paper. Glue them along the bottom one-third of your windsock.
Related: Paper Plate Rainbow Yarn Art
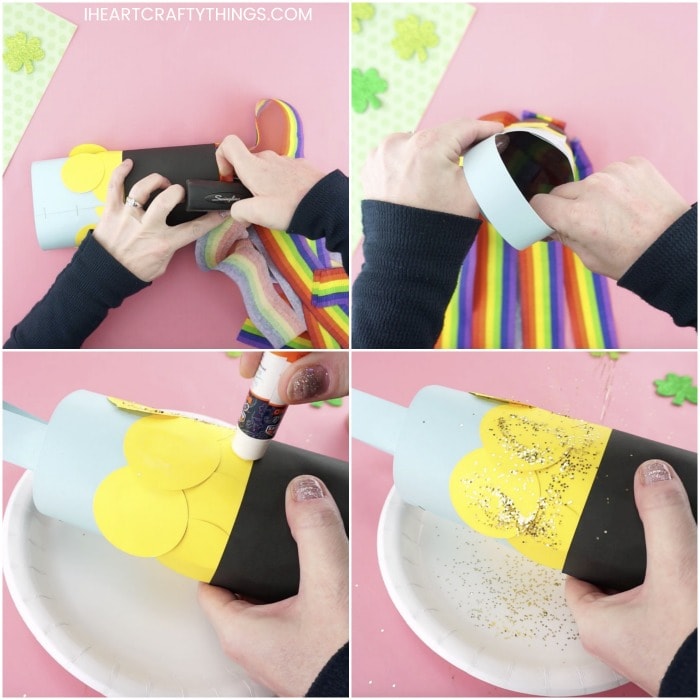
Step 5: Bend your pot of gold into a circle, connecting the ends together. Place two staples at the top and bottom of the windsock to join the ends together.
Step 6: Cut a blue paper strip handle that is 1-inch by 11-inches. Add a generous amount of extra strength glue stick on each end of the paper strip and attach it inside the top of the windsock for a handle.
Related: Paper Plate Pot of Gold Craft
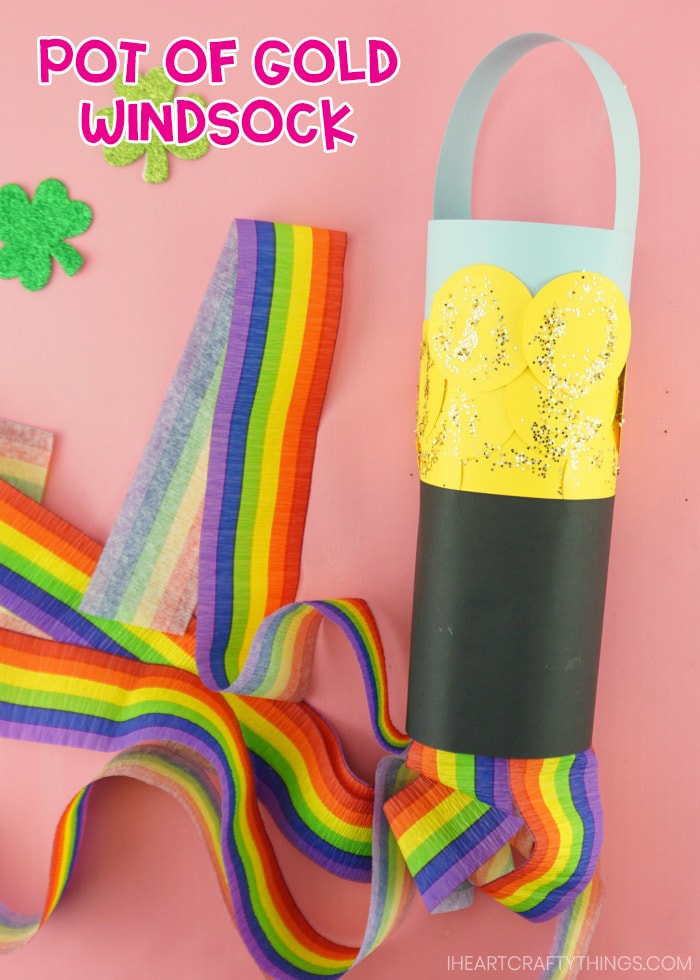
Step 7 : Add some glue to each of the gold pieces with a glue stick. Pour some gold glitter onto the glue to make your gold sparkly. (You might need to add glue and glitter on one section at a time.) Let your glue dry before handling the pot of gold windsock.
How to Make a Leprechaun Windsock
St. Patrick’s Day crafting would be complete without making a cute leprechaun craft. This leprechaun windsock is absolutely adorable and will look so cute hanging up on display for a St. Patrick’s Day decoration.
Don’t forget to download our leprechaun hat template to make prep time extra easy for this craft.
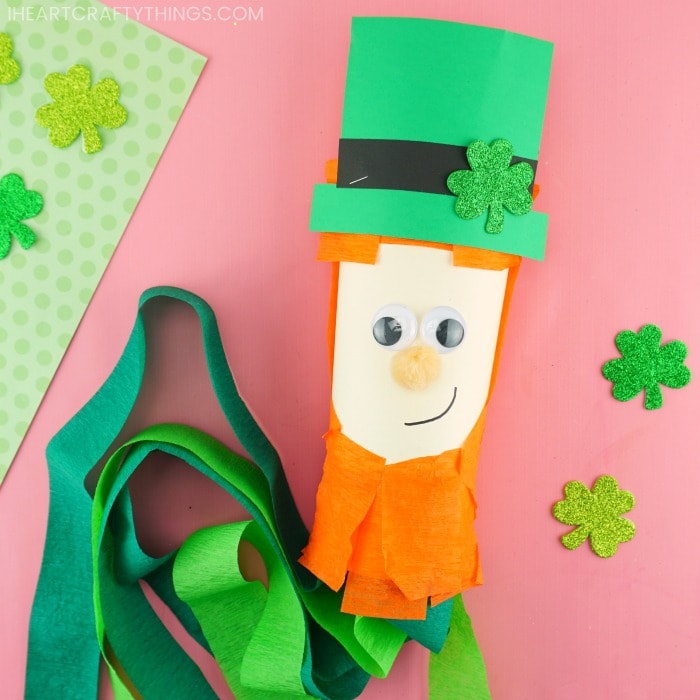
Step 1: Download and print out the leprechaun hat template. Use the template as a pattern to cut out the hat pieces from green and black cardstock paper. Glue the black strip onto the green hat.
Step 2: Cut out six pieces of 18-inch green crepe paper and glue them on the bottom one-third of a piece of cream cardstock paper. We used a mixture of light and dark green crepe paper.
Related: Winter Windsocks Crafts
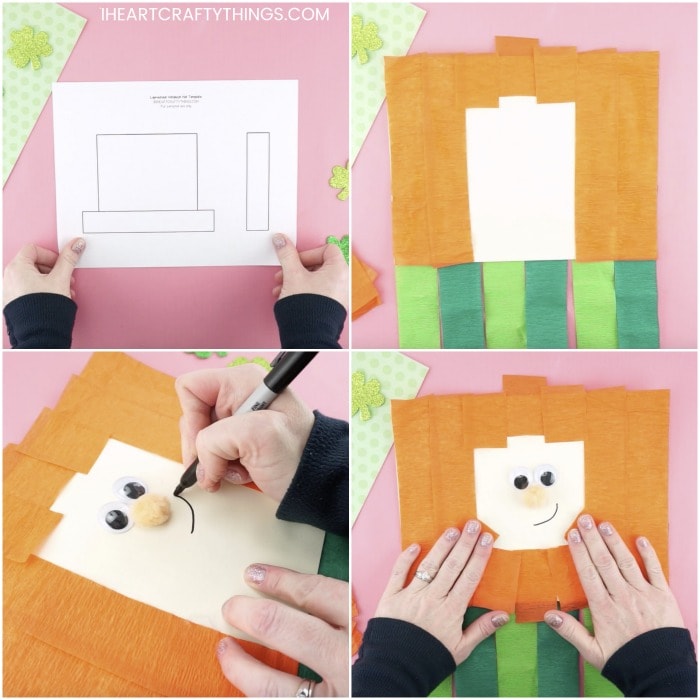
Step 3: Turn your leprechaun windsock face up. Cut out four sections of orange crepe paper 8 1/2-inches in length and glue two on each end of your windsock. Then cut out three smaller pieces of orange crepe paper and glue them at the top center of the creme cardstock.
Step 4: Glue a 1-inch peach pom-pom and two 1-inch googly eyes on your windsock. Then use a black marker to draw a smile on your leprechaun.
Related: Easy Paper Bowl Leprechaun Craft
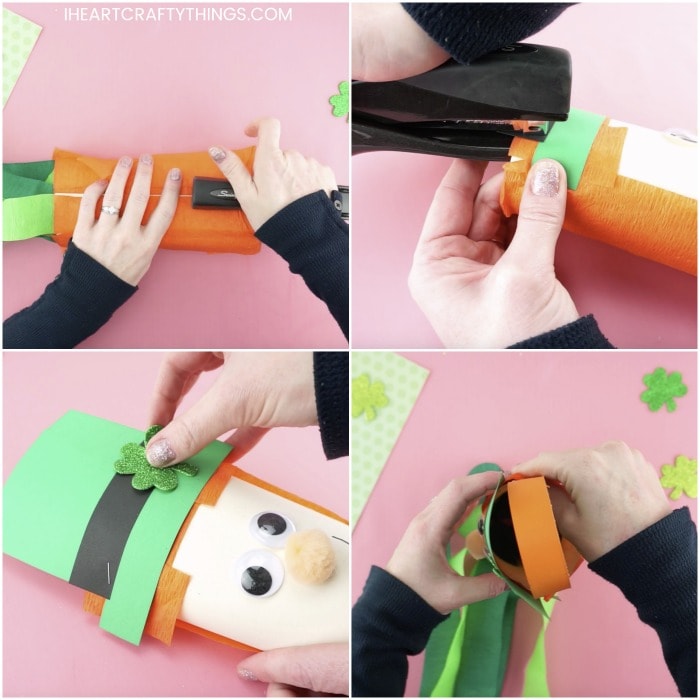
Step 5: Cut out several more smaller pieces of orange crepe paper and glue them at the bottom of the windsock to give your leprechaun his famous orange beard.
Step 6: Bend your leprechaun into a circle, connecting the ends together. Place two staples at the top and bottom of the windsock to join the ends together.
Related: 12 Rainbow Crafts for Kids
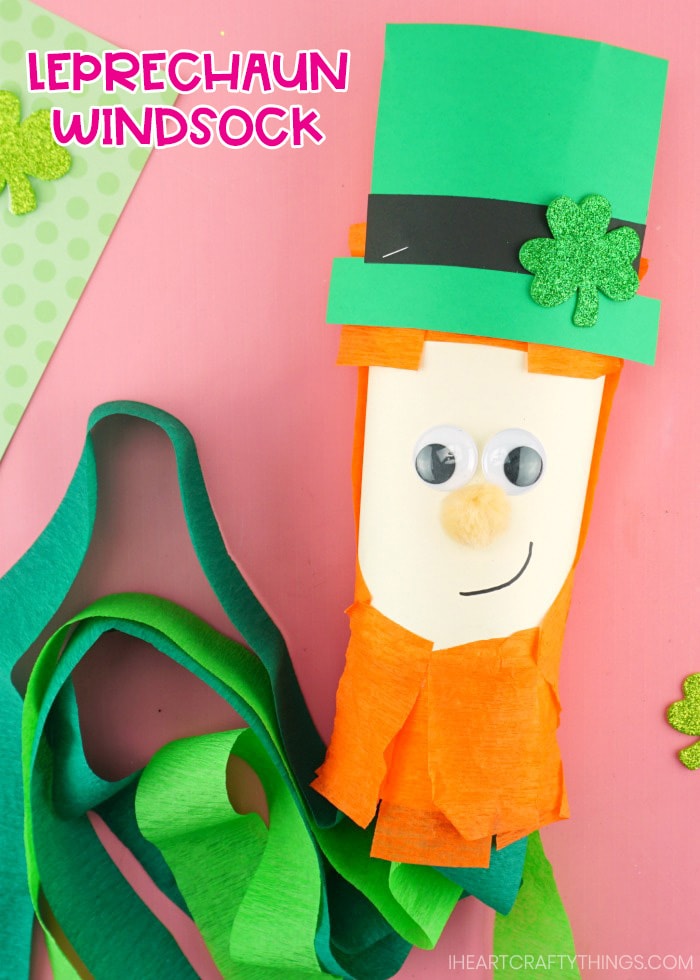
Step 7: Use a stapler to attach the leprechaun hat at the top of the windsock. Then place a glittery shamrock sticker on the leprechaun hat.
Step 8: Cut an orange paper strip handle that is 1-inch by 11-inches. Add a generous amount of extra strength glue stick on each end of the paper strip and attach it inside the top of the leprechaun windsock for a handle.
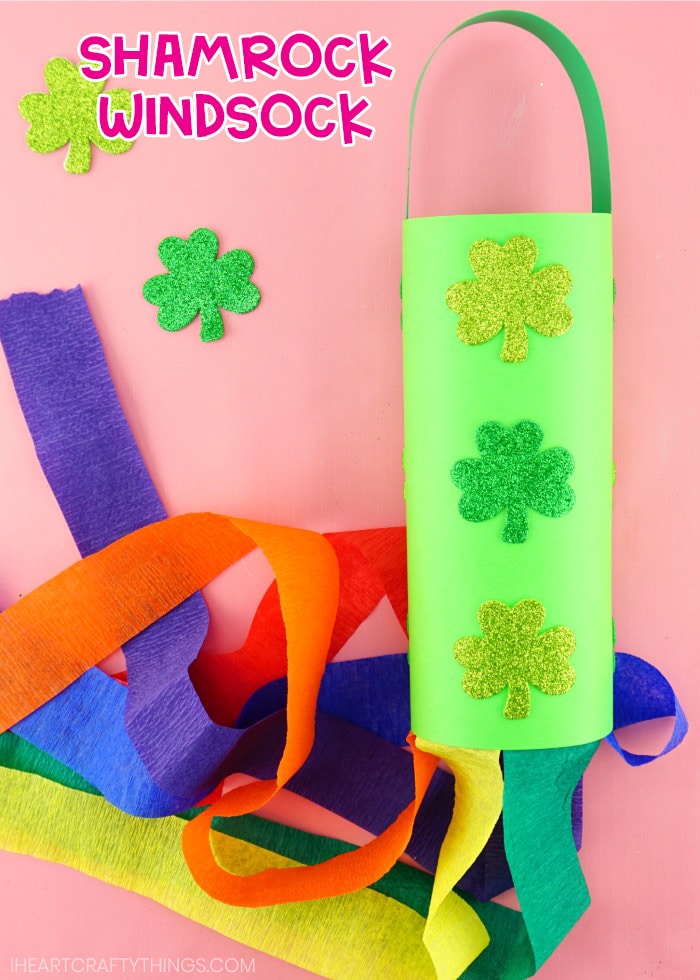
How to Make a Shamrock St. Patrick’s Day Windsock
This fun shamrock windsock is the simplest of each of the designs so it’s perfect for preschoolers and younger children. The sparkly stickers and rainbow crepe paper are the perfect touch for this colorful windsock.
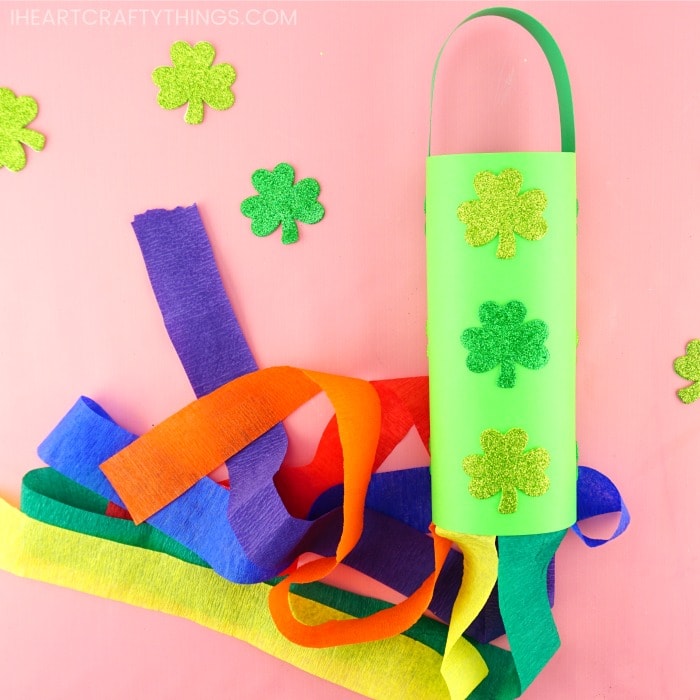
Step 1: Decorate a sheet of green cardstock paper with shamrock stickers. They don’t have to be glittery, but I think the glitter adds a magical feel to the windsock craft.
Step 2: Turn your windsock face down. Cut out six strips of crepe that are 18-inches in length in red, orange, yellow, green, blue and purple. Glue them along the bottom one-third of your shamrock windsock. We glued our colors in order of the rainbow but children can place their colors in any order of their choosing.
Related: Paper Plate Shamrock Twirler
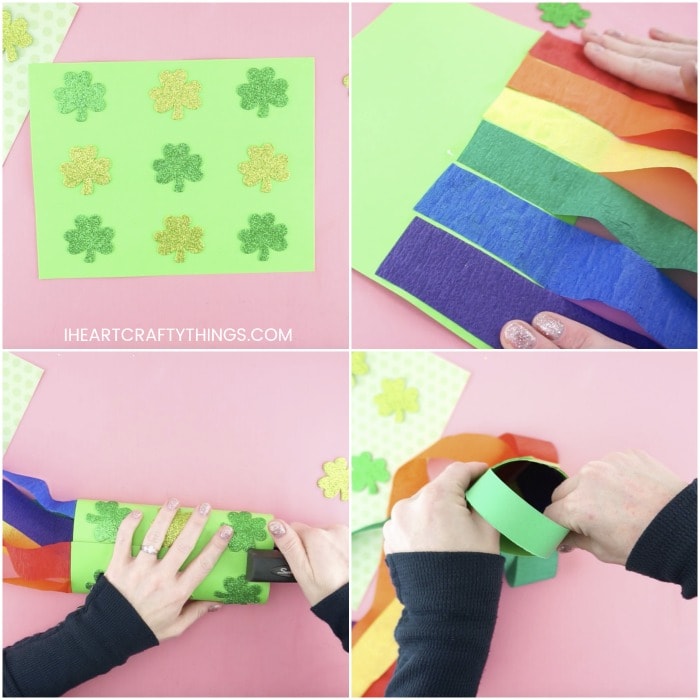
Step 3: Bend your windsock into a circle, connecting the ends together. Place two staples at the top and bottom of the windsock to join the ends together.
Step 4: Cut a green paper strip handle that is 1-inch by 11-inches. Add a generous amount of extra strength glue stick on each end of the paper strip and attach it inside the top of the St. Patrick’s Day windsock for a handle.
Related: Double-sided Rainbow Windsock
More Amazing St. Patrick’s Day Crafts for Kids
This stunning black glue and watercolor shamrock is a fun and colorful art project for kids to make for St. Patrick’s Day.
Make some adorable leprechaun finger puppets as part of your St. Patrick’s Day celebrations. They are fun for kids to make and play with!

Here’s a fun and simple way for kids to create a St. Patrick’s Day card for a friend or family member. Our printable template helps make creating the card a breeze!
These yarn wrapped shamrocks from our friend at Red Ted Art is a great way to add a fine motor activity into St. Patrick’s Day.
Check out this awesome list of over 40 St. Patrick’s Day arts and crafts projects for kids.


