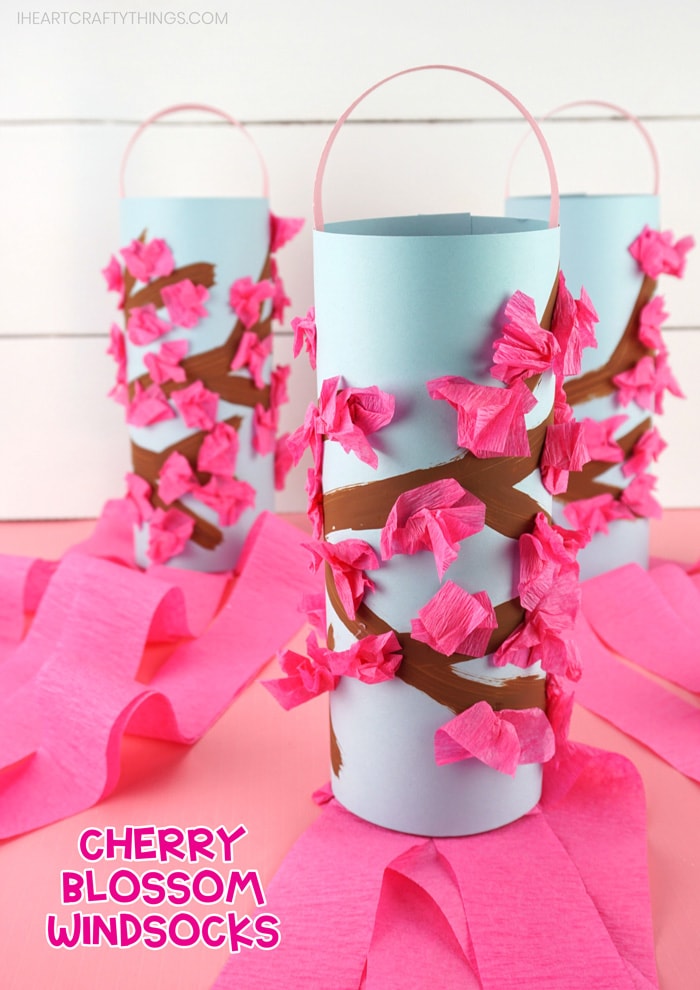
Celebrate the beautiful colors of the spring season with this simple cherry blossom craft. Toddlers and preschoolers will love watching the bright pink cherry blossoms on their windsock catch in the breeze and twirl around after making their craft.
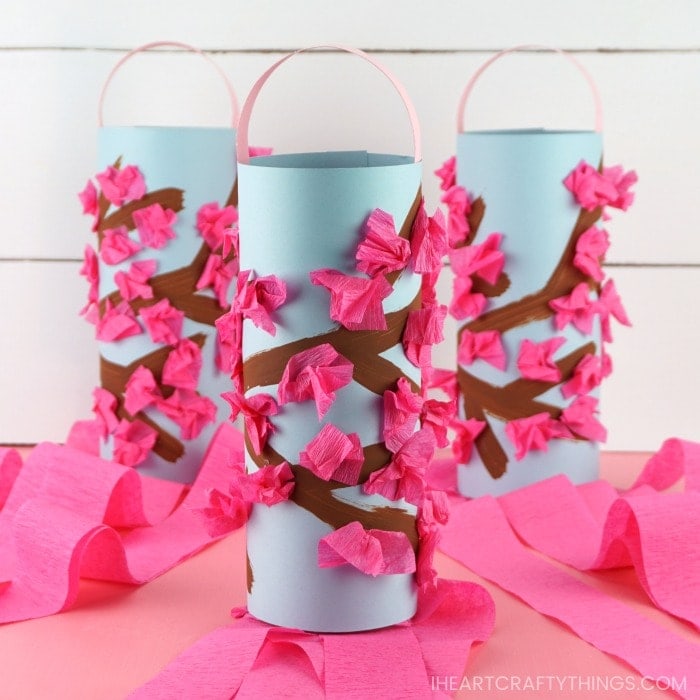
After children use their creativity to paint tree branches all over their windsock, they will love decorating it with pink crepe paper cherry blossoms.
Scrunching up the crepe paper blossoms is a great activity for little ones for strengthening fine motor muscles in the hands too.
Spring Cherry Blossom Craft
These beautiful cherry blossom windsocks make a fantastic craft to hang up in the classroom or at home to display for colorful spring decorations.
Read our simple how-to instructions for making this easy spring craft below, and before you get started, make sure to catch our full video tutorial inside this post.
Supplies needed to make a Cherry Blossom Windsock:
This post contains affiliate links to the products mentioned. Read our disclosure policy for more information.
- blue cardstock
- brown paint
- paintbrush
- pink crepe paper
- glue stick or school glue
- scissors
- stapler
Instructions for how to make a cherry blossom craft
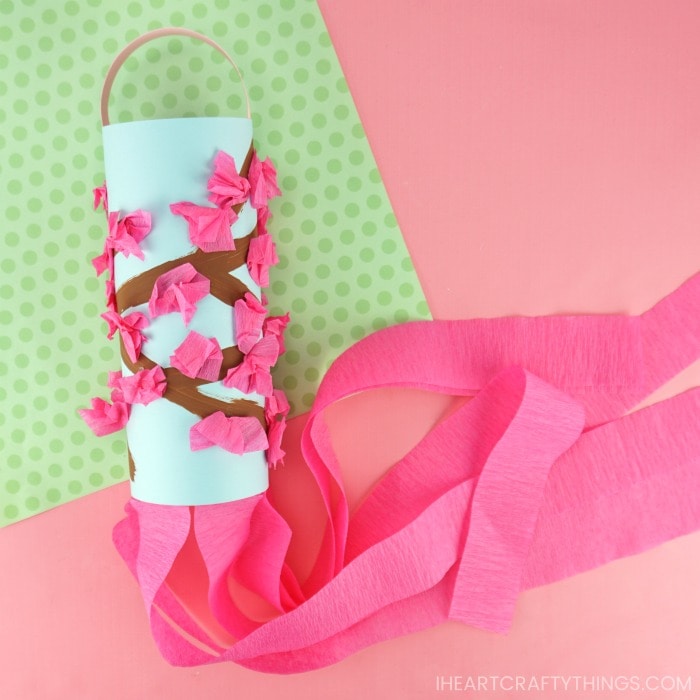
Step 1: Pour some brown paint onto a small paper plate. Use a paintbrush to paint tree cherry tree branches on your blue cardstock. Allow the brown paint to dry completely.
Step 2: Cut six pieces of pink crepe paper about 18-24 inches in length. Turn your cherry blossom craft face down. Use a glue stick to add glue at the bottom of the paper and place all six pieces of crepe paper along the bottom of your blue cardstock.
See Also: Spring Windsock Crafts
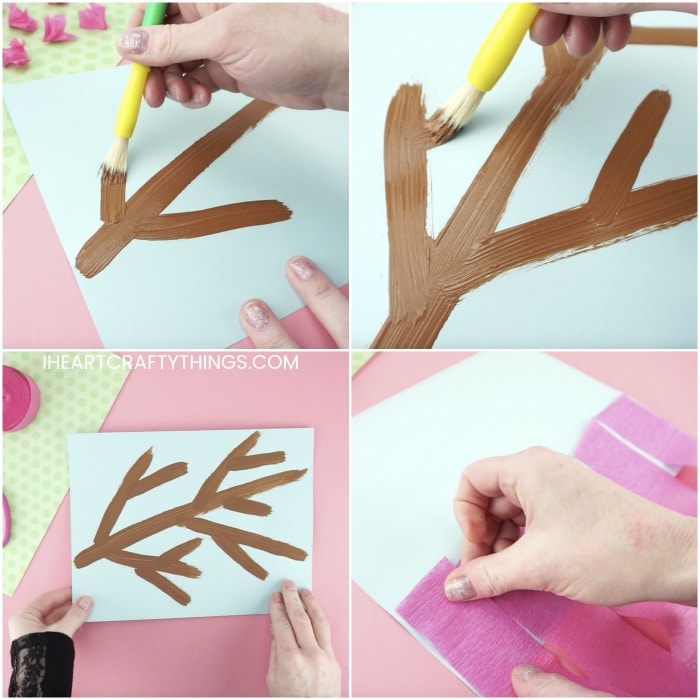
Step 3: Cut out several dozen squares from your pink crepe paper. Scrunch up one of the tissue paper squares to make a cherry blossom. Add a dot of glue stick on one of the cherry tree branches and place the pink cherry blossom onto it.
Step 4: Continue scrunching up crepe paper squares and glueing them all over the cherry tree branches until it is full of cherry blossoms.
Related: 3D Spring Tree Paper Craft
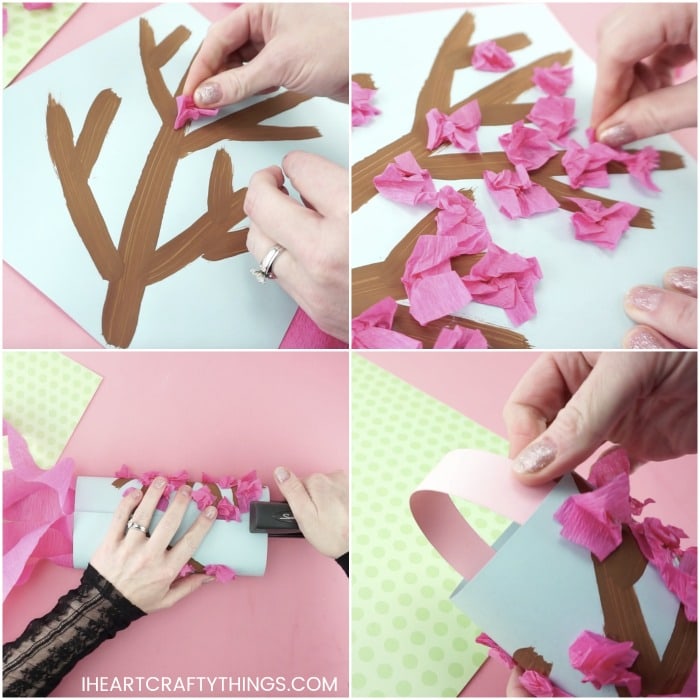
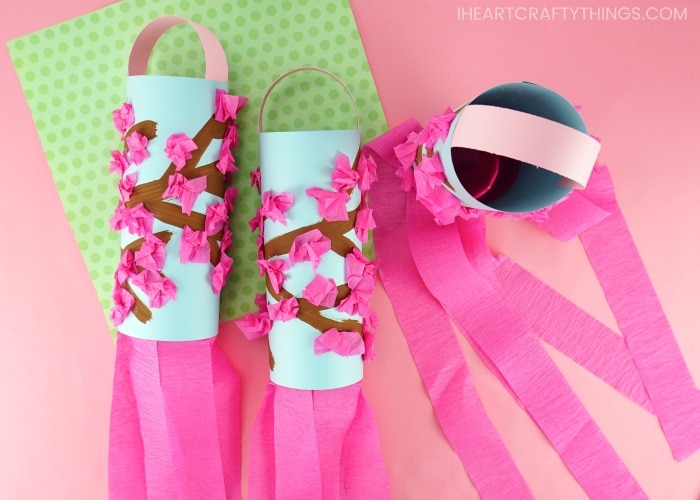
Step 5: Bend your cherry blossom craft into a circle and connecting the ends together. Place two staples at the top and bottom of the windsock to join the ends together.
Step 6: Cut a length of pink cardstock 1-inch by 8 1/2-inches. Add a generous amount of extra strength glue stick on one end of the paper strip and attach it inside the top of the windsock. Add glue on the opposite end of the paper strip and attach it to the opposite end of the windsock to create your handle.
Hang your windsock outside and watch it dance around in the spring wind. Or display the windsock indoors for a colorful spring decoration.
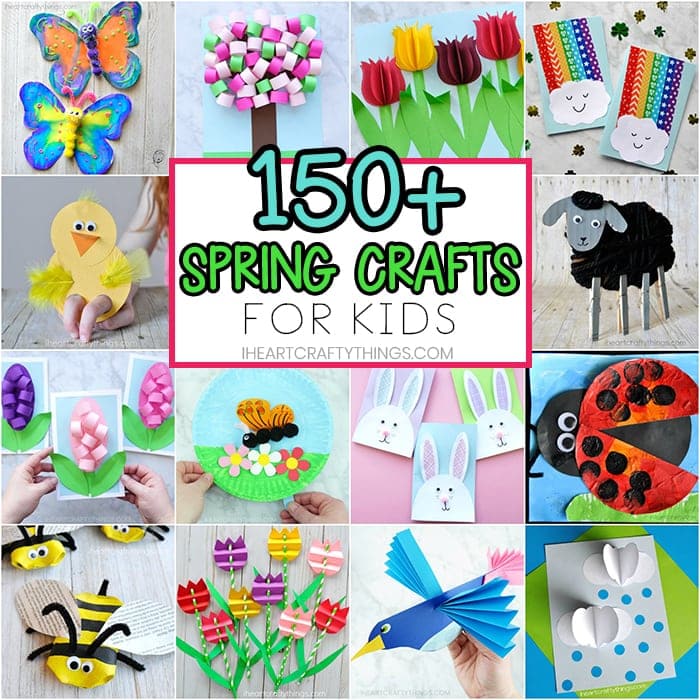
Related: 150+ Spring Crafts for Kids
More Easy Spring Crafts for Kids
Learning about farm animals is a super fun theme for spring time. Make some of these adorable paper farm animal crafts to go with a farm unit at home or school.
Here are more colorful spring windsocks kids will love making this season. We have a pretty butterfly, ladybug and insect to choose from, or make all three!
This pop up flower card is perfect for a spring craft! Make the craft for yourself to display on a shelf, or make it as a gift for someone you love.
We adore this cute flowers in the garden paper plate craft from our friend at Non-Toy Gifts. Head to their website for the full tutorial.
Looking for more fun and easy spring crafts? Check out our list of over 150+ spring crafts for kids. You’ll find awesome flower crafts, insect craft ideas, Easter arts and crafts projects and so much more!