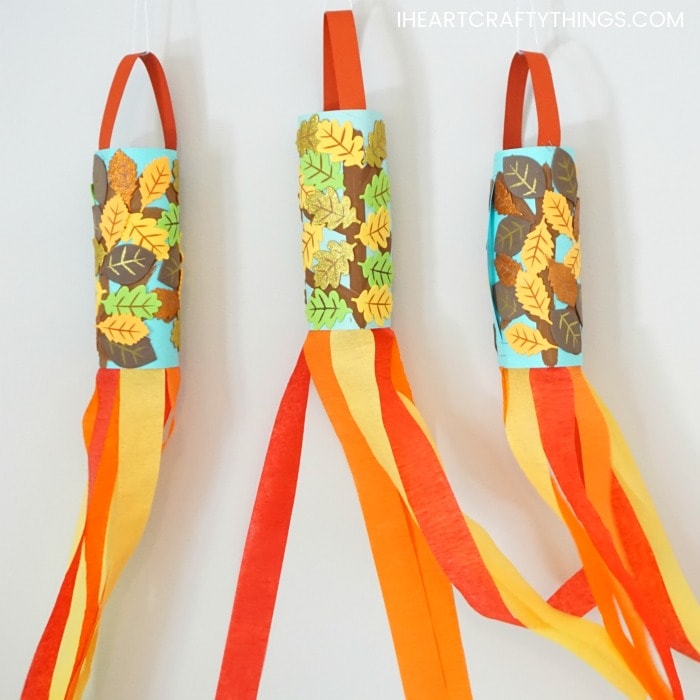
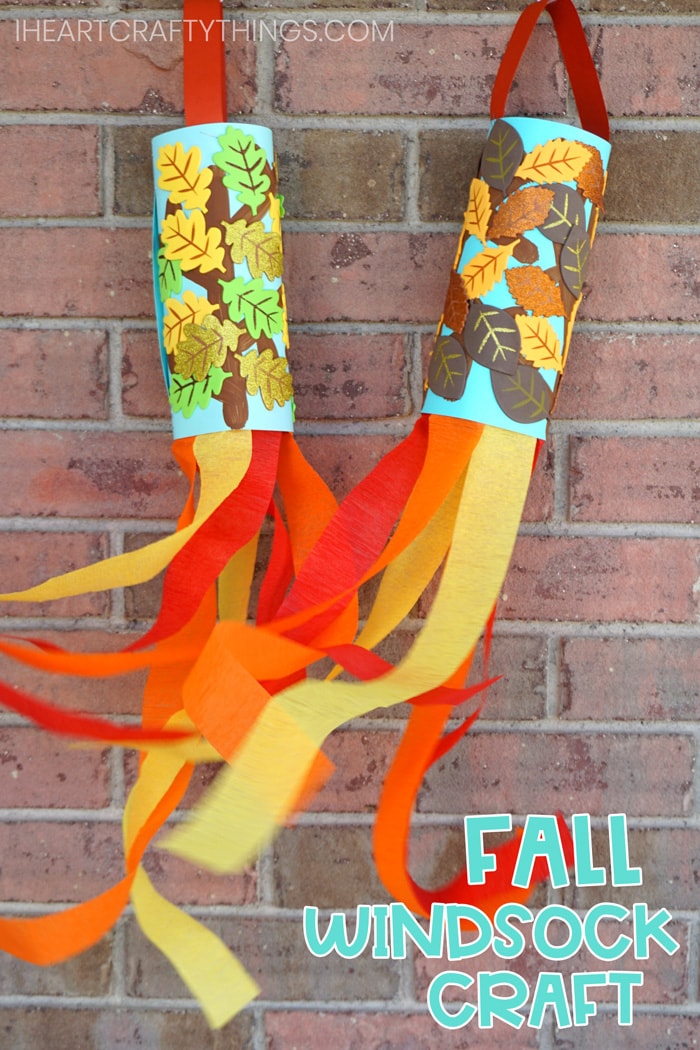
Celebrate the beautiful colors of the fall season with this simple fall windsock craft. Toddlers and preschoolers will love watching the red, yellow and orange colors of the season catch in the wind after making their craft.
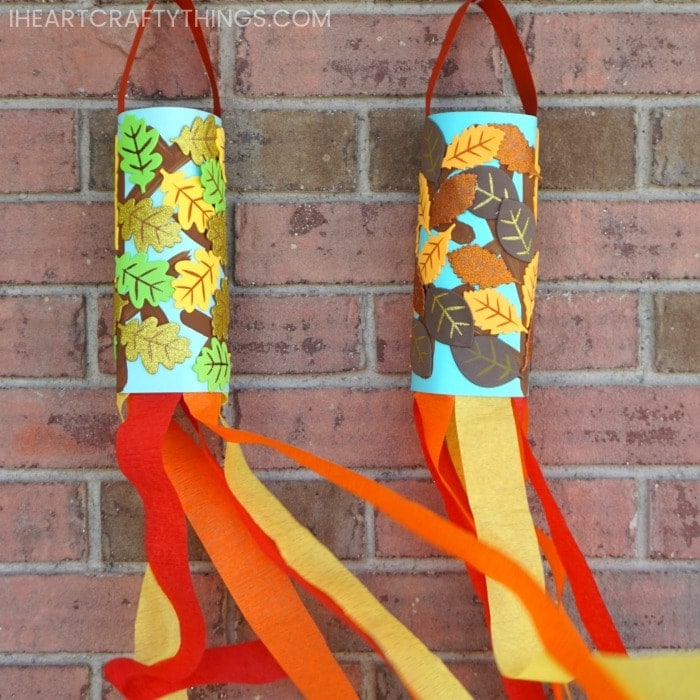
After kids use their creativity to paint tree branches all over their windsock, they will love decorating it with leaf stickers. Not only do kids love getting to use stickers for crafting but peeling the backing off them is great for strengthening fine motor muscles in the hands.
Read our simple how-to instructions for making this easy fall craft below, and make sure to catch our full video tutorial near the bottom of this post.
How to Make a Fall Windsock Craft
This post contains affiliate links to the products mentioned. Read our disclosure policy for more information.
Supplies Needed for Windsock Craft:
- light blue cardstock
- red cardstock
- brown paint
- small paper plate
- paintbrush
- foam leaf stickers (We found ours at Hobby Lobby. Here are similar ones on Amazon.)
- crepe paper (We used red, orange and yellow)
- glue stick
- stapler
Instructions for making your Fall Windsock:
Step 1: Pour some brown paint onto a small paper plate. Use a paintbrush to paint tree branches on your light blue cardstock.
Start by painting two branches centered on your cardstock. Then paint branches and limbs coming out from each of the tree branches. Allow the brown paint to dry completely.
Related: 3 Easy Hedgehog Crafts with Template
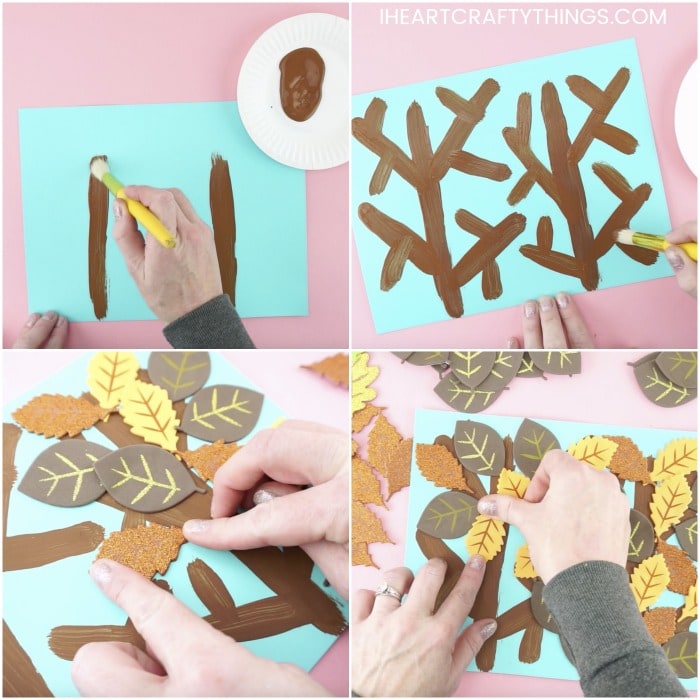
Step 2: When your tree branches have finished drying, gather your felt fall leaf stickers. Peel the backing off a sticker and place it down onto your tree branches.
Step 3: Continue adding leaf stickers around each of the tree branches on your light blue cardstock.
Related: Fall Tree Paper Craft
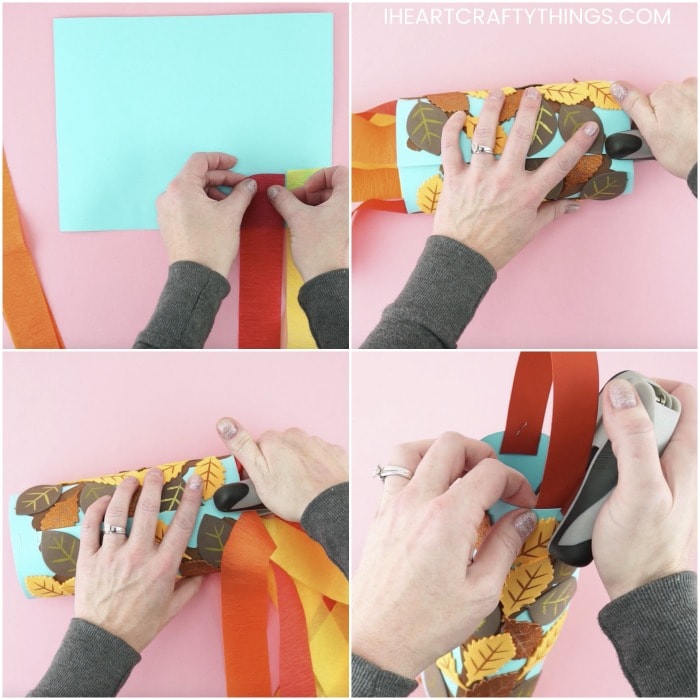
Step 4: Cut six pieces of crepe paper about 24 inches in length. We used two red, yellow and orange pieces.
Step 5: Turn your fall tree artwork over. Use a glue stick to add glue at the bottom of the paper and place all six pieces of crepe paper along the bottom of your cardstock.
Related: Paper Bowl Scarecrow Craft
Step 6: Bend your fall tree artwork, forming a circle and connecting the ends together. Place two staples at the top and bottom of the windsock to join the ends together.
Step 7: Cut a length of red cardstock 1-inch by 11-inches. Place the strip inside the top of the windsock and attach it with a staple. Then staple the opposite end of the red strip to the opposite end of the windsock.
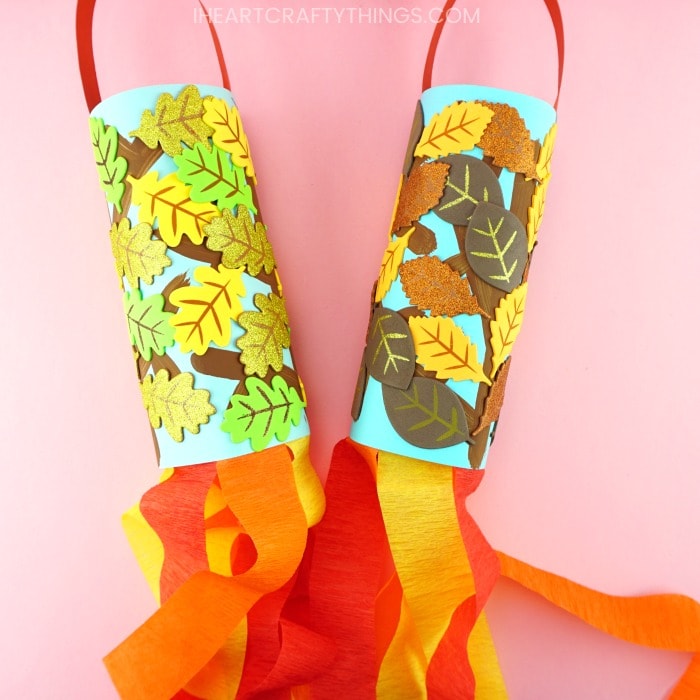
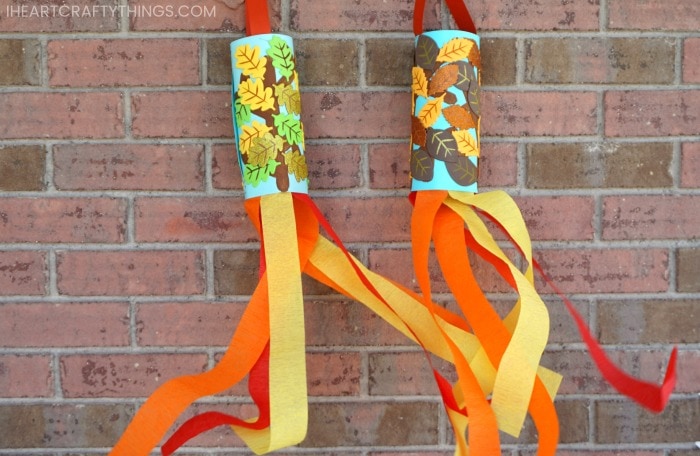
Hang your windsock outside and watch it dance around in the fall wind. Or display the windsock indoors for some festive fall decor.
Video Tutorial: How to Make this Fall Preschool Craft
Watch the video below for a step by step guide on how to make this colorful windsock craft.
Find more easy fall crafts for kids by browsing the categories at the top menu bar of our website.
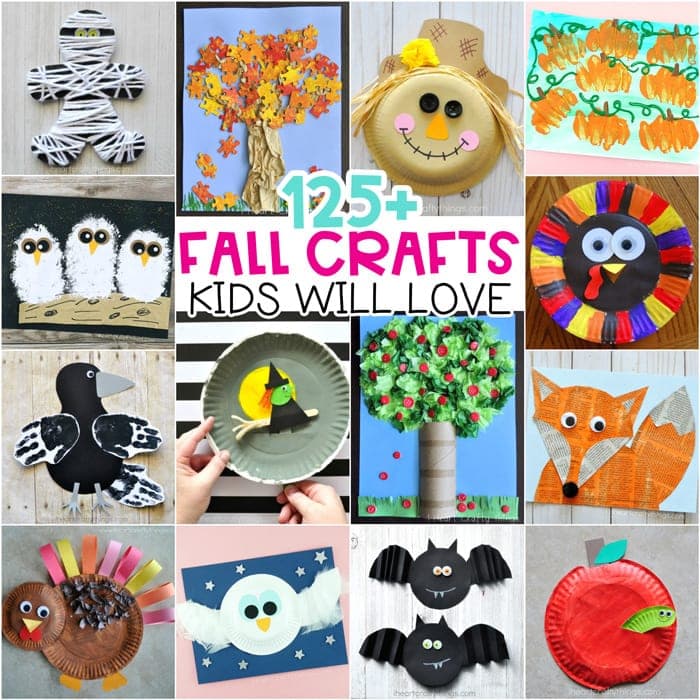
Looking for more amazing fall arts and crafts ideas? You’ll love our resource of over 125 amazing fall crafts for kids. Find pumpkins, fall trees, woodland animals, Halloween and Thanksgiving crafts and more.