I don’t have many decorations for Halloween so I decided it would be fun to make something with my toddler that we could put on display for Fall. I’ve had these darling paper pumpkins pinned from Delia Creates on Pinterest for a couple months and thought they would be perfect!
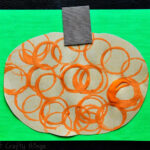
Delia painted her paper strips by marble painting, but I wanted a different texture so we decided to use the shaving cream method for painting our paper strips. I made all of our strips 1 inch and we used two different colors of orange in our shaving cream. We ended up using 10 strips for each pumpkin but I wish we would have used 11 to close the gaps in a tiny bit more. I always love the beautiful texture shaving cream painting creates!

You can visit Delia Creates to see her picture tutorial of how she put her pumpkins together. I did mine a little bit different. After punching the holes in both sides, I put a brad in one end of the strips and secured it shut. Then I fanned my strips out like pictured below.

Then I turned it over and folded the strips up one at a time while inserting the strip into another brad. Once all the strips were in the brad, I secured it closed.

I loosened up the brad a little on the top to help secure the pipe cleaner stem on top and then we secured the green vine to the stem.

Easy peasy and oh so cute!!

I am loving how they look up on our living room mantle. So festive for Fall and Halloween!


Did you create a Pinterest-inspired project this month? Stop by tomorrow to link it up to the Pinterest Challenge. It will run all week long! Hope to see you there!