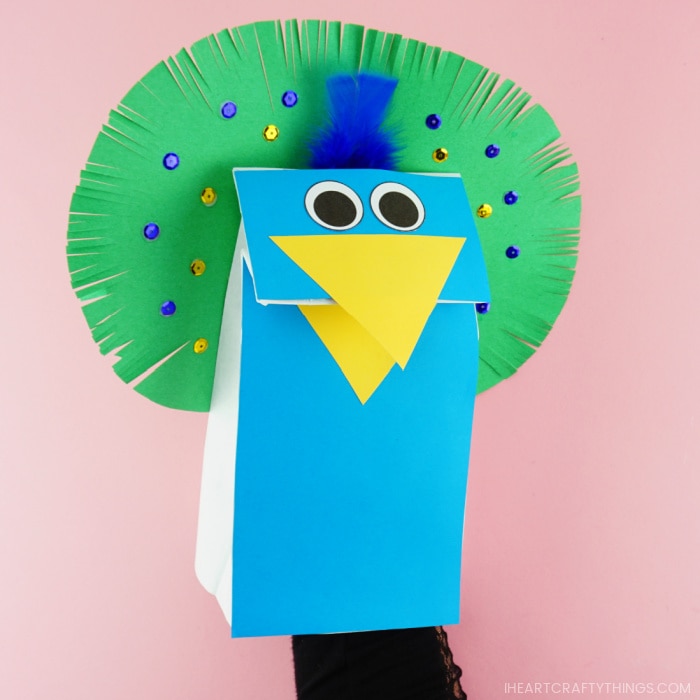
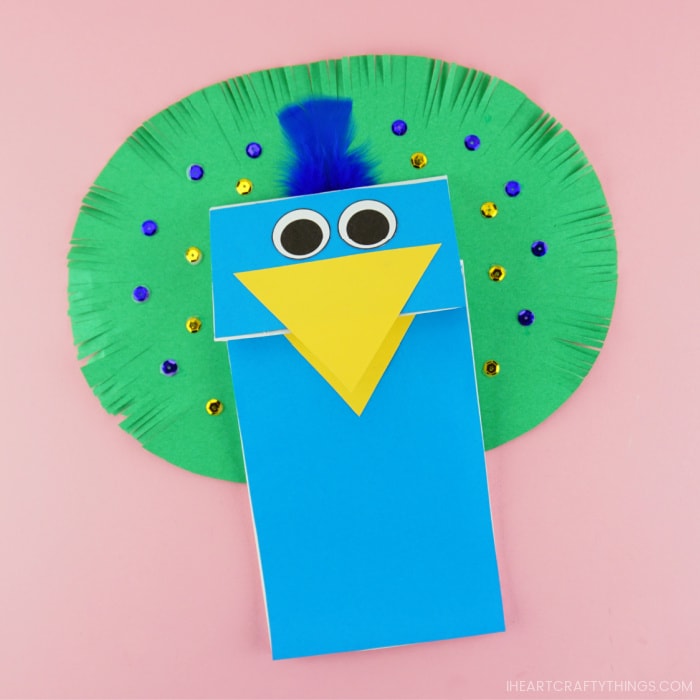
Get ready for an afternoon full of fun with preschoolers making and playing with this colorful paper bag peacock puppet!
My older boys started back at school this past week. I sure miss them during the day but I also enjoy all the quality time I get to spend with my little preschooler at home. With some of our one-on-one time today, we created this paper bag peacock puppet after reading one of our favorite peacock-themed children’s books.
[This craft was originally sponsored by Elmer’s Early Learners Academy and posted on August 26, 2014. It has been updated to include a craft template, updated tutorial text, photos and a video tutorial. All sponsored links and information have also been removed.]
After making our puppets, my daughter and I played with them together and giggled to our heart’s content. Given how much fun we had, I’m certain you and your kids are in for a treat making and playing with these fun puppets.
Playing with puppets is not only great for preschoolers to help develop their speaking skills, but operating the puppets with their little fingers and hands is fantastic for fine motor play. This is why I adore making paper bag puppets at home with my kids.
How to Make a Peacock Puppet Craft
These peacock puppets are super simple for kids to make with the help of our peacock puppet printable template. Using materials you already have on hand at home, like paper bags, makes whipping them up really easy too.
Get your copy of the template below, grab your supplies and read our easy step-by-step instructions below for how to make your own paper bag puppets. Make sure to watch our video tutorial inside this post before get started too.
Supplies needed for this paper bag puppet craft:
This post contains affiliate links to the products mentioned. Read our disclosure policy for more information.
- peacock craft template <—- Get the printable template here
- paper lunch bags
- blue cardstock or construction paper
- yellow cardstock or construction paper
- green construction paper (9″ x 12″)
- blue feathers (optional)
- tape (optional)
- blue and gold sequins
- pencil for tracing
- scissors
- herb scissors (optional but so much fun!)
- extra strength glue stick
- school glue or tacky glue
Instructions for making this peacock craft
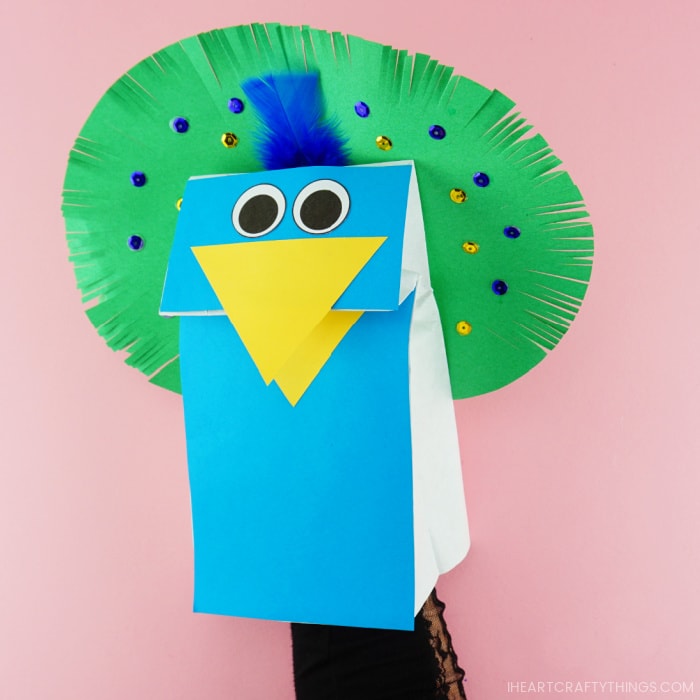
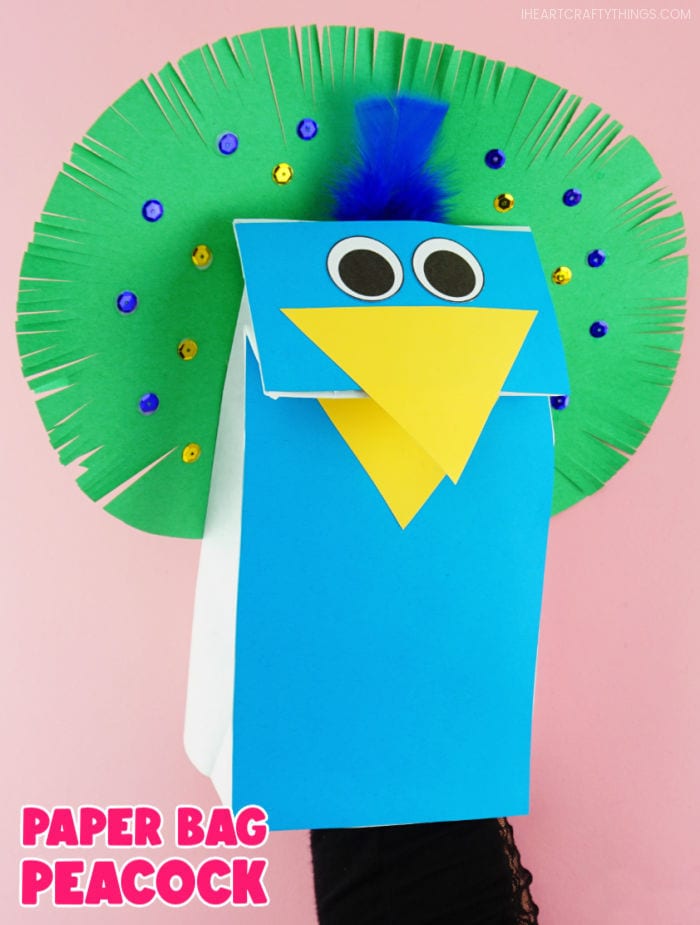
1. Begin by downloading and printing out the printable puppet template. Print out the paper bag puppet pieces page on blue cardstock or construction paper, the beak on yellow cardstock or construction paper and the eyes and wing pages on white cardstock paper. Cut out each of the pieces from the template.
You can also print out each page on white paper and have children color the pieces with markers or crayons before making their puppets.
Related: Paper Bag Crow Puppet
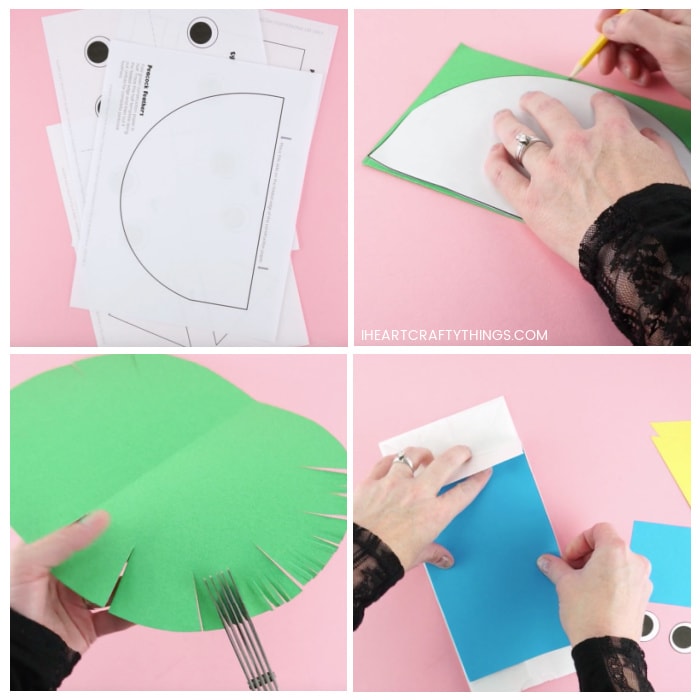
2. Fold your 9″ x 12″ green construction paper in half. Place the feathers template along the folded edge where indicated on the template. Use your pencil to trace the feathers template onto the construction paper, then cut it out. When you unfold the paper you have your full set of peacock feathers.
3. Use scissors to cut slits around the perimeter of the peacock feathers to define the feathers. This is so great for preschoolers to get in extra scissor cutting practice! You can use regular scissors, or for added fun, try using herb scissors to make several small slits around the peacock feathers.
Assembling the Paper Bag Puppet
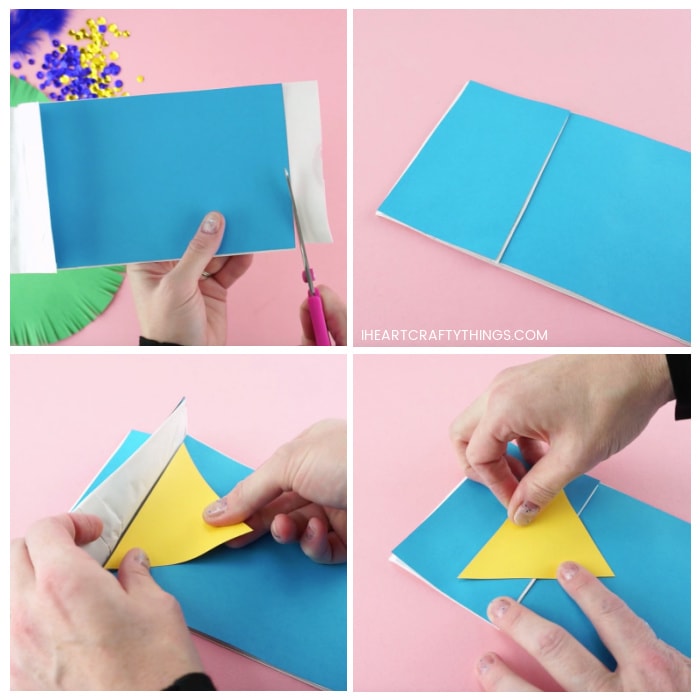
4. Add glue all over the back of the peacock body piece from the template and glue it onto the front of the paper bag puppet. Make sure to lift the flap at the top and glue the piece all the way at the top. Cut off the excess of the paper bag at the bottom of the puppet.
5. Glue the peacock face piece from the template onto the top of the paper bag puppet.
6. Lift the flap at the top of the puppet and glue one of the triangle peacock beak pieces onto the bag, under the flap. Then add glue on the top half of the underside of the second beak piece. Line it up with the other beak piece and glue it onto the top side of the peacock face, above the flap of the paper bag.
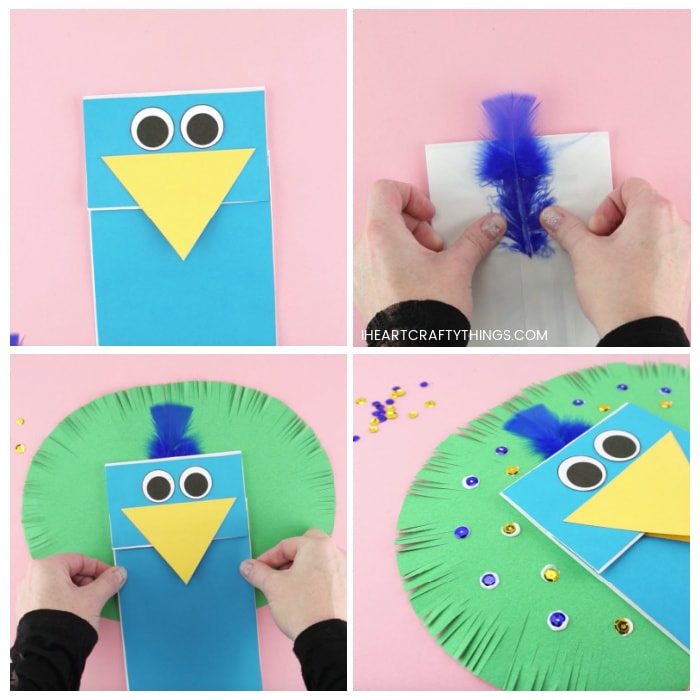
7. Glue the eyes on your puppet.
8. Turn the puppet over and tape down a blue feather at the top of the peacock. If you don’t have a blue feather, we have included a rectangle that you can cut slits in and glue at the top of the peacock.
9. Use a glue stick to add glue on the top one-third of the back of the paper bag. Glue it down on the center of the green peacock feathers.
10. Place dots of school glue or tacky glue all over the green peacock feathers. Place gold and blue sequins on each of the dots.
Your peacock puppet is ready for play
Once the glue on your puppet has completely dried, you can play with your peacock. Place your hand inside the paper bag with the fingers curling down inside the flap at the top of the bag. Move your fingers up and down on the flap of the bag to watch as the peacock beak opens and closes.
These fun peacock puppets are great for preschoolers to make after reading a peacock-themed children’s book. Our personal favorite is “Three Hens and a Peacock” by Lester Laminack.
Kids might also enjoy creating hen puppets from paper bags and retelling the story in their own words with a puppet show.
More Easy Puppet Crafts for Kids
These zebra finger puppets are the epitome of fun! Our handy free template makes it another easy puppet craft for kids to make.
Use felt, glitter glue and sequins to create these gorgeous felt butterfly puppets. Children will love fluttering around their colorful, decorated butterflies.
The paint smash technique to creating these silly monster puppets is so much fun for kids. The best part, each puppet is sure to turn out completely unique.
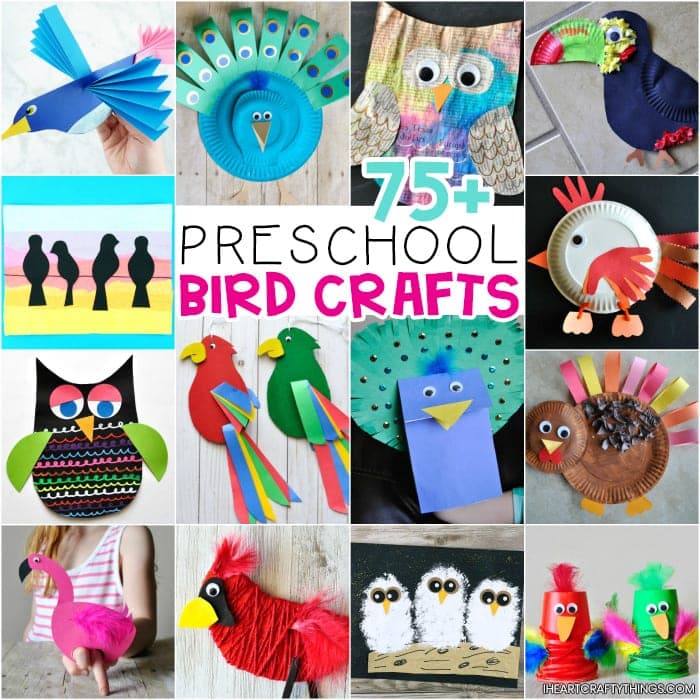
Check out our complete list of fun and easy bird crafts for preschoolers. Over 75 amazing ideas for kids!