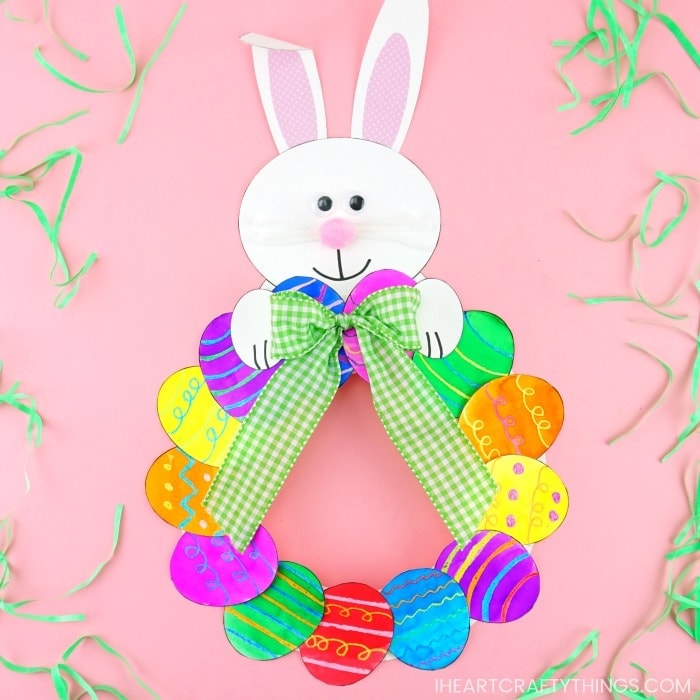
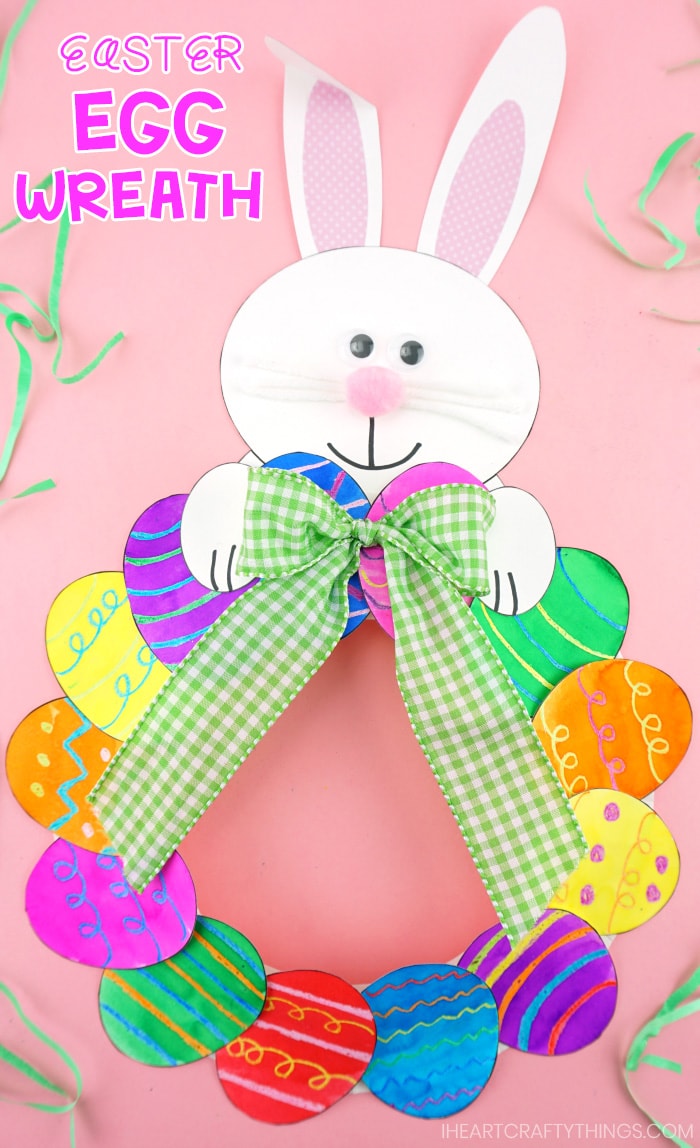
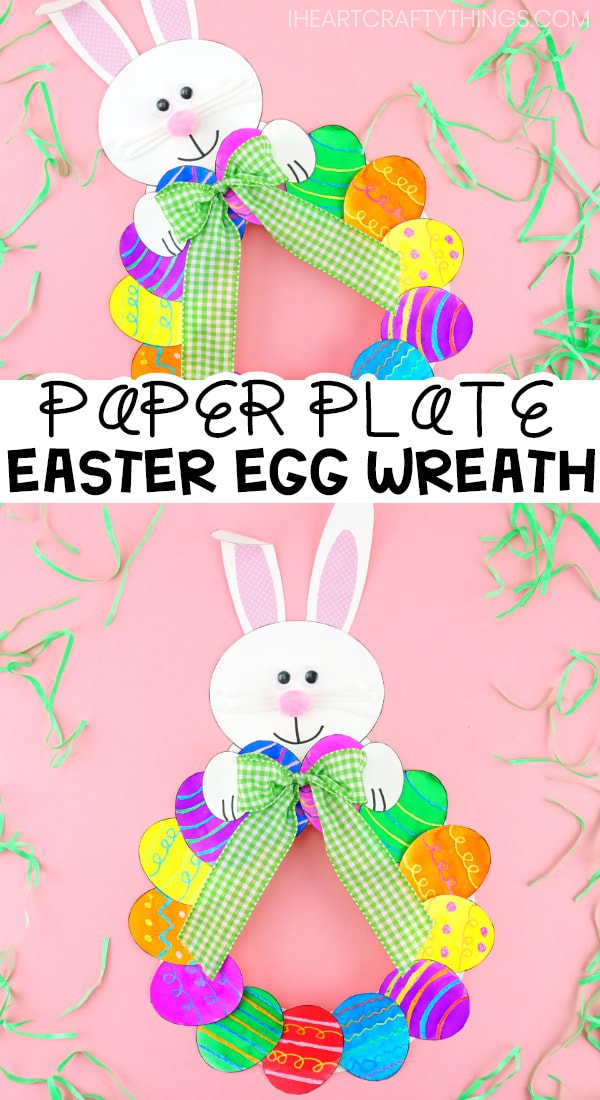
If you are on the hunt for a gorgeous Easter wreath idea to make with your kids this year but don’t want to glue together all of those plastic eggs, boy do we have a treat for you today. This paper plate Easter egg wreath is beautiful and so simple for kids to create.
We tried to keep the materials simple in this Easter wreath craft so that even preschoolers can help take part in making it. That means there’s no need to whip out the hot glue gun to make this darling egg wreath!
Using a paper plate as a base for your wreath helps make it a simple wreath idea for kids of all ages to create. Not to mention, it’s so much better for the environment.
You’ll notice each Easter egg on the wreath is created with a crayon resist and watercolor painting technique. This technique is such a fun art project for kids to participate in and the color and vibrance of each of the eggs can’t be beat.
How to Make a Paper Plate Easter Egg Wreath
This post contains affiliate links to the products mentioned.
Supplies needed for Easter Wreath Craft:
- Easter egg wreath template <—- Purchase in our shop.
- White cardstock
- Patterned scrapbook paper (optional)
- Crayons
- Watercolors (We love these liquid watercolors!)
- Paintbrush
- White yarn or string
- 1/2-inch pink craft pom
- Googly Eyes
- Markers (optional)
- Scissors
- Glue stick
- Tacky Glue
- Ribbon
- Glue Dots

NOTE: If you are in the EU, please visit our TpT Store to purchase any of our templates.
Related: Hatching Chick Easter Craft
Whether you create this beautiful paper plate Easter wreath at home, or in a classroom, each wreath is sure to turn out unique and beautiful. The finished egg wreath will turn heads being up on display this Easter holiday.
Instructions for Paper Plate Egg Wreath:
1. Purchase the Easter egg wreath template from our shop. Download the template and print it off on white cardstock paper.
Note: If you aren’t interested in buying the template you can use pictures as a guide for creating the pieces you’ll need to make your Easter wreath.
2. Use crayons to make lines and designs in each of the Easter eggs on the template. This is a great way for kids to express their own creativity and make their wreath extra unique.
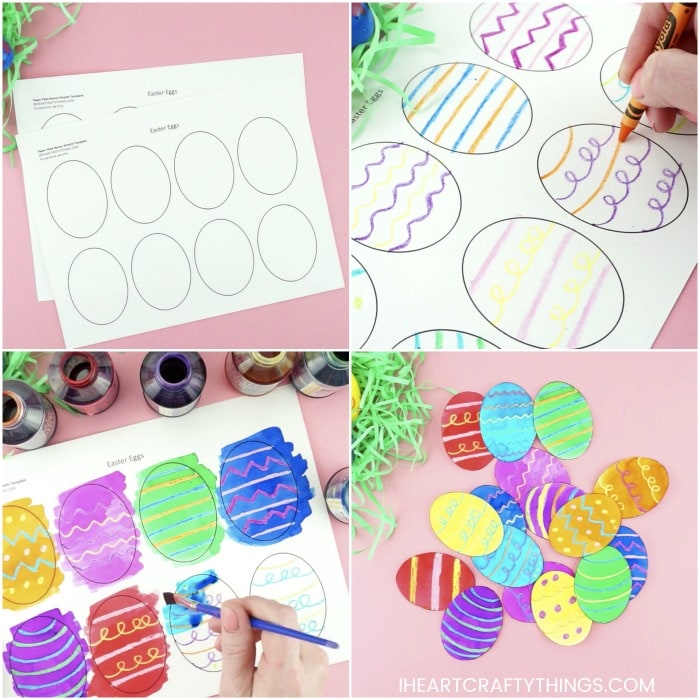
Straight lines, squiggly lines, zig-zag lines and polka-dots are all fun ways to decorate your eggs. I loved using a combination of them all when decorating each of my Easter eggs.
We only used 13 eggs for our wreath but there are a few extras included in the template just in case. Kids might also overlap the eggs a bit more than I did and may end up utilizing all 16 eggs included in the template.
3. Paint the decorated Easter eggs with watercolors. Set them aside to let the watercolor paint dry completely.
I can’t say enough about how much I love using liquid watercolors for projects like this! We love and use the Sargent brand found on Amazon. The colors are vibrant and each bottle lasts us over a year so they are worth every penny.
4. Once the watercolors are finished drying, cut out each of the eggs. Set them aside until step nine.
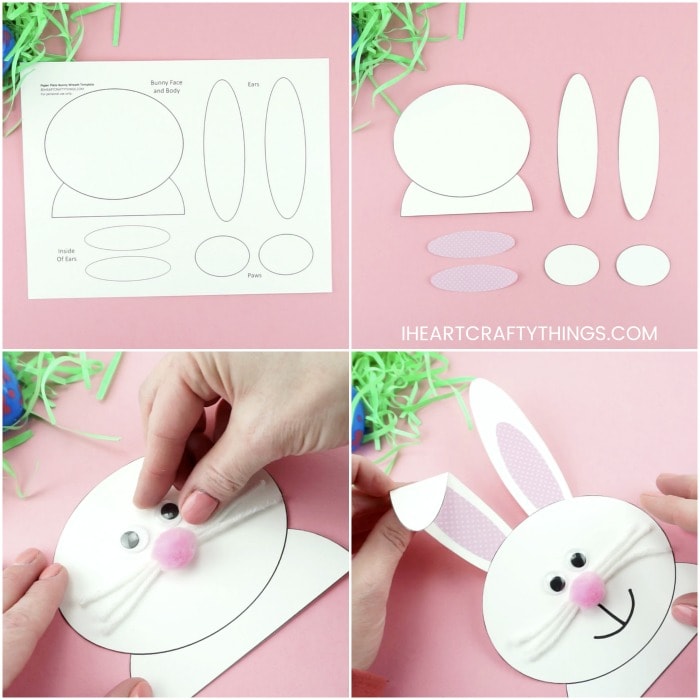
5. Cut out each of the bunny pieces of the template. Color the inside ears section with markers or crayons, or use the pieces as a template to cut them out of pink patterned scrapbook paper.
Related: Colorful Easter Egg Black Glue Art Project
Assemble the paper bunny together
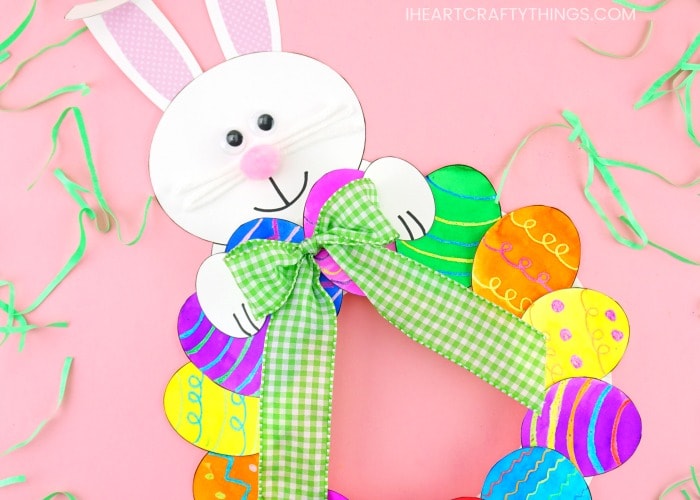
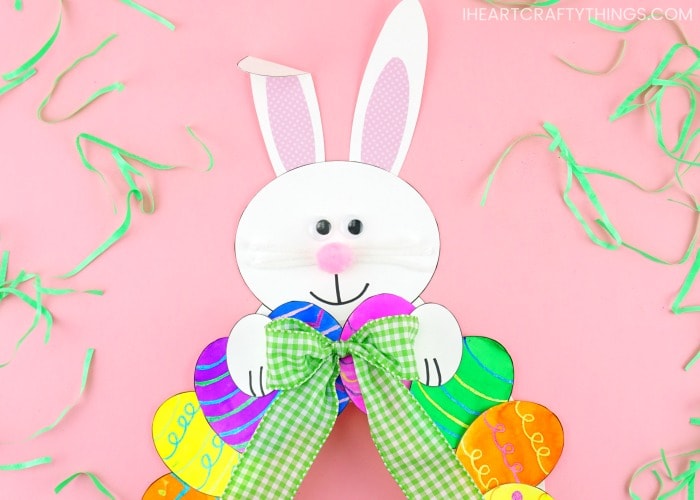
6. Glue the ears at the top of the bunny face. If wanted, fold one of the ears down to look like a floppy bunny ear.
7. Cut three pieces of white yarn at equal lengths for whiskers. Glue them on the center of your bunny face with Tacky Glue. Then glue a pink craft pom in the center of the whiskers. Add googly eyes to your bunny.
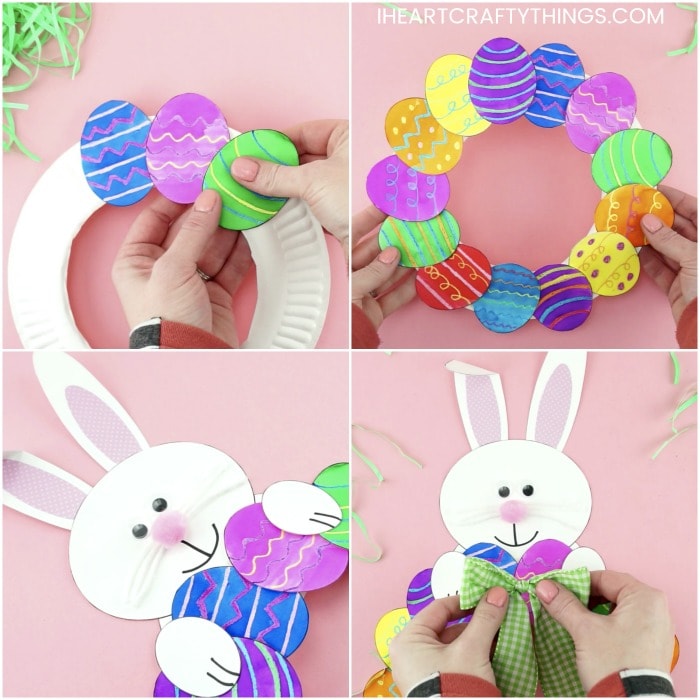
8. Cut the center circle out of a paper plate to make a wreath form.
9. Glue the colorful Easter eggs around the perimeter of the paper plate wreath, overlapping each of the eggs slightly with one another.

10. Add glue on the bottom of your paper bunny and glue it at the top of the paper plate wreath behind the eggs. Use a marker or crayons to draw lines on your bunny paws and then glue them on the front of the wreath.
11. Cut off a length of ribbon, tie it into a bow and attach it at the top of your wreath with a Glue Dot. You can also choose to omit the bow on the wreath.
Related: DIY Bunny Headband Craft for Kids
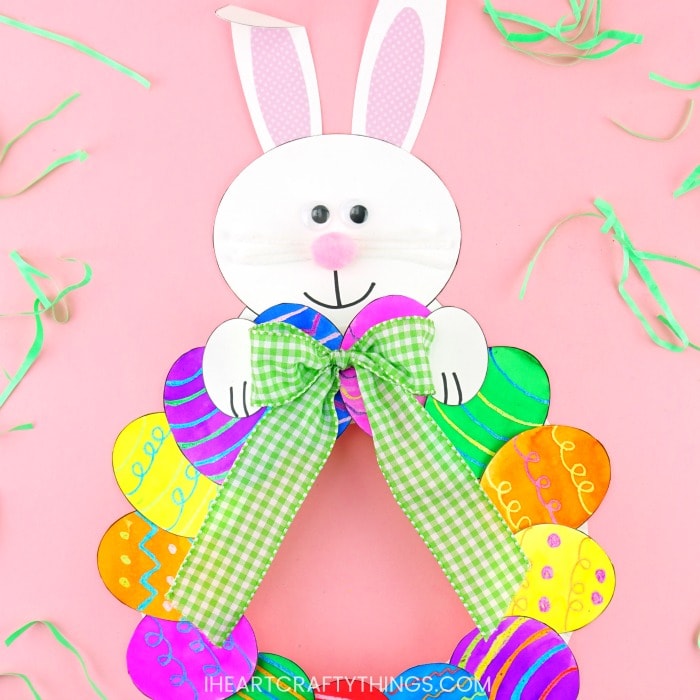
Your Paper Plate Easter Egg Wreath is complete
Using a crayon resist and watercolors technique on the Easter eggs makes this wreath colorful and stunning. The cute bunny peeking over the top of the wreath adds an extra cute touch for kids to enjoy too.
Now all you have to do, once all the components of the wreath have finished drying, is simply hang the pretty egg wreath on display on a front door or a hook in your home for a colorful Easter decoration.
If you make this colorful paper plate Easter wreath, we’d love to hear about it. Send us a picture of your completed craft and leave us your comments by email.
Video Tutorial: How to Make an Easter Egg Wreath
Watch the video below to be guided through each step of our paper plate Easter wreath craft.
Find more Easter crafts and easy kids arts and crafts ideas by browsing the categories at the top menu bar of our website.
Looking for more fun arts and crafts ideas to make with your kids this spring? Check out over 150 spring craft ideas for kids. So many great crafts to keep the kids busy and entertained all season long.
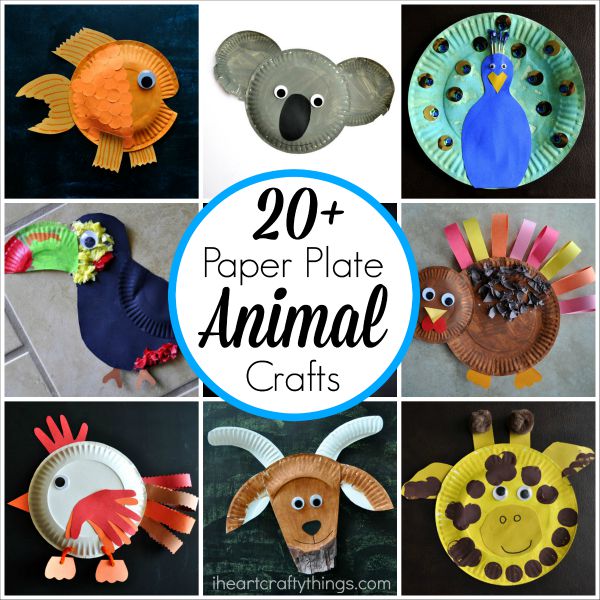
Want more clever ways to transform paper plates into fun kid crafts? Check out this list of over 20 creative ways to make paper plate animal crafts.