- small paper plates
- various colors of acrylic paint
- paint brush
- scissors
- stapler (optional)
- school glue
- colored construction paper
- black construction paper
- markers (optional)
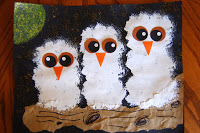
1. Paper plates work so well to make owls, so we stuck with them on this project. Start by painting three small paper plates one color. Let them dry completely.
2. After your paper plates are dry, use a different color to paint a pattern on one of the paper plates to use as the body for the owl. We mimicked our favorites out of the story in the picture above.

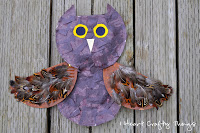
3. After the pattern is dry that you painted, take another one of the painted paper plates and cut it in half to use as the wings. I used a stapler to attach them to the body. You could also use a generous amount of school glue.

4. Next, use a generous amount of school glue to attach the last paper plate to the body as the head of the owl.
5. Cut out eyes, black pupils and a nose out of construction paper and glue them on to the face. One of my son’s owl had a striped nose so he used markers to make the pattern on his nose.

6. Lastly cut a slit out of the top of the owls head to finish your owl. You can also do this step before attaching it to the body.

My 7 year old liked the dotted owl in the book…

And I went with a striped pattern…

I’m telling you, it never gets old creating with my children! We are going to take a break for a couple days to enjoy Halloween festivities and will be back with some turkey fun!!