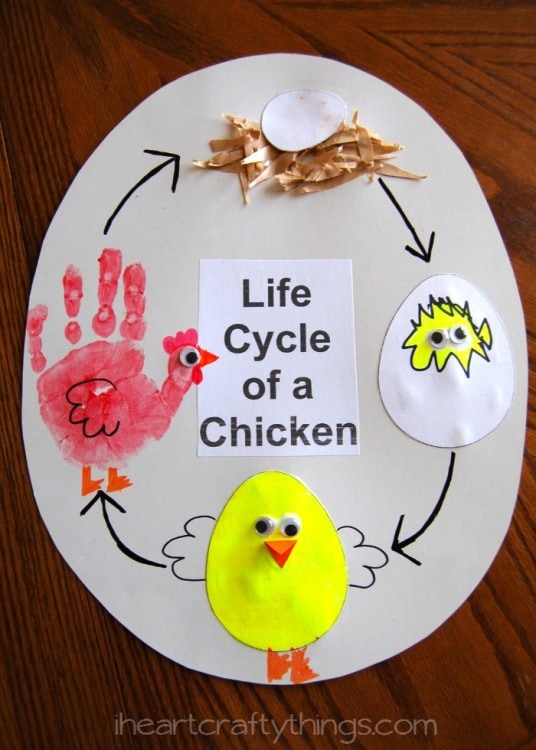
My preschooler and I are having fun learning about birds this week. We started by reading some books about birds and we made this “Life Cycle of a Chicken” craft. I saw the idea in The Mailbox Magazine a while back and I just love how it turned out. Find a list of the books we read to go along with this activity at the bottom of this post.

{This post contains affiliate links for your convenience. Read our Disclosure Policy for more information.}
HOW TO MAKE A LIFE CYCLE OF A CHICKEN CRAFT
Supplies you will need:
- poster board
- white and orange cardstock paper
- shredded brown paper
- black, orange, yellow and red marker
- googly eyes
- washable red tempera paint (We received ours from our friends at Craftprojectideas.com and you can find some at your local Walmart.)
- glue
Directions:
1. Start by cutting an egg shape out of a piece of poster board. Then I printed out a little rectangle label from the computer that said, “Life Cycle of a Chicken” and we glued it to the center. You can also just write Life Cycle of a Chicken with your black marker in the center of the poster.
2. At the top of the egg we talked about how chickens start out as an egg. Then we made a little nest by putting glue all over and adding shredded pieces of brown paper.
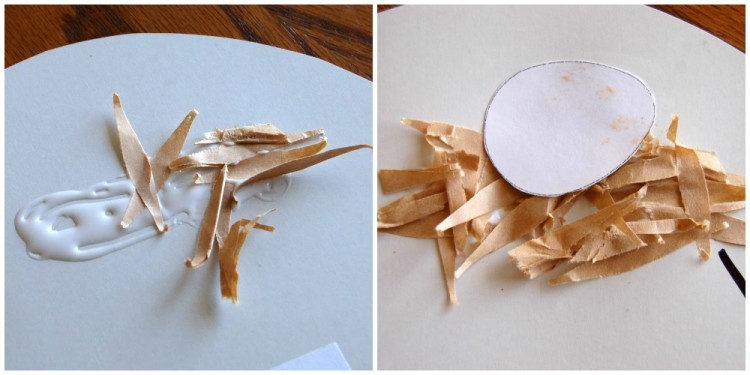
3. After the nest was complete, I cut a small oval shape out of paper and my son glued it into the nest. If pre-schoolers are able to cut themselves, have them do the cutting.
Check out our free Unicorn coloring pages!
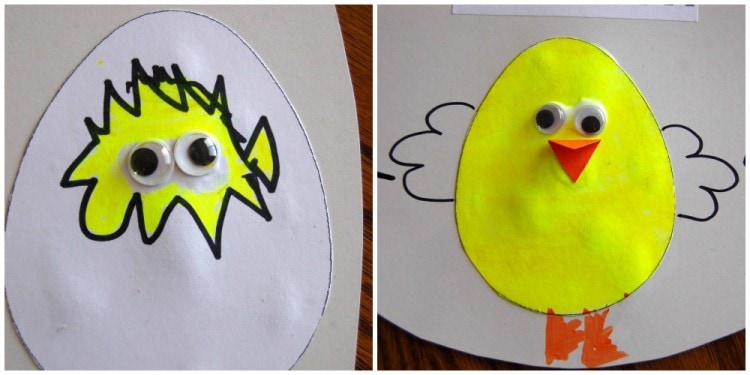
4. Then we discussed how the Mommy Chicken sits on her eggs to keep them at the right temperature, while the birds grow inside the egg. When they are all grown they begin to hatch out of the egg. I cut a larger egg out of paper and my son glued it to the poster board. Then he drew a jagged edge circle on the egg to represent the egg hatching. My son colored the inside yellow and he added googly eyes to represent the chick inside.
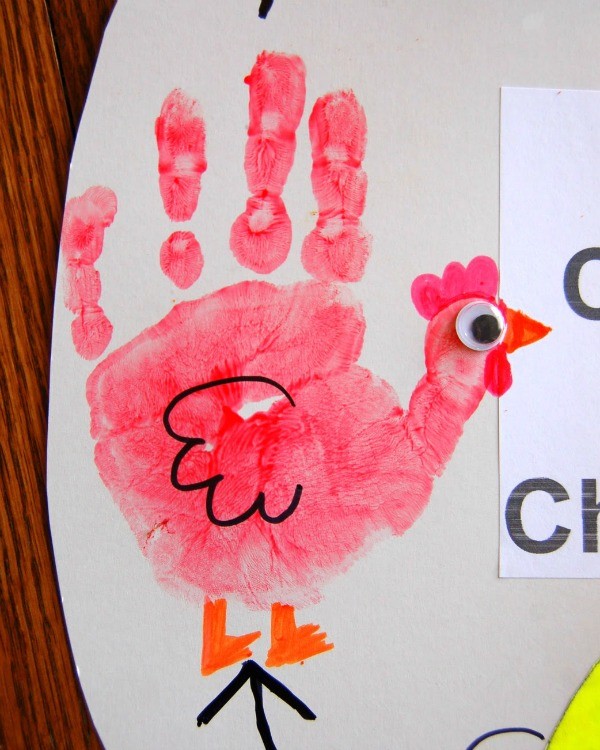
6. Next, we made the grown chicken. I covered my son’s hand with our red tempera paint and he placed his hand on the poster board to make a handprint. After the paint was completely dry, my son glued on a googly eye and drew on the feet, beak and waddle. I added the outline of the wing with black marker.
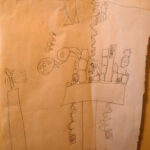
7. To complete our chart, I simply drew arrows between each stage to show that it is an endless cycle and we talked about each stage one more time. It was such a fun project!
Here are some books we read before making this project:
- Birds (DK Eye Wonder Series)
- Five Little Chickens by Nancy Tafuri
- The Perfect Nest by Catherine Friend
You might also enjoy these crafts:
- Hatching Chick Craft
- Paper Bag Frog Puppet
- Apple Print Butterflies
- Tissue Paper Ladybug Craft
- Balloon Print Chick Craft
Google+, Twitter, and Instagram for more crafty fun!